***
Your New Favorite Halloween Tradition: Jack-O’-Lantern Cheesecake
Hey there, friend! Anna here. Can you feel it? That crisp, cool air, the rustle of brightly colored leaves, and the undeniable buzz of excitement that means Halloween is just around the corner. It’s the season of cozy sweaters, haunted hayrides, and of course, spectacularly fun food. And if there’s one thing I love more than a perfectly spooky costume, it’s a dessert that brings pure, unadulterated joy to the table.
That’s exactly why I’m so thrilled to share this recipe with you today. We’re moving beyond the standard bag of candy and diving fork-first into the most show-stopping, conversation-starting, deliciously spooky dessert you’ll make all season: my legendary Jack-O’-Lantern Cheesecake. This isn’t just any cheesecake; it’s a creamy, spiced, pumpkin-packed masterpiece topped with a vibrant orange “shell” and a classic, grinning Jack-O’-Lantern face. It’s the perfect centerpiece for your Halloween party, a guaranteed hit at the potluck, and a fantastically fun project to make with your favorite little ghosts and goblins.
I’ve designed this recipe to be big on flavor and bigger on fun. We’re using a double batch of my creamiest pumpkin filling, infused with warm spices and a secret hint of maple, all nestled into a buttery graham cracker crust. And the best part? While it looks incredibly impressive, I promise it’s built on simple, clear steps. My goal is to have you feeling like a confident kitchen wizard, not a stressed-out sorcerer’s apprentice. So, preheat that oven, grab your favorite mixing bowl, and let’s create some Halloween magic together!
A Cheesecake That Lit Up the Party
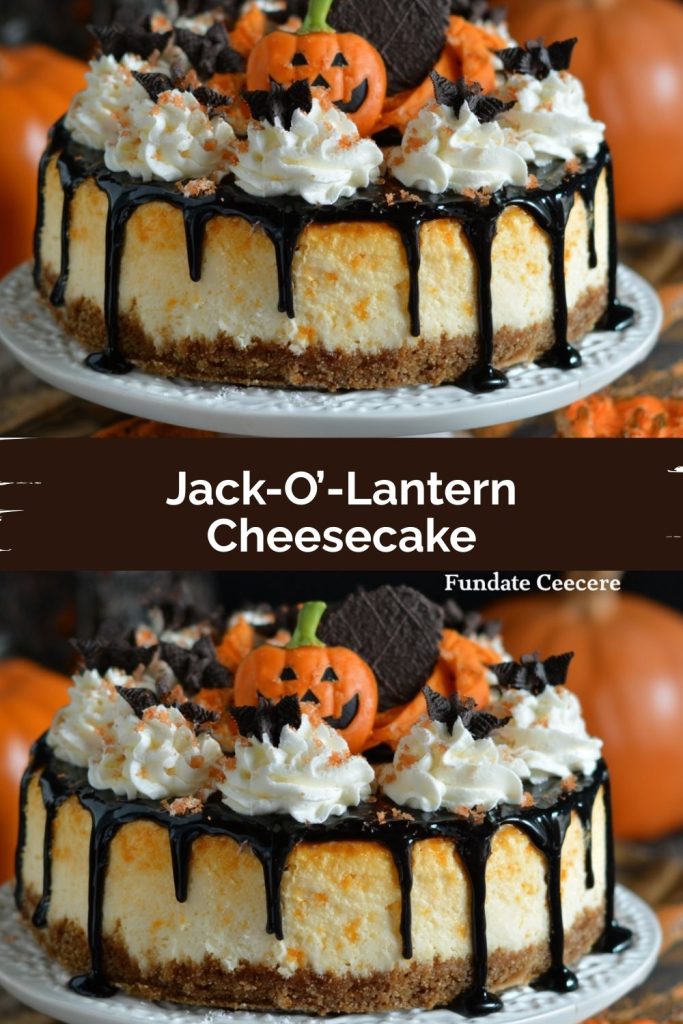
PrintJack-O’-Lantern Cheesecake
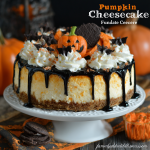
This Jack-O’-Lantern Cheesecake is a Halloween hit—smooth pumpkin spice filling with a graham cracker crust, topped in vibrant orange frosting and a spooky face. We’ve doubled the recipe for party-sized servings and added a touch of maple and a whipped topping layer to make this dessert as indulgent as it is festive.
- Prep Time: 30 min
- chill: 4–6 hrs
- Cook Time: 1 hr
- Total Time: 6.5 hrs
Ingredients
Crust:
3 cups graham cracker crumbs
½ cup melted butter
Filling:
48 oz cream cheese, softened
2 cups sugar
2 cups canned pumpkin puree
6 large eggs
2 tsp vanilla extract
2 tsp pumpkin spice
2 tbsp maple syrup (optional for added warmth)
Topping:
2 cups orange frosting (store-bought or homemade)
1 cup whipped topping or whipped cream (optional layer under frosting)
Black gel icing (for Jack-O’-Lantern face)
Instructions
Preheat oven to 325°F. Mix crumbs and butter; press into a 10-inch springform pan. Bake for 10 min and cool.
Beat cream cheese and sugar until fluffy. Add eggs one at a time, then mix in pumpkin, vanilla, spice, and maple syrup.
Pour filling over crust. Bake for 65–75 min or until just set. Cool completely, then chill 4+ hours.
Optional: spread a thin layer of whipped topping over cheesecake. Then cover with orange frosting.
Use black gel icing to draw a Jack-O’-Lantern face—classic triangle eyes, nose, and jagged smile.
Nutrition
- Calories: 400
- Fat: 27g
- Carbohydrates: 33g
- Protein: 6g
This cheesecake recipe holds a special place in my heart because it was born from a minor kitchen disaster that turned into a beloved tradition. Years ago, I signed up to bring a dessert to my son’s first-grade Halloween class party. I had grand plans for intricately decorated cookies, but after a long day, time got away from me. Panic started to set in! I glanced at my pantry, saw a few cans of pumpkin puree, and knew a classic pumpkin cheesecake was my reliable fallback.
As I was smoothing the last of the filling into the pan, my son wandered into the kitchen, his face painted like a little black cat. “Mom,” he said, his eyes wide, “can you make it look like a pumpkin? A real one with a face?” The request was too adorable to ignore. We rummaged through the cabinets, found some orange frosting and black decorating gel, and got to work. The result was far from perfect—the face was a little lopsided, and the orange coating was slightly uneven—but the sheer delight on his face was absolute perfection. When we brought it into his classroom, the kids went wild. It was the hit of the party, and a messy, joyful kitchen memory I’ll always cherish. Now, we make it together every single year.
Gathering Your Magical Ingredients
Here’s everything you’ll need to create this festive masterpiece. Remember, using room temperature ingredients is the #1 secret to a silky-smooth, crack-free cheesecake filling!
For the Graham Cracker Crust:
- 3 cups graham cracker crumbs: You can buy these pre-crumbled or make your own by pulsing about 20 full sheets of graham crackers in a food processor until fine. Chef’s Insight: For a deeper flavor, try using ginger snap cookies or Biscoff cookies instead!
- 1/2 cup (1 stick) unsalted butter, melted: This acts as the glue that holds our crust together. Using unsalted butter lets us control the salt level. Substitution Tip: If you only have salted butter, that’s okay! Just omit any additional salt from the recipe.
For the Pumpkin Spice Filling:
- 48 oz (six 8-oz blocks) cream cheese, softened: This is the star of the show! Full-fat cream cheese is essential for the proper texture and richness. Please, please let it sit on the counter for at least 1-2 hours before you start. This is non-negotiable for a lump-free batter.
- 2 cups granulated sugar: Sweetens and helps create structure. I find this is the perfect level of sweetness to balance the tang of the cream cheese and the earthiness of the pumpkin.
- 2 cups canned pumpkin puree: Not pumpkin pie filling, which has added sugars and spices. We want 100% pure pumpkin. Libby’s is my go-to brand for its consistent texture and flavor.
- 6 large eggs, at room temperature: Eggs are the binding agent that gives the cheesecake its structure. Room temperature eggs incorporate much more evenly into the batter, preventing overmixing.
- 2 tsp pure vanilla extract: The flavor foundation that makes everything taste more… well, everything! Use the real stuff for the best flavor.
- 2 tsp pumpkin pie spice: The warm, cozy soul of this dessert. No store-bought blend? Make your own with 1 1/2 tsp cinnamon, 1/4 tsp nutmeg, 1/4 tsp ginger, and 1/8 tsp cloves or allspice.
- 2 tbsp pure maple syrup (optional but highly recommended): My secret weapon! This doesn’t make the cheesecake taste like maple; instead, it adds a layer of warm, caramel-like depth that makes the pumpkin flavor sing.
For the Jack-O’-Lantern Decoration:
- 2 cups orange frosting: You can use a good-quality store-bought vanilla frosting tinted with orange food gel (gel food coloring gives a more vibrant color than liquid) or make a simple homemade buttercream. This is your pumpkin’s “skin”!
- 1 cup whipped topping or stabilized whipped cream (optional): I love adding this thin layer under the frosting. It creates a lovely buffer, adds a cloud-like texture, and makes the cheesecake even more indulgent.
- 1 tube black gel icing: This is for drawing the face. The gel type is much easier to control than the liquid kind for detailed work.
Let’s Build This Spooky Masterpiece: Step-by-Step
Follow these steps, take your time, and you’ll have a flawless cheesecake. I’m walking you through every single detail!
Step 1: Prep Your Pan and Oven.
Preheat your oven to 325°F (160°C). Take a 10-inch springform pan and give it a light coating of non-stick spray. For ultimate insurance against sticking, I like to place a parchment paper circle on the bottom of the pan. Chef’s Hack: Wrap the outside bottom and sides of your springform pan in a double layer of heavy-duty aluminum foil. This will prevent any water from sneaking into your crust during the water bath step later!
Step 2: Create the Crust.
In a medium bowl, combine the graham cracker crumbs and melted butter. Mix it with a fork until the mixture resembles wet sand and holds together when you pinch it. Pour the crumbs into your prepared pan and press them firmly and evenly into the bottom and about halfway up the sides. I use the flat bottom of a measuring cup to really pack it down—this prevents a crumbly crust! Bake for 10 minutes, then remove and let it cool on a wire rack. Reduce the oven temperature to 300°F (150°C).
Step 3: Make the Dreamy Filling.
In the bowl of a stand mixer fitted with the paddle attachment (or a large bowl with a hand mixer), beat the softened cream cheese on medium-low speed until it’s completely smooth and creamy. Scrape down the bowl and beater thoroughly. This is the most important step to avoid lumps! Add the sugar and beat again until just combined. Now, with the mixer on low, add the eggs one at a time, beating until each egg is just incorporated before adding the next. Overbeating the eggs incorporates too much air, which can cause the cheesecake to puff up and crack. Scrape down the bowl again. Add the pumpkin puree, vanilla extract, pumpkin spice, and maple syrup (if using). Mix on low until everything is beautifully blended and smooth. Give it one final scrape and stir by hand to ensure no hidden pockets of unmixed cream cheese are lurking at the bottom.
Step 4: The Water Bath (Your Cheesecake’s Best Friend).
Place your foil-wrapped springform pan into a large roasting pan. Carefully pour the filling over your cooled crust. Smooth the top with a spatula. Now, bring a kettle of water to a boil. Place the roasting pan with the cheesecake in the oven on the center rack. Carefully pour the hot water into the roasting pan around the springform pan until it comes about halfway up the sides. This water bath creates a steamy environment that bakes the cheesecake gently and evenly, preventing cracks and giving it that legendary creamy texture.
Step 5: Bake and Cool with Patience.
Bake for 65-75 minutes. The cheesecake is done when the edges are set but the center still has a slight jiggle—like Jell-O—when you gently shake the pan. Turn off the oven, crack the oven door open, and let the cheesecake cool gradually in the oven for 1 hour. This gradual temperature change is another key to preventing cracks! After an hour, remove it from the oven and the water bath, carefully remove the foil, and let it cool completely to room temperature on a wire rack. Then, cover it and refrigerate for at least 4 hours, but preferably overnight. This patience is crucial for the perfect sliceable texture.
Step 6: Decorate and Celebrate!
Once your cheesecake is thoroughly chilled, run a thin knife around the inner edge of the springform pan to loosen it, then unclasp the ring. If you’re using the optional whipped topping layer, spread it gently over the top of the cheesecake now. Next, carefully frost the entire top (and sides, if you’re feeling ambitious!) with the orange frosting, creating a smooth pumpkin-like surface. Finally, take your black gel icing and let your artistic spirit soar! Draw on a classic Jack-O’-Lantern face: triangle eyes, a triangle nose, and a fun, jagged smile. Slice, serve, and watch everyone’s faces light up!
How to Serve Your Spooky Sensation
This cheesecake is a star all on its own, but a little flair never hurts! Use a sharp knife dipped in hot water and wiped dry for the cleanest slices. Place each slice on a black or dark orange plate for a dramatic effect. A small dollop of extra whipped cream on the side looks fantastic, and a tiny sprinkle of extra pumpkin pie spice or a cinnamon stick on the plate adds a professional touch. For the adults, a cup of strong coffee or a glass of dessert wine like a Riesling or a creamy bourbon-laced cocktail pairs divinely with the warm spices.
Get Creative! Recipe Variations
This recipe is a wonderful canvas for your own ideas! Here are a few twists to try:
- Chocolate Swirl: Swirl 1/2 cup of melted and cooled chocolate into the filling before baking for a marble effect.
- Gingersnap Crust: Swap the graham crackers for gingersnap crumbs for an extra spicy kick.
- Boo-zy Adult Version: Add 2 tablespoons of bourbon or spiced rum to the filling along with the vanilla.
- Dairy-Free Delight: Use your favorite plant-based cream cheese and butter alternatives. For the whipped layer, coconut whipped cream works beautifully.
- Mini Jack-O’-Lanterns: Divide the batter among a muffin tin lined with liners (use a vanilla wafer for the base) for adorable individual servings. Reduce baking time to about 20-25 minutes.
Anna’s Chef’s Notes
This recipe has evolved so much since that first lopsided cake! The maple syrup was a happy accident—I once realized I was out of vanilla and used maple syrup in a pinch, and the resulting flavor was so incredible it became a permanent fixture. Over the years, I’ve learned that the water bath, while a bit fussy, is 100% worth the effort for that flawless texture. And a funny story: one year, I was so focused on getting the face perfect that I completely forgot to add the sugar to the filling! We ended up with a very sad, though beautifully decorated, savory pumpkin pie-cheesecake hybrid. It was… not good. So now, I always lay out all my ingredients in little bowls before I start (mise en place!) to avoid any sugary disasters. Learn from my mistakes!
Your Questions, Answered!
Q: My cheesecake cracked! What did I do wrong?
A: Oh, friend, don’t despair! This is the most common cheesecake woe. Cracks are usually caused by three things: overmixing the batter (which incorporates too much air), a rapid temperature change, or overbaking. The water bath and cooling the cake slowly in the oven are your best defenses against this. And hey, that’s what the gorgeous orange frosting is for—it covers a multitude of sins! A cracked cheesecake still tastes absolutely amazing.
Q: Can I make this ahead of time?
A: Absolutely! In fact, I highly recommend it. Cheesecake needs time to set properly. You can bake it up to 2 days in advance and keep it refrigerated. I would wait to frost and decorate it until the day you plan to serve it for the freshest look.
Q: Why is it so important for the cream cheese and eggs to be at room temperature?
A: Room temperature ingredients blend together smoothly and evenly. Cold cream cheese will leave little lumps in your batter no matter how long you mix it. Cold eggs don’t emulsify as well and can cause you to overmix the batter trying to blend them in, which leads to cracking. Planning ahead makes all the difference!
Q: The center of my cheesecake is still really wobbly after 75 minutes. Should I keep baking it?
A: Trust the jiggle! The residual heat will continue to cook the cheesecake as it cools in the turned-off oven. If the edges are set and the center has a small, jiggly area about the size of a quarter, it’s done. Overbaking is the primary cause of a dry, dense, or cracked cheesecake.
Nutritional Information*
*This is an estimated nutritional breakdown per serving, provided for informational purposes only. Calculations will vary based on specific brands and ingredient choices.
Per Serving (1 slice): Calories: ~400 | Total Fat: 27g | Saturated Fat: 15g | Cholesterol: 125mg | Sodium: 300mg | Total Carbohydrates: 33g | Dietary Fiber: 1g | Sugars: 26g | Protein: 6g
Final Thoughts
Halloween has a way of bringing out the kid in all of us, and this Jack-O’-Lantern Cheesecake is the sweetest way to celebrate that magic. It’s festive, fun, and just a little bit spooky—perfect for wowing a party crowd or making memories in the kitchen with your little ghouls and goblins. And while it looks like something straight from a bakery window, it’s built on simple, approachable steps that anyone can master.
So go ahead—carve your pumpkin, frost your face, and let this cheesecake light up your Halloween table. Because sometimes, the best holiday traditions aren’t the ones we plan, but the ones we create together with laughter, sprinkles of cinnamon, and maybe a little orange frosting on our noses.