Your New Favorite Bite of Buttery, Creamy Heaven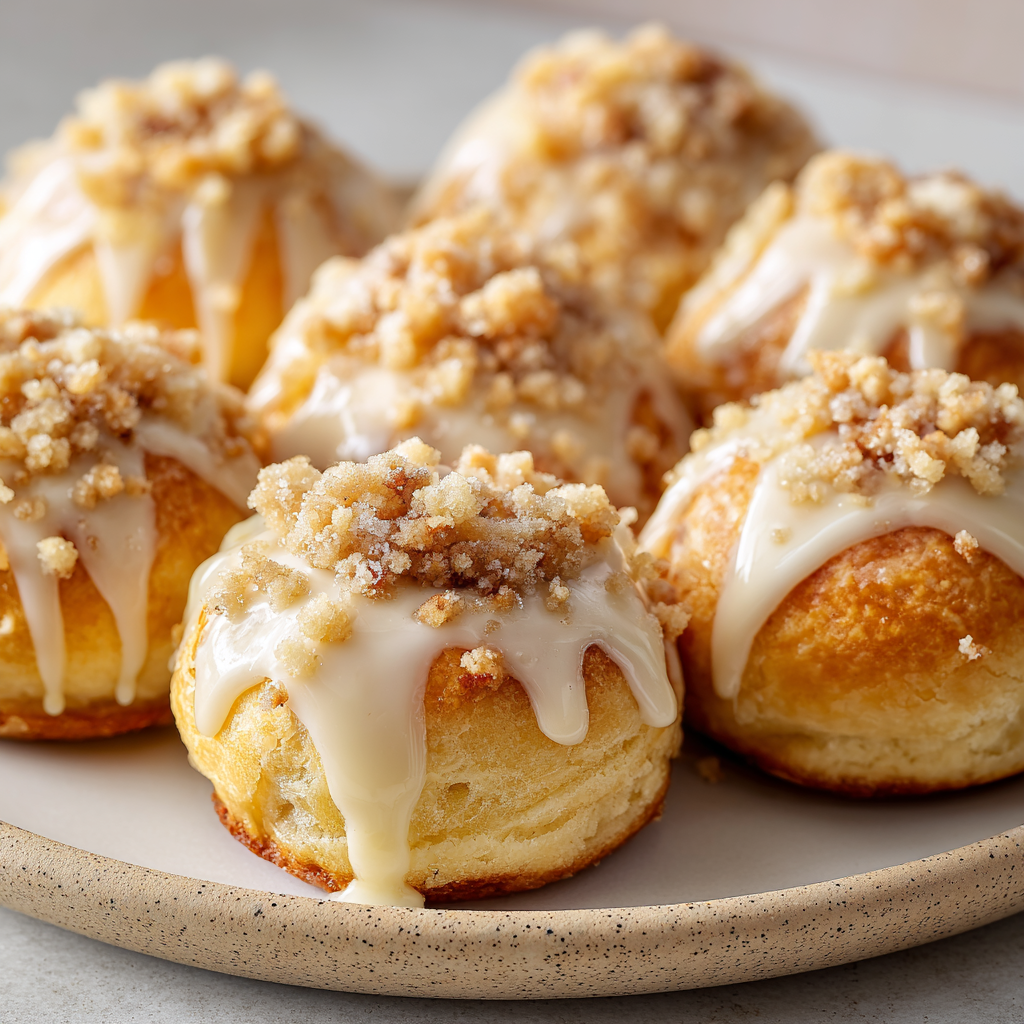
Hey there, friend! Let’s be real for a second: is there anything better than the smell of something sweet and buttery baking in the oven? That warm, comforting aroma just seems to hug the whole house, promising something delicious is just minutes away. Now, imagine that something is a soft, golden pastry bun, cradling a pocket of lush, tangy vanilla cheesecake, all topped with a buttery, crunchy crumble and a sweet, dreamy glaze. Are you swooning yet? Because I certainly am!
These Mini Crumble Cheesecake Buns are my latest obsession, and I have a feeling they’re about to become yours, too. They’re the perfect little treat—elegant enough for a weekend brunch with friends, simple enough for a Tuesday afternoon pick-me-up, and absolutely guaranteed to vanish from the cooling rack at lightning speed. We’re taking all the best parts of a decadent cheesecake and a cozy coffee cake and rolling them into one irresistible, bite-sized package. I’ve tweaked and tested this recipe to perfection, doubling the filling for maximum creaminess and adding a few secret twists (hello, lemon zest and almond extract!) to make them truly unforgettable. So, preheat that oven, put on your favorite playlist, and let’s bake up some pure, unadulterated joy together.
The Happy Accident That Started It All
PrintMini Crumble Cheesecake Buns

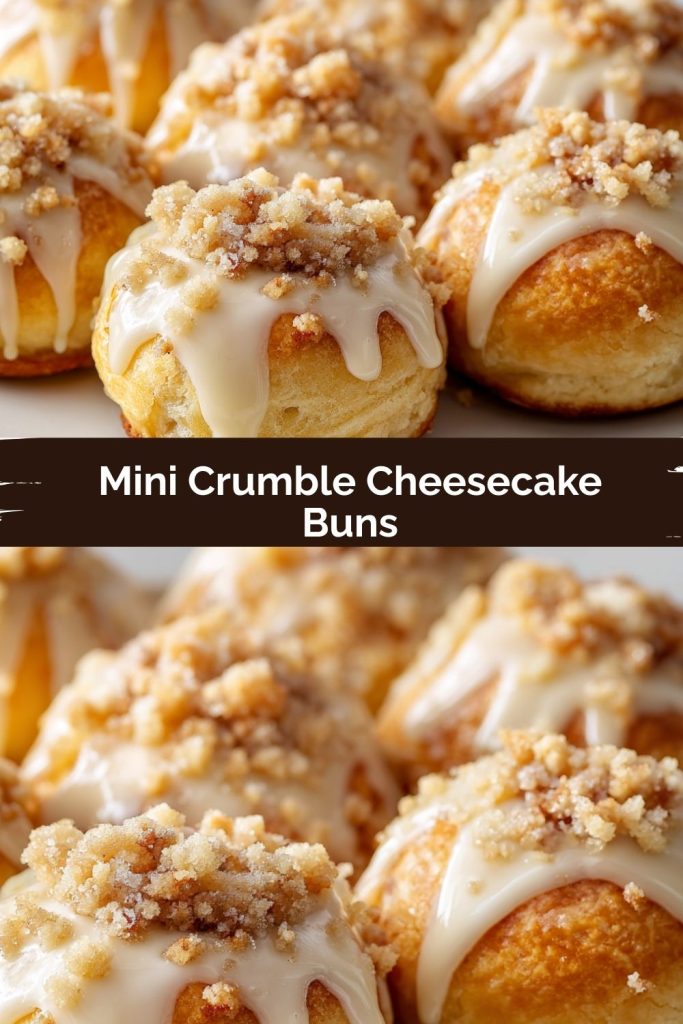
These Mini Crumble Cheesecake Buns combine creamy vanilla cheesecake filling with a buttery crumble topping and a sweet sugar glaze—all wrapped in a soft, golden pastry. We’ve doubled the recipe, added lemon zest and almond extract for brightness, and finished with a glaze that’s simple but elevated.
- Prep Time: 25 min
- Cook Time: 22 min
- Total Time: 50 min
Ingredients
Cheesecake Filling (Double Batch + Twist)
400g cream cheese, softened
4 tbsp granulated sugar
2 packets vanilla sugar (or 2 tsp vanilla extract)
1 tsp lemon zest (adds a bright, tangy note)
Crumble Topping
40g cold butter (about 2 tbsp)
2 tbsp granulated sugar
1 cup all-purpose flour
Pinch of salt
Optional: ¼ tsp cinnamon or crushed nuts for texture
Egg Wash
2 egg yolks + 1 tsp milk
Vanilla Glaze
2 cups powdered sugar
4 tbsp milk (adjust for consistency)
¼ tsp almond extract (adds a bakery-style edge)
Instructions
Cheesecake Filling: Mix cream cheese, sugars, and lemon zest until smooth. Chill until needed.
Crumble: Combine butter, sugar, flour, and salt. Mix until crumbly. Chill.
Pastry Base (use store-bought brioche dough or sweet yeast dough): Divide into 12–14 rounds, flatten, and indent centers.
Fill each with cheesecake mixture and top with crumble. Brush edges with egg wash.
Bake at 350°F (175°C) for 20–22 minutes or until golden.
Cool slightly. Drizzle with glaze and serve warm or at room temp.
Nutrition
- Calories: 280 c
- Fat: 14g
- Carbohydrates: 32g
- Protein: 4g
This recipe has a fun little backstory, as the best ones often do. It all started one rainy Sunday when I was attempting to make a classic coffee cake. Midway through creaming the butter and sugar, my husband wandered through the kitchen and mentioned how much he loved the cheesecake brownies I’d made the week before. And just like that, a lightbulb went off! I looked at the coffee cake batter, then at the leftover cream cheese in the fridge, and thought… why not?
What began as a slightly chaotic kitchen experiment turned into something magical. That first batch was a bit messy (we won’t talk about the filling that slightly escaped a few buns!), but the flavor was an instant home run. They reminded me so much of the fancy pastries my grandma would buy from the German bakery as a special treat—but now, we could make them right at home, filling the kitchen with that same incredible smell and creating our own new traditions. It’s a happy little reminder that some of the best dishes come from a bit of curiosity and a willingness to play with your food!
Gathering Your Magical Ingredients
Here’s everything you’ll need to create these little bites of bliss. Don’t worry—it’s all simple, approachable stuff! I’ve included my best tips and swaps to make this recipe work for you.
For the Cheesecake Filling (Our Double-Batch Star!)
- 400g (about 14 oz) Cream Cheese, softened: This is the heart of the operation! Use full-fat for the richest, creamiest texture. Pro Tip: Take it out of the fridge at least an hour ahead. Soft cream cheese blends smoothly and prevents lumps. For a lighter version, Neufchâtel cheese works too.
- 4 tbsp Granulated Sugar: Just the right amount to sweeten the filling without overpowering the tangy cream cheese.
- 2 packets Vanilla Sugar OR 2 tsp Vanilla Extract: Vanilla sugar gives it an authentic, bakery-level flavor, but pure vanilla extract is a perfect substitute. We’re using two packets (or teaspoons) because we’re doubling the goodness!
- 1 tsp Lemon Zest: My secret weapon! This isn’t just for lemon flavor; the zest adds a incredible bright, aromatic note that cuts through the richness and makes the vanilla pop. Don’t skip it!
For the Buttery Crumble Topping
- 40g (about 2 tbsp) Cold Butter: Cold is key! It ensures your crumble stays, well, crumbly and doesn’t melt into a paste. I like to cube mine and pop it back in the fridge until the very last second.
- 2 tbsp Granulated Sugar: For a touch of sweetness and helps create that perfect crunchy texture.
- 1 cup All-Purpose Flour: The base of our crumble. It binds with the butter to create those perfect little nuggets of goodness.
- Pinch of Salt: Balances the sweetness and enhances all the other flavors.
- Optional: ¼ tsp Cinnamon or 2 tbsp Crushed Nuts (like pecans or almonds): Feel free to get creative here! A dash of cinnamon adds warmth, and nuts give an fantastic extra crunch.
For Assembly & Finishing
- 1 lb store-bought Brioche or Sweet Yeast Dough: The ultimate shortcut to amazing results! Using a quality pre-made dough saves so much time and delivers a soft, pillowy base. Look for it in the freezer section or fresh dough aisle.
- Egg Wash (2 Egg Yolks + 1 tsp Milk): This gives the buns their gorgeous, glossy, golden-brown finish. The yolks provide amazing color.
- Vanilla Glaze (2 cups Powdered Sugar, 4 tbsp Milk, ¼ tsp Almond Extract): The crowning glory! The almond extract is my special twist—it adds a subtle, sophisticated flavor that makes everyone ask, “What is that? It’s amazing!”
Let’s Build Our Buns: A Step-by-Step Guide
Okay, team! Let’s get our hands a little dusty and create some magic. Follow these steps, and you’ll be a mini bun master in no time.
- Prep Like a Pro: First things first, preheat your oven to 350°F (175°C). Line a baking sheet with parchment paper. This is our non-stick insurance policy! Now, take your cream cheese out of the fridge to ensure it’s perfectly soft for the filling.
- Make the Filling: In a medium bowl, combine your softened cream cheese, granulated sugar, vanilla sugar (or extract), and that glorious lemon zest. Use a hand mixer or a sturdy whisk to beat it all together until it’s completely smooth and silky. No lumps allowed! Once it’s perfect, cover the bowl and pop it into the refrigerator to chill and firm up a bit while we work on the other components. This makes it so much easier to handle later.
- Create the Crumble: In a separate bowl, combine the flour, sugar, and salt for the crumble. Add your cold, cubed butter. Now, using your fingertips, a pastry cutter, or even a fork, work the butter into the flour mixture. You’re looking for a variety of sizes—some pea-sized crumbs, some smaller sandy bits. This texture is what gives you that fantastic crunch. Once it’s crumbly, chill this bowl as well. Cold toppings bake up so much better!
- Assemble the Buns: Lightly flour your work surface. If using frozen dough, make sure it’s fully thawed according to package directions. Divide your dough into 12-14 equal-sized pieces. Roll each piece into a smooth ball, then use your thumb or the back of a small spoon to press a deep, well-defined indent into the center of each one. This is our cheesecake pocket! Pull the chilled filling from the fridge and place a generous tablespoonful into each indentation. Don’t be shy!
- Top & Brush: Grab your chilled crumble and sprinkle a hearty amount over the top of each filled bun, gently pressing it down so it adheres. Next, whisk your egg yolks and milk together for the egg wash and gently brush it on the exposed edges of the dough (not the crumble topping). This will give them that beautiful, professional-looking shine.
- Bake to Golden Perfection: Carefully place your assembled buns on the prepared baking sheet, giving them a little room to breathe. Slide them into your preheated oven and bake for 20-22 minutes. You’ll know they’re done when the dough is golden brown, the crumble is toasted, and the cheesecake filling is set. Your kitchen will smell absolutely divine.
- The Grand Finale – The Glaze! While the buns are cooling slightly on a wire rack, whisk together the powdered sugar, milk, and almond extract for the glaze. Start with 3 tablespoons of milk and add the fourth only if you need it to reach a drizzle-able consistency. Once the buns are just warm (not piping hot), use a spoon or a piping bag to zig-zag that beautiful glaze all over the top.
How to Serve These Beautiful Buns
Presentation is part of the fun! I love arranging these buns on a beautiful wooden board or a vintage cake stand. They are best served slightly warm or at room temperature, when the glaze is still a little soft and the cheesecake is creamy. They are the ultimate shareable treat for a coffee date, a brunch spread, or as a sweet ending to a family dinner. Pour a big cup of coffee, a glass of cold milk, or even a sweet dessert wine, and dig in!
Get Creative! Fun Flavor Twists
Once you’ve mastered the classic, the flavor world is your oyster! Here are a few of my favorite ways to mix things up:
- Berry Bliss: Place a few fresh raspberries or blueberries on top of the cheesecake filling before adding the crumble.
- Chocolate Chip Craving: Fold ¼ cup of mini chocolate chips into the cheesecake filling before scooping.
- Apple Cinnamon: Mix ½ tsp cinnamon into the crumble topping and add a spoonful of finely diced apple on top of the cheesecake filling.
- Lemon Poppy Seed: Add an extra teaspoon of lemon zest and a tablespoon of poppy seeds to the cheesecake filling.
- Dairy-Free Delight: Use your favorite plant-based cream cheese and butter alternatives. The results are still fantastic!
Anna’s Chef Notes & Kitchen Stories
This recipe has evolved so much from that first messy batch! My biggest lesson learned: chill your components. I cannot stress this enough. Chilling the filling and the crumble makes the assembly process infinitely easier and cleaner. It prevents the filling from oozing out too much and helps the crumble keep its shape for that perfect texture.
Another funny kitchen story? The first time I made these for my kids, they were so impatient they tried to eat them straight from the oven. The glaze melted into a puddle and the filling was lava-hot! We now have a household rule: a mandatory 10-minute cooling period. It’s worth the wait, I promise. These buns also keep surprisingly well in an airtight container in the fridge for a few days. I sometimes sneak one cold from the fridge with my morning coffee—it’s a delicious secret!
Your Questions, Answered!
Q: My cheesecake filling oozed out everywhere! What did I do wrong?
A: Don’t worry, this is a common hiccup! It usually means either the filling wasn’t chilled enough (making it too soft to handle) or the indent in the dough wasn’t deep enough. Next time, make sure you’ve really chilled that filling and press a deep, clear well into the center of each dough ball, creating a sturdy “wall” around the edges to contain the goodness.
Q: Can I make these ahead of time?
A: Absolutely! You can assemble the buns completely (up to the point of baking) and keep them covered in the refrigerator overnight. In the morning, just brush with the egg wash and bake. You might need to add a minute or two to the baking time since they’ll be going into the oven cold. You can also freeze the unbaked buns on a tray and then transfer to a freezer bag. Bake from frozen, adding about 5-7 extra minutes.
Q: My crumble melted instead of staying crumbly. Help!
A: This almost always points to the butter being too warm. Remember, cold butter is non-negotiable for a good crumble! If your kitchen is very warm, after making the crumble, pop it in the freezer for 10 minutes before sprinkling it on the buns.
Q: I can’t find brioche dough. What’s the best substitute?
A: No problem! Any similar enriched dough will work beautifully. Look for “sweet roll” dough, “dinner roll” dough, or even a tube of crescent roll dough (just press the seams together to form a solid sheet before cutting and shaping).
Nutritional Information*
*This is an estimated nutritional breakdown per bun, based on 12 buns and provided for informational purposes only. Values may vary based on specific ingredients used.
- Calories: ~280 kcal
- Fat: 14g
- Carbohydrates: 32g
- Protein: 4g
Final Thoughts
Mini Crumble Cheesecake Buns are the kind of treat that feel bakery-fancy yet totally doable in your own kitchen. With their pillowy brioche base, tangy cheesecake center, buttery crumble topping, and sweet glaze, they check every box: soft, creamy, crunchy, and just the right touch of indulgence.
What I love most about these buns is how versatile they are. They can be the star of a brunch table, a cozy afternoon pick-me-up with coffee, or a make-ahead dessert that impresses without stress. And thanks to the simple shortcuts—like starting with store-bought dough—you get maximum payoff with minimal fuss.
So whether you’re baking to treat yourself, surprise your family, or wow your guests, these little golden beauties are guaranteed to disappear fast. Bake a batch, take a bite, and enjoy that moment of pure, buttery, creamy heaven.