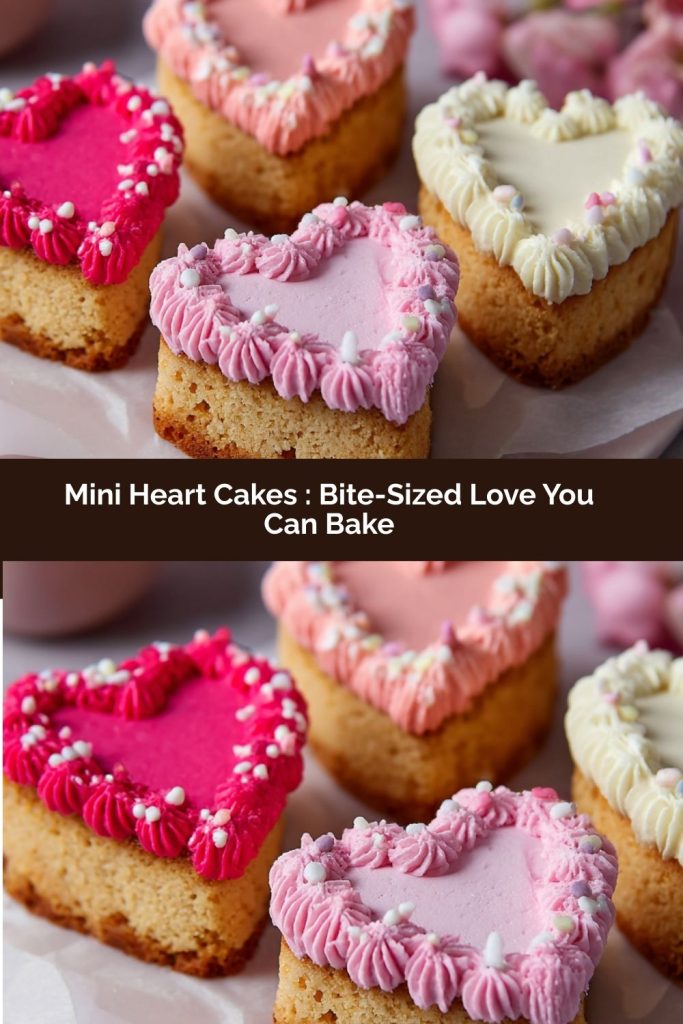
Mini Heart Cakes: Bake a Batch of Bite-Sized Love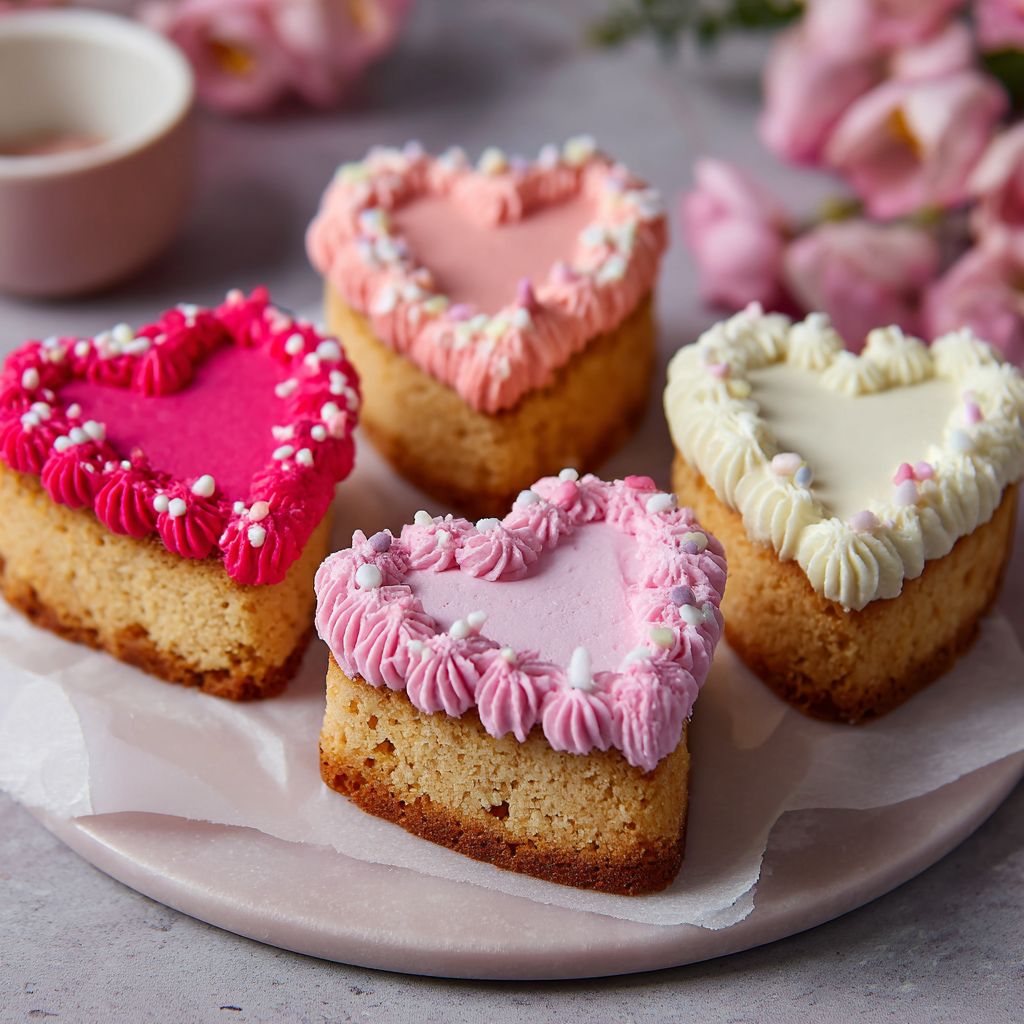
Hey friend! Anna here. Grab your favorite mug of tea (or let’s be honest, coffee—I won’t tell) and pull up a stool. Today, we’re not just baking; we’re creating little edible hugs. We’re talking about Mini Heart Cakes—the ultimate expression of sweet, shareable joy.
Have you ever wanted to bake something that feels special, looks utterly adorable, but doesn’t require a pastry degree or a whole weekend? That’s the magic of these little cakes. They’re soft, fluffy, and packed with charm, like tiny love letters in dessert form. Whether you’re planning a romantic Valentine’s dinner, hosting a bridal shower, celebrating Galentine’s Day, or just want to make a Tuesday feel extraordinary, these cakes are your secret weapon. They prove that great food doesn’t have to be complicated to be memorable.
The best part? This recipe is a beautiful blank canvas. We’ll start with the coziest, most reliable vanilla cake base—a recipe I’ve tested more times than I can count. Then, we’ll unleash our inner artist with colors, fillings, and swirls of frosting. You get all the satisfaction of a layered cake, but in a fun, bite-sized, no-fuss package. So, tie on that apron, put on a good playlist, and let’s turn ordinary ingredients into something incredibly sweet. Your kitchen is about to become the heart of the home, literally.
The Story Behind These Sweet Little Hearts
PrintMini Heart Cakes : Bite-Sized Love You Can Bake

These Mini Heart Cakes are everything you want in a romantic dessert—soft, fluffy, and full of charm. Whether you’re baking for Valentine’s Day, a bridal shower, or just a heartfelt treat at home, these little cakes deliver big impact. Customize with colors, fillings, or frostings, and layer them up like tiny love letters in cake form.
- Prep Time: 20 minutes
- Cook Time: 15 minutes
- Total Time: 35 minutes
- Yield: 8–10 mini heart cakes 1x
Ingredients
For the cake:
1 cup all-purpose flour
½ cup sugar
1 ½ tsp baking powder
¼ tsp salt
½ cup milk
¼ cup butter (melted)
1 egg
1 tsp vanilla extract
Food coloring (red or pink, optional)
For the filling & frosting:
Buttercream, cream cheese frosting, or whipped cream
Optional: jam, chocolate ganache, or sprinkles
Instructions
Preheat oven to 350°F (175°C). Grease a rimmed baking sheet or line with parchment paper.
In a bowl, whisk together dry ingredients. In a separate bowl, combine milk, melted butter, egg, vanilla, and food coloring.
Mix wet and dry ingredients until just combined. Pour into prepared pan and spread evenly.
Bake for 12–15 minutes or until a toothpick comes out clean. Let cool completely.
Use a heart-shaped cookie cutter to cut out mini cakes.
Layer two hearts with frosting and optional filling in between.
Decorate tops with swirls of frosting, sprinkles, or a dusting of powdered sugar.
Nutrition
- Calories: ~180 per cake (varies with filling)
This recipe takes me right back to my grandma’s linoleum-floored kitchen. She wasn’t a fancy baker, but she was a generous one. Every February, she’d bake a simple sheet cake, and together, we’d cut out heart after heart using her one trusted (and slightly rusty) metal cookie cutter.
She’d let me slather the pink buttercream (always dyed with a few drops from a little glass bottle) and pile on the sprinkles. They weren’t perfect. Some hearts were lopsided, others had crumbly edges we’d sneak as “chef’s treats.” But we’d stack them on a plate, and she’d deliver them to neighbors, the mailman, anyone she thought needed a smile. She taught me that food is more than fuel; it’s a connector, a tiny token of care you can hold in your hand. These mini heart cakes are my homage to her—to that feeling of creating something delightful and sharing it without overthinking. It’s the spirit of “more love, less stress,” baked right in.
Gathering Your Ingredients: A Chef’s Guide
Simple ingredients, big flavor! Here’s what you’ll need, plus my little notes to set you up for success.
- 1 cup all-purpose flour: The trusty foundation. For a slightly lighter crumb, you can swap in cake flour. If you only have all-purpose, that’s perfect—these cakes are meant to be tender and forgiving.
- ½ cup sugar: Just the right amount of sweetness. I use regular granulated sugar here. It creams beautifully into the batter for structure and that lovely golden hue.
- 1 ½ tsp baking powder: Our leavening hero! This is what gives our mini cakes their lovely lift and fluffy texture. Make sure yours is fresh for the best rise.
- ¼ tsp salt: Don’t skip it! Salt is the flavor enhancer that makes the vanilla and sweetness really sing.
- ½ cup milk: Whole milk adds wonderful richness, but any milk you have works. For a dairy-free version, unsweetened almond or oat milk are great substitutes.
- ¼ cup butter, melted: Butter equals flavor. I melt it and let it cool slightly so it doesn’t cook the egg. For a dairy-free cake, use a neutral-tasting oil like avocado or a plant-based butter.
- 1 large egg: Our binding agent that adds structure and moisture. Let it come to room temperature for a smoother batter.
- 1 tsp pure vanilla extract: The soul of the cake! Use the good stuff if you can. It makes all the difference.
- Food coloring (red or pink, optional): Gel food coloring is my go-to for vibrant color without thinning the batter. A little goes a long way!
For the Filling & Frosting:
- Buttercream, cream cheese frosting, or whipped cream: This is where you shine! My classic vanilla buttercream is a dream (butter, powdered sugar, vanilla, a pinch of salt, cream). Cream cheese frosting adds a tangy twist. For a lighter option, stabilized whipped cream is divine.
- Optional: jam, chocolate ganache, or sprinkles: Raspberry jam between the layers? Yes, please. A drizzle of ganache? Decadent. A mountain of sprinkles? Pure joy. Customize to your heart’s content.
Let’s Bake: Step-by-Step with Chef’s Tips
Ready? Let’s do this. I’ll walk you through each step with all my favorite little hacks.
- Preheat & Prep: Preheat your oven to 350°F (175°C). This isn’t just a suggestion—a properly preheated oven is key for even baking. Grease a rimmed baking sheet (like a half-sheet pan/jelly roll pan) or line it with parchment paper. The rim is important so our thin batter doesn’t run away! A light coating of baking spray is my secret for easy release.
- Mix the Dry Team: In a medium bowl, whisk together the flour, sugar, baking powder, and salt. Whisking is crucial here! It incorporates air and ensures our leavening is evenly distributed, so every bite is consistent. No one wants a pocket of baking powder.
- Combine the Wet Team: In a separate bowl or large measuring cup, whisk together the milk, slightly cooled melted butter, egg, and vanilla until smooth. If you’re using food coloring, add it now. Pro tip: If your egg is cold from the fridge, whisk it in a bowl first, then slowly stream in the warm melted butter while whisking to gently bring up the temperature without cooking it.
- Bring It All Together: Pour the wet ingredients into the dry ingredients. Use a spatula to gently fold and mix until just combined. A few small lumps are totally fine! Overmixing is the enemy of tender cakes—it develops the gluten in the flour and can lead to a tough texture. We want tender hearts, not tough ones.
- Bake to Perfection: Pour the batter onto your prepared pan and use an offset spatula or the back of a spoon to spread it into a thin, even layer. Pop it in the oven and bake for 12-15 minutes. Start checking at 12! The cake is done when the top springs back lightly to the touch and a toothpick inserted into the center comes out clean or with a few moist crumbs.
- The Cool Down: This step requires patience, my friend! Let the cake cool completely in the pan on a wire rack. If you try to cut warm cake, it will tear and crumble. I sometimes pop the whole pan in the fridge for 15 minutes to speed things up if I’m impatient.
- Heart-Cutting Time: Once completely cool, use a small (about 2-inch) heart-shaped cookie cutter to stamp out your cakes. Press straight down and twist slightly for a clean cut. Get as many as you can! You can gather the scraps, gently press them together, re-roll, and cut more—they’ll be slightly denser but still delicious.
- Assembly & Decoration: Now for the fun! Pair up similar-sized hearts. Pipe or spread a little frosting on one heart, add a dollop of jam if using, and top with its partner. Then, decorate the tops. A simple swirl of frosting, a sprinkle of sanding sugar, or a delicate dusting of powdered sugar looks beautiful. There are no rules here—make them *yours*.
How to Serve Your Mini Masterpieces
Presentation is part of the joy! Arrange these little cakes on a beautiful cake stand, a simple wooden board, or even in individual petit four cases for a fancy touch. For a special touch, scatter a few edible rose petals, fresh berries, or heart-shaped sprinkles around the plate. They’re perfect as a dessert centerpiece, packed into a treat box as a gift, or lined up on the counter for a sweet weekend baking project with kids. Serve them with coffee, champagne, or a big glass of cold milk—pure happiness on a plate.
Recipe Variations: Make It Your Own
- Chocolate Lover’s Dream: Replace 2 tbsp of flour with unsweetened cocoa powder for a chocolate base. Fill with chocolate buttercream and ganache.
- Lemon Berry Burst: Add the zest of one lemon to the dry ingredients. Fill with lemon curd and fresh whipped cream, and top with a tiny blueberry or raspberry.
- Funfetti Celebration: Fold 2 tablespoons of rainbow sprinkles into the batter before baking. Use vanilla frosting and roll the edges in more sprinkles.
- Dairy-Free & Vegan: Use plant-based milk, vegan butter, and a flax egg (1 tbsp ground flax + 3 tbsp water, rested for 5 mins). Top with dairy-free frosting.
- Gluten-Free Swap: Use a 1:1 gluten-free all-purpose flour blend. The batter may be slightly thicker, so add an extra tablespoon of milk if needed.
Chef’s Notes & Kitchen Stories
This recipe has evolved in my kitchen from a one-pan sheet cake into these adorable handheld treats. I love that it’s virtually crumb-free because we’re working with a sturdier sheet cake base—no tedious stacking of wobbly cake layers! One of my favorite “oops” moments turned into a win: I once overbaked the sheet by a minute, making it perfect for soaking with a simple syrup (just equal parts sugar and water, heated until dissolved) brushed lightly on the cut hearts before assembling. It added incredible moisture and a professional touch! Remember, baking is about feeling, not just following. If your batter seems too thick, add a splash more milk. If it’s too thin, add a dusting of flour. You’ve got this.
FAQs & Troubleshooting
Q: My cakes turned out dense. What happened?
A: The most common culprit is overmixing the batter. Remember, mix until *just* combined. Also, ensure your baking powder is fresh (test it by stirring ½ tsp into hot water—it should fizz vigorously).
Q: Can I make these ahead of time?
A: Absolutely! Bake the cake sheet, let it cool, wrap it tightly in plastic wrap, and store it at room temp for a day. You can also cut the hearts and store them layered with parchment in an airtight container. Frost the day you plan to serve them for the best texture.
Q: My hearts are crumbling when I cut them!
A: This means the cake wasn’t 100% cool. Patience is key! Also, dip your cookie cutter in powdered sugar or flour between cuts to prevent sticking. If you have scraps, just press them into a final heart—it’ll be rustic and delicious.
Q: I don’t have a heart-shaped cutter. What can I use?
A> No problem! Use any small shape you have—circles, squares, or even cut triangles to make little heart shapes freehand. You can also bake the batter in a greased mini muffin tin for “mini cupcake hearts” and frost the tops.
Nutritional Information*
*Approximate values per mini cake (with basic vanilla buttercream).
Prep Time: 20 mins | Cook Time: 15 mins | Total Time: 35 mins + cooling | Servings: 8-10 mini cakes
Calories: ~180 | Carbohydrates: 25g | Protein: 2g | Fat: 8g | Saturated Fat: 5g | Cholesterol: 30mg | Sodium: 120mg | Fiber: 0.3g | Sugar: 17g
Nutritional info is an estimate and will vary based on specific ingredients and portion sizes used.
 Final Thoughts
These Mini Heart Cakes are more than just bite-sized desserts—they’re tiny celebrations you can share with the people you love, or savor all by yourself for a little sweet escape. They prove that creating something special in the kitchen doesn’t need to be complicated or time-consuming. A simple vanilla cake, a little frosting, and your creativity are all you need to spread a lot of joy.
What I adore most about this recipe is its flexibility. Customize the flavors, colors, and fillings to suit any occasion—Valentine’s Day, a birthday, or even a random Tuesday that deserves a little magic. They’re forgiving, fun, and endlessly adorable, which makes them a perfect project for bakers of all skill levels.
So the next time you want to bake a treat that’s both charming and delicious, remember these little hearts. They’ll bring smiles, spark conversation, and—most importantly—fill your home with the warm, cozy feeling that only homemade sweets can.