***
Ooey Gooey Neiman Marcus Cake: The Legendary Treat That Feels Like a Hug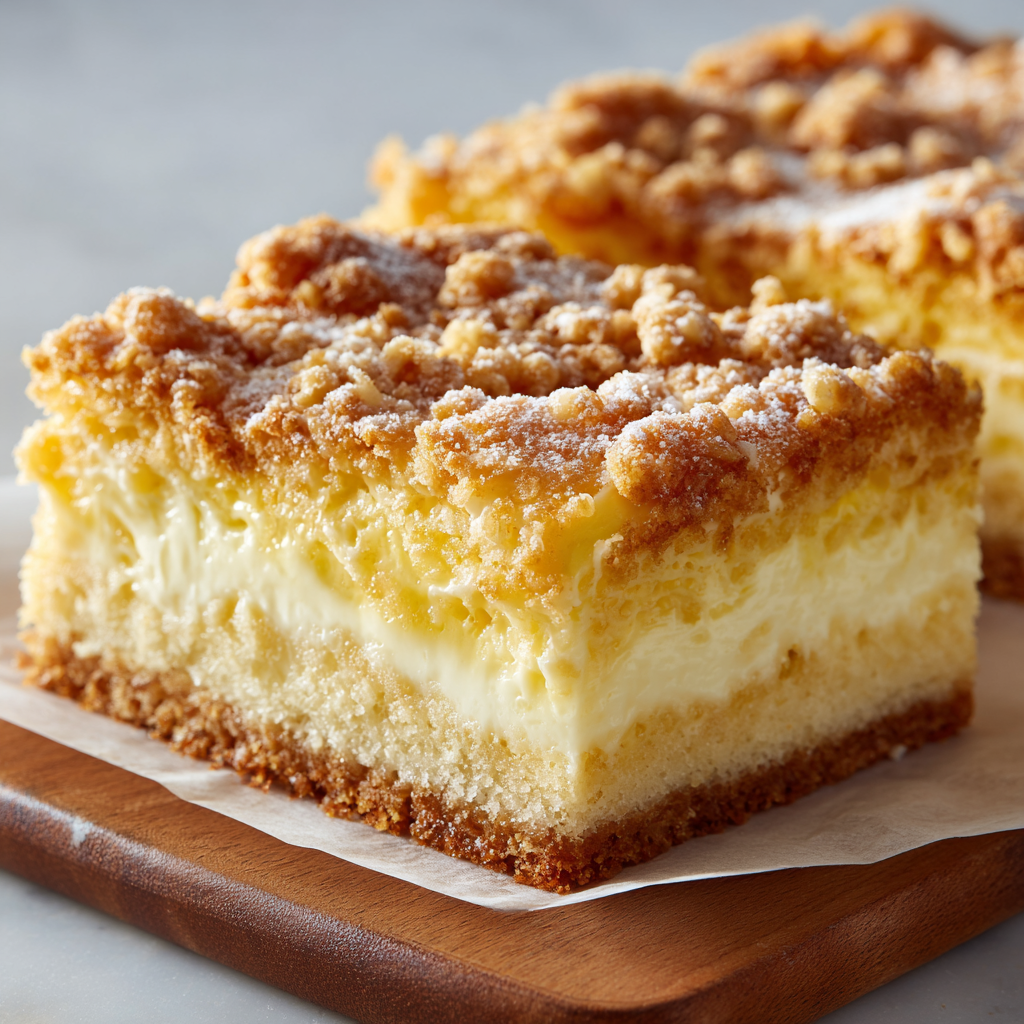
Hey there, friend! Anna here. Can we talk about dessert for a second? Not just any dessert, but the kind of dessert that stops conversations. The kind that makes you close your eyes after the first bite and let out a happy, contented sigh. The kind that’s passed around on handwritten recipe cards, stained with butter and love, becoming a legend in its own right.
That, my friend, is the magic of Neiman Marcus Cake.
If you’ve never had the pleasure, let me paint you a picture. Imagine a dense, buttery, almost cookie-like base. Now, top that with a layer of impossibly creamy, sweet, and tangy cream cheese filling that bakes up into a golden, crackly crown. It’s rich, it’s decadent, and it walks the perfect line between a firm bar and a gloriously gooey center. It’s the dessert you bring to a potluck when you want to be everyone’s favorite person. It’s the treat you sneak a sliver of at 10 a.m. with your coffee, pretending you’re being civilized, but really, you’re just having a moment of pure, unadulterated joy.
Today, I’m sharing my tried-and-true, slightly-tweaked version of this classic. We’re adding a whisper of almond for depth, ensuring maximum creaminess, and locking in that perfect balance of crunch and goo. This isn’t just a recipe; it’s a ticket to becoming a kitchen hero. So, grab your favorite mixing bowl and let’s make some magic together.
The Recipe Card That Started It All
PrintOoey Gooey Neiman Marcus Cake: A Buttery Classic with a Twist

This ultra-rich, melt-in-your-mouth Neiman Marcus Cake is a legendary treat for good reason. With a buttery yellow cake base and a dreamy cream cheese topping that bakes into a golden, crackly crown, it’s the ultimate dessert for any sweet tooth. We’ve taken this classic and turned it up just a notch—with a hint of almond, extra creaminess, and a perfect balance of crunch and goo.
- Prep Time: 10 mins
- Cook Time: 35–40 mins
- Total Time: 45–50 mins
- Yield: 28 rich squares 1x
Ingredients
Base Layer:
2 boxes (15.25 oz) yellow cake mix
4 large eggs
1 cup butter, melted
2 tsp vanilla extract
1/2 tsp almond extract (optional, for depth)
Topping Layer:
16 oz cream cheese, softened
4 large eggs
7 cups confectioners’ sugar
Pinch of salt
Optional: 1/2 cup chopped pecans or walnuts for texture
Dusting of powdered sugar (for serving)
Instructions
Preheat oven to 350°F (175°C). Grease a 13×9-inch baking pan and line with parchment paper for easy removal.
In a large bowl, mix both cake mixes with melted butter, vanilla, almond extract, and 4 eggs until a thick dough forms. Press evenly into the prepared pan.
In a separate bowl, beat cream cheese until fluffy. Add remaining eggs, one at a time, then slowly beat in confectioners’ sugar and a pinch of salt until smooth.
Pour cream cheese mixture over the cake base and spread evenly. If using, sprinkle chopped nuts over the top for added crunch.
Bake for 35–40 minutes, or until the edges are golden and the center has a soft jiggle (don’t overbake—it should be gooey!).
Cool completely before slicing. Dust with powdered sugar just before serving.
Nutrition
- Calories: 290
- Fat: 14g
- Carbohydrates: 38g
- Protein: 3g
This cake always takes me right back to my Great-Aunt Carol’s kitchen. It was a place of wonder—always smelling of sugar, yeast, and whatever fabulous concoction she was whipping up. She was the family’s unofficial pastry chef, and her recipe box was a treasure trove of classics.
I remember the first time I tried her “Famous Butter Cake.” I must have been about ten, and one bite of that soft, buttery, cream-cheesy square felt like I’d discovered the secret to all happiness. The recipe was written in her beautiful, looping cursive on a now-yellowed index card, with a little smudge of vanilla extract in the corner. She’d whisper, with a wink, “This one’s a secret, Anna. Don’t tell the neighbors!” It felt like I was being let in on the most precious of family secrets.
That card is now tucked safely in my own recipe binder, a tangible link to her and to all the love that can be baked into a single 9×13 pan. Every time I make this cake, I think of her, and I’m reminded that the very best recipes aren’t just lists of ingredients; they’re containers for our sweetest memories.
Gathering Your Magical Ingredients
One of the best things about this cake is its beautiful simplicity. We’re using a couple of clever shortcuts (no shame in that game!) to create something that tastes incredibly complex and homemade. Here’s what you’ll need:
For the Buttery Base Layer:
- 2 boxes (15.25 oz each) Yellow Cake Mix: This is our foundation! Don’t prepare the mix as directed on the box; we’re using it dry. The mix gives us the perfect balance of flour, sugar, and leavening agents to create that dense, chewy base. I’m a fan of a classic, butter-recipe yellow cake mix for this.
- 1 cup Butter, melted: This is what transforms the dry cake mix into a pliable, rich dough. Using melted butter, rather than oil or softened butter, gives the base a delightful shortbread-like texture. I use unsalted, but salted works too—it just enhances that sweet-and-salty vibe!
- 4 large Eggs: They bind everything together and add structure and richness to our base. Make sure they’re at room temperature for best incorporation.
- 2 tsp Vanilla Extract: The queen of baking! Pure vanilla extract adds that warm, familiar flavor we all know and love.
- 1/2 tsp Almond Extract (optional, but highly recommended): This is my little “chef’s twist.” Almond extract is a powerhouse. It doesn’t make the cake taste like almonds, per se, but it adds a incredible depth and complexity that makes people go, “Wow, what is that amazing flavor?” It’s the secret weapon!
For the Dreamy Cream Cheese Topping:
- 16 oz Cream Cheese, softened: This is the star of the show. Please, please ensure it’s properly softened to room temperature. If it’s cold, you’ll end up with lumpy filling. Take it out about an hour before you start. Full-fat is the way to go for the ultimate creamy, tangy experience.
- 4 large Eggs: More eggs! These are crucial for setting the topping and giving it that custardy, firm-yet-soft texture.
- 7 cups Confectioners’ Sugar: Yes, you read that right. This is a celebration cake, after all! The powdered sugar dissolves beautifully into the cream cheese, creating a silky-smooth, sweet filling. Don’t substitute granulated sugar, as it will make the topping grainy.
- Pinch of Salt: A tiny pinch is all you need to balance the intense sweetness and make the other flavors pop.
- 1/2 cup Chopped Pecans or Walnuts (optional): If you’re a texture person like me, this is for you. Sprinkling nuts on top adds a wonderful crunchy contrast to all the gooey goodness.
- Dusting of Powdered Sugar (for serving): A final snowy dusting before serving makes it look absolutely gorgeous and professional.
Let’s Bake! Your Step-by-Step Guide to Perfection
Okay, apron on? Let’s do this! I’ll walk you through each step, and I’ve tucked in all my favorite chef hacks to ensure your cake is absolutely flawless.
Step 1: Prep Your Pan and Preheat
First things first, preheat your oven to a nice, hot 350°F (175°C). This ensures the oven is perfectly ready for our creation. Now, for the pan: grab your trusty 13×9-inch baking pan. Here’s my number one tip for easy removal and clean slices: grease the pan, then line it with parchment paper, leaving a little overhang on the two long sides. This creates a “sling” that will let you lift the entire cake out in one beautiful piece. It’s a game-changer!
Step 2: Create the Buttery Base
In a large bowl, we’re going to make the base layer. This isn’t a typical cake batter; it’s going to be a thick, almost cookie-dough-like situation. Simply dump in both boxes of dry cake mix, add the 4 eggs, melted butter, vanilla, and that magical almond extract. Use a sturdy spoon or even your hands (my preferred method!) to mix until a thick, cohesive dough forms. It might seem a bit dry at first, but keep mixing—it will come together. Once it’s uniform, transfer this dough to your prepared pan. Now, for a perfectly even base, I like to use the bottom of a measuring cup or a small glass, lightly greased, to press the dough firmly and evenly into the bottom of the pan. Get it nice and compact!
Step 3: Whip Up the Cream Cheese Dream Topping
Time for the good stuff! In another large bowl (or your stand mixer fitted with the paddle attachment), place your softened cream cheese. Beat it on medium speed for a minute or two until it’s completely smooth and fluffy. No lumps allowed! Scrape down the sides of the bowl. Now, with the mixer on low, add the 4 eggs, one at a time, letting each incorporate fully before adding the next. This prevents the mixture from breaking. Now, here’s the fun (and slightly messy) part: gradually add the 7 cups of confectioners’ sugar. I add it one cup at a time with the mixer on low speed, unless you want a sweet, sugary cloud all over your kitchen! Once all the sugar is in, add your pinch of salt, bump the speed up to medium-high, and beat for a full 1-2 minutes until the filling is silky, smooth, and utterly dreamy.
Step 4: Assemble and Add Crunch (Optional)
Pour that beautiful cream cheese filling over your pressed base. Use a spatula to spread it evenly, making sure it reaches all the way to the edges. If you’re using chopped nuts, now is the time to sprinkle them evenly over the top. They’ll toast up beautifully in the oven, adding a fantastic nutty flavor and crunch.
Step 5: Bake to Gooey Perfection
Slide the pan into your preheated oven. Now, listen closely, because this is the most important part: Bake for 35-40 minutes. You are looking for the edges to be a deep, golden brown and to be fully set. The center, however, should still have a distinct jiggle. It should wobble like a happy custard when you gently shake the pan. Do not overbake! The residual heat will continue to cook the center as it cools. Overbaking is the enemy of the “ooey gooey” we’re chasing. If the top is browning too quickly, you can tent it loosely with aluminum foil for the last 10 minutes.
Step 6: The Hardest Part—The Cool Down
Once it’s out of the oven, place the pan on a wire rack. I know it’s tempting, but you must let this cake cool completely before you even think about slicing it. I usually let mine cool for at least 2-3 hours, and sometimes I even pop it in the fridge for an hour after that. This allows the filling to fully set, ensuring you get clean, beautiful squares and not a delicious, but soupy, mess. Patience is a virtue, especially in baking!
How to Serve This Masterpiece
Once your cake is completely cool, use the parchment paper sling to lift it gently onto a cutting board. This makes slicing so much easier! Use a sharp knife, wiping it clean between cuts for pristine squares. Just before serving, give the top a generous dusting with a little more powdered sugar through a fine-mesh sieve. It looks beautiful and adds a final touch of sweetness. This cake is rich, so small squares are perfect. Serve it with a hot cup of coffee, a cold glass of milk, or a dollop of freshly whipped cream to cut through the richness. Get ready for the compliments to roll in!
Make It Your Own: Delicious Recipe Variations
This recipe is a fantastic canvas for your creativity! Here are a few of my favorite twists:
- Chocolate Lover’s Dream: Use one box of yellow cake mix and one box of devil’s food cake mix for the base. You could even fold 1 cup of chocolate chips into the cream cheese filling.
- Lemon Burst: Omit the almond extract. Add the zest of two lemons and 2 tablespoons of lemon juice to the cream cheese filling. It’s incredibly bright and refreshing!
- Tropical Twist: Add 1 cup of shredded sweetened coconut to the cream cheese filling and sprinkle another 1/2 cup on top with the nuts.
- Cookie Doodle: Use a spice cake mix for the base and add 1 teaspoon of cinnamon to the cream cheese filling. It tastes like a snickerdoodle!
- Fruity Swirl: Before baking, dollop 1/2 cup of your favorite fruit jam (raspberry is divine) over the cream cheese layer and use a knife to gently swirl it in.
Anna’s Chef’s Notes & Kitchen Stories
This recipe has been a part of my life for so long, it’s evolved right along with me. I remember the first time I made it on my own, in my first apartment with a oven that ran hot. Let’s just say I learned the importance of that “jiggle test” the hard way—I ended up with a firmer, less-gooey cake, but my roommates still devoured it! That’s the beauty of this dessert; even its “mistakes” are delicious.
The addition of almond extract was a happy accident. I was out of vanilla once and used almond instead, and the result was so much more interesting and complex. It’s been a non-negotiable in my version ever since. I also swear by the parchment paper sling. The first time I served this cake in perfect, clean-lifted squares at a family gathering, the look on my mom’s face—the same one who watched me make baking mishaps for years—was pure pride. It’s the little victories, friends.
Your Questions, Answered! (FAQs & Troubleshooting)
I’ve made this cake more times than I can count, and I’ve heard all your questions! Here are the answers to the most common ones.
Q: My topping cracked on top! What did I do wrong?
A: Don’t worry, a few small cracks are totally normal and don’t affect the taste one bit! However, large cracks can happen if you overbeat the cream cheese mixture after adding the eggs (which incorporates too much air) or if the oven temperature is too high. Next time, try mixing on a lower speed once the eggs are in, and double-check your oven temp with an independent thermometer. But truly, a dusting of powdered sugar hides a multitude of sins!
Q: Can I make this cake ahead of time?
A: Absolutely! In fact, I think it’s even better the next day. Once completely cooled, cover it tightly with plastic wrap or transfer the slices to an airtight container. It will keep beautifully at room temperature for 1 day, or in the refrigerator for up to 4 days. The flavors have more time to meld, and the texture becomes even more fudgy. You can serve it cold or let it come to room temperature for that original gooey texture.
Q: The center was still super runny after cooling. Help!
A: This means it needed a few more minutes in the oven. The center should jiggle, but it shouldn’t look liquid or soupy. If this happens, just pop it back in the oven for 5-minute increments until the center has a more unified, custard-like jiggle. Remember, it will continue to set as it cools. Consider it a learning experience for next time!
Q: My cream cheese filling was lumpy. How can I prevent that?
A: Lumpy filling almost always traces back to the cream cheese not being soft enough. It needs to be at a true room temperature—you should be able to press your finger into it easily. If you’re in a hurry, you can microwave the unwrapped blocks on a plate for 15-20 seconds, but be very careful not to melt it! Taking the time to properly soften your cream cheese is the #1 secret to a silky-smooth topping.
Nutritional Information
Please note: This is a rich, celebratory dessert. The following is an estimate per serving (1 square), provided for informational purposes. Values may vary based on specific ingredients used.
- Calories: ~290
- Fat:</

-
Final Thoughts: The Dessert That Never Fails to Steal the Show 🍰💛
If ever there were a dessert that embodies comfort, nostalgia, and pure joy in every bite, this Ooey Gooey Neiman Marcus Cake is it. It’s the kind of treat that doesn’t just satisfy a sweet tooth—it tells a story. A story of family kitchens, shared laughter, and that quiet little moment when everyone goes silent because the first bite is that good.
Every layer has a role to play: the buttery, cookie-like crust that gives you that first golden crunch; the rich, velvety cream cheese center that melts in your mouth; the sweet, crackly top that catches the light (and your heart). It’s indulgent without apology—and that’s exactly what makes it so special.
Whether you’re baking it for a potluck, gifting it to a neighbor, or sneaking a square for breakfast (no judgment here), this cake delivers pure happiness every single time. So here’s to recipes that never go out of style, to gooey goodness, and to desserts that taste like love baked right in.