Your New Favorite Snack is Just a Twist Away!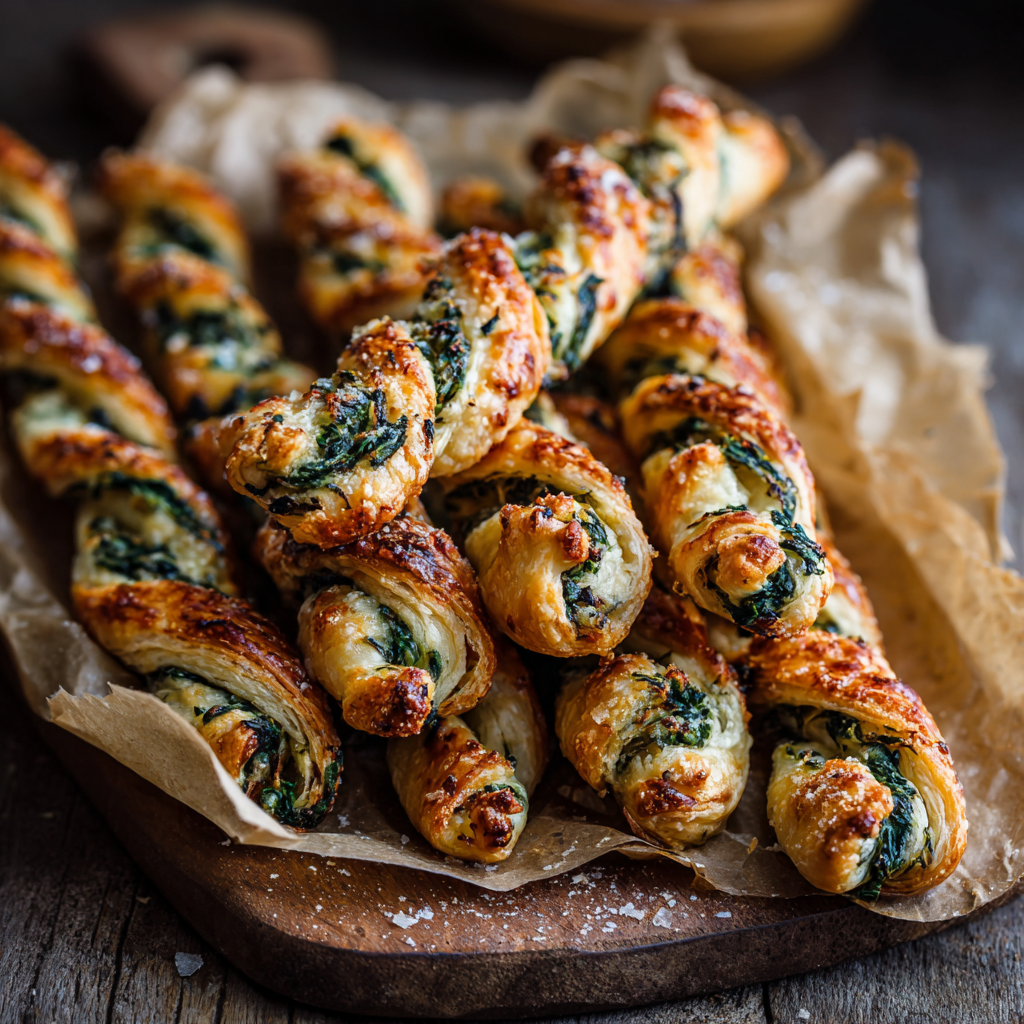
Hey there, friend! Anna here. Can I let you in on a little secret? The recipes that get the most love in my kitchen aren’t always the elaborate Sunday dinners or the perfectly iced layer cakes. Nope. Often, it’s the simple, throw-together-in-minutes, impossibly delicious snacks that truly steal the show. The ones that make you feel like a kitchen wizard with minimal effort and maximum reward.
Today, I’m so excited to share one of those magical recipes with you: my Crispy Parmesan and Spinach Cheese Twists. Imagine this: flaky, buttery puff pastry, twisted around a savory, garlicky filling of nutty Parmesan and vibrant spinach. They bake up into golden, crisp ribbons of pure joy that are impossible to resist. The best part? You probably have most of the ingredients in your kitchen right now, and they come together in about 30 minutes flat.
Whether you’re whipping up a quick after-school treat, needing a show-stopping appetizer for your next gathering, or just treating yourself to a little moment of savory bliss with your afternoon coffee, these twists are your answer. They’re the edible equivalent of a warm hug – comforting, satisfying, and guaranteed to make everyone smile. So, let’s shake off any stress, preheat that oven, and cook up something amazing together!
A Twist of Nostalgia
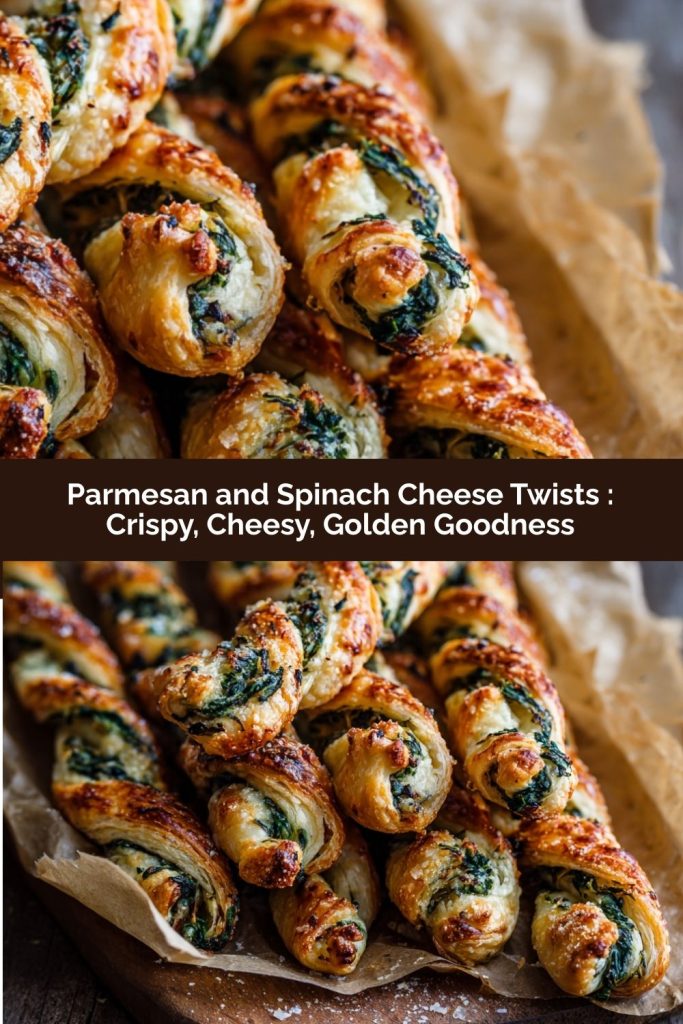
PrintParmesan and Spinach Cheese Twists : Crispy, Cheesy, Golden Goodness

These parmesan and spinach puff pastry twists are the ultimate savory snack or appetizer. Crisp on the outside, gooey and garlicky inside, they’re irresistibly flaky and full of flavor. Whether you serve them at brunch or as a holiday finger food, these twists are a guaranteed hit.
- Prep Time: 10 minutes
- Cook Time: 15–18 minutes
- Total Time: ~30 minutes
Ingredients
1 sheet puff pastry, thawed
1 cup grated Parmesan cheese
1 cup chopped spinach (fresh or thawed from frozen and squeezed dry)
1 tsp garlic powder
1 tsp onion powder
1/2 tsp salt
1/2 tsp black pepper
1/4 tsp red pepper flakes
1 egg, beaten (for egg wash)
2 tbsp water
Instructions
Preheat oven to 400°F (200°C) and line a baking sheet with parchment.
In a bowl, mix spinach, Parmesan, garlic powder, onion powder, salt, pepper, and red pepper flakes.
Roll out puff pastry slightly and cut in half lengthwise. Spread the spinach mixture over one half.
Top with the second half and press lightly to seal. Cut into 1-inch strips.
Twist each strip and place on the baking sheet.
Brush with beaten egg and bake for 15–18 minutes, until puffed and golden.
Serve warm or room temperature.
Nutrition
- Calories: 140
- Fat: 9g
- Carbohydrates: 12g
- Fiber: 1g
- Protein: 5g
This recipe always takes me right back to my grandma’s cozy, flour-dusted kitchen. She was the queen of “a little of this, a little of that” cooking, and she had a magical way with puff pastry. I can still vividly remember one chilly autumn afternoon, watching her deftly roll out a sheet of pastry for a classic apple turnover. But then, with a mischievous twinkle in her eye, she took the leftover scraps, sprinkled them with cheddar and a pinch of paprika, gave them a quick twist, and tossed them in the oven alongside the desserts.
Ten minutes later, she presented me with my own personal plate of these hot, cheesy, golden bites. “Chef’s treat,” she’d whisper. To me, they were more than a snack; they were a secret handshake into the world of cooking—a world where creativity and joy were the most important ingredients. These Parmesan and Spinach Twists are my grown-up, slightly more elegant homage to her kitchen wisdom. They carry that same spirit of simple, from-the-heart goodness that turns an ordinary moment into a delicious memory.
Gathering Your Magical Ingredients
Part of the beauty of this recipe is its simplicity. Let’s take a quick look at what you’ll need and why each ingredient plays such a star role. I’ve also included my favorite swaps and tips so you can make this recipe your own!
- 1 sheet puff pastry, thawed – This is our blank canvas! Look for an all-butter puff pastry in the freezer aisle for the best flavor. The key is to thaw it according to package directions, usually in the fridge overnight. If you’re in a pinch, you can thaw it on the counter for about 40 minutes, but don’t let it get too warm or it will become sticky and hard to work with.
- 1 cup grated Parmesan cheese – I highly recommend grating your own Parmesan from a block! It melts better and has a far superior, nuttier flavor than the pre-shredded kind (which often contains anti-caking agents).
- 1 cup chopped spinach (fresh or thawed from frozen and squeezed dry) – This is our pop of color and a sneaky bit of green! If using frozen spinach, you MUST squeeze it as dry as humanly possible. I wrap it in a clean kitchen towel and wring it out over the sink. Any extra moisture will make your pastry soggy.
- 1 tsp garlic powder – We’re using powder here for its consistent, mellow flavor that distributes evenly. It gives you that perfect garlicky backbone without the risk of burning that fresh garlic might have.
- 1 tsp onion powder – The best friend of garlic powder! It adds a subtle sweetness and depth that rounds out the savory flavor profile beautifully.
- 1/2 tsp salt & 1/2 tsp black pepper – The dynamic duo of seasoning! Don’t be shy here; they help balance the richness of the cheese and pastry.
- 1/4 tsp red pepper flakes – This is our secret weapon! It doesn’t make the twists spicy, per se, but it adds a wonderful, gentle warmth that lingers in the background and keeps you reaching for “just one more.”
- 1 egg, beaten (for egg wash) + 2 tbsp water – This is what gives our twists that gorgeous, professional-looking golden sheen. The water just thins it out enough for an easy, even brush.
Let’s Get Twisting! Your Step-by-Step Guide
Ready to see some kitchen magic happen? Follow these steps, and you’ll have a tray of golden perfection in no time. I’ve sprinkled in all my favorite chef hacks to ensure your success!
- Preheat oven to 400°F (200°C) and line a baking sheet with parchment. This is a non-negotiable first step! A properly preheated oven is crucial for that instant puff, and the parchment paper is your insurance policy against any sticky situations. No parchment? A silicone baking mat works wonderfully too.
- In a medium bowl, mix the spinach, Parmesan, garlic powder, onion powder, salt, pepper, and red pepper flakes. Go ahead and use your hands to really get in there and combine everything. You want every flake of spinach to be coated in that cheesy, garlicky goodness. Take a whiff – smells like heaven already, doesn’t it?
- On a lightly floured surface, roll out your thawed puff pastry sheet just slightly to smooth out any creases. We’re not trying to make it huge, just to even it out. Then, using a sharp knife or a pizza cutter, cut the sheet in half lengthwise, so you have two long, equal rectangles.
- Sprinkle the spinach and Parmesan mixture evenly over one half of the pastry, leaving a tiny bare border around the edges. This border is important! It’s our “glue zone” that will help seal the two layers together later. Press the filling down gently so it adheres to the pastry.
- Carefully place the second sheet of pastry on top of the filling-covered half. Line up the edges as best you can. Now, gently press down all around the edges, and especially around the filling, to seal the two layers together. A little tip: you can use a fork to crimp the edges for a cute, decorative look and a super-secure seal!
- Using your sharp knife or pizza cutter again, cut the layered pastry into 1-inch strips. You should get about 12-14 strips, depending on the exact size of your pastry. Don’t worry if they’re not perfectly identical – that’s part of their homemade charm!
- Now for the fun part! Gently pick up each strip by both ends and twist it several times. Think of it like wringing out a towel, but much more gently. You want to create a lovely spiral of pastry and filling. Don’t be afraid to give it a good 3-4 twists.
- Place each twisted strip on your prepared baking sheet, pressing both ends down lightly onto the parchment to secure them. This prevents them from untwisting in the oven’s heat. They don’t spread too much, so you can place them about an inch apart.
- In a small bowl, beat the egg with the 2 tablespoons of water. Use a pastry brush (or your finger in a pinch!) to lightly brush this egg wash over the top of every twist. This is the final step before the oven, and it’s what gives them that beautiful, glossy, golden-brown finish. Be generous but don’t drench them.
- Bake for 15-18 minutes, or until the twists are puffed, deeply golden, and firm to the touch. Your kitchen is going to smell absolutely incredible. I like to rotate the pan halfway through baking for even color. And remember, all ovens are a little different, so keep an eye on them after the 15-minute mark!
- Let the twists cool on the pan for at least 5 minutes before serving. I know, the temptation is real! But that filling is like molten lava straight out of the oven. This brief rest allows the cheese to set slightly, making them easier (and safer!) to eat.
How to Serve These Golden Beauties
Presentation is part of the fun! I love piling these twists high on a wooden cutting board or in a rustic basket, maybe with a little sprig of fresh rosemary for a pop of green. They are fantastic all on their own, but for a real treat, serve them with a side of warm marinara sauce or a cool, creamy ranch dip for dunking. They’re the ultimate party appetizer, a brilliant addition to a brunch spread next to some scrambled eggs, or simply the perfect companion to a cup of soup on a lazy weekday.
Get Creative! Recipe Variations
The basic formula here is a playground for creativity. Once you’ve mastered the original, try one of these delicious twists on the twist!
- Everything Bagel Twist: Swap the filling for a mixture of cream cheese, everything bagel seasoning, and chopped chives.
- Pizza Twist: Use a layer of tomato pesto or pizza sauce, a blend of mozzarella and Parmesan, and a sprinkle of dried oregano.
- Spicy Jalapeño Popper: Mix in 2 tablespoons of finely chopped pickled jalapeños and 1/4 cup of shredded sharp cheddar into the filling.
- Sun-Dried Tomato & Feta: Replace the spinach with finely chopped sun-dried tomatoes (oil-packed and patted dry) and swap the Parmesan for crumbled feta cheese.
- Dairy-Free Delight: Use your favorite vegan puff pastry and swap the Parmesan for a generous sprinkle of nutritional yeast and a pinch of smoked paprika.
Anna’s Chef’s Notes
Over the years, this recipe has become a true workhorse in my repertoire. I’ve made them for fancy holiday parties, last-minute potlucks, and everything in between. One of my favorite kitchen memories is of my daughter, who was about four at the time, “helping” me by sprinkling the cheese. She got more on her face and the floor than on the pastry, but the sheer pride on her face when we pulled the golden twists out of the oven was worth every bit of the cleanup. That’s the real magic of cooking, isn’t it?
I’ve also learned a thing or two. If you’re prepping for a party, you can assemble the twists up to the point of baking, arrange them on the parchment-lined sheet, and then pop the entire tray in the freezer for 20 minutes until they’re firm. Then, transfer them to a freezer bag. When you’re ready, bake them straight from frozen, adding just 2-4 extra minutes to the baking time. It’s a total game-changer!
Your Questions, Answered!
I’ve gotten so many wonderful questions about this recipe over time. Here are answers to the most common ones to help you out!
Q: My twists didn’t puff up very much. What happened?
A: The most common culprit is pastry that was too warm when you started. If the butter in the pastry melts before it hits the hot oven, it won’t create that signature steam-puffed lift. Make sure your pastry is cold, your filling isn’t warm, and your oven is fully preheated. Also, be gentle when twisting – you don’t want to stretch the dough thin.
Q: Can I make these ahead of time?
A: Absolutely! As I mentioned in my notes, you can freeze the unbaked twists. You can also assemble them, cover the tray with plastic wrap, and keep them in the fridge for up to 4 hours before baking. This is perfect for getting a head start on party prep!
Q: My filling is leaking out while baking. How can I prevent this?
A: A little cheese melt-out is normal, but a major leak usually means the edges weren’t sealed properly. Make sure you press the two pastry layers together firmly around all the edges before you cut the strips. Using the fork to crimp is a great way to ensure a tight seal.
Q: Is there a substitute for the egg wash?
A> You can use just a tablespoon of milk or heavy cream for a slightly less shiny, but still golden, finish. For a dairy-free option, a bit of olive oil or melted vegan butter brushed on top will also work.
Nutritional Information (Approximate, per twist)
- Calories: ~140
- Protein: 5g
- Carbohydrates: 12g
- Fat: 9g
- Fiber: 1g
Prep Time: 10 minutes | Cook Time: 15-18 minutes | Total Time: ~30 minutes
Final Thoughts
At the end of the day, this Sweet Corn & Cream Cheese Tortellini Skillet is everything I adore about late-summer cooking: simple ingredients, big comforting flavor, and a whole lot of heart. It’s the kind of dish that proves you don’t need fancy techniques or endless steps to create something that feels downright magical. Just a skillet, a few pantry staples, and those sun-sweet kernels of corn that make every bite taste like a warm August evening.
Whether you’re cooking for your family, sharing a cozy date-night dinner, or treating yourself after a long day, this recipe brings that perfect balance of ease and indulgence. And if you find yourself tweaking it, swapping herbs, or adding your own special touches—well, that’s exactly how kitchen traditions are born.
So here’s to sweet corn season, to one-pan miracles, and to the joy of making something delicious with the people (and memories) we love most. I hope this recipe becomes one of those keepers you come back to again and again. Happy cooking, friend—and save me a bowl!