***
Your Search for the Perfect Sugar Cookie Frosting is Officially Over!
Hey there, friend! Let’s have a little heart-to-heart about sugar cookies. You know the ones. You spend an hour carefully cutting out stars, trees, and maybe a slightly lopsided reindeer. You bake them with love, let them cool… and then comes the moment of truth. The frosting.
Is it too gritty? Too runny? Does it dry matte and dull, or worse, never set at all, leaving you with a sticky, stackable nightmare? I’ve been there. I’ve had frosting disasters that looked more like abstract art than a winter wonderland. But after years of testing, tweaking, and probably consuming my weight in powdered sugar, I’ve cracked the code.
This isn’t just any frosting. This is the one. The frosting that glides onto your cookies like a dream, sets with a soft, glossy crust that’s gentle to the touch, and stays perfectly, beautifully put. It’s the secret behind those gorgeous, bakery-style cookies that make people say, “You made these?!” It’s creamy, it’s flavorful, and I promise, it’s joyfully simple to make. So, let’s banish frosting frustration forever and whip up a batch of this magic together. Your cookies are about to become the stars of the show!
A Little Frosting, A Lot of Heart
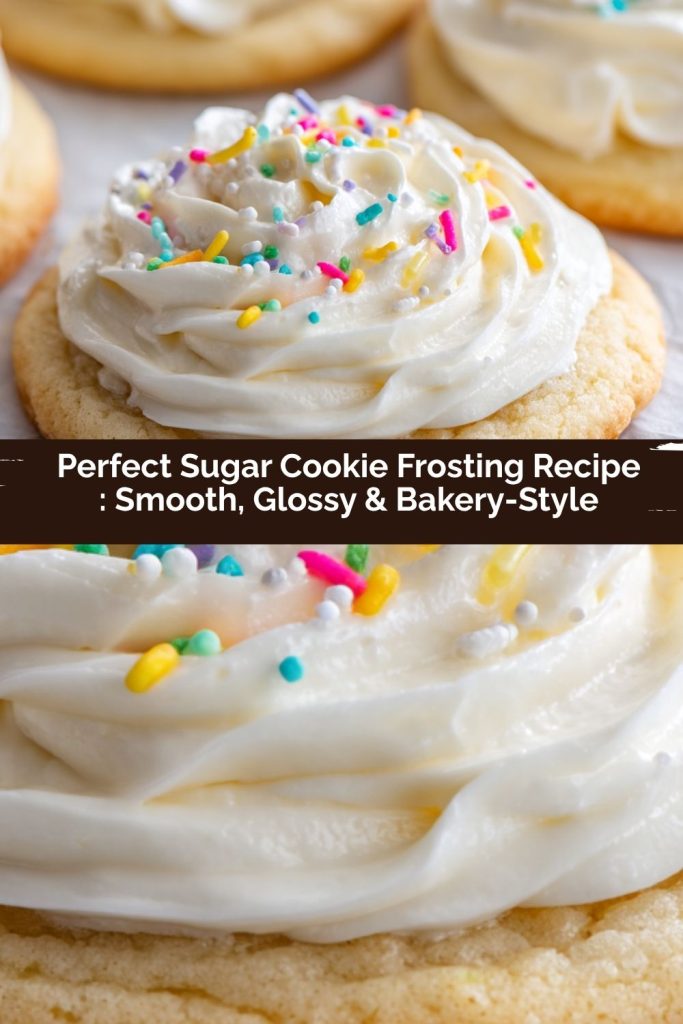
PrintPerfect Sugar Cookie Frosting Recipe : Smooth, Glossy & Bakery-Style

This sugar cookie frosting is soft, creamy, and perfectly spreadable—ideal for turning even the simplest cookies into bakery-worthy treats. It sets with a light crust so your cookies stay beautiful and stackable, while remaining tender underneath. Whether you’re decorating holiday cut-outs or classic round cookies, this frosting delivers flavor and finish. With easy mix-ins for flavor or color, it’s endlessly customizable for any occasion.
- Prep Time: 10 minutes
- mix time: 10 minutes
- Total Time: 20 minutes
- Yield: Frosts approx. 4–5 dozen cookies
Ingredients
2 cups (4 sticks) unsalted butter, softened
8 cups powdered sugar, sifted
4 tablespoons heavy cream (or milk for a lighter version)
4 teaspoons vanilla extract
1/4 teaspoon salt
Optional: Gel or liquid food coloring
Optional twist-ins:
1 teaspoon almond extract (for a bakery-style edge)
Zest of 1 lemon or orange (for a citrus pop)
1 tablespoon maple syrup (for a fall-inspired touch)
Instructions
In a large mixing bowl, beat the softened butter on medium speed until smooth and creamy (about 2–3 minutes).
Gradually add the powdered sugar, one cup at a time, mixing on low to prevent a sugar cloud.
Add heavy cream, vanilla, salt, and any twist-ins, then beat on medium-high for 2–3 minutes until light and fluffy.
Add food coloring if desired, mixing until fully blended.
Use immediately to frost cooled sugar cookies, or store in an airtight container in the fridge for up to 1 week. Re-whip before using for best texture.
Nutrition
- Calories: 190
- Sugar: 24 g
- Sodium: 25 mg
- Fat: 10 g
- Carbohydrates: 25 g
This recipe takes me right back to my Grandma Eleanor’s kitchen, a place that always smelled of cinnamon and unconditional love. Every December, she’d declare a “Cookie Day.” The table would be buried in flour, and my job, from the time I could reach the counter, was to be the Official Frosting Stirrer. Her frosting was simple—just butter, powdered sugar, and a splash of milk—but to me, it was pure alchemy.
I’ll never forget the year I was finally deemed old enough to add the food coloring. It was a single drop of red, and I remember holding my breath, watching it swirl into the white cream like a ribbon of magic. As we decorated, she’d tell me stories about the cookies she made for my dad when he was a boy. We weren’t just frosting cookies; we were layering on love, one sprinkle-covered star at a time. That’s the spirit I want to bring to your kitchen. This recipe is my homage to Grandma Eleanor—a little more polished, but with the same huge, joyful heart. It’s not just about making things pretty; it’s about creating sweet, delicious memories.
Gathering Your Frosting Superstars
Great frosting starts with great ingredients. Here’s exactly what you’ll need and why each one matters. I’ve also included my favorite chef-y insights and substitutions so you can make this recipe your own!
- 2 cups (4 sticks) unsalted butter, softened: This is the foundation! Using unsalted butter lets you control the salt level perfectly. “Softened” is key here—it should give slightly when pressed but still hold its shape. Too cold, and your frosting will be lumpy; too melted, and it won’t hold air, becoming greasy.
- 8 cups powdered sugar, sifted: This gives our frosting its structure and sweetness. I always sift my powdered sugar. It might feel like an extra step, but it’s the #1 secret to a silky-smooth, lump-free texture. Trust me on this!
- 4 tablespoons heavy cream: This is our magic ingredient for richness and that dreamy, spreadable consistency. For a slightly lighter version, whole milk works, but the heavy cream gives it a luxurious, bakery-style body that’s just unbeatable.
- 4 teaspoons vanilla extract: Pure vanilla extract adds a warm, classic flavor that makes the frosting taste homemade and special. This is where you don’t want to skimp!
- 1/4 teaspoon salt: Don’t forget the salt! It’s not enough to make things salty; it’s just enough to balance the intense sweetness and make all the other flavors pop.
- Optional: Gel or liquid food coloring: If you’re adding color, I’m a huge fan of gel food coloring. It’s highly concentrated, so you need less, and it won’t water down your frosting like liquid colors sometimes can.
Optional Flavor Twist-Ins (Pick one!):
- 1 teaspoon almond extract: My personal favorite! It gives that classic, nostalgic “bakery cookie” flavor. It’s subtle but absolutely divine.
- Zest of 1 lemon or orange: For a bright, sunny pop of flavor! The citrus zest cuts through the sweetness beautifully and makes the frosting taste incredibly fresh.
- 1 tablespoon maple syrup: A cozy, fall-inspired touch. Swap this in for a teaspoon of the cream to keep the consistency perfect. It pairs wonderfully with spices.
Let’s Make Some Magic: Your Step-by-Step Guide
Ready to create the smoothest, fluffiest frosting of your life? Follow these steps, and you really can’t go wrong. I’ve packed each one with my best tips and hacks to set you up for success.
- Cream the Butter Like a Pro. Place your softened butter in a large mixing bowl. Using either a stand mixer with the paddle attachment or a trusty hand mixer, beat the butter on medium speed for a full 2-3 minutes. Don’t rush this! We’re not just mixing it; we’re whipping air into it until it’s pale, smooth, and wonderfully creamy. This is the first secret to a light, not dense, frosting. Chef’s Hack: If you forgot to soften your butter, you can cube it and beat it for a minute alone. It will soften up from the friction!
- Gradually Add the Powdered Sugar. Now, with your mixer on low speed, begin adding your sifted powdered sugar, one cup at a time. Let each cup incorporate fully before adding the next. I know it’s tempting to dump it all in, but this patience is what prevents that infamous “powdered sugar cloud” from exploding all over your kitchen! Once all the sugar is in, the mixture will be thick and crumbly—this is totally normal.
- Bring It All Together. It’s time to add the liquid love! Pour in the heavy cream, vanilla extract, salt, and any of your chosen flavor twist-ins (like that almond extract I’m always raving about). Start your mixer on low to combine, then crank it up to medium-high speed and let it rip for a full 2-3 minutes. Watch as it transforms from that thick, pasty mess into a voluminous, light, and incredibly fluffy frosting. This whipping time is non-negotiable for that perfect texture.
- Color It Beautiful (Optional). If you’re using food coloring, now’s the time! Add a small amount of gel color and mix on low until it’s fully blended. You can always add more to deepen the color, so start conservatively. Chef’s Hack: To get a super vibrant color without thinning the frosting, let the colored frosting sit for 10-15 minutes. The color will deepen and develop beautifully!
- Frost & Enjoy! Your masterpiece is ready! Use an offset spatula, a butter knife, or even a piping bag to frost your completely cooled sugar cookies. The frosting is perfectly spreadable right now. As it sits, it will form that lovely, light crust that makes the cookies stackable, while staying tender underneath.
Serving Up Your Sweet Creations
Presentation is part of the fun! For a classic look, I love using a small offset spatula to create pretty swoops and swirls on top of each cookie. If you’re feeling fancy, fit a piping bag with a star or round tip for more intricate designs. And let’s not forget the final flourish—a sprinkle of sanding sugar, a handful of nonpareils, or even a delicate dusting of edible glitter right after frosting makes them truly sparkle. Arrange them on a beautiful platter and watch them disappear!
Make It Your Own: Delicious Variations
The fun doesn’t stop with vanilla! This frosting is a fantastic blank canvas. Here are a few of my favorite twists:
- Chocolate Lover’s: Replace 1 cup of powdered sugar with 3/4 cup of unsweetened cocoa powder (sifted, of course!) for a rich chocolate frosting.
- Cream Cheese Swirl: For a tangy twist, replace one stick of butter with 4 oz of softened cream cheese. It’s a gorgeous flavor pairing with spiced cookies.
- Peppermint Patty: Swap the vanilla for 1-2 teaspoons of peppermint extract and a few drops of red food coloring for a festive, candy-cane inspired treat.
- Dairy-Free Delight: Use vegan butter sticks and a thick, unsweetened non-dairy milk (like oat or coconut) to make this recipe friendly for everyone.
- Lemon Glaze: For a thinner, pourable glaze, simply increase the heavy cream by one tablespoon at a time until it reaches your desired consistency.
Anna’s Chef Notes & Kitchen Stories
This recipe has been a labor of love, and it’s evolved so much over the years! The original version was good, but it was the switch to whipping the butter for a full three minutes and the insistence on sifting the sugar that truly transformed it from “good” to “I-need-this-recipe-now” great.
One of my favorite kitchen fails (which is now a funny story) was the time I tried to double the recipe in my stand mixer without considering its capacity. Let’s just say I learned the importance of a “splatter guard” the hard way, and my white kitchen walls were briefly polka-dotted with pink frosting. We laughed for days. So, my pro-tip: if you’re doubling the batch, do it in two separate rounds or use the biggest bowl you own!
Most importantly, don’t stress. Frosting is meant to be fun. If it’s a little too thick, add a teaspoon of cream. Too thin? Add a bit more powdered sugar. You’ve got this. The best part of this recipe, for me, is that it’s become a tradition in my own home now, just like it was in my grandma’s. I hope it becomes one in yours, too.
Frosting FAQs: Your Questions, Answered!
I’ve gotten so many wonderful questions about this frosting over the years! Here are the answers to the most common ones to help you out.
Q: Why is my frosting grainy?
A: The most common culprit is gritty powdered sugar. Always, always sift it! Another reason could be that your butter wasn’t fully softened, leaving tiny butter lumps. If it’s already made, you can sometimes save it by beating it for a few more minutes, or pressing it through a fine-mesh sieve—a bit of a workout, but it works!
Q: My frosting is too soft/runny. How can I fix it?
A: No worries! First, pop the whole bowl into the refrigerator for 20-30 minutes to let the butter firm up. Then, re-whip it. If it’s still too soft, you can gradually add a little more sifted powdered sugar, a 1/4 cup at a time, until it reaches your desired consistency.
Q: My frosting is too thick and hard to spread. Help!
A: This is an easy fix! Simply add more liquid. Start with one teaspoon of heavy cream (or milk) at a time, beating well after each addition, until it becomes smooth and spreadable. A little liquid goes a long way, so add it slowly.
Q: Can I make this frosting ahead of time, and how do I store it?
A: Absolutely! This is a great make-ahead recipe. Store it in an airtight container in the refrigerator for up to one week. When you’re ready to use it, let it come to room temperature for about an hour, then re-whip it with your mixer for a minute or two to bring back that fluffy, spreadable texture.
Nutritional Information
Please note: This is an estimate provided for informational purposes only. I am not a nutritionist.
Per 2-tablespoon serving (approximately): Calories: 190 | Fat: 10g | Carbohydrates: 25g | Sugar: 24g | Protein: 0g | Sodium: 25mg
Prep Time: 10 minutes | Mix Time: 10 minutes | Total Time: 20 minutes | Yield: Frosts approximately 4-5 dozen cookies