Protein Cheesecake Jars: Your New Favorite Healthy Dessert (Seriously!)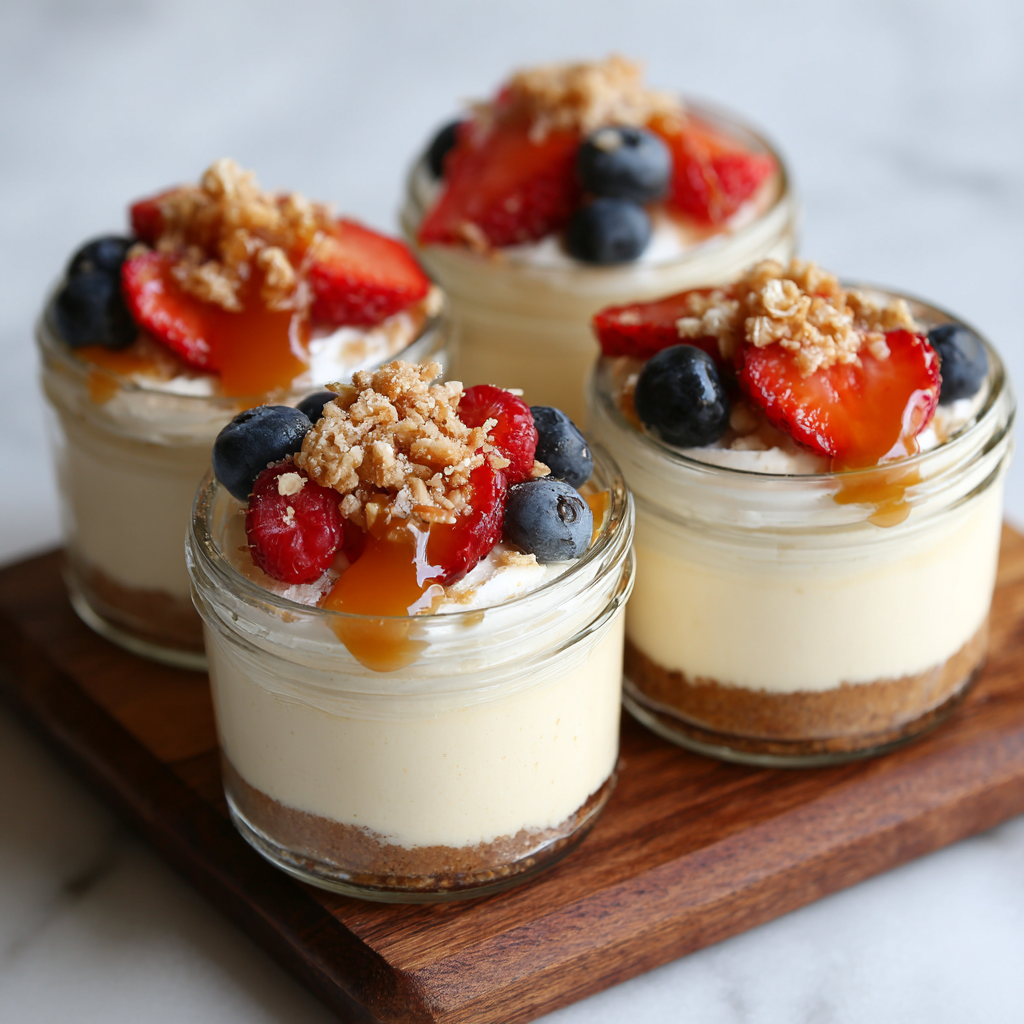
Hey there, friend! Let’s talk about cravings. You know the ones—that late-afternoon hankering for something sweet, the post-dinner desire for a creamy, satisfying bite, or that post-workout moment when your body is shouting for something delicious that *also* fuels it. For the longest time, I felt like I had to choose: either a decadent, sugar-laden treat that left me feeling sluggish, or a bland, “healthy” option that just didn’t hit the spot.
Sound familiar? Well, I’m here to tell you that you can have it all. You absolutely deserve a dessert that feels like a hug, tastes like a celebration, and still loves you back. That’s where these magical Protein Cheesecake Jars come in.
Think of this as your kitchen shortcut to pure joy. We’re talking about that iconic, tangy-sweet cheesecake flavor, but we’re whipping it up in a bowl in about five minutes, with no oven in sight. By blending creamy Greek yogurt, a scoop of protein powder, and just a kiss of cream cheese, we create a protein-packed base that’s unbelievably smooth and indulgent. Layer it with a little crunch, top it with sun-ripe berries, and you’ve got a portable jar of happiness that’s perfect for meal prep, a quick snack, or a dessert you can feel genuinely good about.
This isn’t about deprivation; it’s about delicious empowerment. It’s about making your wellness journey *joyful*. So, grab your favorite mixing bowl and a couple of cute jars—let’s make your kitchen (and your taste buds) very, very happy.
The Midnight Snack That Sparked a Kitchen Revolution
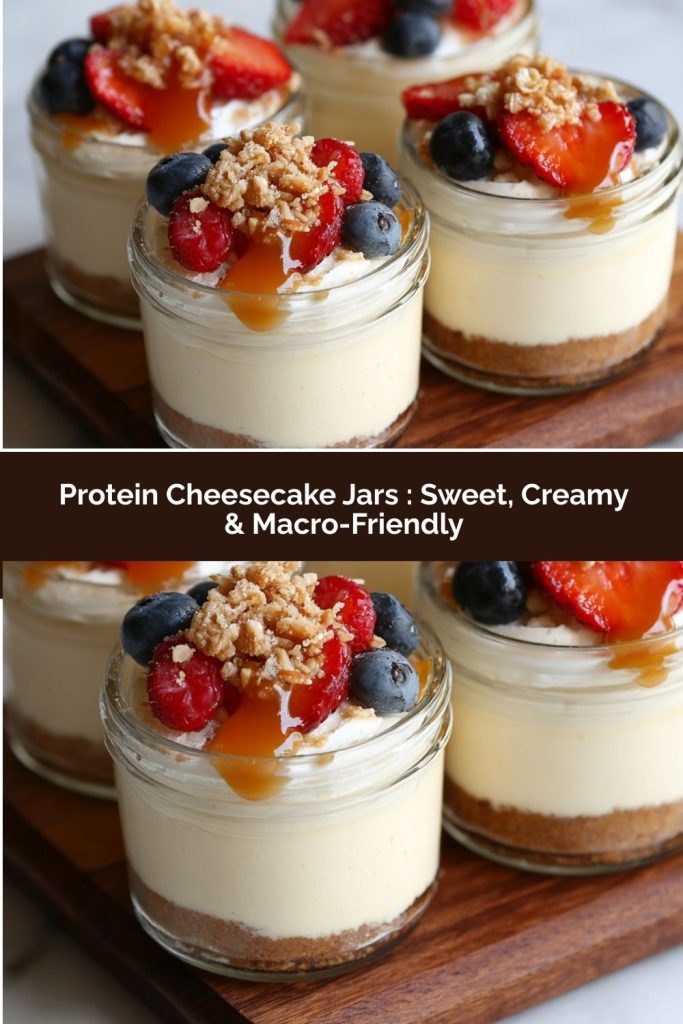
PrintProtein Cheesecake Jars : Sweet, Creamy & Macro-Friendly
These Protein Cheesecake Jars give you that rich, indulgent cheesecake flavor with none of the crash. Lightened up with Greek yogurt and boosted with protein powder, they’re perfect for a sweet snack, post-workout treat, or dessert you can feel good about. No baking, no fuss—just creamy, high-protein goodness in every spoonful.
- Prep Time: 5 minutes
- chill time: 30 minutes (optional)
- Total Time: 35 minutes
Ingredients
1/2 cup plain Greek yogurt (2% or non-fat)
1 scoop vanilla or plain protein powder
1 tablespoon cream cheese (softened)
1–2 teaspoons honey or maple syrup (optional, to taste)
1/4 teaspoon vanilla extract
1–2 tablespoons crushed graham crackers or granola (optional base)
Fresh berries for topping (strawberries, blueberries, or raspberries)
Instructions
In a bowl, mix Greek yogurt, protein powder, cream cheese, sweetener, and vanilla until smooth and creamy.
In small jars or containers, layer graham cracker crumbs at the bottom (optional).
Spoon the cheesecake mixture on top and smooth out the surface.
Top with fresh berries or a drizzle of nut butter for extra flavor.
Chill for at least 30 minutes before serving for best texture.
Nutrition
- Calories: 180
- Fat: 6g
- Carbohydrates: 6g
- Protein: 20g
I have to confess: this recipe was born out of a classic “hangry” moment. Picture it: It was late, I’d just finished a long day of recipe testing (yes, sometimes that involves a lot of dishes and not a lot of eating!), and my stomach was growling. I wanted cheesecake. I needed cheesecake. But the thought of waiting for a whole one to bake, cool, and set was… laughable.
I stood in front of the fridge, door open, letting the cool air wash over me as I scanned the shelves. There was my trusty tub of Greek yogurt, a leftover tablespoon of cream cheese from breakfast bagels, and my vanilla protein powder sitting on the counter. A lightbulb went off. What if I just… mixed them? Could it possibly taste like the real thing, or was my craving-addled brain just playing tricks on me?
Five minutes later, I was sitting on the kitchen floor (the best place for profound culinary discoveries, obviously), spooning a creamy, tangy mixture straight from the bowl. It was cool, it was satisfying, and it tasted incredibly like the cheesecake filling I was dreaming of. I added a few crushed graham crackers from the pantry for that essential buttery crunch and topped it with a handful of frozen blueberries. In that moment, a star was born. This little “aha!” experiment became a weekly staple in my house—a testament to the fact that the most beloved recipes often come from our real, hungry, impatient lives.
Gather Your Ingredients: A Closer Look
Here’s everything you’ll need to make two perfectly-portioned jars of heaven. I’ve included my best tips and swaps so you can make this recipe work with what you’ve got!
- 1/2 cup plain Greek yogurt (2% or non-fat): This is our superstar base! Greek yogurt gives us that signature tang and a massive protein boost. I prefer 2% for a slightly richer texture, but non-fat works beautifully too. Chef’s Insight: Make sure it’s plain and not flavored, as we’re controlling the sweetness ourselves.
- 1 scoop vanilla or plain protein powder: This is our flavor and structure secret weapon. A good-quality vanilla or unflavored whey or casein blend works wonders. Substitution Tip: For a plant-based version, use your favorite vegan vanilla protein powder. The texture might be slightly different, but the flavor will be great!
- 1 tablespoon cream cheese (softened): Don’t skip this! That single tablespoon is the magic key to authentic cheesecake flavor and lush creaminess. Let it sit on the counter for 15 minutes to soften—it blends in like a dream. Chef’s Insight: Full-fat, reduced-fat, or even a plant-based cream cheese all work here. Use what you love.
- 1–2 teaspoons honey or maple syrup (optional, to taste): This is your sweetness dial. I often find the protein powder and berries make it sweet enough for me, but if you have a sweet tooth, add a teaspoon and taste! Substitution Tip: A pinch of zero-calorie sweetener or a pitted date blended in works too.
- 1/4 teaspoon vanilla extract: A little splash enhances all the other flavors and adds that warm, bakery-style aroma. Pure vanilla extract is always my go-to.
- 1–2 tablespoons crushed graham crackers or granola (optional base): The “crust” layer! It gives that wonderful textural contrast. Chef’s Insight: No graham crackers? Try crushed vanilla wafers, digestive biscuits, or even a sprinkle of chopped nuts.
- Fresh berries for topping: The bright, juicy finish! Strawberries, blueberries, or raspberries add freshness, vitamins, and a gorgeous pop of color. Frozen berries, thawed, are a fantastic year-round option.
Let’s Make It: Step-by-Step to Creamy Bliss
This is the fun part—and it goes so fast! I’ll walk you through each step with my favorite little hacks to ensure perfection.
- Soften & Prep: First, take your tablespoon of cream cheese out of the fridge. Letting it soften on the counter is a small step that makes a HUGE difference. It will blend into the yogurt seamlessly, leaving no little lumps behind. While it’s warming up, grab your jars or containers and your mixing bowl.
- Crunch Time (Optional): If you’re using a base layer, now’s the time to get crushing! Pop your graham cracker (or cookie of choice) into a zip-top bag and use a rolling pin, the bottom of a glass, or even your hands to crush it into fine crumbs. Chef’s Hack: For a hint of buttery flavor without extra fat, you can spritz the crumbs with a *tiny* bit of cooking spray or add a 1/4 teaspoon of melted butter. Divide the crumbs between your two jars and gently press them down.
- The Grand Mixing: In your mixing bowl, combine the Greek yogurt, softened cream cheese, protein powder, vanilla extract, and your optional sweetener. Now, pick your weapon: a small whisk, a fork, or a spatula. I’m a whisk girl for this job—it really gets things moving. Mix, mix, mix! At first, it might look a bit clumpy or dry, but keep going. Within a minute, it will transform into a luscious, smooth, and thick cream that looks (and tastes!) exactly like cheesecake filling. Pro Tip: If the mixture seems too thick, you can add a teaspoon of milk or water to loosen it. Go slow—you can always add more, but you can’t take it out!
- Jar It Up: Use a spoon to dollop the creamy cheesecake mixture over your crumb base (or straight into the jar if you’re going crustless). Smooth the tops with the back of the spoon for a pretty finish. This is your blank canvas!
- The Fun Finale – Toppings! Here’s where you get creative. Pile on those fresh berries! I love a mix of sliced strawberries and blueberries for color. But don’t stop there. A drizzle of almond butter, a sprinkle of cinnamon, a few dark chocolate chips, or a dollop of sugar-free jam are all incredible choices.
- The (Tough) Wait: You can absolutely eat this right away (no judgment from me!). But for the absolute best, most cohesive texture, pop the lids on and let them chill in the fridge for at least 30 minutes. This lets the flavors marry and the whole thing firms up beautifully. It’s worth the wait, I promise.
How to Serve Your Masterpiece
These jars are the epitome of easy elegance. I love serving them straight from the fridge in the jar itself—it’s charming and portion-perfect. For a special touch, you can run a knife around the edge before serving to make it look extra fancy. They’re fantastic as an afternoon pick-me-up with a cup of tea, a post-workout refuel, or a light yet satisfying dessert after dinner. Grab a long spoon, dig all the way to the bottom to get a bit of every layer, and enjoy!
Mix It Up! Recipe Variations
Once you’ve mastered the basic formula, the flavor world is your oyster! Here are a few of my favorite twists:
- Chocolate Peanut Butter Dream: Use chocolate protein powder. Swirl in a tablespoon of peanut butter powder or a teaspoon of real PB into the mix, and top with a few mini chocolate chips.
- Lemon Berry Bliss: Use plain or vanilla protein powder and add 1-2 teaspoons of fresh lemon zest and a squeeze of lemon juice to the mix. Top with a mix of raspberries and blueberries.
- Pumpkin Spice (Seasonal Favorite): Replace 2 tablespoons of the Greek yogurt with pure canned pumpkin puree. Add a pinch of pumpkin pie spice to the mix. Top with a sprinkle of granola and a tiny drizzle of maple syrup.
- Cookies & Cream: Crush 1-2 chocolate sandwich cookies (like Oreos) for the base layer. Use vanilla protein powder and fold a few extra crushed cookie bits into the cheesecake filling.
- Tropical Escape: Use vanilla protein powder and mix in a tablespoon of crushed dried pineapple or coconut flakes. Top with fresh mango or pineapple chunks.
Anna’s Chef Notes & Kitchen Stories
This recipe has become such a beloved staple in my home that it’s evolved in the funniest ways. My kiddo now calls them “cheesecake pots” and insists on adding “sprinkles of joy” (a.k.a. rainbow sprinkles) to his on Fridays. I’ve even started making a big batch of the base mixture on Sunday and storing it in one container in the fridge. Throughout the week, we scoop out portions and personalize our toppings—it’s the ultimate healthy, no-fuss dessert station.
A word on protein powders: they can vary wildly in sweetness and absorbency. If your first try is too sweet, next time use a plain/unflavored powder. If it’s too thick, add that teaspoon of liquid. Consider your first batch a delicious experiment to calibrate it perfectly for your favorite brand. The beauty is, even the “experiments” taste amazing!
Your Questions, Answered (FAQs & Troubleshooting)
Q: My mixture turned out super thick and almost doughy. What happened?
A: This is almost always the protein powder! Some brands, especially casein-based ones, absorb liquid like a champ and thicken up a lot. No worries—just thin it out. Add a teaspoon of milk, water, or even a little extra Greek yogurt and stir until it reaches your desired creamy consistency.
Q: Can I make this dairy-free?
A> Absolutely! Use a dairy-free Greek-style yogurt (like one made from coconut or almond milk), a vegan cream cheese alternative, and a plant-based protein powder. The flavor profile will be slightly different but still utterly delicious.
Q: How long do these keep in the fridge?
A> They’re best enjoyed within 2-3 days. If you’ve added a fresh fruit topping, I recommend adding it right before serving to keep it from getting soggy. You can store the base mixture and toppings separately for easy assembly.
Q: It’s not sweet enough for me. How can I fix it?
A> Easy fix! Simply stir in a bit more of your chosen sweetener—honey, maple syrup, or a few drops of liquid stevia. Taste as you go. Also, remember that a sweet, juicy berry topping adds a lot of natural sweetness.
Nutritional Information*
*This is an approximate estimate for one jar, calculated without the optional graham cracker base and using 2% Greek yogurt, one scoop of standard whey protein, and 1 tsp of honey.
- Calories: ~180
- Protein: 20g
- Carbohydrates: 6g
- Fat: 6g
- Fiber: 1g
Prep Time: 5 minutes | Chill Time: 30 minutes (optional) | Total Time: 35 minutes | Servings: 2 small jars
 Final Thoughts
These Protein Cheesecake Jars are proof that healthy can feel indulgent. Creamy, tangy, a little sweet, and packed with protein, they hit all the dessert cravings without leaving you with that post-sugar crash regret. They’re perfect for a mid-afternoon pick-me-up, a post-workout treat, or a little nightcap dessert that feels both luxurious and nourishing.
The best part? They’re endlessly flexible. Swap toppings, experiment with flavors, or double the batch for a week of grab-and-go treats—these jars are your canvas for delicious creativity. Every spoonful is a tiny victory for your taste buds and your wellness goals.
So, grab a jar, dig in, and savor the fact that you just made yourself a dessert that truly loves you back. Your kitchen, your cravings, and your day just got a little brighter. 🌸🥄🍓