Protein Pastel Cheesecake “Egg” Pops: Your New Favorite Spring Treat!
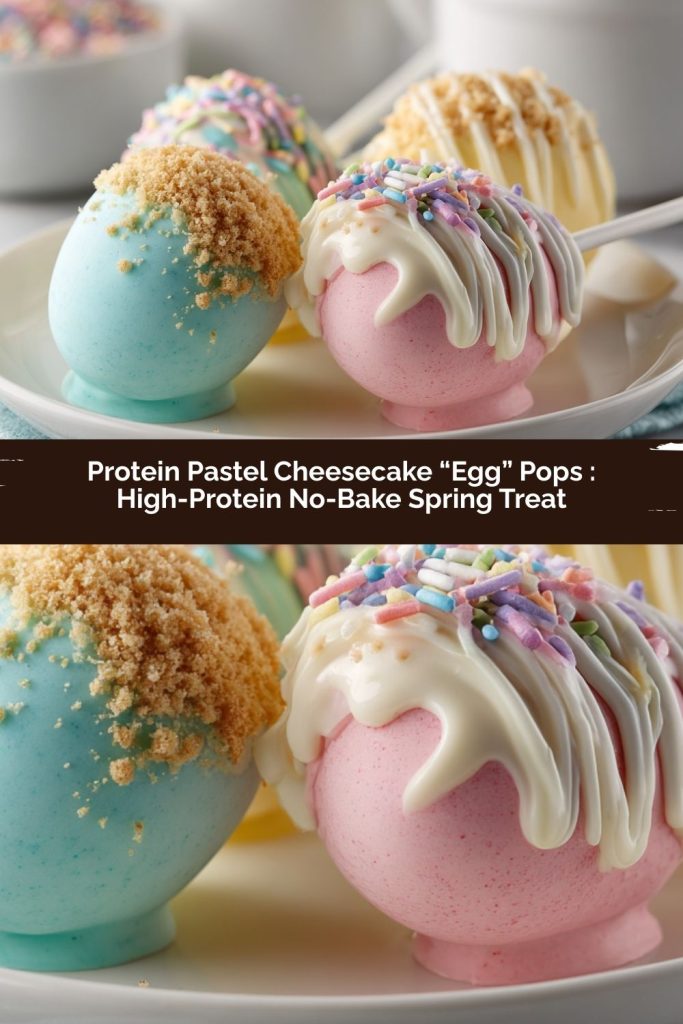
PrintProtein Pastel Cheesecake “Egg” Pops : High-Protein No-Bake Spring Treat

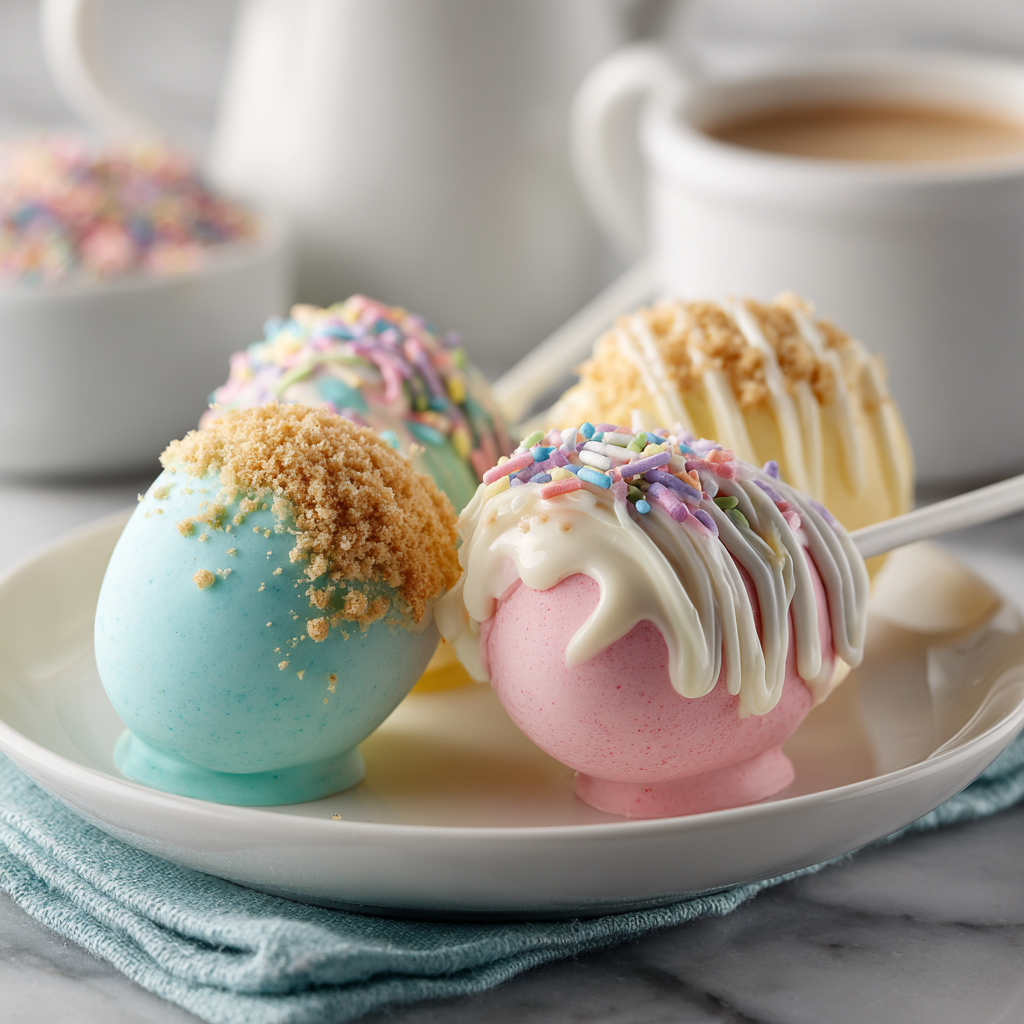
These Protein Pastel Cheesecake “Egg” Pops are creamy, fun, and surprisingly nourishing. Blended with protein powder and Greek yogurt, the cheesecake filling stays smooth and rich while delivering extra staying power. Shaped into festive eggs, dipped in pastel-tinted white chocolate, and served on sticks, they’re playful enough for spring celebrations yet smart enough for a better-for-you dessert option. Perfect for Easter tables, seasonal dessert boards, or high-protein snack prep.
- Prep Time: 20 minutes
- chill time: 45 minutes
- Total Time: 1 hour 5 minutes
- Yield: 10–12 pops 1x
Ingredients
For the cheesecake filling:
8 oz cream cheese, softened
½ cup plain Greek yogurt
⅓ cup vanilla protein powder
¼ cup powdered sugar or maple syrup
½ teaspoon vanilla extract
¼ cup crushed graham crackers
For coating:
1 ½ cups white chocolate, melted
Gel food coloring (pastel shades)
Equipment: lollipop sticks
Optional decoration: sprinkles, drizzle, edible shimmer dust
Instructions
In a bowl, beat cream cheese until smooth.
Mix in Greek yogurt, protein powder, sweetener, vanilla, and crushed graham crackers until thick and creamy.
Scoop mixture and shape into egg forms. Insert lollipop sticks gently into the base.
Freeze 30–45 minutes until firm.
Divide melted white chocolate into small bowls and tint with pastel food coloring.
Dip chilled cheesecake eggs into tinted chocolate, coating fully.
Decorate immediately before chocolate sets.
Refrigerate until ready to serve.
Nutrition
- Calories: Approximately 190 per pop
- Fat: 11g
- Protein: 8–10g
Hey there, friend! Anna here, ready to whisk you away on a kitchen adventure that’s equal parts magical and delicious. Have you ever found yourself staring down the dessert table at a spring gathering, caught between wanting something utterly celebratory and something that won’t leave you in a sugar coma? I’ve been there too. That’s exactly why I created these whimsical, creamy, and secretly smart Protein Pastel Cheesecake “Egg” Pops.
Imagine the rich, tangy creaminess of your favorite cheesecake, lightened up with a protein-packed punch, shaped into adorable little eggs, and dipped in the prettiest pastel chocolates. They’re fun to make, absolutely stunning to serve, and they taste like a pure celebration of spring. The best part? They’re no-bake! That means more time for you to enjoy the beautiful weather or simply relax instead of babysitting an oven.
This recipe is for everyone who loves a great dessert but also loves feeling good. Whether you’re prepping treats for an Easter egg hunt, building a show-stopping dessert board, or just meal-prepping some satisfying high-protein snacks for the week, these pops have got you covered. They’re a conversation starter, a mood-lifter, and proof that eating well can be an absolute delight. So, let’s tie on our favorite aprons, put on some happy music, and cook up something amazing together!
A Spring Tradition, Reimagined
My love for springtime treats goes way back. As a kid, Easter meant two things: a brand-new, frilly dress I’d inevitably get grass stains on, and my grandmother’s elaborate, mile-high coconut cake. It was a masterpiece, but oh, was it heavy! After the big meal, we’d all be slumped on the couch, groaning from the sweetness. Years later, when I started my own family’s traditions, I wanted to capture that same festive joy but in a way that left us feeling light and energetic, ready for an afternoon of hiding eggs in the garden.
That’s how the “better-for-you” dessert mission began in my kitchen. I started playing with protein powders in desserts, not to make them taste “healthy,” but to make them more satisfying. The first time I blended cream cheese with vanilla protein powder and a splash of Greek yogurt, I knew I was onto something. It had that luxurious cheesecake texture I adored, but with a nourishing twist. Shaping them into eggs and dipping them felt like pure, playful magic—a nod to those childhood holidays, but with a fresh, modern spin that my whole family now looks forward to every single spring.
Gathering Your Magical Ingredients
Here’s what you’ll need to create these little pops of joy. I’ve included my favorite tips and swaps for each ingredient so you can make this recipe work beautifully for you!
- 8 oz (one block) cream cheese, softened: This is the heart of our cheesecake filling! Full-fat gives the creamiest, richest texture, but reduced-fat works in a pinch. Chef’s Tip: Let it sit on the counter for a good 30-60 minutes. Soft cream cheese blends smoothly and prevents lumps.
- ½ cup plain Greek yogurt: I love using full-fat or 2% Greek yogurt here. It adds a wonderful tang, extra creaminess, and a big boost of protein. If you’re dairy-free, a thick, plain coconut yogurt can be a great substitute.
- ⅓ cup vanilla protein powder: This is our secret weapon! It thickens the filling and adds staying power. Use a whey/casein blend or a plant-based vanilla powder you love the taste of. The flavor really comes through, so pick a good one!
- ¼ cup powdered sugar OR maple syrup: Your sweetener of choice! Powdered sugar (also called icing sugar) dissolves instantly for a super smooth filling. Pure maple syrup adds a lovely depth. Start with ¼ cup and taste—you can always add a touch more if you like it sweeter.
- ½ teaspoon pure vanilla extract: The classic flavor enhancer. It rounds out all the other ingredients beautifully.
- ¼ cup crushed graham crackers: This is our “crust” element mixed right in! It gives a subtle texture and that classic cheesecake flavor. Don’t have graham crackers? Digestive biscuits, vanilla wafers, or even a few tablespoons of almond flour work wonderfully.
- 1 ½ cups white chocolate chips or melting wafers: For that gorgeous pastel shell. I highly recommend using a good quality “candy melt” or “coating chocolate” for easiest dipping—it sets firmer and smoother. High-quality baking chocolate works too, just add a teaspoon of coconut oil when melting to help it flow.
- Gel food coloring (pastel shades): Gel or powder food coloring is key! It tints the chocolate vibrant colors without adding liquid, which can cause the chocolate to seize. Think soft pinks, lilacs, mints, and yellows.
- Lollipop sticks & optional decorations: You can find paper lollipop sticks or treat sticks at most craft or baking stores. For extra sparkle, have some sprinkles, edible glitter, or a little dark chocolate for drizzling ready to go!
Let’s Make Some Magic: Step-by-Step
Ready to create? Follow these steps for foolproof, gorgeous pops. I’m right here with you with all my best kitchen hacks!
Step 1: The Dreamy Filling. In a large mixing bowl, beat your softened cream cheese with a hand mixer (or a sturdy spatula and some elbow grease!) until it’s completely smooth and lump-free. This is the most important step for a silky texture. Now, add in the Greek yogurt, protein powder, your chosen sweetener, and vanilla. Mix on medium speed until everything is fully combined and gloriously creamy. It will be thick and hold its shape—that’s perfect! Finally, fold in the crushed graham crackers with a spatula until they’re evenly distributed.
Step 2: Shape & Stick. Line a small baking sheet or plate with parchment paper. Using a tablespoon or a small cookie scoop, portion out the mixture. Roll each portion into a smooth ball in your hands, then gently shape it into an oval “egg” shape. Place it on the parchment. Now, gently insert a lollipop stick about halfway into the base of each egg. Don’t force it or push it all the way through! A gentle twist as you push helps. Pop the whole tray into the freezer for 30-45 minutes. This firms them up so they won’t fall off their sticks during the chocolate dip.
Step 3: The Pastel Dip. While the eggs chill, melt your white chocolate. Do this in a microwave-safe bowl in 20-second bursts, stirring well between each, or use a double boiler. The goal is smooth, fluid chocolate that’s not too hot. Chef’s Hack: If using pure chocolate, stir in 1 tsp of coconut oil after melting to make it extra dippable. Divide the melted chocolate among several small, deep cups or bowls (I use little ramekins). Using a toothpick, add a tiny dab of gel food coloring to each and stir until you have beautiful, even pastel shades.
Step 4: The Grand Finale (Dipping & Decorating!). Take your egg pops out of the freezer. Working quickly with one pop at a time, hold it by the stick and dip it straight down into one of your pastel chocolates. Swirl it gently to coat completely. Lift it out, let the excess chocolate drip off for a second, and then hold it upright. This is your moment to decorate! Immediately add sprinkles or a pinch of edible glitter before the chocolate sets. To stand them up, you can stick the other end of the popsicle stick into a piece of styrofoam, an upside-down colander, or simply lay them back on the parchment. The chocolate will set at room temperature, but for speed, you can refrigerate for 15 minutes.
Serving Up the Joy
Presentation is half the fun with these pops! For a party, stand them upright in a vase filled with sugar or dried beans to create a stunning edible centerpiece. For a dessert board, lay them on a bed of green “Easter grass” (shredded coconut tinted with a little matcha powder works as a cute, edible alternative!) alongside fresh berries and other bite-sized treats. They’re also perfect simply handed out as a sweet, satisfying end to a spring brunch or tucked into lunchboxes as a special surprise.
Make It Your Own: Fun Variations
The beauty of this recipe is how easily it adapts! Here are a few of my favorite twists:
- Lemon Berry Bliss: Add the zest of one lemon to the filling and use freeze-dried raspberry powder (just a teaspoon!) to tint your white chocolate a natural pink. So fresh and bright!
- Cookies & Cream: Swap the crushed graham crackers for crushed oreos (filling and all) and use a chocolate protein powder. Dip in regular dark chocolate for a decadent twist.
- Tropical Escape: Use a vanilla or coconut protein powder, and mix 2 tablespoons of finely chopped dried pineapple and coconut into the filling. Dip in white chocolate and roll in toasted coconut flakes.
- Dairy-Free Delight: Use dairy-free cream cheese, coconut yogurt, plant-based protein powder, and vegan white chocolate. It works like a dream!
- Mini “Nest” Pops: After dipping, immediately press a small cluster of chow mein noodles or toasted coconut around the base to look like a nest and place a couple of mini chocolate eggs on top.
Anna’s Kitchen Notes
This recipe has evolved so much from my first messy kitchen experiment! The first batch, I’ll admit, was a bit… abstract. The filling was too soft, the eggs looked more like lumpy potatoes, and my chocolate seized into a grainy mess because I used liquid food coloring. We ate them with a spoon, laughing the whole time! That’s the joy of cooking—every “mistake” is a lesson. Now, the recipe is foolproof, but never be afraid of a little kitchen chaos. It’s how we learn and make memories.
These pops keep beautifully in an airtight container in the fridge for up to 5 days, making them fantastic for make-ahead entertaining. You can also freeze them (without decoration) for up to a month—just wrap them individually. The protein powder and Greek yogurt really help them hold their texture beautifully. I hope this recipe becomes a part of your family’s spring story, just like it’s part of mine.
Your Questions, Answered!
Q: My cheesecake pop fell off the stick when I dipped it! What happened?
A: Oh, I’ve been there! This usually means they weren’t frozen long enough. The filling needs to be very firm to withstand the weight of the chocolate. Pop them back in the freezer for another 20-30 minutes. Also, make sure you’re not pushing the stick all the way through the egg—just about halfway is perfect.
Q: My white chocolate got thick and clumpy when I tried to color it. Can I fix it?
A> This is “seizing,” and it happens when even a tiny bit of water or liquid gets into the chocolate. This is why we use gel coloring! To salvage it, try stirring in a teaspoon of coconut oil or shortening (not butter) and gently re-warming it. It might not be perfectly smooth for dipping, but you can let it cool and use it as a drizzle instead! For next time, ensure all your bowls and tools are completely dry.
Q: Can I make these without protein powder?
A> Absolutely! Simply omit the protein powder. The filling will be a bit softer, so you may want to add an extra 2-3 tablespoons of powdered sugar and freeze them for a full hour before dipping to ensure they’re firm enough.
Q: How do I get a super smooth, thin chocolate coating?
A> The temperature of your chocolate is key. It should be fluid but not hot. If it’s too thick, warm it a little more. If it’s too thin and runny, let it cool for a minute. Tap off the excess chocolate firmly and give the pop a little swirl in the air—this helps create a professional-looking finish.
Nutritional Info (Approximate, Per Pop)
Makes 10-12 pops. This is an estimate and will vary based on specific ingredients and brands used.
- Calories: ~190
- Protein: 8-10g
- Fat: 11g
- Carbohydrates: 15g
- Prep Time: 20 min | Chill Time: 45 min | Total Time: 1 hr 5 min
 Final Thoughts
These Protein Pastel Cheesecake “Egg” Pops are everything I love about spring baking—playful, joyful, and just a little bit magical. They bring all the creamy indulgence of classic cheesecake, wrapped up in a lighter, protein-packed treat that still feels like a celebration. Whether you’re making them for Easter, a spring brunch, or just a week when you want your snacks to feel a little more special, these pops prove that nourishing desserts can still be whimsical and downright fun.
I hope this recipe invites you to slow down, get a little creative with color, and maybe even make a few sweet memories along the way. Don’t worry about perfection—every swirl of pastel chocolate and every slightly wonky egg is part of the charm. From my kitchen to yours, here’s to springtime treats that make you smile first… and feel good after. 💕🌸