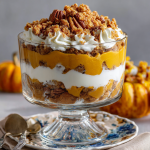
Your New Favorite Holiday Dessert Hack: No-Bake Pumpkin Pie Cups!
Hey there, friend! Let’s talk about the holidays. The twinkling lights, the cozy sweaters, the gathering of your favorite people… and the stress that can sometimes bubble up in the kitchen when you’re trying to make everything perfect. Sound familiar? I’ve been there too. That’s why I’m absolutely obsessed with recipes that deliver maximum joy with minimal effort. Because let’s be real, you should be spending your time sipping sparkling cider and laughing with your friends, not slaving over a hot oven.
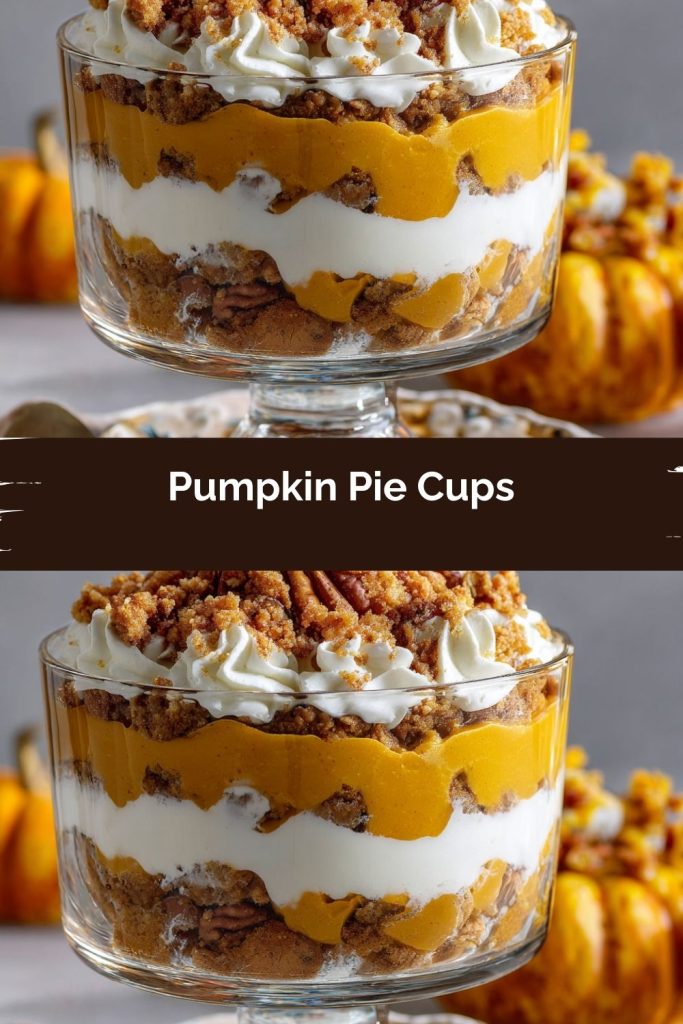
That’s where these utterly irresistible Pumpkin Pie Cups swoop in to save the day. Imagine this: all the cozy, spiced flavor of a classic pumpkin pie, deconstructed into adorable individual servings. They’re creamy, they’re dreamy, and they come together in about 15 minutes flat. No rolling pin, no pie weights, no fretting over a soggy bottom crust. We’re taking a brilliant shortcut with a store-bought pie (no shame in our game!) and elevating it with a cloud of fluffy, homemade whipped cream. It’s the kind of simple, genius trick that will have everyone asking for the recipe. So, let’s put the “easy” in “cheesy holiday ease” and make something amazing together!
A Pie, A Party, and A Very Happy Accident
PrintPumpkin Pie Cups
A no-bake dessert hack that’s as easy as it is irresistible. Made from a store-bought pumpkin pie and dressed up with fluffy homemade whipped cream, these mini cups are perfect for Friendsgiving, holiday parties, or any moment that needs a sweet little something.
- Prep Time: 10–15 minutes
- Total Time: 10–15 minutes
- Yield: 8–10 cups 1x
Ingredients
1 whole pumpkin pie (store-bought, like Costco’s)
2 cups heavy whipping cream
2 tablespoons powdered sugar
2 teaspoons vanilla extract
Ground cinnamon, for garnish
Mini party cups or dessert glasses
Instructions
Gently scrape the crust off the pumpkin pie and set it aside in a bowl.
Using an ice cream scoop, portion the pumpkin filling into small dessert cups.
Make whipped cream: In a mixing bowl, beat heavy cream, powdered sugar, and vanilla until soft, fluffy peaks form.
Top each pumpkin scoop with a generous swirl of whipped cream.
Sprinkle with cinnamon and, if desired, crumble some of the pie crust on top for crunch.
Nutrition
- Calories: 220
- Sugar: 12g
- Fat: 14g
- Carbohydrates: 20g
- Protein: 2g
This recipe was born from a happy little kitchen accident a few years ago, right before my first big Friendsgiving. I’d volunteered to bring dessert, envisioning a picture-perfect, from-scratch pumpkin pie. But as fate would have it, my day got away from me. Before I knew it, guests were due to arrive in an hour, and my pie was still a sad pile of ingredients on the counter. Panic mode: activated.
Then I saw it. A gorgeous, generously-sized store-bought pumpkin pie I’d picked up from Costco “just in case.” In a moment of sheer desperation (and inspiration!), I grabbed a spoon, scooped the filling right out of the tin, and plopped it into some little cups I had leftover from a party. I quickly whipped some cream, gave it a fancy swirl on top, and dusted it with cinnamon. I arranged them on a platter, fully expecting them to be my little secret. But you know what? They were the hit of the night! Everyone loved having their own personal dessert, and they couldn’t believe it was a “hack.” That night taught me a beautiful lesson: the best recipes aren’t about perfection; they’re about sharing joy, even if it comes straight from the grocery store bakery.
Gather Your Ingredients: Shortcut Magic!
Here’s the beautiful shortlist of everything you need to create this little bit of magic. The best part? You probably have most of this already!
- 1 whole pumpkin pie (store-bought): This is our superstar shortcut! I’m a huge fan of the ones from Costco or your local bakery—they’re reliably delicious and have a great spice-to-filling ratio. Don’t stress about the brand; just grab one you like.
- 2 cups heavy whipping cream: The key to that ethereal, cloud-like topping. Make sure it’s very cold—I even pop my mixing bowl in the freezer for 10 minutes beforehand. This helps it whip up faster and get extra fluffy.
- 2 tablespoons powdered sugar: We’re using powdered sugar instead of granulated because it dissolves instantly and gives the whipped cream a beautifully smooth texture. It also sweetens it just perfectly.
- 2 teaspoons vanilla extract: A splash of good vanilla is non-negotiable for me. It adds a warm, aromatic depth that makes the whipped cream taste truly homemade and special.
- Ground cinnamon, for garnish: A light dusting on top not only looks gorgeous but gives a wonderful aromatic hint as you lean in to take your first bite.
- Mini party cups or dessert glasses: This is where the fun comes in! Use clear cups to show off the beautiful layers, or get festive with some cute holiday-themed ones.
Let’s Assemble the Magic: Step-by-Step
Ready to become a dessert hack master? Follow these simple steps and you’ll have a stunning dessert platter in no time.
- Deconstruct the Pie: Gently scrape the crust off the pumpkin pie and set it aside in a bowl. I like to use a butter knife or a small offset spatula for this. Don’t toss that crust! We’re going to use it for a delicious, crunchy topping later. Think of it as your secret weapon for texture.
- Scoop and Portion: Using an ice cream scoop or a large spoon, portion the beautiful pumpkin filling into your small dessert cups. An ice cream scoop is my go-to because it gives you perfect, neat little mounds and makes the process super quick. Fill each cup about ¾ of the way full.
- Whip it Good: Now, for the homemade magic. In a chilled mixing bowl, combine the heavy whipping cream, powdered sugar, and vanilla extract. Using a hand mixer or a stand mixer fitted with the whisk attachment, beat on medium-high speed. Watch closely! You’ll see it go from liquidy, to frothy, to soft peaks, and finally to beautiful, firm peaks. Chef’s Tip: Stop when the whisk leaves distinct trails in the cream and the peaks hold their shape when you lift the whisk. Be careful not to overbeat, or you’ll start making butter!
- Top with Flair: Transfer your glorious whipped cream to a piping bag fitted with a large star tip for those gorgeous, bakery-style swirls. No piping bag? No problem! A zip-top bag with the corner snipped off works perfectly, or you can just dollop it on with a spoon—it will taste incredible regardless.
- The Finishing Touch: Sprinkle a little ground cinnamon over the top of each cup. For that extra *chef’s kiss*, take some of the reserved pie crust, crumble it between your fingers, and sprinkle it over the whipped cream. This adds a wonderful buttery, crunchy contrast to the creamy filling and is my absolute favorite part.
How to Serve These Little Cups of Joy
Presentation is part of the fun! Arrange your finished Pumpkin Pie Cups on a beautiful wooden board or a festive platter. I love to add a few whole cinnamon sticks, some fresh rosemary sprigs, or even a handful of leftover pumpkin seeds around them for a rustic, holiday feel. They are perfect for a dessert bar where guests can grab and go, making mingling easy. Serve them immediately for the best texture, or you can keep them chilled in the fridge for up to an hour before your party starts.
Get Creative! Fun Variations to Try
Once you’ve mastered the base recipe, the flavor world is your oyster! Here are a few of my favorite ways to mix it up:
- Gingersnap Crunch: Swap the pie crust crumble for crushed gingersnap cookies. The spicy, molasses flavor pairs phenomenally well with the pumpkin.
- Chocolate Drizzle: Melt some chocolate chips with a touch of coconut oil and drizzle it over the whipped cream before garnishing. Because chocolate makes everything better.
- Bourbon-Spiked Whipped Cream: Add a tablespoon of bourbon to the whipping cream along with the vanilla for a sophisticated, grown-up kick.
- Dairy-Free Delight: Use a coconut cream pie and whip up some coconut cream instead of dairy cream for a fabulous vegan-friendly version.
- Cranberry Compote Swirl: Add a small spoonful of tangy cranberry sauce or compote between the pumpkin layer and the whipped cream for a burst of color and flavor.
From My Kitchen to Yours: Chef’s Notes
This recipe has become such a staple in my holiday entertaining playbook precisely because it’s so forgiving and fun. I’ve made these cups while chatting with my girlfriends in the kitchen, with my kiddos “helping” by adding the cinnamon sprinkle, and in a frantic pre-guest panic. They always turn out wonderfully. Over time, I’ve learned that the “best” pie to use is simply the one you enjoy eating! The crumbled crust topping was a later addition—my husband is a texture fanatic and suggested it one year. It was such a game-changer that I’ve never looked back. Remember, cooking is about making memories, not just meals. If you’re having fun and sharing something made with love, that’s the real magic.
Your Questions, Answered!
Let’s tackle a few common questions to make sure your dessert-making is smooth sailing.
- Can I make these ahead of time? You can prepare the components ahead of time! Scoop the pie filling into the cups, cover them tightly with plastic wrap, and store them in the fridge for up to 24 hours. Keep the whipped cream in a separate airtight container in the fridge. Wait to assemble (add whipped cream, garnish) until just before serving so everything stays fresh and the whipped cream doesn’t deflate.
- My whipped cream is runny/grainy. What happened? Runny cream usually means it needed a little more whipping time. Just keep beating until those soft peaks form! Grainy cream is a sign of overwhipping. If you catch it early, you can sometimes save it by folding in a few more tablespoons of cold liquid cream. If it’s very separated, unfortunately, you’re on your way to butter. But hey, homemade butter is a great consolation prize!
- What’s the best way to crumble the pie crust? I find using my fingers works best to get a variety of textures, from fine crumbs to slightly larger chunks. You can also place the crust scraps in a zip-top bag and gently crush them with a rolling pin.
- Can I use a homemade pie instead? Absolutely! If you have a favorite homemade pumpkin pie recipe, by all means, use it! This hack is all about ease, but if you’ve got the time and desire to bake from scratch, your cups will be extra special.
Nutritional Information (Per Cup, Estimate)
This is a rough estimate based on the ingredients listed and will vary depending on the specific brand of pie you use. This is a dessert, so enjoy it in all its indulgent glory!
- Calories: ~220
- Protein: 2g
- Fat: 14g
- Carbohydrates: 20g
- Sugar: 12g
Preparation Time: 10–15 minutes
Servings: 8–10 cups
Final Thoughts
At the end of the day, the holidays aren’t about perfect pie crusts or elaborate desserts—they’re about gathering around the table, sharing laughs, and creating memories. These No-Bake Pumpkin Pie Cups prove that you can have all the cozy flavors of pumpkin pie without the fuss, leaving you with more time to actually enjoy the season. Whether you whip them up for Friendsgiving, a family dinner, or just a quiet night with a mug of cider, they’re guaranteed to bring smiles (and maybe a few recipe requests!). Keep it simple, keep it sweet, and let these little cups of joy become your new holiday tradition.