***
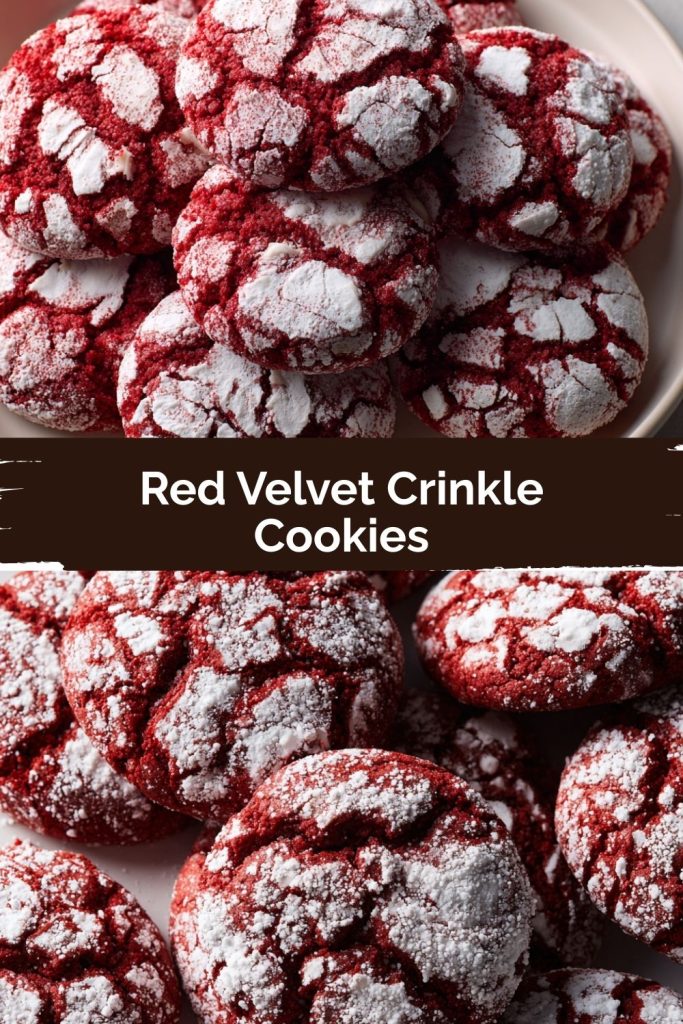
Unwrap a Little Magic: The Coziest Red Velvet Crinkle Cookies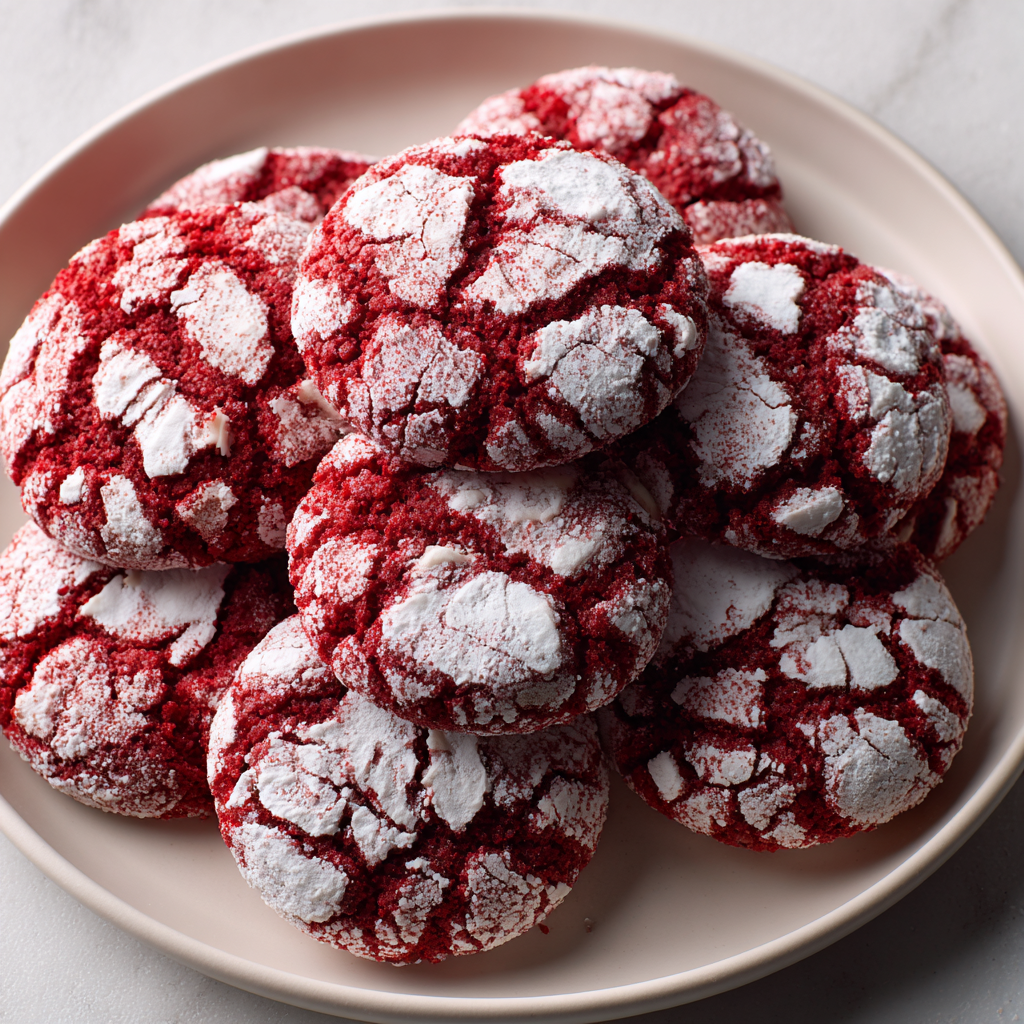
Hey there, friend! Is there anything more delightful than the quiet hum of the oven and the promise of something sweet wafting through the house? Especially during the holiday season, my kitchen becomes my favorite place to be—a little haven of warmth, flour-dusted counters, and the joyful chaos of creating treats for the people I love. And if there’s one cookie that consistently steals the show on my holiday platter, it’s these stunning, snow-kissed Red Velvet Crinkle Cookies.
Imagine this: a cookie that’s impossibly soft and fudgy on the inside, with that iconic, bold red hue peeking through a gorgeous, crackled blanket of powdered sugar. They look like they belong in a patisserie window, but I promise you, they are wonderfully simple to make. They capture all the elegance and flavor of a classic red velvet cake—that subtle cocoa richness, the tender crumb—but in a fun, portable, utterly irresistible form. They’re the perfect project for a cozy afternoon, whether you’re baking with little helpers, gifting them to neighbors, or simply treating yourself. So, let’s preheat those ovens and fill our homes with the sweet scent of nostalgia and chocolate. I’m so excited to guide you through this one!
A Cookie Tin Full of Memories
PrintRed Velvet Crinkle Cookies

These Red Velvet Crinkle Cookies are soft, fudgy, and rolled in snowy powdered sugar for a festive crackled finish. With a hint of cocoa and a bold red hue, they’re a stunning addition to any holiday cookie tray. Rich in flavor and easy to make, they bring the elegance of red velvet to the palm of your hand.
- Prep Time: 15 minutes (+1 hour chill)
- Cook Time: 10–12 minutes
- Total Time: 27 minute
- Yield: About 24 cookies 1x
Ingredients
1 ½ cups all-purpose flour
½ cup unsweetened cocoa powder
1 tsp baking powder
¼ tsp salt
½ cup unsalted butter, softened
1 cup granulated sugar
2 large eggs
1 tsp vanilla extract
1 tbsp red food coloring
½ cup powdered sugar (for rolling)
Optional Twists
Add ½ tsp espresso powder to deepen the chocolate flavor
Stir in ½ cup mini white chocolate chips for a color contrast
Mix in a pinch of cinnamon for warmth
Instructions
In a medium bowl, whisk together flour, cocoa powder, baking powder, and salt.
In a large bowl, cream butter and sugar until light and fluffy.
Add eggs, one at a time, beating well after each. Mix in vanilla and red food coloring.
Gradually add dry ingredients to wet, mixing until just combined.
Cover and chill dough for at least 1 hour (longer if possible).
Preheat oven to 350°F (175°C). Line baking sheets with parchment paper.
Scoop tablespoon-sized balls of dough, roll in powdered sugar until fully coated.
Place on baking sheet and bake for 10–12 minutes, until tops are crackled and edges are set.
Cool on sheet for 5 minutes, then transfer to a wire rack.
Nutrition
- Calories: 120
- Sugar: 10g
- Fat: 6g
- Carbohydrates: 15g
These cookies always take me right back to my grandmother’s kitchen. Nana Reynolds was a force of nature, especially in December. Her counter would be lined with tins, each destined for a different friend or family member, and they were always packed with an assortment of her famous baked goods. But for me, the real treasure was the “secret” tin she kept tucked just behind the flour canister. This was where she stashed the cookies she knew were my favorite—the ones with the crazy red color and the snowy tops.
I’d sneak in, still in my pajamas, and she’d pretend to be surprised every single time. She’d open that tin, the powdered sugar puffing into a little cloud, and hand me one still slightly warm from her early morning baking session. We’d sit at her checkered tablecloth-covered table, share a cookie, and she’d tell me stories about Christmases when my dad was little. For me, these crinkle cookies aren’t just a recipe; they’re a taste of her love, her magic, and those quiet, stolen moments of sweetness. It’s that feeling—that warmth and connection—that I hope these cookies bring to your kitchen, too.
Gathering Your Cookie Crew: The Ingredients
Part of the joy of baking is understanding your ingredients! It’s like meeting your team before the big game. Here’s what you’ll need and why each one plays a starring role.
- 1 ½ cups all-purpose flour: The trusty foundation of our cookie. It gives the cookies their structure. For a slightly softer cookie, you can swap in cake flour, but all-purpose works beautifully here.
- ½ cup unsweetened cocoa powder: This is where our chocolate flavor comes from! Use a good-quality cocoa powder for the richest taste. Natural or Dutch-process will both work in this recipe.
- 1 tsp baking powder: Our leavening agent! This is what gives the cookies their slight lift and helps create those beautiful, craggy cracks.
- ¼ tsp salt: The flavor enhancer! Salt is crucial in sweets—it balances the sweetness and makes the chocolate flavor pop. Don’t skip it!
- ½ cup unsalted butter, softened: For richness, tenderness, and that melt-in-your-mouth quality. “Softened” is key here—it should be cool to the touch but leave a slight indent when you press it. This ensures it creams perfectly with the sugar.
- 1 cup granulated sugar: Sweetness and, importantly, it helps create a tender texture by creaming with the butter to incorporate air.
- 2 large eggs: They bind everything together and add moisture. Make sure they’re at room temperature to create a smooth, emulsified dough.
- 1 tsp vanilla extract: The classic flavor backbone that complements the chocolate so well.
- 1 tbsp red food coloring: For that signature, vibrant red hue! I prefer gel food coloring as it’s more potent and doesn’t add extra liquid, but liquid works too—you might just need a bit more.
- ½ cup powdered sugar (for rolling): This is our “snow”! Rolling the dough balls in powdered sugar is what creates that iconic crinkled, festive look as the cookies expand in the oven.
Let’s Make Some Magic: The Step-by-Step Guide
Ready to create these beauties? Follow these steps, and you’ll be a crinkle cookie pro in no time. I’ve sprinkled in all my best tips and tricks!
Step 1: The Dry Team Assemble!
In a medium bowl, whisk together your flour, cocoa powder, baking powder, and salt. Whisking is important here—it combines everything evenly and aerates the mixture a little, which helps keep our cookies light. Give it a good 30-second whisk until you see one uniform, chocolatey color. No cocoa lumps allowed!
Step 2: Creamy Dreamy Base
In a large bowl, use an electric mixer (or some serious arm power and a whisk!) to cream together the softened butter and granulated sugar. We’re looking for it to become light in color and fluffy in texture. This usually takes about 2-3 minutes on medium speed. This step is crucial for texture, so don’t rush it! You’re creating tiny air pockets that will help the cookies bake up perfectly.
Step 3: Bringing it All Together
Add your eggs, one at a time, beating well after each addition. This ensures each egg is fully incorporated into the butter mixture, creating a smooth, cohesive base. Now, mix in the vanilla extract and that glorious red food coloring. Don’t be shy! Scrape down the sides of the bowl to make sure everything is evenly mixed. At this point, you should have a shockingly red, beautifully smooth batter.
Step 4: The Grand Union
Gradually add your dry ingredients to the wet ingredients, mixing on low speed until *just* combined. I mean it—the moment you no longer see streaks of flour, stop mixing! Overmixing is the enemy of a tender cookie, as it develops the gluten in the flour and can make them tough.
Step 5: The Patience Game (Chill Time!)
This might be the hardest step, but it is non-negotiable! Cover the bowl with plastic wrap and chill the dough for at least 1 hour, and up to 3-4 hours if you can. Overnight is even better! This firms up the butter, which prevents the cookies from spreading too much into flat puddles in the oven. It also allows the flavors to meld and deepens that red color. Trust me, your future perfectly-shaped cookies thank you.
Step 6: Preheating & Prepping
When you’re ready to bake, preheat your oven to 350°F (175°C). This ensures it’s at the perfect, consistent temperature when the cookies go in. Line your baking sheets with parchment paper. This is my #1 baking hack for easy cleanup and preventing any sticking.
Step 7: The Snowball Roll
Place your powdered sugar for rolling in a small bowl. Use a tablespoon-sized cookie scoop or a spoon to portion out the dough. Roll each portion into a smooth ball between your palms. Now, roll each ball generously in the powdered sugar until it’s completely covered. I like to roll mine twice for an extra-thick, snowy coating—it makes the final crackle effect even more dramatic.
Step 8: Bake to Perfection
Place the dough balls about 2 inches apart on your prepared baking sheets. They need room to spread and become gorgeous! Bake for 10-12 minutes. The cookies are done when the edges look set and the tops are beautifully crackled. The centers might still look a tiny bit soft—that’s perfect! They will continue to set as they cool. Remember, ovens can vary, so keep an eye on them after the 10-minute mark.
Step 9: The Cool Down
Let the cookies cool on the baking sheet for at least 5 minutes. They are too delicate to move right out of the oven. After they’ve firmed up a bit, transfer them to a wire rack to cool completely. This stops the cooking process and ensures the bottom doesn’t get soggy.
How to Serve These Stunning Cookies
Presentation is part of the fun! Pile these crimson-and-white beauties high on a vintage cake stand or a simple wooden board for a gorgeous contrast. They are a showstopper on any holiday cookie tray all on their own. For an extra-special touch, serve them alongside a glass of cold milk for the kids or a mug of strong coffee for the adults. They also make incredible edible gifts—tuck a stack into a cellophane bag tied with a ribbon, and you’ve got a present that’s made with love.
Make Them Your Own: Delicious Variations
Love to play with flavors? Here are a few of my favorite ways to mix things up:
- Mocha Depth: Add ½ tsp of espresso powder to the dry ingredients. It won’t make them taste like coffee, but it will deepen and intensify the chocolate flavor beautifully.
- White Chocolate Chip Bliss: Gently fold ½ cup of mini white chocolate chips into the dough after mixing. The creamy white chips create a lovely color and flavor contrast with the red velvet.
- Warm Spice Twist: Add a pinch (about ¼ tsp) of cinnamon or even a dash of nutmeg to the dry ingredients for a subtle, warming note that feels extra cozy.
- Peppermint Sparkle: For a festive kick, add ¼ tsp peppermint extract along with the vanilla. After rolling in powdered sugar, roll the dough balls in crushed candy canes for a festive sparkle and crunch.
- Gluten-Free Swap: You can use a 1:1 gluten-free all-purpose flour blend in place of the regular flour. The results are just as fabulous!
Anna’s Chef Notes & Kitchen Stories
This recipe has been a labor of love in my kitchen for years. The first time I tried to make them, I was so impatient that I skipped the chill time. The result? Red Velvet Pancakes. Delicious, but not exactly the elegant cookie I was going for! It was a hilarious (and tasty) lesson in why patience is indeed a virtue in baking.
Over time, I’ve learned that the longer you can chill the dough, the better. I often make the dough the night before a big baking day. It’s one less thing to do and the cookies bake up even more perfectly. Also, don’t worry if your dough seems very red before baking—it will darken a touch and that cocoa color will come through more once baked, creating that perfect deep red velvet shade we all know and love.
Your Questions, Answered!
Q: My cookies didn’t crackle much. What happened?
A: The most common culprit is the powdered sugar dissolving into the dough. This usually happens if the dough wasn’t chilled enough or if the powdered sugar wasn’t thick enough. Next time, ensure your dough is thoroughly chilled (overnight is best!) and try a double roll in the sugar for a thicker barrier. Also, make sure your baking powder is fresh!
Q: Can I use a natural food coloring?
A: Absolutely! You can use beet powder or a natural food coloring made from plants. The color will be more muted and might have a slight earthy taste, but it’s a great natural alternative. You’ll likely need to use more than a tablespoon to achieve a vibrant hue.
Q: Why are my cookies cakey and not fudgy?
A: This usually points to overmixing the dough once the flour was added. Remember, mix until *just* combined! Overmixing develops gluten, which leads to a more cake-like texture. Also, be careful not to over-bake them. Taking them out when the centers are still soft is key to that fudgy interior.
Q: How do I store these, and can I freeze them?
A> They store beautifully! Keep them in an airtight container at room temperature for up to 5 days. They also freeze perfectly for up to 3 months. You can freeze the baked cookies or even the rolled dough balls! Freeze the dough balls on a sheet pan, then transfer to a freezer bag. When you’re ready to bake, just roll the frozen dough ball in powdered sugar and add a minute or two to the baking time.
Nutritional Information (Approximate, Per Cookie)
Calories: 120 | Sugar: 10g | Fat: 6g | Carbohydrates: 15g | Protein: 2g
Final Thoughts ✨
If holiday baking had a crown jewel, these Red Velvet Crinkle Cookies would wear it proudly. They’re festive, fudgy, and oh-so-photogenic, yet simple enough to whip up on a snowy afternoon. Every bite is a little taste of nostalgia—soft cocoa richness wrapped in a powdered sugar “snowstorm.”
Whether you’re tucking them into a cookie tin for gifting, piling them high on the holiday dessert table, or sneaking one (or three) with your morning coffee, they’re guaranteed to bring smiles and a sprinkle of magic. So, dust off that mixing bowl, channel your inner Nana Reynolds, and let these cookies carry a little warmth from your kitchen to the people you love most