Why These Bars Will Steal Your Heart (and Your Last Forkful!)
Hey friend! Anna here, your kitchen cheerleader and fellow butter enthusiast. Can you smell it? That intoxicating blend of toasty pecans, bubbling caramel, and rich chocolate wafting through the air? That, my friend, is the scent of pure, unadulterated joy—and it’s coming from these Salted Caramel & Chocolate Pecan Pie Bars. Imagine everything you adore about classic pecan pie—the gooey center, the nutty crunch, that sweet-salty magic—but transformed into effortless, sliceable bars with a decadent chocolate twist and a buttery shortbread base that’ll make you swoon. No rolling pins, no fussy crimping, just pure, shareable bliss (though let’s be real, hiding a few for yourself is totally encouraged!).
I know life gets busy. Maybe you’re juggling work, family, or just really want an impressive dessert without spending hours in the kitchen. That’s why I’m obsessed with these bars. They deliver ALL the nostalgia and wow-factor of a holiday pie but in a fraction of the time. We’re making a double batch here because trust me, one pan disappears faster than you can say “second helping.” These beauties are your secret weapon for potlucks, bake sales, cozy nights in, or anytime you need a guaranteed smile-inducer. They’re beginner-friendly, seasoned-chef-approved, and packed with love (and cream… always cream!). So grab your favorite mixing bowl and let’s turn ordinary into extraordinary together!
A Sticky Fingers Kind of Memory
PrintSalted Caramel and Chocolate Pecan Pie Bars
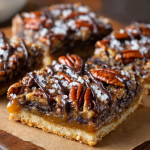
These luscious bars are everything you love about pecan pie—sweet, salty, gooey, and chocolatey—wrapped in a buttery shortbread crust. With roasted pecans, silky caramel, and a chocolatey finish, they’re a guaranteed hit at any gathering or dessert table.
- Prep Time: 20 mins
- Cook Time: 45 mins
- Total Time: 1 hr 5 mins
- Yield: 24–30 bars 1x
Ingredients
Crust
1 cup unsalted butter, very soft (2 sticks)
2 cups all-purpose flour
1/2 cup confectioners’ sugar
2 Tbsp cornstarch
Pinch of salt (optional)
Filling
16 oz roasted salted pecans (about 4 cups)
2 cups semi-sweet chocolate chips
1 cup unsalted butter (2 sticks)
2 cups packed light brown sugar
2/3 cup whipping cream or heavy cream
2 Tbsp vanilla extract
1 tsp salt (or to taste)
Instructions
Preheat oven to 350°F (175°C). Line a 9×13-inch baking pan with parchment paper.
Make the crust: In a bowl, mix butter, flour, powdered sugar, cornstarch, and salt until a soft dough forms. Press evenly into prepared pan.
Bake for 18–20 minutes until lightly golden. Let cool slightly.
Prepare the filling: In a saucepan over medium heat, melt butter, then stir in brown sugar and cream. Bring to a gentle boil and simmer for 1 minute.
Remove from heat, stir in vanilla and salt.
Assemble: Scatter pecans and chocolate chips evenly over the crust. Pour warm caramel mixture on top, spreading evenly.
Bake again: Return pan to oven and bake 20–25 minutes, or until bubbly and golden.
Cool completely before slicing into bars.
Nutrition
- Calories: 330
- Sugar: 22g
- Fat: 22g
- Carbohydrates: 32g
- Protein: 3g
These bars take me straight back to my Grandma Elsie’s cramped, warm kitchen in Vermont. She was the queen of pecan pie, but hers was a day-long affair involving whispered prayers over the filling and stern warnings not to jiggle the oven. One chaotic Thanksgiving when I was about ten, I decided to “help” by whisking her precious caramel filling… a little too enthusiastically. Let’s just say the walls (and my sweater) got a caramel glaze that year! Amidst the sticky chaos, Grandma didn’t scold. She laughed that deep, rumbling laugh of hers, wiped a blob of caramel off my nose, and said, “Anna-bug, sometimes the messiest moments make the sweetest memories.” That disaster sparked my love for simplifying classics. These bars capture every bit of Grandma’s magic—the deep caramel, the buttery crust, the nutty heart—but ditch the stress. Every time I make them, I see her smiling, covered in caramel, reminding me that cooking is about joy, not perfection.
Gathering Your Sweet Symphony
Here’s your treasure list! Remember, quality matters with simple ingredients. Let’s dig into why each one shines:
- Crust:
- 1 cup unsalted butter, very soft (2 sticks): This is your flavor foundation! Very soft butter (think almost spreadable, but not melted) ensures an easy-to-press, tender, melt-in-your-mouth crust. Salted butter works too (just skip the optional salt later).
- 2 cups all-purpose flour: Provides the structure. For a slightly nuttier vibe, swap 1/4 cup with almond flour.
- 1/2 cup confectioners’ sugar: Its fine texture gives the crust a delicate sweetness and lovely crispness. Granulated sugar makes it tougher – stick with powdered here!
- 2 Tbsp cornstarch: The secret weapon! It tenderizes the crust like a dream, making it beautifully shortbread-like. Don’t skip it!
- Pinch of salt (optional): If using unsalted butter, this tiny pinch balances the sweetness. Chef’s tip: I always add it!
- Filling:
- 16 oz roasted salted pecans (about 4 cups): ROASTED and SALTED are key! They bring maximum flavor and crunch. Using raw or unsalted nuts? Toss them on a baking sheet at 350°F for 8-10 mins first, then sprinkle with 1/4 tsp salt.
- 2 cups semi-sweet chocolate chips: Provides pockets of melty chocolate bliss. Use chunks for bigger gooey bites, or swap half with dark chocolate chips for intensity. Milk chocolate makes it sweeter.
- 1 cup unsalted butter (2 sticks): Combines with sugar for that luscious caramel base.
- 2 cups packed light brown sugar: PACKED is crucial for the right texture and deep molasses flavor. Dark brown sugar works for an even richer taste.
- 2/3 cup whipping cream or heavy cream: Essential for silky, luxurious caramel. Half-and-half is the absolute minimum substitute (filling will be firmer). Milk isn’t recommended – it can make the filling grainy.
- 2 Tbsp vanilla extract: Yes, 2 whole tablespoons! It elevates the caramel complexity. Use pure vanilla for the best flavor.
- 1 tsp salt (or to taste): This is where the “salted” magic happens! Start with 1 tsp. After mixing, taste the caramel (carefully, it’s hot!). If you want that addictive sweet-salty punch, add another 1/4 tsp. Flaky sea salt for finishing is also chef-approved!
Let’s Build Some Magic, Step-by-Step!
Ready to create? Preheat your oven to 350°F (175°C) and line a 9×13-inch baking pan with parchment paper, leaving some overhang on the long sides. This makes lifting the whole glorious slab out later SO easy!
- Make the Dreamy Shortbread Crust: “In a large bowl, combine the very soft butter, flour, powdered sugar, cornstarch, and that optional pinch of salt. Use a sturdy spoon or your impeccably clean hands to mix until a soft, slightly crumbly dough forms. Chef Hack Alert! No mixer needed! The warmth of your hands helps it come together beautifully. Don’t overwork it – just mix until no dry flour remains.
- Press & Bake: “Dump the dough into your prepared pan. Now, channel your inner potter! Use your fingers or the flat bottom of a measuring cup to firmly and evenly press the dough across the bottom and slightly up the sides. Pro Tip: A light dusting of flour on your fingers/cup prevents sticking. Bake this golden base for 18-20 minutes. You want it lightly golden around the edges – it shouldn’t be dark brown yet. Pull it out and let it cool slightly (about 10-15 minutes) while you make the caramel. Why Cool? A hot crust + molten caramel = potential soggy bottom. We want crisp perfection!
- Conjure the Salted Caramel: “In a medium saucepan over MEDIUM heat, melt the 1 cup of butter. Once melted, whisk in the packed brown sugar and heavy cream. Safety First! This mixture will bubble up dramatically when you add the cream – use a pan with high sides! Bring it to a gentle boil (you’ll see consistent bubbles across the surface), then immediately reduce the heat just enough to maintain a steady simmer. Let it bubble and thicken for exactly 1 minute, whisking constantly. Timing is Key! This minute cooks out the raw sugar taste and thickens the caramel just right. Under-cooked = runny filling. Over-cooked = hard candy bars!
- Finish the Caramel Elixir: “Remove the saucepan from the heat! Whisk in the glorious 2 tablespoons of vanilla extract and the 1 teaspoon (or more!) of salt. It will bubble furiously again – that’s normal. Give it a good whisk until smooth and combined. Chef Insight: Smell that? Pure heaven. Taste a tiny drop (carefully!) and adjust salt if desired. Set aside briefly.
- Layer Up the Goodness: “Sprinkle the roasted salted pecans evenly over the slightly cooled crust. Next, shower the chocolate chips evenly over the pecans. Now, slowly and carefully pour the warm caramel sauce over everything. Pro Tip: Start pouring around the edges first, then move to the center. Use an offset spatula or the back of a spoon to gently nudge it into an even layer, covering all the nuts and chocolate. Don’t worry if it looks like a lot – it settles beautifully!
- Bake to Bubbly Perfection: “Carefully slide the pan back into the oven. Bake for 20-25 minutes. You’re looking for the whole surface to be actively bubbling (especially in the center) and the caramel turning a deeper golden brown. Don’t Overbake! The filling will set as it cools. Overbaking makes it hard.
- The Crucial Wait (I Know, It’s Hard!): “Remove the pan and place it on a wire rack. This is the ultimate test of willpower: LET IT COOL COMPLETELY. Seriously. This takes at least 2-3 hours, or even better, overnight at room temperature. Why the Wait? Cutting into warm bars = caramel lava flow. Cooling lets everything set into that perfect chewy-gooey texture. Rushing ruins the structure!
- Slice & Savor: “Once completely cool, use the parchment paper overhang to lift the entire slab out of the pan. Place it on a cutting board. Use a large, sharp knife dipped in hot water (and wiped dry between cuts) for clean slices. Cut into 24 squares or 30 smaller rectangles. Chef Hack: Run the knife under hot water, wipe dry, make a cut, repeat! Clean, beautiful bars every time.
Showtime! Serving Your Masterpiece
Presentation is part of the fun! These bars are stars all on their own, but a little flair never hurts. Place them on a simple white platter to let their caramel swirls and chocolate chips shine. For a touch of elegance, dust the tops lightly with flaky sea salt just before serving – that extra salty crunch against the sweet is divine. A tiny dollop of barely sweetened whipped cream or a scoop of high-quality vanilla bean ice cream alongside takes them into “decadent dessert” territory. Feeling fancy? Drizzle a little extra melted chocolate or caramel sauce on the plate. But honestly? Watching friends’ eyes light up as they bite into that perfect, chewy-crisp-gooey bite is the best garnish of all!
Make It Your Own! Delicious Twists
Love playing with flavors? Try these fun spins:
- Bourbon Bliss: Replace 1 Tbsp of the vanilla with 1-2 Tbsp of good bourbon in the caramel. Smoky, grown-up perfection!
- Espresso Kick: Whisk 1-2 Tbsp of instant espresso powder or fine-ground coffee into the flour for the crust. Deepens the chocolate flavor beautifully.
- Nutty Swap: Swap half the pecans for walnuts or almonds for a different flavor profile. Toast them first!
- Pretzel Crunch: Mix 1/2 cup crushed pretzel pieces into the pecans before sprinkling for an epic sweet-salty-crunchy combo.
- Dairy-Free Delight: Use high-quality plant-based butter sticks and full-fat coconut cream (the canned kind, shaken well) instead of dairy butter and cream. Check chocolate chips are dairy-free!
From My Kitchen to Yours: Anna’s Extra Scoop
Oh, these bars! They’ve evolved from my Grandma’s pie through many messy kitchen experiments. That double vanilla? Learned that after a batch tasted flat. The cornstarch in the crust? Total game-changer discovered during a flour shortage! One hilarious fail involved using honey instead of brown sugar – let’s just say it became “pecan hockey pucks.” Stick to brown sugar, folks! The beauty now is their reliability. They travel like a dream (layer them in a container with parchment between layers), freeze beautifully for up to 3 months (thaw overnight in the fridge), and taste even better on day two as the flavors meld. They’re my most requested recipe, the one I bring when comfort is needed, and the treat that always makes my kitchen smell like home. Remember: the caramel WILL bubble like crazy – embrace the drama! And that cooling time? Worth every agonizing minute. Now go make some memories (and maybe a little mess)!
Your Questions, Answered!
Let’s tackle those common kitchen conundrums:
- Q: My caramel filling bubbled over in the oven! Help!
A: Deep breaths! This usually means the pan was too full or the oven temp was slightly too high. Next time, place a baking sheet on the rack below your pan to catch any drips. It doesn’t affect the taste, just makes cleanup a bit stickier. Ensure you’re using the correct size pan (9×13-inch) and not overfilling it – a gentle boil is key, not a raging one. - Q: The bars are too runny/gooey after cooling. What happened?
A: This typically means the caramel filling wasn’t simmered for the full minute, or the bars were cut too soon. Ensure you bring the caramel to that *gentle boil* and simmer for the full 60 seconds, whisking constantly. Also, resist the urge to cut! They MUST cool completely, preferably overnight. If it’s still too soft after proper cooling, pop the whole pan (covered) in the fridge for an hour before slicing – it firms it up nicely. - Q: Can I use store-bought caramel sauce to save time?
A: While homemade caramel is truly special for flavor and texture, you *can* use a good quality, thick store-bought caramel sauce in a pinch (aim for about 2 cups). Gently warm it slightly before pouring. However, the homemade version with brown sugar, butter, and cream sets better and has a richer depth. The store-bought might result in a slightly softer bar. - Q: My crust crumbled when I cut the bars!
A: A few things: Did you press the crust firmly and evenly?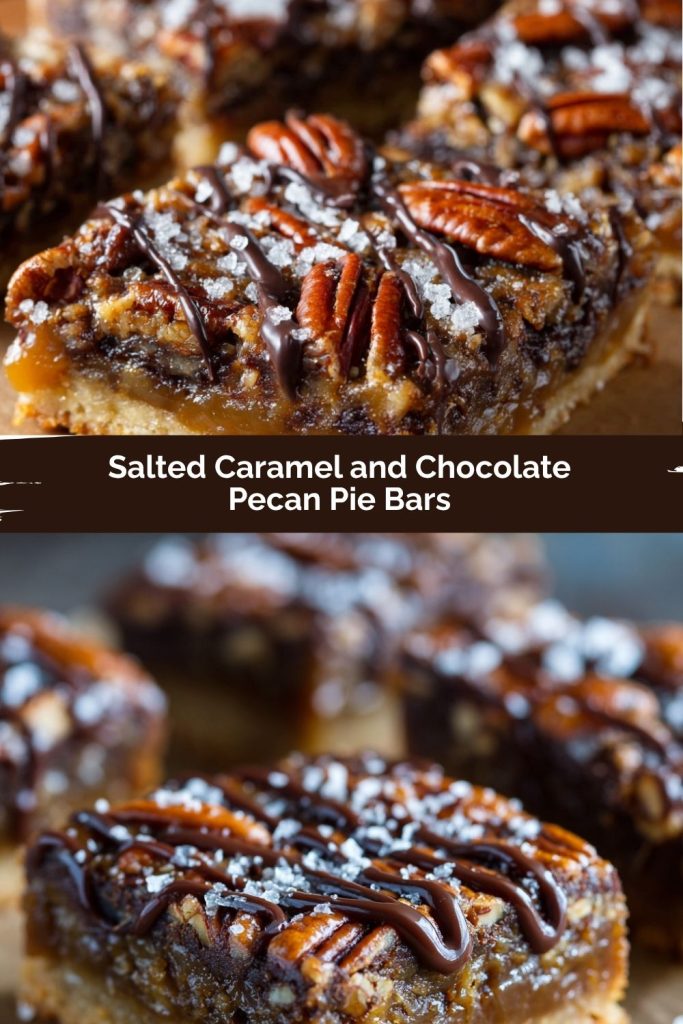
Final Thoughts
If pecan pie had a rebellious little sister who showed up to Thanksgiving in a leather jacket with sea salt in her pocket—these bars would be her. Rich, gooey, buttery, and just the right amount of salty-sweet, they’re everything I crave in a fall dessert without the fuss of a pie crust. Whether you’re baking ahead for the holidays or just need something indulgent for a cozy night in, these bars are here to deliver major flavor and nostalgic charm in every bite. Serve ’em warm with ice cream, sneak one with your coffee the next morning (zero regrets), and don’t be surprised when they disappear faster than you can say “pecan pie remix.”
Using the bottom of