
***
Strawberry Milk Mousse Cups: Your New Favorite No-Bake Treat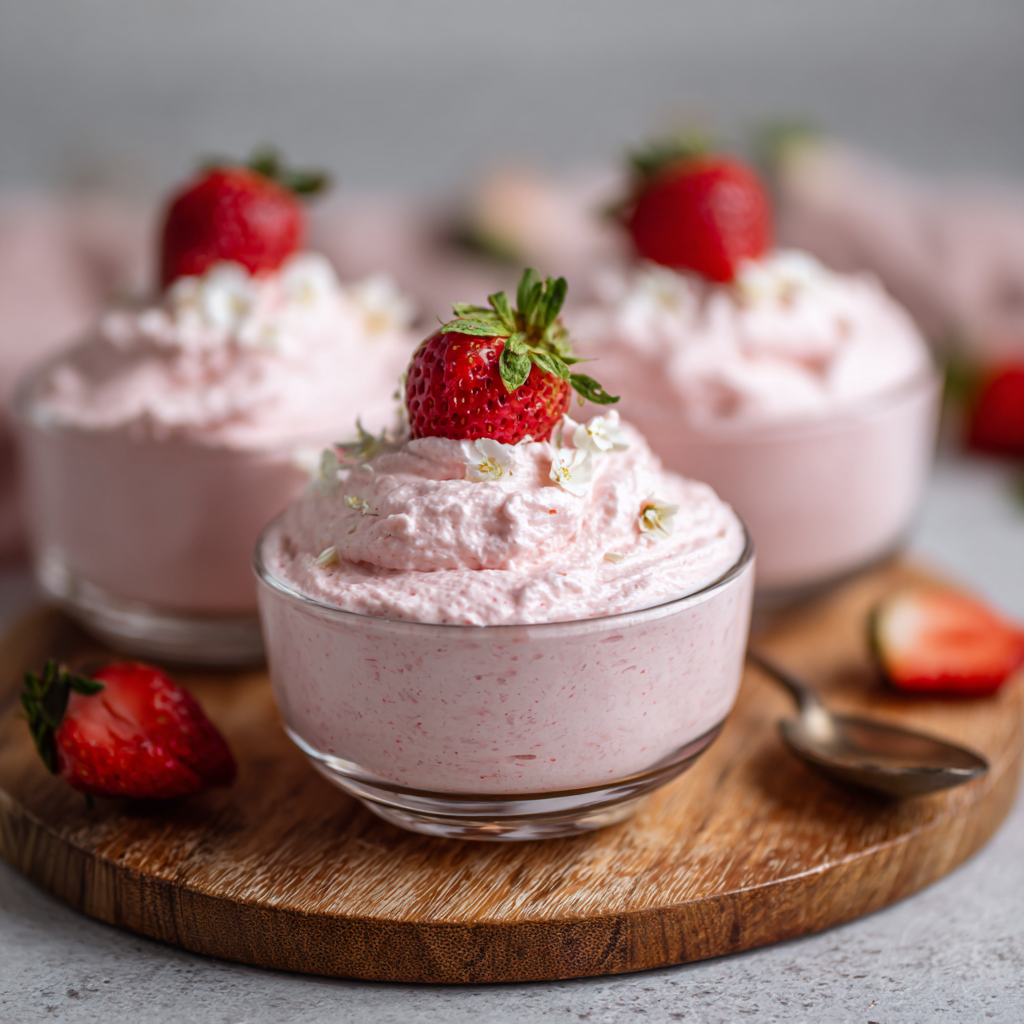
Hey there, friend! Let’s be real for a second: sometimes, you just need a dessert that feels like a hug. Something that’s effortlessly pretty, wonderfully light, and doesn’t require you to turn on the oven. You want a little bit of magic at the end of your meal, without a sink full of dishes to show for it. Am I right?
Well, pull up a stool and get ready to fall in love, because these Strawberry Milk Mousse Cups are about to become your go-to sweet escape. Imagine the creamy, dreamy texture of a classic mousse, but infused with the sweet, nostalgic flavor of your favorite strawberry milk. It’s like a fluffy pink cloud that melts the second it hits your tongue.
This isn’t a fussy, complicated dessert. In fact, it’s one of the first recipes I love to teach new cooks because it builds so much confidence. With just a handful of simple ingredients and about 10 minutes of active time, you can create a dessert that looks like it came from a fancy patisserie. It’s perfect for impressing dinner guests, treating your family on a weeknight, or just celebrating the fact that you made it through another Wednesday. So, let’s ditch the stress and whip up a little bit of joy together. I promise, your spoon will thank you.
A Sip of Sweet Nostalgia
PrintStrawberry Milk Mousse Cups : Light, Creamy, and Pretty in Pink

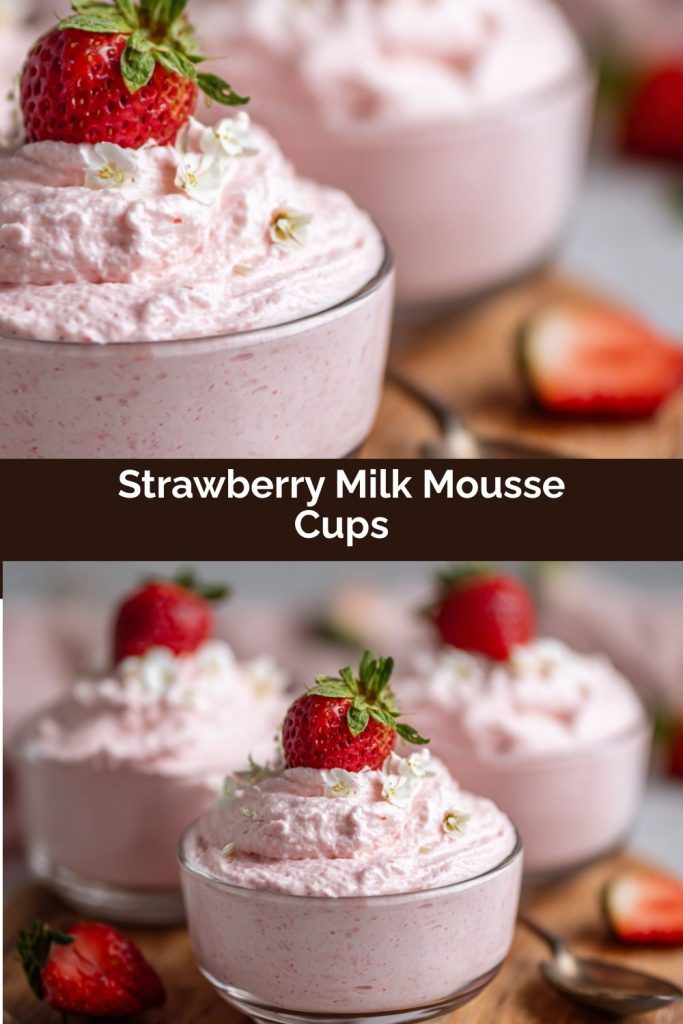
These strawberry milk mousse cups are airy, creamy, and delicately sweet—like a cloud of strawberry-flavored nostalgia. Made with simple ingredients and no baking, they’re perfect for parties, date nights, or a fun twist on classic mousse. Pretty, pink, and irresistible.
- Prep Time: 10 minutes
- chill time: 1 hour
- Total Time: 1 hour 10 minutes
- Yield: 4 mousse cups 1x
Ingredients
1 cup cold heavy cream
¼ cup strawberry milk (store-bought or homemade)
2 tbsp powdered sugar
½ tsp vanilla extract
2 tbsp strawberry gelatin (optional, for color and extra flavor)
Optional: fresh strawberries, whipped cream, or sprinkles for topping
Instructions
In a chilled mixing bowl, beat cold heavy cream with powdered sugar and vanilla until soft peaks form.
Slowly pour in strawberry milk and continue whipping until fluffy and thick.
If using gelatin, dissolve it in 1 tbsp warm water, let cool slightly, then fold it into the mousse mixture.
Spoon into small cups or jars. Chill for at least 1 hour.
Garnish with whipped cream, strawberries, or sprinkles just before serving.
Nutrition
- Calories: 210
- Fat: 18g
- Carbohydrates: 12g
- Fiber: 0g
- Protein: 2g
This recipe always takes me right back to my grandma’s linoleum-floored kitchen, with the sun streaming through the checkered curtains. After school, she’d have a special treat waiting for me: a tall, cold glass of strawberry milk. But this wasn’t the kind from a powder packet. Oh no. She’d mash up a few fresh, ripe strawberries with a spoonful of sugar at the bottom of the glass, pour in the cold milk, and give it a vigorous stir. That first sip was pure, unadulterated happiness—sweet, fruity, and made with so much love.
I wanted to capture that exact feeling in a dessert. A mousse felt like the perfect vehicle—it’s elegant enough for a grown-up palate but still carries that playful, joyful essence of my childhood afternoons. Every time I make these cups, I’m reminded of her, of simplicity, and of the fact that the most magical recipes often start with the simplest memories. It’s my hope that when you make this, you’ll create your own sweet memories, too.
Gathering Your Magical Ingredients
Part of the beauty of this recipe is its simplicity. Each ingredient plays a specific role in creating that perfect, airy texture and flavor. Here’s what you’ll need and why it’s important:
- 1 cup cold heavy cream or heavy whipping cream: This is the backbone of our mousse! The high fat content is what allows the cream to whip up into stiff, beautiful peaks that hold their shape. Chef’s Insight: I can’t stress this enough—your cream MUST be cold. I even pop my mixing bowl and beaters in the freezer for 15 minutes before I start. Cold cream whips faster and higher!
- ¼ cup strawberry milk: This is where our signature flavor comes from! You can use a high-quality store-bought version or make your own simple version by blending ¼ cup milk with a tablespoon of strawberry syrup or a few mashed strawberries. Substitution Tip: If you’re in a pinch, you can use ¼ cup regular milk mixed with 1 tsp of strawberry extract, but the real-deal strawberry milk gives the best, most authentic taste.
- 2 tbsp powdered sugar: We use powdered (or confectioner’s) sugar instead of granulated because it dissolves instantly into the cream, giving us a silky-smooth mousse without any graininess. It also contains a tiny bit of cornstarch, which helps stabilize our whipped cream a little.
- ½ tsp vanilla extract: A classic flavor enhancer! Vanilla adds a warm, floral depth that makes the strawberry flavor taste even more complex and delicious. It’s the secret weapon in so many desserts.
- 2 tbsp strawberry gelatin (optional, but recommended): Now, this is my little hack for an extra boost of flavor and that gorgeous, vibrant pink color. It also adds a bit more structure to the mousse, helping it stay firm for longer. Substitution Tip: If you’d rather avoid gelatin, a tiny drop of pink food coloring will work for color, but you’ll lose that extra strawberry punch.
- Fresh strawberries, extra whipped cream, or fun sprinkles for topping: This is where you get to be an artist! Toppings add texture, freshness, and a beautiful finished look. Have fun with it!
Let’s Whip Up Some Magic: Your Step-by-Step Guide
Ready to see some kitchen wizardry in action? Follow these steps, and you’ll have a flawless mousse in no time. I’ve included all my best tips and hacks along the way!
- Prep Your Gelatin (If Using): If you’re using the strawberry gelatin for that extra oomph, let’s get it ready first. In a small bowl, sprinkle the 2 tablespoons of gelatin powder over 1 tablespoon of warm (not boiling) water. Whisk it with a fork until it’s completely dissolved and looks smooth. Then, set it aside to cool down to room temperature. Chef’s Hack: You can place this little bowl in a larger bowl of ice water to speed up the cooling process. We don’t want to add hot gelatin to our cold cream, or it might deflate our beautiful fluff!
- The Big Chill: Grab that chilled mixing bowl and your cold heavy cream. Pour the cream in, then add the 2 tablespoons of powdered sugar and the ½ teaspoon of vanilla extract. Now, using a hand mixer or a stand mixer fitted with the whisk attachment, start beating on medium-high speed. Watch the magic happen! It will go from liquid, to frothy, to soft peaks. What are soft peaks? When you lift the beaters out of the cream, the peak that forms should curl over nicely at the top. We’re not quite at the stiff peak stage yet!
- Introduce the Star Flavor: Once you’ve hit those lovely soft peaks, it’s time for the strawberry milk. With the mixer running on low speed, slowly drizzle in the ¼ cup of strawberry milk. This slow incorporation helps prevent the cream from breaking or getting grainy. Once it’s all in, crank the speed back up to medium-high and whip until you have medium-stiff peaks. This means when you lift the beaters, the peaks stand up straight but still have a slight little curl at the very tip. The mixture will be thick, fluffy, and hold its shape beautifully.
- Fold in the Gelatin: Remember that cooled gelatin? Now’s its time to shine. Take a spatula and add the gelatin to the whipped cream mixture. Using a gentle, folding motion (think of it as gently turning the mixture over onto itself from the bottom of the bowl), incorporate the gelatin until you see no more streaks. Be gentle here—we want to keep all that air we just whipped in!
- The Grand Finale – Spoon and Chill: Get out your serving glasses—I love using little clear cups or vintage jam jars so you can see the pretty pink layers. Spoon or pipe the mousse evenly into four containers. Gently tap them on the counter to settle the mousse and remove any air bubbles. Now, pop them in the refrigerator to set for at least 1 hour, though 2 hours is even better for a firmer set. This is the perfect time to clean up and maybe sneak a taste of what’s left in the bowl (cook’s treat!).
- Garnish and Serve with a Smile: Just before serving, top your mousse cups with a dollop of fresh whipped cream, a slice of strawberry, or a sprinkle of your favorite toppings. This is your moment to shine!
How to Serve Your Strawberry Milk Mousse
Presentation is part of the fun! I love serving these in individual portions—it makes everyone feel special. Clear glasses or mason jars are my go-to because they show off the mousse’s lovely color and texture. For a real wow factor, you can layer the mousse with crushed vanilla wafers or graham crackers to create a mini “cheesecake” parfait. Serve them straight from the fridge with a cup of coffee after a dinner party or as a sweet, cool treat on a warm afternoon. They’re delightful, elegant, and oh-so-simple.
Get Creative! Flavor Twists & Swaps
Once you’ve mastered the basic recipe, the flavor world is your oyster! Here are a few of my favorite ways to mix it up:
- Chocolate Strawberry: Layer the mousse with a spoonful of chocolate ganache or add some mini chocolate chips folded in at the end.
- Lemon Berry Bliss: Swap the strawberry milk for lemonade milk (just mix a tbsp of lemon curd into the milk) and fold in some fresh raspberries.
- Adult-Only Boozy Mousse: For a fun gathering, fold a tablespoon of strawberry liqueur or a little vodka into the mixture along with the strawberry milk.
- Dairy-Free Dream: Use well-chilled full-fat coconut cream and a dairy-free strawberry milk alternative. The result is just as creamy and delicious!
- Cookies & Cream: Fold in crushed Oreo cookies right before chilling for a fun, crunchy texture.
Anna’s Kitchen Notes & Stories
This recipe has been a fun one to evolve over the years. The first time I made it, I was so impatient that I only let it chill for about 20 minutes. Let’s just say we had very delicious, but very soupy, strawberry mousse soup! The wait is truly essential for that perfect, cloud-like texture.
It’s also become my daughter’s favorite “cooking lesson.” She loves being in charge of the mixer and, more importantly, the sprinkles. We’ve had many a kitchen counter dusted in pink sugar, and I wouldn’t have it any other way. That’s the real joy of cooking—it’s not just about the food you make, but the memories you create while you’re making it. Don’t be afraid to get a little messy and make this recipe your own!
Your Questions, Answered!
I’ve gotten a few questions about this recipe over the years, so I’ve compiled the most common ones here to help you out!
Q: My mousse is too runny. What happened?
A: The most common culprit is not whipping the cream enough, or the cream wasn’t cold enough. Make sure you’re whipping to those distinct medium-stiff peaks. Another reason could be that the gelatin (if using) was still too warm when folded in, which can slightly melt the cream. Finally, ensure you’re chilling it for the full hour—patience is key!
Q: Can I make this ahead of time?
A: Absolutely! This is a fantastic make-ahead dessert. You can prepare the mousse cups completely, cover them tightly with plastic wrap, and store them in the refrigerator for up to 24 hours. I’d recommend adding any fresh fruit or crunchy toppings right before serving so they don’t get soggy.
Q: I don’t have a hand mixer. Can I whisk this by hand?
A> You sure can, but be prepared for a little arm workout! Use a large balloon whisk and a chilled metal bowl. It will take some time and elbow grease, but you’ll get there. Look for those same visual cues—soft peaks, then medium-stiff peaks after adding the milk.
Q: What’s the best substitute for the gelatin to keep this vegetarian?
A> Great question! Agar-agar is a fantastic plant-based alternative derived from seaweed. Use about 1 teaspoon of agar-agar powder, dissolved in the warm water according to package directions (it often needs to be simmered briefly to activate). Let it cool slightly before folding it in, just like the gelatin.
Quick Nutrition & Prep Details
Prep Time: 10 minutes | Chill Time: 1 hour | Total Time: 1 hour 10 minutes
Yields: 4 mousse cups
Type: No-Bake Dessert, Kid-Friendly, Light Treat
Skill Level: Easy
Approximate Nutrition Per Cup (without toppings): Calories: 210 | Protein: 2g | Carbs: 12g | Fat: 18g | Fiber: 0g
Final Thoughts
At the end of the day, these Strawberry Milk Mousse Cups are everything I adore in a dessert: simple, nostalgic, a touch whimsical, and guaranteed to make someone smile. They’re the kind of treat that feels both effortless and thoughtful, like a little love note served in a glass. Whether you’re making them for a special celebration, a family movie night, or just because you deserve something sweet (and you do!), I hope they bring a bit of that same joy my grandma’s strawberry milk always brought me.
So pull out your whisk, grab a handful of strawberries, and let a little pink-cloud magic into your kitchen. Here’s to easy moments, sweet memories, and desserts that make life feel just a little softer. Enjoy every spoonful, friend.