Stuffed Pancake Muffins with Chocolate Chips: Your New Breakfast Magic Trick
Hey there, friend! Come on in, the coffee’s fresh and I have the most delightful kitchen trick to show you. Have you ever wished you could bottle up the cozy, syrupy joy of a weekend pancake stack and have it ready to grab on a chaotic Tuesday morning? Well, pull up a stool, because we’re about to make that dream a delicious, muffin-shaped reality.
I’m talking about Stuffed Pancake Muffins—soft, fluffy, studded with melty chocolate chips, and hiding a secret, warm pocket of pure maple syrup right in their heart. Imagine biting into a perfectly portable, just-sweet-enough muffin and getting a surprise burst of maple goodness. It’s a hug in food form, I swear.
This recipe is my love letter to busy foodies, meal-prep heroes, and anyone who believes breakfast should be a little bit magical. We’re taking everything we adore about from-scratch pancakes—the tender crumb, the golden edges—and transforming them into the ultimate grab-and-go treat. They’re simple to whip up, fantastic for freezing, and guaranteed to make you feel like a kitchen wizard. So, are you ready to cook up some joy? Let’s get our bowls ready and turn an ordinary morning into something amazing.
The Pancake Pile-Up That Started It All
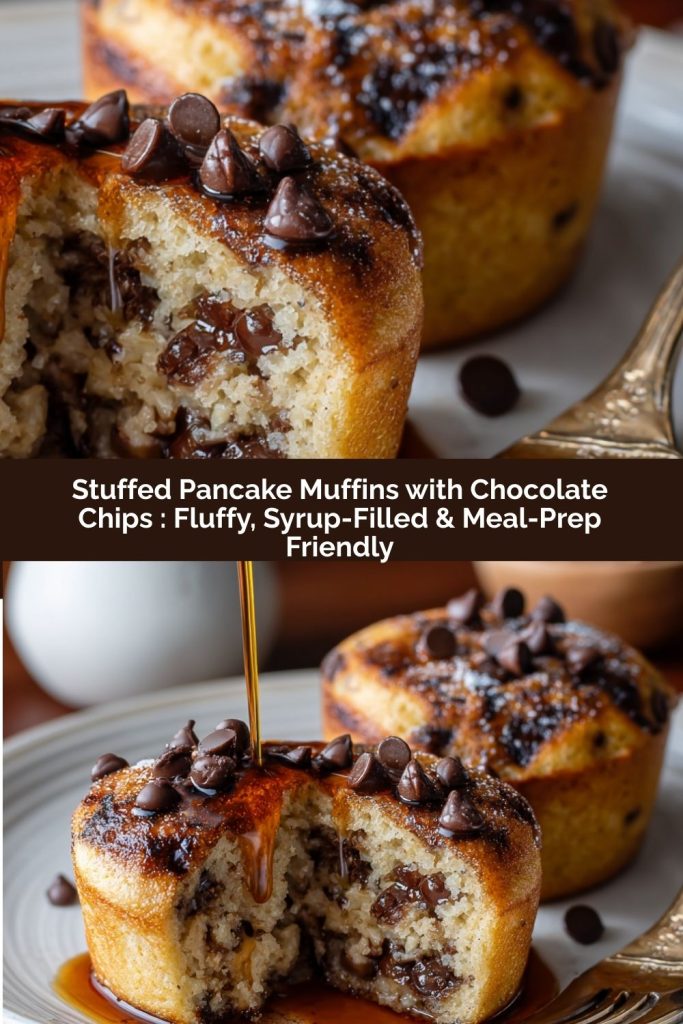
PrintStuffed Pancake Muffins with Chocolate Chips : Fluffy, Syrup-Filled & Meal-Prep Friendly
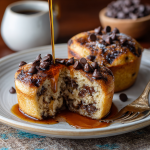
These Stuffed Pancake Muffins with Chocolate Chips take classic pancakes and turn them into a grab-and-go dream. Soft, fluffy, and packed with chocolate chips, each muffin hides a warm pocket of maple syrup in the center—like a bite of breakfast magic. Perfect for busy mornings, brunch boards, or kid-friendly meal prep, they’re easy to make, easy to freeze, and totally irresistible straight from the oven or reheated on the go.
- Prep Time: 10 minutes
- Cook Time: 18 minutes
- Total Time: 28 minutes
- Yield: 12 muffins 1x
Ingredients
1 1/2 cups all-purpose flour
1 tablespoon baking powder
1/4 teaspoon salt
2 tablespoons sugar
1 cup milk
1 large egg
1/2 teaspoon vanilla extract
2 tablespoons melted butter or oil
3/4 cup mini chocolate chips
1/3 cup maple syrup (for filling)
Instructions
Preheat oven to 350°F (175°C) and grease or line a 12-cup muffin tin.
In a large bowl, whisk together flour, baking powder, salt, and sugar.
In another bowl, mix milk, egg, vanilla, and melted butter until smooth.
Combine wet and dry ingredients just until blended. Fold in mini chocolate chips.
Fill each muffin cup halfway, add 1–2 teaspoons maple syrup to the center, then top with more batter to cover.
Bake 15–18 minutes or until golden and cooked through. Cool slightly before serving.
Nutrition
- Calories: 210
- Fat: 9g
- Carbohydrates: 26g
- Protein: 4g
This recipe was born from a particularly… *lively* Saturday morning at my house. Picture this: me, flipping pancakes at the stove like a short-order cook, trying to keep up with the demand. One kid wants just chocolate chips, another wants theirs “syrup-only, on the side, Mom!”, and my husband is patiently waiting for a stack that isn’t somehow laced with sprinkles. The kitchen was a symphony of clattering plates and “is it ready yet?” and I was desperately trying to get a warm pancake myself!
In that moment of beautiful chaos, I had a flashback to my own childhood, sitting at my grandma’s table. She’d make a towering pile of pancakes for everyone, and the rule was you had to eat from the bottom of the stack so the ones on top stayed warm, soaked in all that glorious syrup. I wanted that same feeling—the warm, syrup-infused bite—but in a format that fit our on-the-go lives. The idea hit me: what if the syrup was *inside*? What if everyone could have their perfect, warm, syrupy bite all at once, without anyone standing at the stove? That’s the spirit behind these muffins. They’re my solution to sharing the cozy, connected feeling of a big breakfast, even when life is hustling us out the door.
Gathering Your Magical Ingredients
Here’s what you’ll need to create this breakfast magic. I’ve added my little chef notes and swap ideas so you can bake with confidence!
-
- 1 1/2 cups all-purpose flour: This is our trusty base. For a slightly heartier texture, you can swap in 1/2 cup of whole wheat flour. Just don’t over-pack your measuring cup—fluff the flour first, then spoon it in and level it off.
- 1 tablespoon baking powder: This is our leavening superstar, responsible for that beautiful, fluffy lift. Make sure yours is fresh (less than 6 months old) for the best rise.
- 1/4 teaspoon salt: A tiny but mighty ingredient! It balances the sweetness and makes all the other flavors pop. Don’t skip it.
2 tablespoons sugar: Just enough to give the muffins a hint of sweetness and help them brown nicely. I use regular granulated, but coconut sugar works beautifully too.
- 1 cup milk: Whole milk gives the richest result, but any milk you have works—dairy or non-dairy like almond or oat milk are all great.
- 1 large egg: Our binder and helper for a tender texture. Let it come to room temperature for easier mixing.
- 1/2 teaspoon vanilla extract: The secret whisper of warmth. A splash of almond extract would also be lovely here.
- 2 tablespoons melted butter or oil: Butter adds fantastic flavor, but a neutral oil (like avocado or canola) makes the muffins super moist and is a great dairy-free option.
- 3/4 cup mini chocolate chips: Minis are key! They distribute perfectly in every bite. You can use regular chips, chopped chocolate, or even swap in blueberries or diced strawberries for a fruity twist.
- 1/3 cup maple syrup (for filling): Use the *real* stuff, please! The flavor is incomparable. This is our hidden treasure, so quality matters. Save a little extra for drizzling, too.
Let’s Bake Some Magic: Step-by-Step
Ready to see the magic happen? Follow these steps, and I’ll walk you through every tip and trick I’ve learned along the way.
- Preheat & Prep: Start by heating your oven to 350°F (175°C). This gives it plenty of time to reach the perfect, even temperature. Now, grab your muffin tin. I highly recommend using paper liners for these—they make cleanup a dream and help the muffins pop out perfectly. If you’re going bare, give each cup a really good spray with non-stick spray. Trust me on this.
- Mix the Dry Team: In a large bowl, whisk together your flour, baking powder, salt, and sugar. I love this part—you’re making sure the baking powder is evenly distributed, which means no weird bitter bites, just uniform fluffiness. A good whisk is your first secret weapon.
- Whisk the Wet Team: In a separate bowl (or a large measuring cup), combine the milk, egg, vanilla, and melted butter or oil. Whisk it until it’s completely smooth and homogenous. Pro tip: If your butter is hot from melting, let it cool for a minute before adding it to the milk and egg, so you don’t accidentally cook the egg!
- The Grand Unification (But Gently!): Here’s the most important step for tender muffins: pour the wet ingredients into the dry ingredients. Grab a spatula and mix them together just until no dry streaks remain. A few lumps are absolutely fine—I promise! Overmixing is the enemy of fluffiness, as it develops the gluten and makes things tough. Think “gentle fold,” not “power stir.”
- Fold in the Joy: Now, gently fold in those glorious mini chocolate chips. Just a few turns to get them evenly dispersed throughout the batter.
- The Secret Stuffing Step: This is the fun part! Using a spoon or cookie scoop, fill each prepared muffin cup about halfway. Now, take a teaspoon and make a little well in the center of each. Carefully pour about 1-2 teaspoons of maple syrup right into that well. The goal is to keep it in the center. Then, cover the syrup completely with more batter, filling the cups about ¾ full. You’re creating a delicious syrup surprise package!
- Bake to Golden Perfection: Slide the tin into your preheated oven and bake for 15-18 minutes. You’re looking for beautifully golden tops and a muffin that springs back lightly when you press the center. The smell will be incredible.
- The (Brief) Patience Test: Let the muffins cool in the tin for about 5 minutes. This lets them set and makes them much easier to remove. Then, transfer them to a wire rack. I know it’s hard, but try to let them cool for another 5-10 minutes before biting in—that syrup center is like molten lava straight from the oven!
How to Serve Your Pancake Muffins
Presentation is part of the fun! For a cozy family breakfast, pile them high on a big platter with a little dusting of powdered sugar and an extra drizzle of maple syrup on the side. If you’re making them for a brunch with friends, arrange them on a beautiful board with bowls of fresh berries, whipped cream, and maybe some crispy bacon on the side. And for the ultimate grab-and-go move? Just let one cool completely, wrap it in a napkin, and take your portable pancake paradise with you out the door.
Make It Your Own: Delicious Twists
The beauty of this recipe is how easily it adapts! Here are a few of my favorite spins:
- Berry Bliss: Swap the chocolate chips for 1 cup of fresh or frozen blueberries or raspberries. A little lemon zest in the batter is heavenly here.
- Peanut Butter Cup: Add ½ cup of peanut butter chips to the batter with the chocolate chips. For the filling, use a mix of maple syrup and a tiny dollop of peanut butter.
- Apple Cinnamon: Fold in ¾ cup of finely diced apple and 1 teaspoon of cinnamon into the batter. Use cinnamon-spiked maple syrup for the center.
- “Funfetti” Birthday: Omit chocolate chips, add ½ cup rainbow sprinkles to the batter, and fill with a simple vanilla glaze (powdered sugar + milk) instead of syrup.
- Dairy-Free & Vegan: Use oat milk, a flax egg, and oil. Ensure your chocolate chips are dairy-free. It works like a charm!
Anna’s Kitchen Notes & Stories
This recipe has become a serious staple in our home, and it’s evolved in the funniest ways. The first time I tested it, I got a little *too* generous with the syrup filling. Let’s just say I created a few pancake muffins with impressive syrup volcanoes! My daughter thought it was the best thing ever (“Look, Mom, it’s a pancake fountain!”), but it taught me that 1-2 teaspoons is the sweet spot for a contained, gooey center.
I also learned that these muffins freeze like a dream. Once they’re completely cool, I pop them in a single layer on a baking sheet to flash-freeze for an hour, then transfer them to a freezer bag. On busy mornings, you can microwave one from frozen for about 45-60 seconds, or let it thaw at room temperature. It’s like having a personal breakfast bakery right in your freezer. Seeing my kids heat these up for themselves before school fills my heart—it’s the joy of a homemade breakfast, simplified.
Your Questions, Answered!
Q: My syrup all leaked out the bottom! What did I do wrong?
A: This usually happens if the muffin cups are overfilled with batter on the bottom layer, or if the well for the syrup isn’t deep enough. Make sure your initial layer is only halfway, create a definite well, and don’t overfill the syrup. Also, using paper liners helps create a barrier.
Q: Can I make the batter the night before?
A: I don’t recommend it for the fluffiest results. Baking powder starts working as soon as it gets wet. For the best rise, mix and bake right away. Your prep can be super quick—just measure your dry ingredients the night before if you want a head start!
Q: The center of my muffins is wet/gummy. Are they undercooked?
A: The syrup center will stay lovely and gooey, but the surrounding cake should be cooked through. If it seems wet, you might need an extra minute or two in the oven. Ovens vary! Use the spring-back test on the *cake part* (not the very center). A toothpick inserted near the edge (not into the syrup pocket) should come out clean.
Q: Can I use pancake mix instead?
A: You absolutely can! Use the dry ingredients from a “complete” mix that makes about 10-12 pancakes. Then, just follow the wet ingredients and steps from this recipe starting at step 3. It’s a fantastic shortcut.
Quick Nutrition Details
Please note: This is an estimate per muffin, based on the specific ingredients used. Values will vary with substitutions.
Per Muffin: Approximately 210 calories, 4g protein, 26g carbohydrates, 9g fat.
Final Thoughts
At the end of the day, these Stuffed Pancake Muffins are proof that breakfast can be both practical and joyful. They tuck all the cozy, syrupy comfort of a weekend pancake stack into a tender, chocolate-speckled muffin you can hold in your hand — whether you’re lingering at the table with family or hustling out the door with coffee in tow.
They’re the kind of recipe that quietly becomes a tradition. The kind you’ll make for sleepovers, lazy Saturdays, first-day-of-school mornings, or simply because everyone could use a little extra sweetness today. And every time that warm maple center reveals itself, you’ll remember why you love them.
So here’s to breakfasts that feel like a hug. To messy kitchens, happy bellies, and tiny pockets of magic baked right inside. I hope these muffins bring as much joy to your mornings as they have to ours. 🥞💛🧁