Let’s Make Magic in Miniature: Crispy Taco Cups!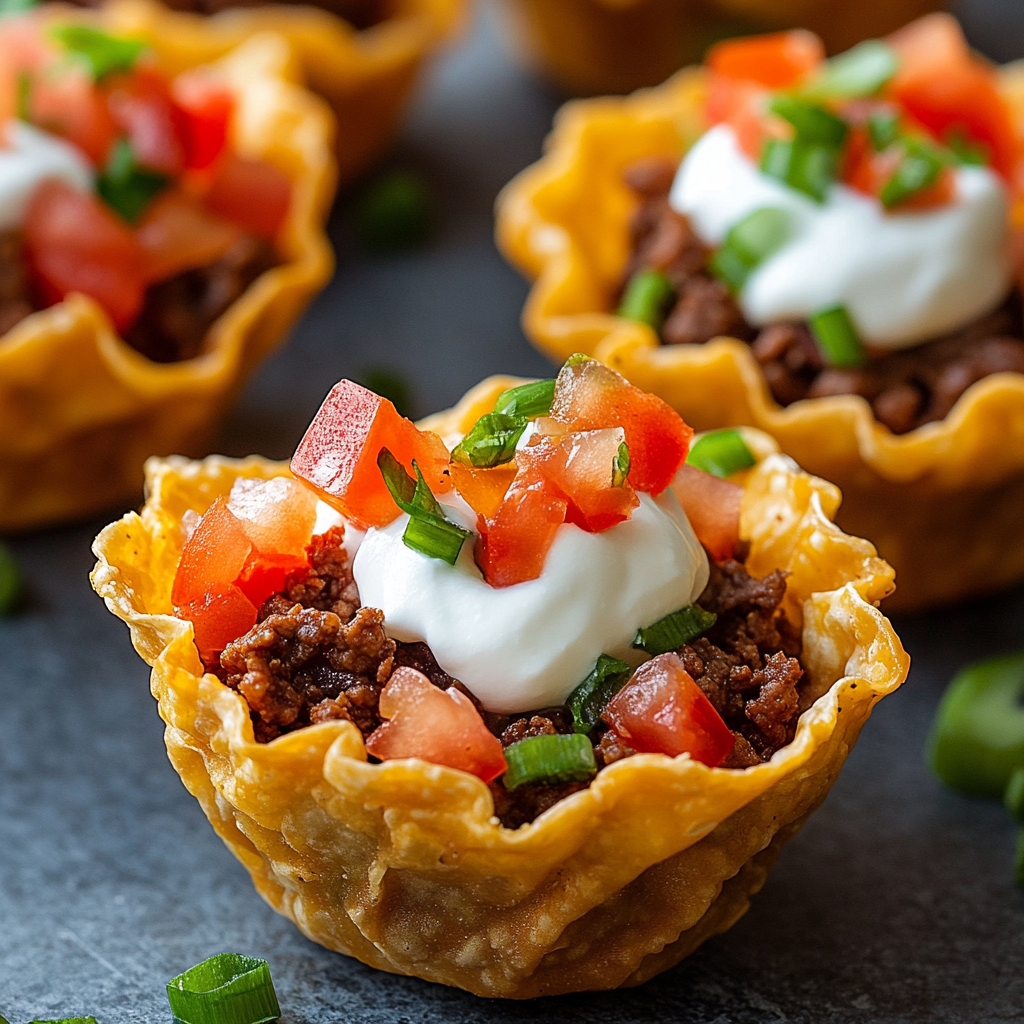
Hey there, friend! Anna here, your kitchen cheerleader, back with a recipe that’s pure joy in a bite-sized package. Picture this: golden, crispy cups cradling savory taco filling, all topped with a cool swoosh of sour cream and a confetti of fresh veggies. These Taco Cups aren’t just food—they’re edible happiness, perfect for turning a regular Tuesday into a fiesta or stealing the spotlight at your next game night. I live for recipes like this: uncomplicated, bursting with flavor, and guaranteed to make everyone gather ’round the kitchen island with eager fingers. No fancy skills needed—just a muffin tin, a handful of simple ingredients, and that wonderful feeling of creating something deliciously fun. Whether you’re wrangling hungry kids, hosting pals, or just craving a playful twist on taco night, these little gems deliver big smiles. They’re proof that the best moments often come in small, crunchy, cheese-filled packages! So tie on that apron, crank up your favorite tunes, and let’s transform everyday ingredients into something extraordinary together. Trust me, your future self (and your hungry crew) will thank you!
Friday Night Lights & Crispy Bites
These taco cups? Oh, they’re steeped in nostalgia! They instantly whisk me back to our chaotic, laughter-filled Friday nights during football season. My husband, Mike, would be passionately debating ref calls (always questionable, according to him!), our golden retriever, Buddy, would be begging for fallen crumbs, and the kids would be sprawled on the rug, half-watching the game, half-plotting their next snack attack. I needed something easy to make ahead, fun to eat without plates, and universally loved. Enter these crispy wonders! I’d pull them hot from the oven, that incredible cheesy aroma filling the room, and suddenly, everyone’s eyes were on the kitchen—not the screen. The best part? Hearing the synchronized crunch as we all bit into them, followed by happy groans. They became our touchdown tradition, a reminder that the simplest bites often create the coziest memories. Even now, the sound of a crowd cheering on TV makes me crave that golden crunch and feel that warm, fuzzy Friday night vibe.
Your Flavor-Packed Toolkit
Grab these simple stars—each plays a key role in our taco cup symphony!
- 2 tsp olive oil: Our sauté starter! It helps brown the beef beautifully. Chef’s Tip: Any neutral oil works, but olive oil adds a hint of fruitiness.
- 1 lb ground beef (90% lean): Lean is key here! Less grease means crispier cups. Swap Idea: Ground turkey, chicken, or even lentils for a plant-powered twist work wonderfully.
- 2 tbsp taco seasoning: The flavor boss! Chef’s Secret: Use my homemade blend for less sodium and more control over the spice level. Store-bought? Absolutely fine too!
- Salt to taste: Our enhancer. Watch Out: Go easy if your seasoning or tomatoes are salty! Taste before adding extra.
- 1 can (14 oz) petite diced tomatoes, drained: Juicy pops of brightness! Why Drain? Soggy cups are the enemy! Squeeze out excess liquid with your hands or a sieve. Seasonal Swap: Use 1 cup fresh diced tomatoes in summer!
- 24 wonton wrappers: Our crispy edible cups! Found near tofu in most stores. Fun Fact: They crisp up like magic in the oven, creating that perfect vessel.
- 1¼ cups shredded cheddar cheese: Melty, gooey bliss! Mix it Up: Try pepper jack for heat, Monterey Jack for mild creaminess, or a Mexican blend.
- ½ cup sour cream: The cool, creamy finish. Lighter Option: Plain Greek yogurt works great and adds protein.
- ¼ cup sliced green onions: Fresh, oniony zing! No Greens? Minced red onion or chives add a similar punch.
- ¼ cup diced fresh tomatoes: A burst of freshness on top. Optional but oh-so-pretty!
- Cooking spray: Essential non-stick magic! Ensures your crispy treasures pop right out.
Let’s Build Some Crispy Magic!
Ready? Here’s your foolproof path to taco cup triumph. Don’t worry—I’ve got your back with tips every step of the way!
- Preheat & Prep: Fire up your oven to 375°F (190°C). Generously spray a standard 12-cup muffin tin with cooking spray. Chef’s Hack: Really get into the corners! This is your insurance policy against stuck cups. Set the tin aside.
- Brown the Beef: Heat the olive oil in a large skillet over medium heat. Add the ground beef. Break it up with a wooden spoon or spatula into small, even crumbles as it cooks. Watch Closely: Cook until no pink remains, about 5-7 minutes. Drain off any excess grease – we want flavor, not sogginess!
- Flavor Bomb Time: Sprinkle the taco seasoning and salt (if using) over the cooked beef. Stir like crazy for 30 seconds until fragrant—smell that? Pure taco heaven! Now, add the DRAINED petite diced tomatoes. Stir to combine. Let this simmer for 2-3 minutes, stirring occasionally. You want most of the liquid absorbed. Key Tip: Letting it simmer thickens the filling, preventing watery cups. Remove from heat.
- Wonton Wonder: Gently press one wonton wrapper into the bottom of each muffin cup. It’s okay if the corners stick up the sides – that’s good! Don’t Stress: If one tears slightly, just patch it with a small piece of another wrapper. They’re forgiving!
- First Layer of Love: Spoon about 1 tablespoon of the beef mixture into each wonton-lined cup. Even Distribution: Use a small cookie scoop for speed and neatness! Sprinkle about 1 teaspoon of cheese over the beef in each cup.
- Double the Crisp: Top each filled cup with a second wonton wrapper. Gently press it down to nestle into the filling. Pro Move: Rotate the top wrapper slightly so the corners don’t perfectly align with the bottom one – it creates better structure.
- Top It Off: Spoon another tablespoon of beef mixture onto each second wrapper. Finish with a generous sprinkle of the remaining cheese (about 1 teaspoon per cup). Cheese Wisdom: That top layer of cheese melts into a gorgeous golden crust!
- Bake to Perfection: Pop the muffin tin into your preheated oven. Bake for 10-12 minutes. Watch for the Gold: They’re ready when the wonton edges are deep golden brown and crispy, and the cheese is gloriously bubbly. Ovens vary, so start checking at 10 minutes!
- The Big Reveal (Patience!): Carefully remove the tin from the oven. CRUCIAL STEP: Let the cups cool in the tin for 5-7 minutes. This lets them set and firms up the structure. Trying to remove them too soon leads to collapse! Use a small offset spatula or butter knife to gently lift each crispy cup out onto a serving platter.
- Dress to Impress: Now, the fun part! Dollop each warm cup with a bit of sour cream. Sprinkle with the vibrant sliced green onions and diced fresh tomatoes. Final Flourish: Serve immediately while they’re gloriously crisp and warm!
Sharing is Caring (But We Won’t Judge If You Hoard a Few!)
Presentation is part of the fun! Arrange these golden beauties on a large, colorful platter or a rustic wooden board. Let those vibrant green onions and red tomatoes shine! I love popping a small bowl of extra sour cream or a zesty salsa (my mango salsa is killer here!) in the center for dipping. Serve them straight from the oven when they’re at their crispiest peak. These are finger food royalty – no forks needed! Just set out some napkins (maybe even fun, patterned ones!) and watch them vanish. Perfect alongside a big, crunchy salad or a pitcher of icy-cold agua fresca for a full fiesta feel.
Make It Your Own!
These cups are your canvas! Try these tasty twists:
- Fiesta Chicken: Swap the beef for seasoned, shredded rotisserie chicken mixed with a spoonful of green salsa or enchilada sauce for moisture.
- Veggie Delight: Skip the meat! Sauté chopped bell peppers, onions, corn, and black beans with the taco seasoning. Mix in some cooked quinoa for extra heartiness.
- Breakfast Bonanza: Morning magic! Fill cups with scrambled eggs, crumbled cooked sausage or bacon, and cheddar. Top after baking with avocado and hot sauce.
- Spicy Kick: Add a finely chopped jalapeño (seeds removed for less heat) to the beef mixture. Use pepper jack cheese and top with a drizzle of sriracha sour cream (mix 2 tbsp sour cream with 1 tsp sriracha!).
- Pizza Party: Swap taco seasoning for 1 tbsp Italian seasoning. Use ground Italian sausage or beef. Layer with pizza sauce, beef, and mozzarella. Top after baking with fresh basil.
From My Kitchen to Yours
Isn’t it funny how some recipes just stick? These taco cups started as a desperate “What’s fast and kid-friendly?” experiment one hectic Friday years ago. The first batch? Let’s just say a few were more “taco volcanoes” than cups – overflowing filling is a messy lesson! Over time, I perfected the draining (crucial!), the double-layer technique for max crisp, and the cooling time (patience, grasshopper!). Now, they’re a well-oiled (well, sprayed!) machine. I’ve made them in blizzards, for potlucks where they vanished in minutes, and even as a “study fuel” snack for my teens. The biggest evolution? Confidence! I know they’ll work, and that lets me relax and enjoy the process – and the inevitable happy noises around the table. That’s the real magic, isn’t it? Turning simple ingredients into shared joy. So go forth, make a mess, and create your own delicious memories!
Your Taco Cup Questions, Answered!
Let’s tackle those kitchen hiccups before they happen:
- Q: My cups are soggy! What went wrong?
A: Sogginess usually comes from excess moisture. Double-check you drained the canned tomatoes VERY well (squeeze them!). Also, ensure your beef filling isn’t too wet after simmering – it should be thick, not runny. Letting the cups cool in the tin for a full 5-7 minutes also helps them firm up. - Q: Can I make these ahead of time?
A: You can prep the filling (steps 2 & 3) up to 2 days ahead and store it covered in the fridge! Assemble the cups just before baking for the crispiest results. Baked cups are best fresh but can be reheated in a 350°F oven for 5-8 minutes to crisp up. - Q: Help! My wonton wrappers are sticking to the pan.
A: That cooking spray is non-negotiable! Be generous, especially in the corners. If one sticks badly, gently loosen it with a thin, flexible spatula while it’s still warm. Letting them cool slightly helps too. - Q: Can I use something besides wonton wrappers?
A: Wontons are ideal for crispiness. Egg roll wrappers, cut into quarters, can work but might be thicker/chewier. Tortillas? They won’t get as crisp in this method. For a gluten-free option, experiment with sturdy gluten-free wrappers if you can find them, but results may vary.
Nutritional Info (Per Taco Cup)
Calories: 160 | Protein: 9g | Carbohydrates: 10g | Fat: 9g
Note: Values are approximate and can vary based on specific ingredients used (e.g., cheese type, fat content of beef). Toppings like extra sour cream will add calories.

These Crispy Taco Cups are everything a weeknight—or game night—should be: easy, cheesy, and chock-full of flavor and fun. They’re proof that you don’t need fancy skills or complicated steps to create something memorable. You just need simple ingredients, a trusty muffin tin, and the willingness to embrace a little kitchen chaos.
Every golden, crunchy bite carries a bit of joy—whether it’s the sound of that perfect taco cup crunch, the laughter around the table, or the creative spins your family adds (hey veggie, breakfast, or pizza twists!). From sloppy first batches to perfected double-layer cups, their evolution has been a reminder: cooking is about shared moments, little victories, and a few delicious discoveries along the way.
So roll up those sleeves, preheat the oven, and get ready to fill your home with the aroma of cheesy, taco-filled cups. Because the real magic isn’t just in the recipe—it’s in the memories you’ll make while making them. Crunch on, chef!
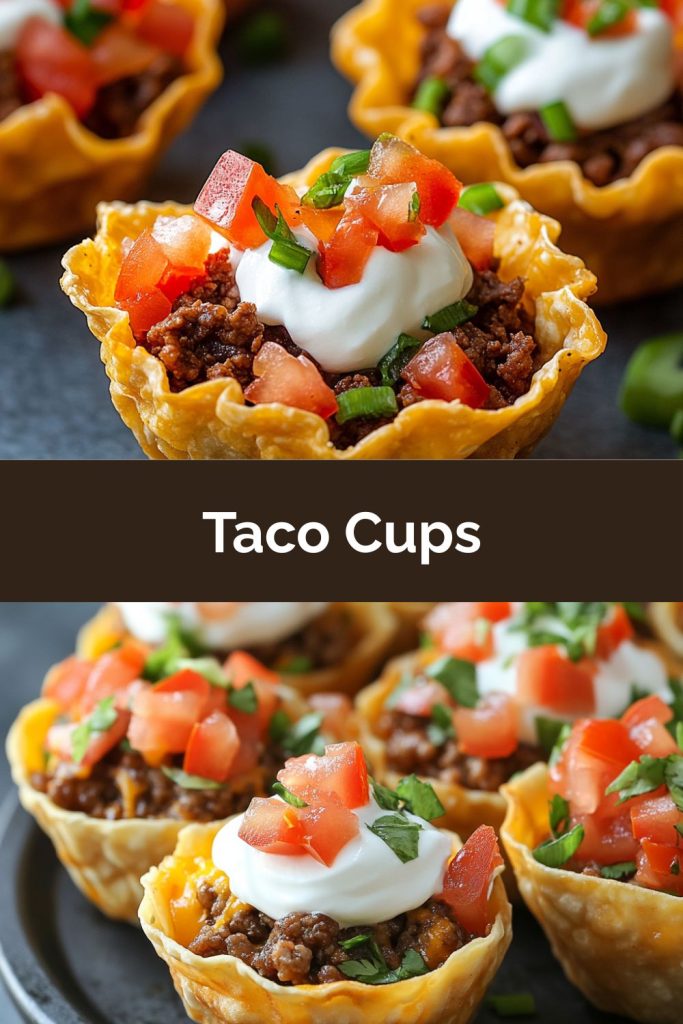
PrintTaco Cups

These Taco Cups bring me back to Friday game nights, when the whole family gathered around, cheering and snacking on these cheesy bites straight from the oven. Crunchy, savory, and layered with flavor, they’re a crowd-pleaser that looks fancy but comes together in a snap. Whether for parties or a fun twist on taco night, they’re guaranteed to disappear fast!
- Prep Time: 10 mins
- Cook Time: 12 mins
- Total Time: 22 minutes
- Yield: 12 taco cups 1x
Ingredients
2 tsp olive oil
1 lb ground beef (90% lean)
2 tbsp taco seasoning
Salt to taste
1 can (14 oz) petite diced tomatoes, drained
24 wonton wrappers
1¼ cups shredded cheddar cheese
½ cup sour cream
¼ cup sliced green onions
¼ cup diced fresh tomatoes
Cooking spray
Instructions
Preheat oven to 375°F (190°C). Spray a muffin tin with cooking spray.
In a skillet, heat olive oil over medium heat. Add ground beef and cook until browned.
Stir in taco seasoning, salt, and diced tomatoes. Simmer for 2–3 minutes.
Place one wonton wrapper into each muffin cup, pressing gently.
Add a spoonful of beef mixture and a sprinkle of cheese.
Top with a second wrapper, then more beef and cheese.
Bake 10–12 minutes, until golden and bubbly.
Let cool slightly, then top with sour cream, green onions, and fresh tomatoes.
Notes
Crispy, cheesy, and bite-sized—these little taco treats are big on flavor and fun!
Nutrition
- Calories: 160
- Fat: 9g
- Carbohydrates: 10g
- Protein: 9g