Let’s Bake a Slice of the Big Apple
Hey there, friend! Let’s talk about dessert royalty. I’m not talking about just any cake; I’m talking about the majestic, the towering, the gloriously creamy Ultimate New York Cheesecake. This isn’t just a dessert; it’s an event. It’s the kind of showstopper that makes people’s eyes go wide, the one that gets a silent, appreciative nod after the first bite. It’s rich, impossibly smooth, and sits proudly on a buttery graham cracker throne. And the best part? It’s a total labor of love, but I promise you, every single minute is worth it.
I know cheesecake can feel a little intimidating. The water bath! The potential cracks! But I’m here to be your guide, your personal cheerleader in an apron. We’re going to walk through this together, step-by-step, and I’m going to share all my favorite little hacks to ensure your cheesecake comes out looking and tasting like it came straight from the best bakery in Brooklyn. So, take a deep breath, preheat that oven, and let’s turn your kitchen into the most magical patisserie. Trust me, you’ve got this.
A Slice of Memory
PrintUltimate New York Cheesecake
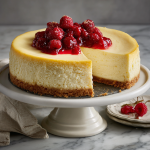
Tall, creamy, and incredibly smooth—this upgraded version of the classic New York cheesecake is rich with a velvety finish and a buttery graham cracker crust. We’ve doubled the servings and added a few twists to elevate the flavor while keeping the soul of the original intact. It’s the showstopper your dessert table needs.
- Total Time: 8 hrs (with chilling)
Ingredients
Crust:
440g (3½ cups) graham crackers, crushed
200g (10 tbsp) unsalted butter, melted
Cheesecake Batter:
1.2 kg (42 oz) cream cheese, softened
8 large eggs, room temperature
2 egg yolks, room temperature
400g (1½ cups) sour cream, room temperature
440g (2 cups) granulated sugar
4 tbsp cornstarch
4 tsp vanilla extract
Juice of 1 lemon
Twists: zest of 1 lemon + ½ tsp almond extract for depth
Instructions
Preheat oven to 325°F (163°C). Wrap pan with foil for water bath.
Combine crushed graham crackers and melted butter. Press into pan base and sides. Bake 10 minutes. Cool.
Beat cream cheese and sugar until smooth. Add cornstarch, vanilla, lemon juice, and zest. Mix in eggs one at a time, then yolks. Blend in sour cream.
Pour into pan. Tap gently to release air bubbles.
Bake in a water bath for 1 hr 30–40 min or until center is slightly jiggly.
Turn off oven, crack door, and let cool 1 hour. Chill at least 6 hours or overnight.
Nutrition
- Calories: 400
- Sugar: 22g
- Fat: 28g
- Carbohydrates: 30g
- Protein: 7g
My love affair with New York cheesecake started not in a fancy restaurant, but in my Nana’s wonderfully cluttered, always-warm kitchen. She was a no-nonsense woman from Queens who believed a good cheesecake could solve most of life’s problems. I remember standing on a wobbly stool, my small hands covered in graham cracker dust, as she let me press the crust into her ancient, well-loved springform pan. The smell of toasting crumbs and melting butter is a core memory for me.
She’d hum an old tune while meticulously mixing the filling, letting me lick the beaters only after she was absolutely sure every last lump was gone. “Smooth, Annie, smooth!” she’d say. The ritual of the water bath felt like alchemy, and the agonizing wait for it to cool overnight was a lesson in delicious patience. That first slice the next day, dense yet creamy, tangy yet sweet, was pure magic. This recipe is my homage to her—a little taller, a touch more nuanced with lemon and almond, but with the same soul-satisfying, velvety heart. It tastes like home.
Gathering Your Cheesecake Crew
Here’s your shopping list for this glorious creation. Using room temperature ingredients is non-negotiable for a smooth, lump-free batter. Plan ahead and take everything out about 2 hours before you start!
For the Crust:
- 440g (about 3½ cups) Graham Cracker Crumbs: The classic base. Their honey-kissed sweetness is the perfect partner for the rich filling. Chef’s Tip: You can buy pre-crushed, but pulsing whole crackers in a food processor gives you more control over the texture. For a fun twist, try biscoff or ginger snaps!
- 200g (10 tbsp) Unsalted Butter, melted: This is the glue that holds our crunchy foundation together. Using unsalted lets us control the salt level. Make sure it’s nicely melted and slightly cooled.
For the Cheesecake Batter:
- 1.2 kg (42 oz) Full-Fat Cream Cheese, softened: This is the star. Full-fat is essential for the proper texture and richness. I always use block cream cheese, not the spreadable kind in a tub. Philadelphia is my go-to for consistent results.
- 440g (2 cups) Granulated Sugar: Sweetens the deal without adding extra flavor. We’re creaming this with the cheese to help aerate the mixture slightly.
- 4 tbsp Cornstarch: Our secret weapon! It’s a stabilizer that helps prevent cracking and gives the cake a beautiful, sliceable firmness without making it starchy.
- 8 Large Eggs + 2 Yolks, room temperature: The eggs provide structure and lush richness. The extra yolks amp up the velvety, custardy texture. Room temp is a must to avoid seizing up the batter!
- 400g (1½ cups) Full-Fat Sour Cream, room temperature: The key to that iconic tang and incredible creaminess. It also helps create a smoother finish on top.
- 4 tsp Pure Vanilla Extract: Use the good stuff! It adds a beautiful warmth and depth of flavor.
- Juice of 1 Lemon: Brightens all the flavors and cuts through the richness.
- Zest of 1 Lemon: Our first “twist.” The zest adds a pop of bright, aromatic citrus oil that makes the flavor sing.
- ½ tsp Almond Extract: Our second “twist.” It’s subtle, but it adds a incredible layer of depth and complexity that people won’t be able to quite place. It’s a game-changer!
Let’s Build Some Magic: Step-by-Step
Okay, team! Aprons on. Let’s do this. Read through all the steps once before you begin. You’ll feel like a pro.
- Prep Like a Pro: Preheat your oven to 325°F (163°C). Take a 9 or 10-inch springform pan and tightly wrap the bottom and sides with a double layer of heavy-duty aluminum foil. This is our waterproof armor for the water bath. Trust me, you don’t want a leak! For extra security, you can also place the wrapped pan in a large oven bag. Lightly grease the inside of the pan.
- Make the Crust: In a medium bowl, stir together the graham cracker crumbs and melted butter until the mixture resembles wet sand. It should hold together when you pinch it. Pour the crumbs into your prepared pan and press them firmly and evenly into the bottom and about two-thirds of the way up the sides. I like to use the bottom of a flat measuring cup to really pack it down and get a clean edge. Bake the crust for 10 minutes, then set it on a wire rack to cool. Reduce the oven temp to 300°F (150°C).
- Start the Batter: In the bowl of a stand mixer fitted with the paddle attachment (or using a large bowl and a hand mixer), beat the softened cream cheese on medium-low speed until it’s completely smooth and creamy, about 2-3 minutes. Scrape down the bowl and beater thoroughly. This is the most important step for a lump-free cake! Add the sugar and cornstarch and beat for another 2 minutes, scraping down the bowl again. The mixture should look light and fluffy.
- Incorporate Flavors & Eggs: Beat in the vanilla extract, lemon juice, lemon zest, and almond extract until just combined. Now, with the mixer on low speed, add the eggs and egg yolks one at a time, mixing until each egg is just incorporated before adding the next. Do not overmix after adding the eggs! Overbeating incorporates too much air and can cause the cheesecake to puff up and crack during baking. Scrape the bowl down once more after the last egg is mixed in.
- Finish the Batter: Finally, gently fold in the room temperature sour cream with a spatula until the batter is homogenous and luxurious. It should be thick, smooth, and beautifully creamy.
- Assemble and De-bubble: Place your foil-wrapped springform pan into a large roasting pan. Pour the batter into the cooled crust. Gently tap the pan on the counter 5-6 times to release any large air bubbles that could create holes in your finished cake.
- The Water Bath: Carefully place the roasting pan in the preheated oven. Then, pour hot water into the roasting pan until it comes about halfway up the sides of the springform pan. This water bath creates a steamy environment for gentle, even cooking, which is the secret to that flawless texture and crack-free top.
- Bake: Bake for 1 hour 30 minutes to 1 hour 40 minutes. The cake is done when the edges are set but the center still has a slight jiggle—like Jell-O—when you gently nudge the pan. The center should read about 150°F on an instant-read thermometer.
- The Crucial Cool Down: Turn off the oven. Crack the oven door open with a wooden spoon and let the cheesecake cool slowly in the oven for 1 hour. This gradual temperature change is the final key to preventing cracks! After an hour, remove the cheesecake from the water bath, carefully remove the foil, and place it on a wire rack to cool completely to room temperature. Then, cover it loosely and refrigerate for at least 6 hours, but preferably overnight. This patience is the hardest part, but it allows the flavors to meld and the texture to set perfectly.
How to Serve Your Masterpiece
The big reveal! Run a thin, sharp knife under hot water, wipe it dry, and carefully slide it between the cake and the pan to loosen the edges before unclasping the springform ring. For the cleanest slices, dip your knife in hot water and wipe it clean between each cut. Serve it plain and proud to let its pure flavor shine, or gild the lily with a drizzle of fresh raspberry sauce, a dollop of whipped cream, or a scattering of macerated berries. A simple dusting of powdered sugar works too! Each magnificent slice is a celebration.
Make It Your Own: Creative Twists
- Chocolate Swirl: Melt ½ cup of chocolate chips with a splash of cream. Drop dollops onto the filled batter and use a knife to swirl it marbled perfection.
- Lemon Blueberry: Fold 1 cup of fresh blueberries tossed in 1 tbsp of flour into the batter. Up the lemon zest for a burst of sunshine.
- Dulce de Leche: Swap out ½ cup of the sugar for 1 cup of dulce de leche. Swirl more on top after baking for a caramel lover’s dream.
- Gluten-Free: Use certified gluten-free graham crackers or gluten-free vanilla cookies for the crust. The filling is naturally GF!
Anna’s Chef Notes
This recipe has evolved over a decade of baking! The almond extract was a happy accident one day when I was out of vanilla—best mistake ever. I’ve also learned that the brand of cream cheese truly matters. Some store brands are softer and have more water content, which can lead to a less stable cake. I always spring for Philadelphia blocks for guaranteed perfection.
And a funny story: I once was so excited to serve a cheesecake that I forgot to loosen the edges. I unclasped the ring and a perfect quarter of the cake just…stayed behind. We now call it the “cheesecake landslide” incident. We still ate it with a spoon, but lesson learned! Always, always run that knife around the edge.
Your Questions, Answered
Q: Can I use a different pan if I don’t have a springform?
A: A springform pan is highly recommended for this tall cake, as it allows for easy removal without damaging it. In a pinch, you can use a deep 9-inch cake pan lined with parchment paper slings for lifting, but getting it out cleanly is trickier.
Q: Why did my cheesecake crack?
A> The top three culprits are: 1) Overmixing the batter after adding the eggs (incorporates too much air), 2) A drastic temperature change (cooling it too quickly), or 3) Overbaking. Following the steps to bring ingredients to room temp, using a water bath, and letting it cool slowly in the oven are your best defenses. And hey, if it cracks, just cover it with whipped cream or fruit! It will still taste incredible.
Q: How do I know it’s done without overbaking it?
A: The “jiggle test” is your best friend. The edges should look set, but the center (about a 3-inch circle) should have a slight, gentle jiggle when you tap the pan. It will firm up dramatically during the cooling process. An instant-read thermometer should read 150°F in the center.
Q: Can I freeze cheesecake?
A: Absolutely! Bake and cool it completely. Wrap the whole cheesecake (or individual slices) tightly in a few layers of plastic wrap and then aluminum foil. Freeze for up to 3 months. Thaw overnight in the refrigerator before serving.
Nutritional Information (Per Slice, based on 20 slices)
Calories: ~400 | Fat: 28g | Saturated Fat: 16g | Carbohydrates: 30g | Sugar: 22g | Protein: 7g | Cholesterol: 145mg | Sodium: 280mg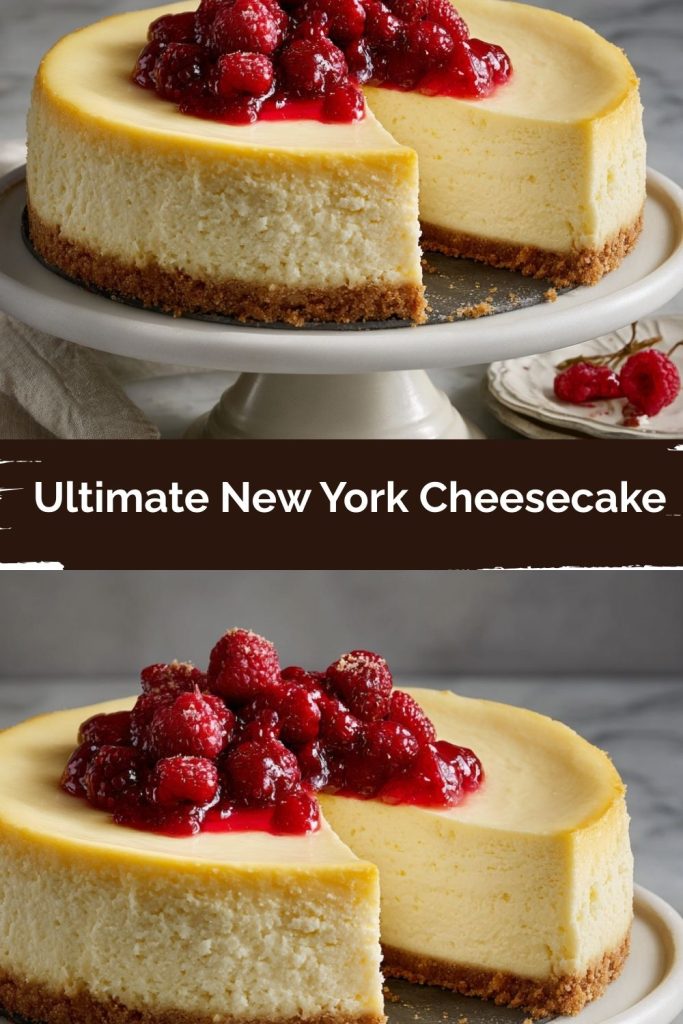
Final Thoughts: A Cheesecake Worth the Wait
The Ultimate New York Cheesecake is more than just a dessert—it’s an experience. From the buttery crunch of that graham cracker crust to the silky, tangy filling that melts on your tongue, every bite feels like a celebration. Yes, it asks for a little patience and a bit of care, but that’s what makes the first forkful so rewarding.
This is the cake you bring out when you want to impress, but it’s also the cake you make on a quiet weekend just because you deserve something extraordinary. For me, it will always taste like Nana’s kitchen—warm, bustling, and filled with love—but I hope when you make it, it takes on new meaning in your story too.
So go ahead, wrap that pan in foil, trust the jiggle, and let your cheesecake cool in its own sweet time. When you finally cut that first slice, you’ll know: this isn’t just cheesecake, it’s dessert royalty. 👑🍰