***
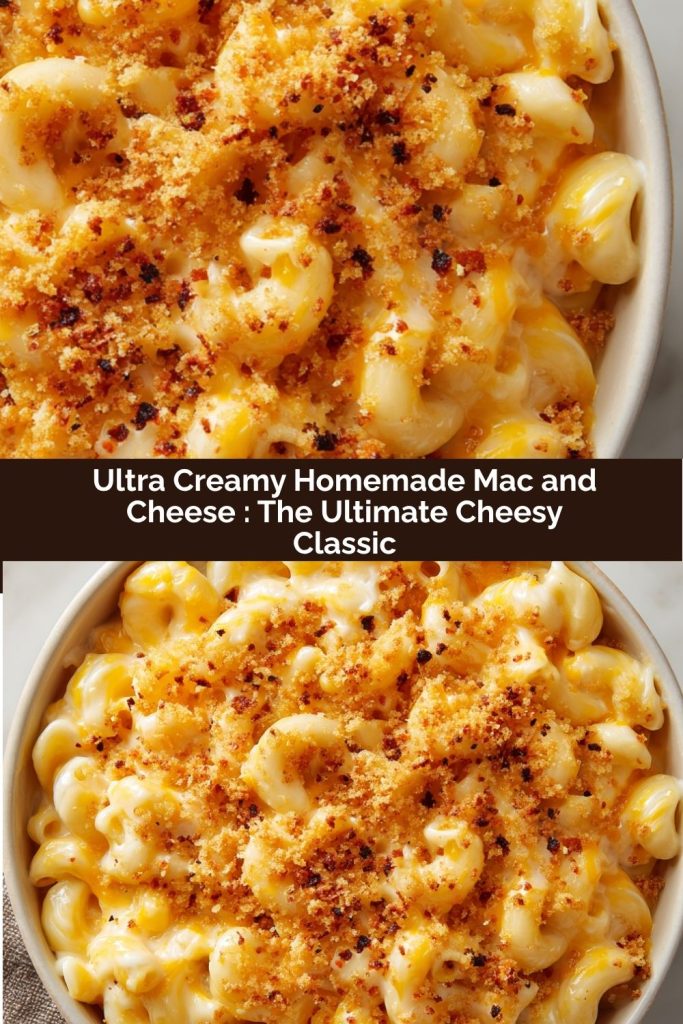
Ultra Creamy Homemade Mac and Cheese – The Ultimate Cheesy Classic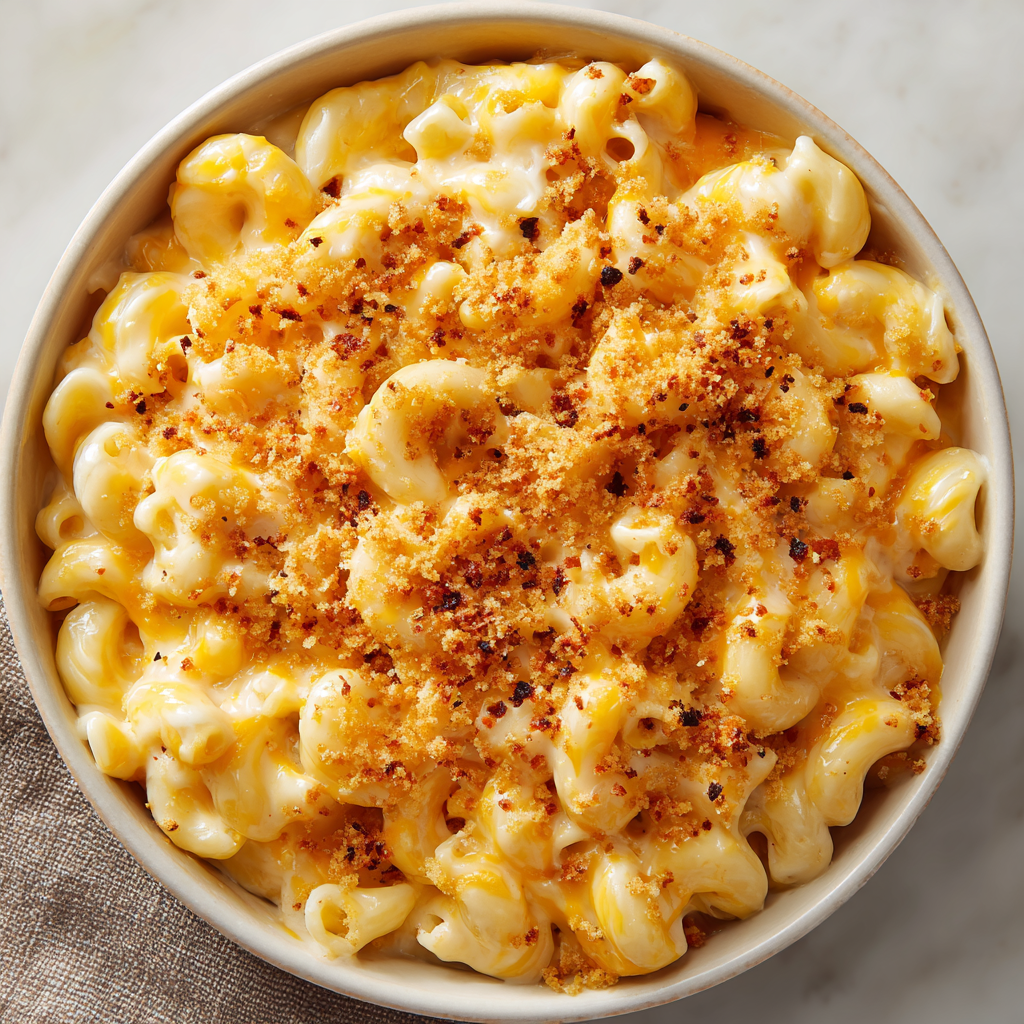
Hey there, friend! Anna here. Can we talk about mac and cheese for a second? I’m not talking about the kind from a blue box (though we’ve all been there, and there’s a time and a place for everything!). I’m talking about the real deal. The kind that bubbles and beckons from the oven, with a sauce so velvety and rich it feels like a warm hug from the inside out.
This isn’t just a side dish; it’s a centerpiece. It’s the star of the potluck, the hero of a tough day, and the ultimate celebration of simple, beautiful ingredients. My mission has always been to make cooking joyful, not stressful, and this recipe is the perfect example. We’re creating a from-scratch cheese sauce that’s miles away from anything powdered, and I promise, it’s easier than you think.
So, if you’ve ever wondered how to achieve that dreamy, creamy, restaurant-quality mac and cheese at home, you’ve come to the right place. Grab your favorite wooden spoon and let’s turn this ordinary day into something downright delicious. We’re about to create some kitchen magic together!
A Pot of Gold at Grandma’s House
PrintUltra Creamy Homemade Mac and Cheese : The Ultimate Cheesy Classic
This Homemade Mac and Cheese is the definition of comfort food done right—rich, ultra-creamy, and layered with bold cheddar flavor. Whether served as a cozy main dish or a decadent side, this version upgrades the classic with a smooth cheese sauce and a touch of spice. It’s a family favorite that never goes out of style.
- Prep Time: 20 minutes
- Cook Time: 20 minutes
- Total Time: 40mins
- Yield: 20 1x
Ingredients
32 oz short pasta (elbow macaroni, shells, or cavatappi work beautifully)
4 cups sharp cheddar cheese, shredded (divided)
4 cups sharp white cheddar cheese, shredded (divided)
8 tbsp unsalted butter
1/2 cup all-purpose flour
4 cups milk (whole or 2% for extra creaminess)
1 tsp salt
1/2 tsp black pepper
1/2 tsp paprika
1/2 tsp garlic powder
Optional twists:
1/2 tsp Dijon mustard for a flavor boost
1/4 tsp cayenne or hot sauce for subtle heat
1/2 cup grated Parmesan for depth
Toasted buttery breadcrumbs or crushed Ritz crackers on top for crunch
Instructions
Cook the pasta: Bring a large pot of salted water to a boil. Cook pasta just to al dente, then drain and set aside.
Make the roux: In a large saucepan, melt butter over medium heat. Whisk in the flour and cook for 1–2 minutes, stirring constantly, until bubbly and golden.
Build the sauce: Gradually whisk in the milk. Cook, whisking often, until the mixture thickens, about 4–6 minutes.
Add cheese & seasoning: Reduce heat to low. Stir in half of each cheese, salt, pepper, paprika, garlic powder, and any optional ingredients. Stir until cheese is melted and sauce is smooth.
Combine: Add cooked pasta and stir to coat. Fold in remaining cheese for pockets of gooey goodness.
Serve: Serve hot as-is, or transfer to a baking dish, top with crumbs or extra cheese, and broil for 3–5 minutes for a golden finish.
Nutrition
- Calories: 390 per serving
- Fat: 21g
- Carbohydrates: 36g
- Protein: 17g
My love affair with mac and cheese started in my grandma’s kitchen. It was a tiny, sunlit room that always smelled like fresh bread and possibility. Every Sunday after church, she’d make her “famous” mac and cheese. To me, it was a pot of pure gold. She didn’t use a recipe, of course. She’d just hum an old hymn, grate a mountain of cheddar, and work her magic with a whisk and a well-loved saucepan.
The best part was the ritual. As the cheese sauce came together, she’d let me dip a piece of bread into the pot for a “chef’s taste test.” It was our little secret. That first bite, all warm and gooey, felt like the very definition of love. She taught me that the secret ingredient wasn’t a specific cheese or a fancy technique—it was the joy of making something with your own two hands to share with the people you love. This recipe is my homage to her, a little nod to the past that continues to create happy memories in my own kitchen today.
Your Blueprint for Cheesy Perfection
Great food starts with great ingredients! Here’s everything you’ll need to build our masterpiece. Don’t be intimidated by the list; I’ve included all my favorite tips and swaps to make this recipe work for you.
- 32 oz short pasta (elbow macaroni, shells, or cavatappi): The vessel for all that creamy goodness! I love cavatappi because its corkscrew shape really holds onto the sauce. Chef’s Insight: Always cook your pasta in well-salted water—it should taste like the sea! This is your only chance to season the pasta itself.
- 4 cups sharp cheddar cheese, shredded (divided) & 4 cups sharp white cheddar cheese, shredded (divided): This is the dynamic duo! Using a mix of orange and white cheddar gives you a beautiful color and a complex, bold flavor. Critical Tip: BUY THE BLOCKS AND SHRED THEM YOURSELF! Pre-shredded cheese is coated in anti-caking agents that can make your sauce grainy. A little extra arm workout is 100% worth it for that silky-smooth texture.
- 8 tbsp unsalted butter: The rich base for our roux, which will thicken our sauce to perfection.
- 1/2 cup all-purpose flour: The other half of the roux dream team. We’ll cook it just enough to get rid of the raw flour taste.
- 4 cups milk (whole or 2% for extra creaminess): The liquid base of our sauce. I highly recommend whole milk for the ultimate creamy experience, but 2% works beautifully, too.
- 1 tsp salt, 1/2 tsp black pepper, 1/2 tsp paprika, 1/2 tsp garlic powder: Our flavor brigade! The paprika adds a subtle warmth and gorgeous color, while the garlic powder gives a savory backbone. You can adjust these to your taste.
Optional, but Highly Recommended Twists:
- 1/2 tsp Dijon mustard: Don’t worry, it won’t taste mustardy! It just adds a incredible depth of flavor that makes the cheese taste even more cheesy.
- 1/4 tsp cayenne or a few dashes of hot sauce: Not for heat, but for a little “hmm, what is that?” in the background. It brightens everything up!
- 1/2 cup grated Parmesan: For a salty, nutty kick that takes the flavor profile to a whole new level.
- Toasted buttery breadcrumbs or crushed Ritz crackers on top: Because that buttery, crunchy contrast against the creamy pasta is pure heaven.
Let’s Build That Creamy Dream: Your Step-by-Step Guide
Okay, team! Aprons on? Let’s do this. I’ll walk you through every step, sharing all my little kitchen hacks to ensure your mac and cheese is absolutely flawless.
Step 1: Cook the Pasta to Perfection
Bring a large pot of heavily salted water to a rolling boil. Add your pasta and cook it just until al dente according to the package directions. This is crucial! We’re going to bake/broil this later, and mushy pasta is a sad pasta. Chef’s Hack: Before you drain the pasta, reserve about a cup of the starchy pasta water. This liquid gold is our secret weapon for thinning the sauce later if it gets too thick. Drain the pasta and set it aside. You don’t need to rinse it—the starch helps the sauce cling!
Step 2: Master the Roux (The Heart of the Sauce)
In your large, empty saucepan (you can even use the pasta pot!), melt the butter over medium heat. Once it’s foaming, sprinkle in the flour. Now, grab your whisk and get ready to dance! Whisk constantly for a full 1-2 minutes. You’re looking for a bubbly, pale golden paste that smells a little nutty. This cooks out the raw flour taste and is the foundation for our thick, luscious sauce. Don’t walk away from the roux! It can burn in a heartbeat.
Step 3: Build the Creamy Base
Now, slowly pour in the milk, just a splash at first, whisking like your cheesy dreams depend on it (they do!). This initial slow incorporation prevents lumps. Once the first splash is incorporated, you can pour in the rest of the milk in a steady stream, whisking the whole time. Keep whisking often as the mixture heats up. It will feel thin at first, but have faith! In about 4-6 minutes, it will magically thicken and coat the back of a spoon. You’ve just made a beautiful béchamel sauce! Fancy, right?
Step 4: The Big Cheese Melt-Down
Reduce the heat to low. It’s cheese time! Stir in your seasonings: salt, pepper, paprika, garlic powder, and any of the optional twists like Dijon or cayenne. Now, gradually add in HALF of your shredded cheddar and white cheddar cheeses. Stir with a wooden spoon or spatula until the cheese is fully melted and the sauce is incredibly smooth. Chef’s Tip: Adding the cheese off the heat prevents it from breaking and becoming oily. Low and slow is the way to go!
Step 5: The Grand Finale – Combine and Create Gooey Pockets
Add your perfectly cooked, drained pasta to the glorious cheese sauce. Stir gently until every single noodle is coated in that velvety goodness. Now, for the pro-move: fold in the remaining half of the shredded cheese. Don’t stir it in completely! You want little pockets and streaks of cheese throughout. These will create amazing, molten pools of cheesy delight in the final dish.
Step 6: To Serve or To Scorch?
You have two fantastic options here. You can serve it directly from the pot for the ultimate creamy, stovetop mac and cheese experience. OR, for a little extra drama, transfer it to a buttered baking dish, top with buttery breadcrumbs or crushed Ritz crackers and a little extra cheese, and pop it under the broiler for 3-5 minutes until the top is golden and gloriously crispy.
How to Serve Your Masterpiece
Presentation is part of the fun! I love serving this family-style, right in the colorful baking dish I used under the broiler. The contrast of the golden-brown top against the creamy interior is just gorgeous. For a cozy night in, a simple scoop in a warm bowl is all you need. If you’re feeling fancy, garnish with a little fresh chopped parsley or chives for a pop of color and freshness. This mac and cheese is rich, so it pairs beautifully with a simple green salad with a sharp vinaigrette to cut through the creaminess, or alongside some roasted broccoli or garlicky sautéed greens.
Make It Your Own: Delicious Twists & Swaps
The beauty of this recipe is its versatility! Once you’ve mastered the base, feel free to get creative.
- The Smoky BBQ Lover: Stir in 1 cup of shredded pulled pork and 2 tablespoons of your favorite BBQ sauce into the finished mac. Top with crispy fried onions.
- The Buffalo Chicken Fanatic: Fold in 2 cups of shredded rotisserie chicken tossed in 1/3 cup of buffalo sauce. Swap the paprika for 1/2 teaspoon of celery seed and top with crumbled blue cheese.
- Lobster Mac for a Special Occasion: Gently fold in 1-2 cups of cooked lobster meat right before baking. A pinch of Old Bay seasoning in the sauce is divine here.
- Gluten-Free & Lighter: Use your favorite gluten-free pasta and swap the all-purpose flour for a 1:1 gluten-free flour blend. For a lighter version, you can use a lower-fat milk, but the sauce won’t be *quite* as luxuriously creamy.
Anna’s Kitchen Notes & Stories
This recipe has been a living, breathing thing in my kitchen for years. I’ve made it for new parents, for grieving friends, for birthday parties, and for countless “I just need mac and cheese” Tuesdays. One of my favorite kitchen fails turned into a win: I once ran out of cheddar and had to use a wild mix of Gruyère, Monterey Jack, and a little bit of Gouda. My family declared it the “best version ever!” So don’t be afraid to play with your cheese blends.
The recipe has evolved, too. The Dijon mustard and cayenne were happy accidents that are now non-negotiable in my house. And the “fold in the second half of the cheese” trick? I learned that after my son complained that one batch was “too smooth.” Kids keep you honest! The goal is a dish that makes you and your people happy, so make it your own.
Your Mac and Cheese Questions, Answered!
Q: My cheese sauce turned out grainy/oily. What happened?
A: Oh, I’ve been there! This is almost always caused by one of two things: 1) Using pre-shredded cheese (those anti-caking agents are the culprit!), or 2) Adding the cheese to the sauce when it’s too hot. The high heat can cause the fats to separate from the proteins. Always shred your own cheese and add it off the direct heat, over a low flame.
Q: Can I make this mac and cheese ahead of time?
A: Absolutely! Assemble the mac and cheese (without the crunchy topping) in your baking dish, let it cool completely, cover, and refrigerate for up to 2 days. When you’re ready, bake it at 350°F (175°C) for 25-35 minutes, until hot and bubbly. You may need to add a splash of milk before baking if the sauce has thickened up too much in the fridge.
Q: My sauce seems too thick. How can I thin it out?
A> No problem! This is where that reserved pasta water comes in. Just whisk in a tablespoon or two at a time until it reaches your desired consistency. The starch in the water helps thin it without making it watery. A little warm milk works, too.
Q: The flavor is a little bland. How can I fix it?
A> Seasoning is key! The cheese and salt levels can vary. Always taste at the end and don’t be shy. Add more salt and black pepper in small increments. A dash of hot sauce or Worcestershire sauce can also work wonders to wake up all the flavors.
Nutritional Information*
Servings: 20 | Prep Time: 20 minutes | Cook Time: 20 minutes
Calories: ~390 | Protein: 17g | Carbs: 36g | Fat: 21g
*Please note: Nutritional information is an estimate and can vary based on the specific ingredients you use. This is provided as a courtesy only.
💛 Final Thoughts
There’s something magical about a dish that feels like home no matter where you are. This homemade mac and cheese is that kind of comfort — creamy, golden, and filled with love in every bite. It’s more than a recipe; it’s a memory in the making, a reminder that sometimes the simplest meals bring the biggest joy.
Whether you’re serving it at a holiday table, sharing it at a potluck, or enjoying a quiet bowl after a long day, this recipe is proof that from-scratch cooking doesn’t have to be complicated to be extraordinary. So grab that wooden spoon, whisk with heart, and let the cheese pull speak for itself — you just made pure happiness.