***
Valentine’s Day Heart Thumbprint Cookies: A Little Jar of Sunshine in Every Bite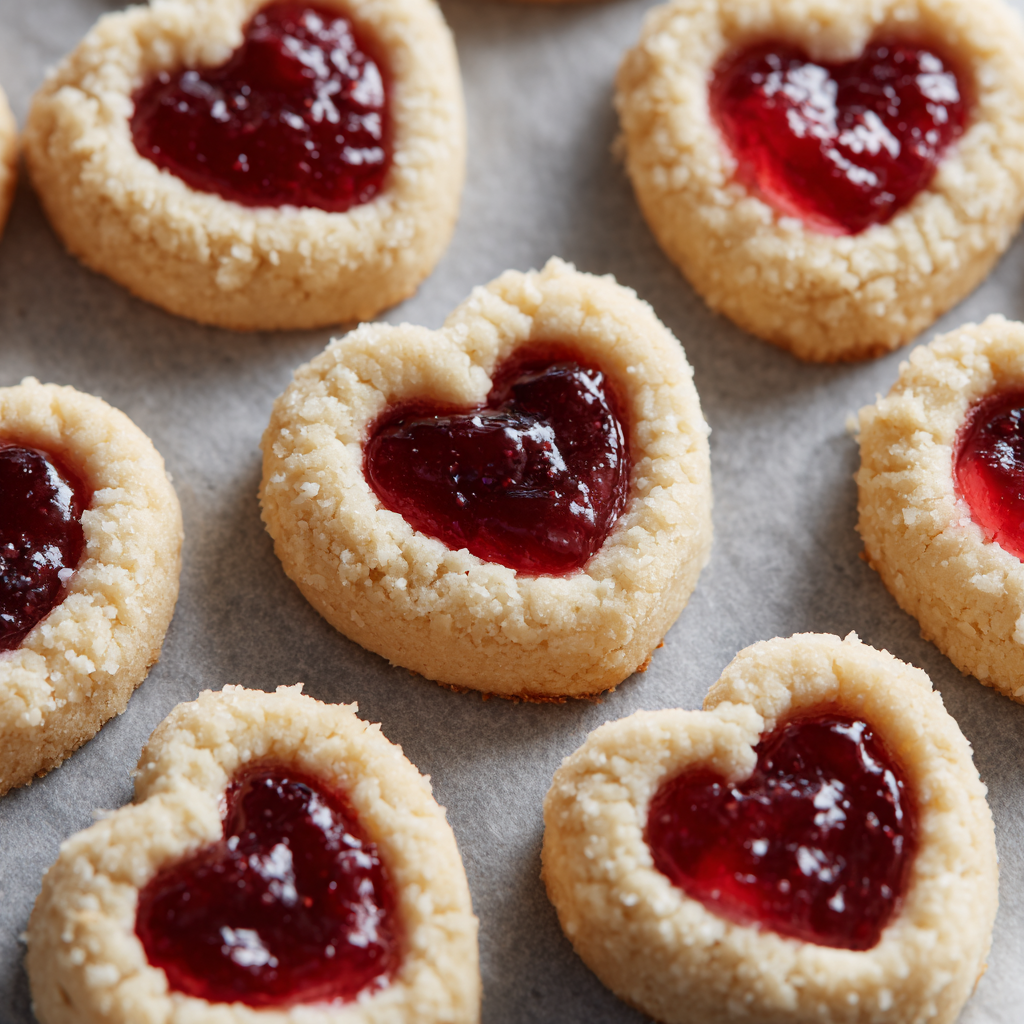
Hey there, friend! Anna here. Can we talk about Valentine’s Day for a second? I think sometimes we put way too much pressure on it. Fancy dinners that require a dozen pans, reservations made months in advance, and this overwhelming need for everything to be perfect. But what if the most perfect, memorable moments come from something simple, sweet, and made entirely with love?
That’s where these little gems come in. I’m so excited to share my recipe for Valentine’s Day Heart Thumbprint Cookies with you. Imagine the most buttery, tender, melt-in-your-mouth cookie you’ve ever had. Now, picture it with a charming, heart-shaped center, glistening with your favorite jam. They’re like little edible Valentines, and I promise you, they pack more magic and meaning than any store-bought box of chocolates.
This recipe is my love letter to joyful, uncomplicated baking. We’re using almond flour for an incredible texture, a hint of almond extract for that “what is that amazing flavor?” factor, and the simplest technique that feels more like play than work. Whether you’re baking them with your partner, your kids, or just for yourself as a beautiful act of self-love, these cookies are here to turn an ordinary afternoon into something truly special. So, preheat that oven, grab your favorite jar of jam, and let’s bake up a whole lot of happy together.
The Cookie That Started with My Grandma’s Apron Strings
PrintValentine’s Day Heart Thumbprint Cookies : Buttery, Jam-Filled & Irresistibly Sweet

Jam-Filled Love in Every Bite:
These Valentine’s Day Heart Thumbprint Cookies are a sweet celebration in cookie form. Buttery, tender, and lightly crisp at the edges, they’re made even more magical with a heart-shaped center filled with your favorite jam. Whether you use blueberry, raspberry, or a combo of both, they’re a festive (and year-round-worthy) treat that looks as lovely as it tastes.
- Prep Time: 10 minutes
- Cook Time: 12 minutes
- Total Time: 22 minutes
- Yield: 15 cookies 1x
Ingredients
1½ cups all-purpose flour (scooped and leveled)
1½ cups almond flour (scooped and leveled)
1 tsp salt
1 cup unsalted butter, softened
½ cup + 2 tbsp granulated sugar
1 tsp vanilla extract
½ tsp almond extract
⅔ cup jam (blueberry, raspberry, or your favorite)
Optional Twists:
Mix two jams for a marbled heart effect
Add a pinch of lemon zest to the dough for brightness
Dip half of each cookie in melted white chocolate after baking for an extra treat
Instructions
Preheat oven to 350°F (175°C) and line a baking sheet with parchment paper.
In a bowl, whisk together all-purpose flour, almond flour, and salt.
In another bowl, cream softened butter and sugar until light and fluffy (about 2-3 minutes).
Beat in vanilla and almond extracts. Gradually add the dry ingredients and mix until a soft dough forms.
Roll dough into 1-inch balls and place on the baking sheet. Use your thumb or the back of a small spoon to make a heart-shaped indent in the center of each.
Fill each heart with about ½ teaspoon of jam.
Bake for 12–14 minutes or until edges are just golden. Cool completely before serving.
Nutrition
- Calories: 160 per cookie
- Sugar: 9g
- Fat: 9g
- Carbohydrates: 18g
- Protein: 2g
Every time I make these thumbprint cookies, I’m instantly transported back to my grandmother’s kitchen. It wasn’t a fancy, magazine-worthy space, but it was the heart of her home, always smelling of sugar, butter, and love. She had this old, floral apron she’d tie around me, and I’d stand on a step stool, ready for my most important job: making the “thumbprints.”
Her version was a simple sugar cookie, but she’d let me press my tiny thumb into the center of each soft dough ball. She’d call them “Anna’s special buttons.” Then, with the seriousness of a master pastry chef, I’d carefully spoon bright red raspberry jam into each one. Watching them come out of the oven, all golden and jeweled, felt like pure magic. It wasn’t about perfection; it was about the joy of creating something together. That feeling—the connection, the nostalgia, the shared accomplishment—is the true soul of this recipe. I’ve just given it a little Valentine’s Day twist, turning my “buttons” into hearts.
Gathering Your Cookie-Making Magic
One of the things I love most about this recipe is how the ingredients work together to create something truly special. Here’s what you’ll need and why each one matters:
- 1½ cups all-purpose flour (scooped and leveled): This is our trusty base. A quick tip for measuring: fluff your flour with a spoon, gently spoon it into your measuring cup, and level it off with a knife. This prevents packing in too much flour, which can make the cookies dry.
- 1½ cups almond flour (scooped and leveled): This is the secret weapon! Almond flour gives these cookies an incredibly tender, almost shortbread-like crumb and a rich, nutty flavor that pairs beautifully with the jam. Chef’s Insight: If you need a nut-free version, you can replace this with an additional 1 ½ cups of all-purpose flour, but the texture will be more classic sugar cookie than melt-in-your-mouth.
- 1 tsp salt: Never underestimate the power of salt in sweets! It balances all the sweetness and makes the buttery flavor pop.
- 1 cup (2 sticks) unsalted butter, softened: The star of the show! Using softened butter is non-negotiable for creating a light and fluffy cookie. Pro Tip: Your butter is perfectly softened when you can press your thumb into it easily, but it still holds its shape. It shouldn’t be greasy or melted.
- ½ cup + 2 tbsp granulated sugar: We use just the right amount to sweeten the dough without overpowering the jam.
- 1 tsp vanilla extract: The classic flavor we all know and love. It provides a warm, sweet base note.
- ½ tsp almond extract: This is my favorite little trick! It amplifies the flavor from the almond flour and gives the cookies a sophisticated, bakery-quality taste. If you’re not a fan, you can simply use an extra ½ tsp of vanilla.
- ⅔ cup jam (blueberry, raspberry, or your favorite!): The jewel in the crown! I adore seedless raspberry for its vibrant color and classic taste, but feel free to use whatever makes your heart sing. Substitution Tip: For a cleaner look and to prevent running, you can gently warm the jam and stir it to make it more fluid before filling the cookies.
Let’s Make Some Magic: Baking Your Heart Cookies Step-by-Step
Ready to get your hands a little dusty with flour? This process is as fun as it is easy. I’ve packed each step with my favorite tips to ensure your cookie success!
- Preheat and Prep. First things first, preheat your oven to 350°F (175°C). This gives it plenty of time to reach the perfect, steady temperature. Line a baking sheet with parchment paper. This little step is my number one hack for preventing sticking and making cleanup an absolute breeze. No parchment? A silicone baking mat works wonderfully too!
- Whisk the Dry Team. In a medium bowl, whisk together your all-purpose flour, almond flour, and salt. Whisking, instead of sifting, does a great job of combining these ingredients and breaking up any little clumps in the almond flour. We’re building a solid foundation for our cookie dough.
- Cream the Butter & Sugar. In a separate, larger bowl, beat the softened butter and sugar together. Now, here’s where a little patience pays off in texture! Beat them on medium-high speed for a full 2-3 minutes. You’re not just mixing them; you’re creaming them. This incorporates tiny air bubbles into the dough, which is what gives us that lovely, light texture instead of a dense cookie. You’ll know it’s ready when the mixture looks pale yellow and fluffy.
- Bring in the Flavor. Beat in the vanilla and almond extracts until they’re fully incorporated. Your kitchen should be smelling pretty amazing right about now!
- Combine with Care. Now, gradually add your dry flour mixture to the wet butter mixture. I like to add it in two or three parts. Mix on low speed just until the flour disappears and a soft dough forms. This is crucial! Overmixing at this stage can develop the gluten in the flour and lead to tougher cookies. A few streaks of flour are okay; they’ll get worked in when we roll the balls.
- Shape with Love. Time for the fun part! Roll the dough into 1-inch balls. I use a small cookie scoop for uniformity, but a tablespoon measure works great too. Place them about 2 inches apart on your prepared baking sheet. They don’t spread a ton, but they need a little room to breathe.
- Create the Heart. This is the signature move! Instead of just pressing with your thumb, we’re making a heart shape. The easiest way is to use the rounded back of a ¼ teaspoon measuring spoon. Press it into the center of the dough ball at a slight angle to create a “V” or heart shape. Gently wiggle it to define the shape. Don’t press all the way to the bottom! You want a nice, deep well to hold all that jammy goodness.
- Fill with Jam. Using a second small spoon or a piping bag for precision, fill each heart-shaped indent with about ½ teaspoon of your chosen jam. Don’t overfill, or it might bubble over during baking. Seeing those little red hearts appear is just the best feeling, isn’t it?
- Bake to Golden Perfection. Pop your beautiful creations into the preheated oven and bake for 12-14 minutes. You’re looking for the edges to be just lightly golden. The centers might still look a little soft, and that’s perfect—they’ll firm up as they cool. This is the secret to a tender cookie!
- The Patient Cool-Down. I know, I know, this is the hardest part! But let the cookies cool on the baking sheet for at least 10-15 minutes before transferring them to a wire rack to cool completely. This allows them to set properly so they don’t fall apart when you pick them up.
Sharing the Sweetness: How to Serve Your Masterpiece
Once your cookies are completely cool, it’s time for the grand finale! I love arranging them on a beautiful wooden board or a vintage cake stand. Dust them with a light snowfall of powdered sugar for an extra-festive touch. They’re perfect with a cold glass of milk for an afternoon treat, or alongside a cup of hot tea or coffee for a cozy evening in. Package a few in a cute cellophane bag tied with a ribbon for the sweetest, most heartfelt homemade gift imaginable.
Make It Your Own! Delicious Recipe Twists
The beauty of this recipe is its versatility! Feel free to play and make it your own. Here are a few of my favorite variations:
- The Marbled Heart: Can’t decide between raspberry and apricot? Use both! Spoon a tiny bit of each jam into the heart and gently swirl them with a toothpick for a gorgeous, marbled effect.
- Citrus Zing: Add the finely grated zest of one lemon or orange to the dough when you cream the butter and sugar. The bright, citrusy notes cut through the richness beautifully.
- Chocolate-Dipped Dream: After the cookies are completely cool, melt some white or dark chocolate. Carefully dip half of each cookie in the chocolate, let the excess drip off, and place it on parchment paper to set. Sprinkle with Valentine’s sprinkles while the chocolate is still wet!
- Nutty Delight: Before baking, you can roll the dough balls in finely chopped pecans or walnuts for a little extra crunch and flavor.
From My Kitchen to Yours: A Few Parting Thoughts
This recipe has truly evolved in my kitchen over the years. It started with my grandma’s classic version, then I discovered almond flour and fell in love with the texture. The heart shape was a happy accident one Valentine’s Day when I was trying to be fancy with a spoon! It just goes to show that some of the best kitchen discoveries aren’t planned.
One funny story: I once was so eager to bake these that I used rock-hard, straight-from-the-fridge butter. Let’s just say my electric mixer protested loudly, and I ended up with buttery chunks instead of a smooth dough. I learned my lesson the hard way—softened butter is key! So now, I always take my butter out about an hour before I plan to bake. These little cookies have taught me so much about patience, joy, and the power of a simple, heartfelt treat. I hope they bring as much happiness to your kitchen as they have to mine.
Your Questions, Answered!
I’ve gotten so many wonderful questions about these cookies over the years! Here are answers to the most common ones to help you bake with confidence.
Q: My jam bubbled over and made a mess! How can I prevent this?
A: Oh, I’ve been there! This usually happens for one of two reasons: the jam was too full, or the jam itself is very runny. To fix it, make sure you’re only using about ½ teaspoon per cookie. You can also try thickening your jam by stirring in a tiny pinch of cornstarch (about ¼ tsp for ⅔ cup jam) before filling the cookies.
Q: Can I make the dough ahead of time?
A: Absolutely! This dough is perfect for making ahead. Simply wrap it tightly in plastic wrap and store it in the refrigerator for up to 3 days. When you’re ready to bake, let it sit at room temperature for 15-20 minutes until it’s soft enough to roll. You can also freeze the dough balls on a baking sheet, then transfer them to a freezer bag for up to 3 months. Bake from frozen, adding 1-2 minutes to the baking time.
Q: My thumbprint indentation puffed up during baking. What did I do wrong?
A> This is a common little hiccup! It usually means the dough was a bit too warm when it went into the oven. Next time, after you’ve shaped and filled the cookies, pop the entire baking sheet into the refrigerator for 10-15 minutes before baking. This chills the butter and helps the cookies hold their shape beautifully.
Q: Are there any other fillings I can use besides jam?
A> Of course! Get creative. You can use lemon curd for a tangy surprise, dulce de leche for a caramel lover’s dream, or even a small square of dark chocolate that will melt into a pool of deliciousness. The world is your oyster… or should I say, your cookie!
A Quick Note on Nutrition
While these are definitely a treat, I always believe in knowing what’s in your food! Please note that this is just an estimate and can vary based on the specific ingredients and brands you use.
Prep Time: 20 minutes | Cook Time: 12 minutes | Servings: 15 cookies
Calories: ~160 per cookie | Fat: 9g | Carbs: 18g | Sugar: 9g | Protein: 2g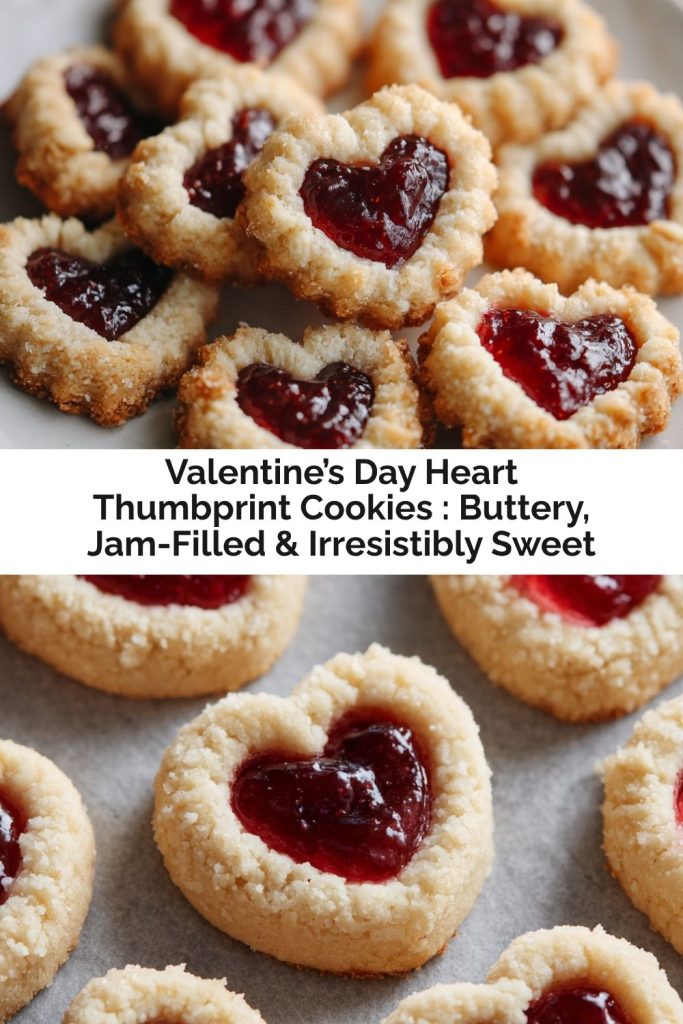
Final Thoughts
These Valentine’s Day Heart Thumbprint Cookies are proof that the sweetest gifts come straight from the heart — and sometimes, from a little flour-dusted countertop. They’re buttery, nostalgic, and just the right mix of tender and jammy, perfect for sharing love in its simplest, most delicious form. Whether you’re baking them with someone special, gifting them to friends, or enjoying them solo with a cup of tea and a cozy blanket, these cookies turn even an ordinary afternoon into a celebration of sweetness and warmth.
So go ahead — tie on that apron, grab your favorite jam, and make a little kitchen magic. Because love, my friend, is best served homemade (and preferably dusted with powdered sugar). ❤️