Hey There, Chili Lover! Let’s Make Some Magic.
Is there anything quite as comforting as a big, steaming bowl of chili on a crisp autumn evening? The way the savory aroma fills the whole house, promising a meal that’s both hearty and heartwarming. It’s a hug in a bowl, a dish that gathers people around the table, and frankly, it’s one of my absolute favorite things to make. Today, we’re tackling a legend: Wendy’s Chili.
Now, I know what you might be thinking. “Anna, a fast-food recipe? Really?” But trust me on this one. There’s a reason this particular chili has such a cult following. It’s uniquely simple, consistently delicious, and hits all the right notes—savory, a little smoky, with just the perfect amount of kick. It’s the chili you can always count on. But what if I told you we could make it even better right in our own kitchens? No mystery ingredients, just honest, good food made with love.
This copycat recipe is my love letter to that iconic bowl. We’re using fresh, quality ingredients to recreate that signature flavor profile, but with the added bonus of knowing exactly what’s in it. It’s perfect for a busy weeknight (hello, slow cooker option!), fantastic for meal prep, and guaranteed to be a crowd-pleaser at your next game-day gathering. So, are you ready to unlock the secret to this beloved classic? Grab your favorite pot, and let’s get cooking!
The Chili That Started It All
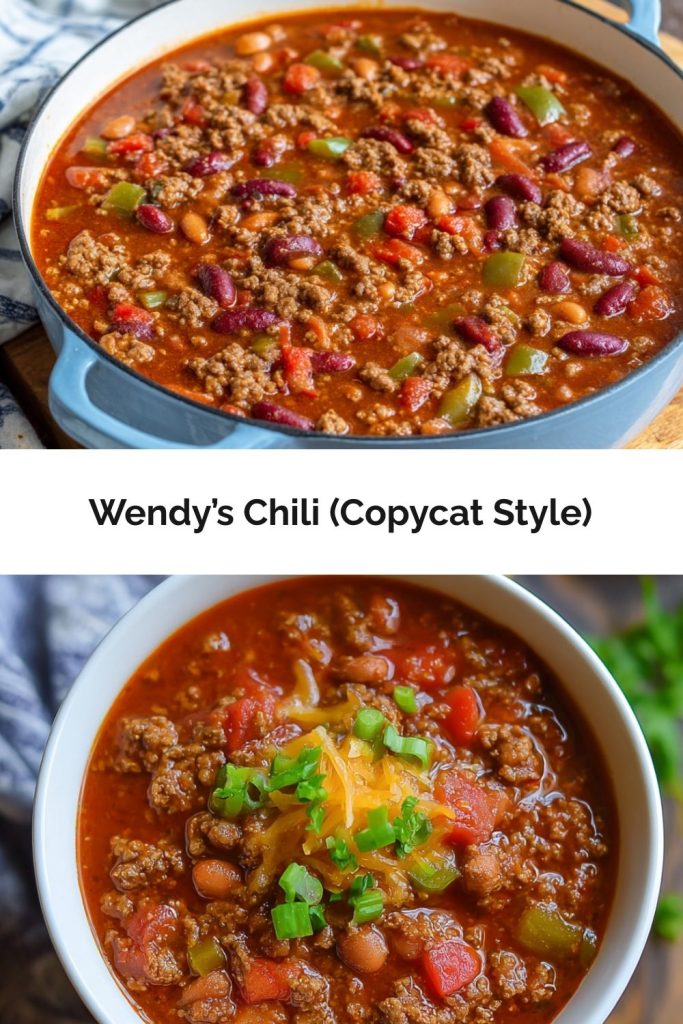
PrintWendy’s Chili (Copycat Style)

This hearty chili is loaded with beef, beans, and vegetables simmered in a savory tomato base with just the right kick of spice. It’s simple, comforting, and perfect for cold nights or meal prep.
- Prep Time: 15 minutes
- Cook Time: 1–1.5 hours (or 3–4 hours slow cooker)
- Total Time: 36 minute
- Yield: 8–10 1x
Ingredients
2 lbs fresh ground beef
1 quart tomato juice
1 (29 oz) can tomato purée
1 (15 oz) can red kidney beans, drained
1 (15 oz) can pinto beans, drained
1 medium-large onion, chopped (about 1 ½ cups)
½ cup diced celery
¼ cup diced green bell pepper
¼ cup chili powder (use less for a milder version)
1 tsp ground cumin
1 ½ tsp garlic powder
1 tsp salt
½ tsp ground black pepper
½ tsp dried oregano
½ tsp sugar
1/8 tsp cayenne pepper (optional, for heat)
Instructions
Cook beef: In a large skillet, brown the ground beef. Drain off excess fat.
Combine: Transfer beef to a 6-quart pot. Add tomato juice, tomato purée, beans, onion, celery, bell pepper, and all seasonings. Stir well.
Simmer: Bring to a boil, then reduce heat and simmer for 1 to 1 ½ hours, stirring every 15 minutes.
Slow Cooker Option: Cook on low 3–4 hours or high 2–3 hours.
Serve: Enjoy hot with toppings like shredded cheddar, sour cream, or cornbread on the side.
Nutrition
- Calories: 300
- Fat: 12g
- Carbohydrates: 25g
- Protein: 22g
My love affair with this specific chili began long before I was a recipe developer. Picture a teenage me, crammed into a booth with my high school friends after a freezing Friday night football game. We’d pile into someone’s car, our breath still visible in the air, and make a beeline for the warm glow of the Wendy’s sign. It was our ritual.
While my friends dove into burgers and fries, I always, without fail, ordered a large chili and a baked potato. There was something about that combination that felt so grown-up and satisfying. It was more than just a meal; it was a moment of warmth and connection after cheering ourselves hoarse. We’d dissect the game, laugh until our sides hurt, and I’d meticulously crumble my potato into the chili, creating the most glorious, comforting mash-up. To this day, the smell of a well-spiced chili instantly transports me back to those vinyl booths, to the sound of my friends’ laughter, and the simple joy of a perfect, steaming bowl. It’s a taste of pure, uncomplicated nostalgia.
Gathering Your Chili Champions
Here’s the beautiful part: the ingredient list is straightforward and forgiving. This isn’t about fancy, hard-to-find items; it’s about letting a few key players shine together. I’ve included some notes and swaps because, as I always say, your kitchen, your rules!
- 2 lbs fresh ground beef: I recommend an 80/20 blend for the best flavor—the little bit of fat adds so much richness. For a leaner option, 90/10 works, but you might want to add a tablespoon of olive oil to the pot when browning. You can also use ground turkey for a lighter version!
- 1 quart tomato juice: This is the secret to Wendy’s signature brothy, not overly thick base. It provides a bright, tangy backdrop for all the other flavors.
- 1 (29 oz) can tomato purée: This gives the chili its body and deep tomato flavor. If you only have crushed tomatoes, that’s a fine substitute, though the texture will be a bit chunkier.
- 1 (15 oz) can red kidney beans, drained & 1 (15 oz) can pinto beans, drained: The dynamic duo! Kidney beans are classic, while pintos add a lovely creaminess. Don’t drain them too thoroughly—a little liquid is okay. Feel free to use all of one kind if that’s what you have.
- 1 medium-large onion, chopped (about 1 ½ cups): A yellow or white onion is perfect here, providing a sweet, savory foundation.
- ½ cup diced celery & ¼ cup diced green bell pepper: The unsung heroes! These veggies melt into the chili as it simmers, adding a subtle depth and sweetness you’d miss if they were gone. It’s the “why is this so good?” factor.
- ¼ cup chili powder: This is your main flavor powerhouse! For a milder chili, start with 2 tablespoons and add more to taste. I like to use a blend of ancho and regular chili powder for a more complex flavor.
- 1 tsp ground cumin: Hello, warmth and earthiness! Cumin and chili powder are a match made in heaven.
- 1 ½ tsp garlic powder, 1 tsp salt, ½ tsp ground black pepper, ½ tsp dried oregano, ½ tsp sugar: The supporting cast. The sugar is a tiny but crucial touch—it balances the acidity of the tomatoes. The oregano adds a faintly floral, earthy note.
- 1/8 tsp cayenne pepper (optional): For my friends who like a little extra kick. Add it if you dare!
Let’s Build that Flavor, Step-by-Step
Okay, team! Aprons on? Let’s transform these simple ingredients into a pot of pure comfort. The process is easy, but a few little tricks make all the difference.
- Brown the Beef with Love: Place a large skillet or your Dutch oven over medium-high heat. Add the ground beef and break it up with a wooden spoon. Now, here’s my first chef hack: don’t stir it constantly! Let it sit for a minute to get a nice, brown crust on one side before stirring. This creates fond—those little browned bits stuck to the pan—which is PURE FLAVOR GOLD. Cook until no pink remains. Once cooked, drain off the excess fat. I like to leave about a tablespoon for extra richness.
- The Big Combine: If you used a skillet, now transfer the drained beef into a large 6-quart pot or Dutch oven. If you browned it directly in the pot, perfect! Now, simply add EVERYTHING else—the tomato juice, tomato purée, drained beans, chopped onion, celery, bell pepper, and all those wonderful spices. Yes, it’s that simple! Give it a really good stir to make sure the spices are evenly distributed and nothing is sticking to the bottom.
- The Simmering Magic: This is where the transformation happens. Bring the pot to a lively boil over high heat. Once it’s bubbling away, immediately reduce the heat to low. You want a gentle simmer—just a few lazy bubbles breaking the surface every now and then. Cover the pot, but leave the lid slightly ajar to let some steam escape. This helps the chili thicken beautifully. Now, let it simmer for at least 1 hour, but 1 ½ hours is even better. Stir it every 15-20 minutes to prevent sticking. This long, slow cooking time is non-negotiable; it allows the flavors to marry and mellow into something truly special.
- Slow Cooker Shortcut: No time to babysit a pot? No problem! After browning and draining the beef, simply dump it and all the other ingredients into your slow cooker. Give it a stir, put the lid on, and cook on LOW for 3-4 hours or on HIGH for 2-3 hours. It’s the ultimate “set it and forget it” meal.
How to Serve Your Masterpiece
The beauty of chili is in the customization! Ladle the hot chili into deep bowls. Now, for the fun part: the toppings. I love setting up a little “chili bar” so everyone can build their own perfect bowl. My must-haves are a generous handful of shredded sharp cheddar cheese, a big dollop of cool sour cream (or Greek yogurt), and a sprinkle of finely chopped red onion for a bit of crunch. Don’t forget a side of warm, buttery cornbread or a few sturdy saltine crackers for dipping. It’s the ultimate cozy meal.
Make It Your Own: Delicious Twists
Once you’ve mastered the classic, feel free to get creative! Here are a few of my favorite variations:
- Spicy Southwest: Add a can of diced green chiles and swap the cayenne for a diced jalapeño (seeds included for heat!).
- Smoky Bacon Bliss: Cook 6 slices of chopped bacon until crispy. Use the bacon fat to brown the beef for an incredible smoky depth. Crumble the bacon on top as a garnish.
- Three-Bean Harvest: Add a can of drained black beans along with the kidney and pinto beans for extra fiber and color.
- Turkey & Sweet Potato: Swap the beef for ground turkey and add a cup of diced sweet potato with the other veggies. It adds a lovely sweetness and makes it a bit lighter.
Anna’s Extra Pinch of Advice
This recipe has evolved so much in my kitchen over the years. I initially followed the classic copycat instructions to a T, but I’ve learned that the real secret is patience. That extra 30 minutes of simmering? It’s a game-changer. The flavors deepen and the texture becomes incredible.
One funny story: I once decided to “kick it up a notch” by doubling all the spices, convinced more was better. Let’s just say it was… an experience. We called it “Five-Alarm Fire Chili” and my husband still jokes about needing a glass of milk with every bite. The moral of the story? Taste as you go! You can always add more spice, but you can’t take it out. Start with the recipe as written—it’s perfectly balanced—and adjust to your taste from there. This chili is now a staple in our freezer; I always double the batch and freeze half for a rainy day. It tastes even better reheated!
Your Chili Questions, Answered!
Q: My chili is too thin! How can I thicken it?
A: No worries, this is a common one! The easiest way is to let it simmer uncovered for an extra 15-30 minutes; the steam will escape and it will naturally reduce and thicken. You can also make a “slurry”: mix 2 tablespoons of cornstarch with ¼ cup of cold water until smooth, then stir it into the simmering chili. Let it cook for another 5-10 minutes until thickened.
Q: Can I make this vegetarian?
A> Absolutely! Omit the ground beef. I recommend sautéing 8 oz of chopped mushrooms with the onions, celery, and pepper to add a “meaty” texture. You could also add an extra can of beans or use a plant-based ground “beef” alternative.
Q: How long does this chili last in the fridge?
A> Stored in an airtight container, it will be delicious for 3-4 days. In fact, the flavors get even better the next day! It also freezes beautifully for up to 3 months. Just thaw overnight in the fridge and reheat on the stove.
Q: Is it okay to use different beans?
A> Of course! Chili is very forgiving. Black beans, great northern beans, or even cannellini beans would all work wonderfully. Just make sure they are drained and rinsed before adding.
Nutritional Information*
*This is an estimate provided for informational purposes only. Values may vary based on specific ingredients used.
Per serving (approximately 1.5 cups): Calories: 300 | Fat: 12g | Carbohydrates: 25g | Protein: 22g
Final Thoughts
This Wendy’s Copycat Chili is more than just a recipe—it’s a bowlful of nostalgia, warmth, and connection. It’s the Friday night football game ritual, the comfort of a baked potato crumbled right in, and the joy of recreating a classic with fresh, honest ingredients at home.
Whether you make it on the stovetop or let the slow cooker do the work, this chili delivers every time: hearty, flavorful, and endlessly customizable. Serve it with all the toppings, a side of cornbread, and a table full of hungry friends or family—and you’ll see why it’s a tradition worth keeping.
So grab your favorite pot, let the spices do their magic, and enjoy a taste of cozy nostalgia that never goes out of style.
“`