***
White Chocolate Peppermint Christmas Cookies: Your New Holiday Tradition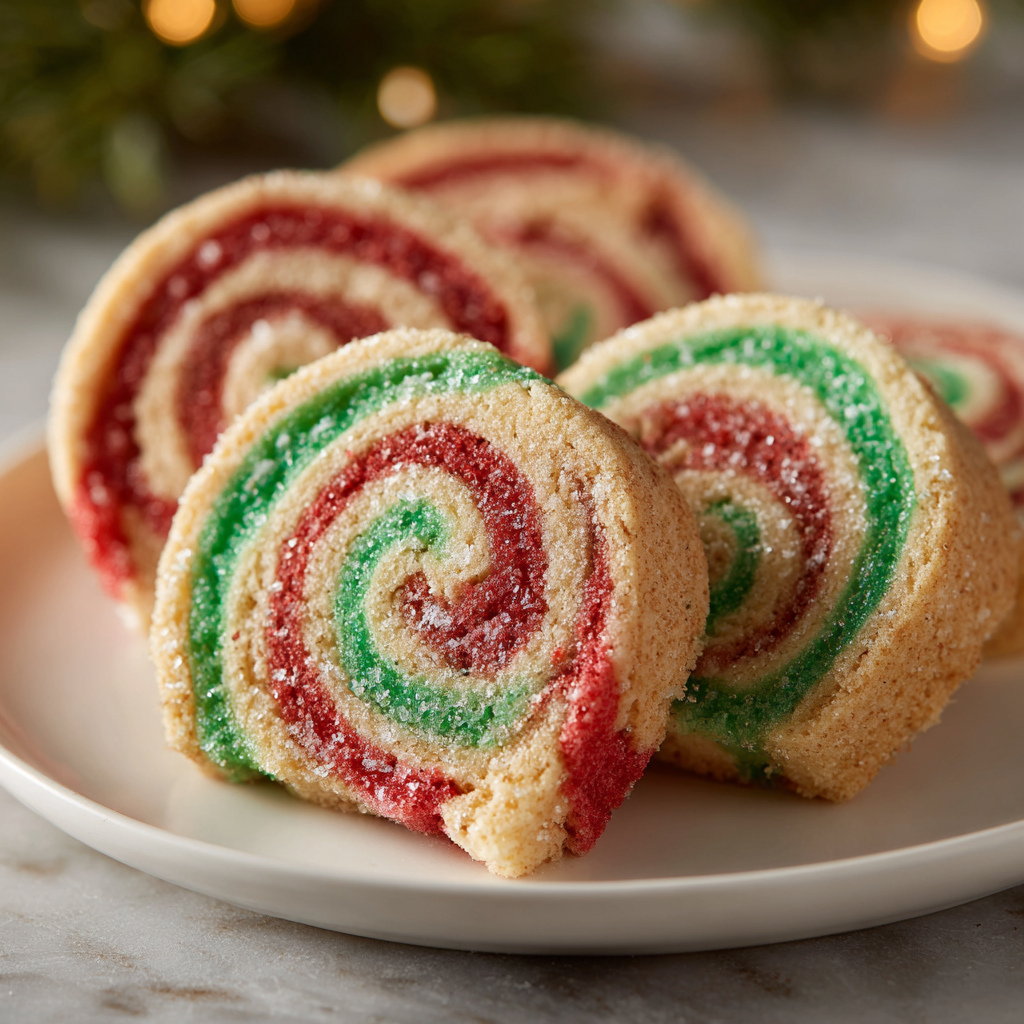
Hello, my fabulous foodie friend! Anna here, welcoming you back to my cozy kitchen corner. Can you feel it? That crisp, magical buzz in the air that only comes once a year? The lights are twinkling, your favorite holiday playlist is on, and there’s a undeniable urge to preheat the oven and create something utterly delicious. If your kitchen is calling for the scent of butter, sugar, and festive cheer, then you, my friend, have landed in the perfect spot.
Today, we’re whipping up a batch of what I genuinely believe are the cookies of the season: my famously chewy, blissfully minty, and absolutely gorgeous White Chocolate Peppermint Christmas Cookies. Imagine this: a soft, buttery cookie base that melts in your mouth, packed with creamy pockets of sweet white chocolate and the refreshing, festive crunch of peppermint candy. They’re like a holiday party in cookie form—elegant enough for your fanciest cookie exchange, but cozy and comforting enough to devour by the handful after a long day of wrapping presents.
This recipe is a joy to make, I promise. We’re creaming butter, whisking dry ingredients, and folding in all that glorious goodness. No stress, no fuss—just you, your mixer, and a whole lot of holiday spirit. So, tie on your favorite apron (the festive one with the reindeer on it, obviously), and let’s bake up a batch of memories together. These cookies are about to become your new must-make holiday tradition!
A Story of Sweet, Crunchy, and Slightly Chaotic Memories
PrintWhite Chocolate Peppermint Christmas Cookies

These cookies are soft, buttery, and speckled with sweet peppermint candy and creamy white chocolate—perfect for cookie exchanges or cozy movie nights (maybe Howl’s Moving Castle, judging by the cute book in the background!).
- Prep Time: 15 minutes
- Cook Time: 10 minutes
- Total Time: ~25 minutes
Ingredients
1 cup butter, softened
¾ cup brown sugar
½ cup granulated sugar
2 large eggs
2 tsp vanilla extract
2½ cups all-purpose flour
1 tsp baking soda
½ tsp salt
1 cup white chocolate chips or chunks
¾ cup crushed peppermint candies or candy canes
Instructions
Preheat oven to 350°F (175°C). Line baking sheets with parchment.
Cream butter and sugars until light and fluffy. Add eggs and vanilla, mixing well.
Whisk dry ingredients in a separate bowl: flour, baking soda, and salt.
Combine wet and dry, then fold in white chocolate and crushed peppermint.
Scoop dough into 1.5-inch balls and place 2 inches apart on baking sheets.
Bake for 9–11 minutes, or until edges are golden and centers just set.
Cool on the pan for 5 minutes, then transfer to a wire rack.
Optional Twists
Dip half of each cookie in melted white chocolate and sprinkle with extra crushed candy cane
Add a pinch of peppermint extract to the dough for more minty depth
Use holiday sprinkles or edible glitter for a magical finish
Nutrition
- Calories: 180
- Fat: 9g
- Carbohydrates: 24g
- Protein: 2g
This recipe always takes me right back to my very first Christmas in this house. My daughter, who was about five at the time, decided that our holiday baking wasn’t nearly chaotic—er, I mean, festive—enough. She insisted we needed to make “sparkly, crunchy, red-and-white cookies” just like the ones in her storybook. Challenge accepted!
We gathered our ingredients, and I handed her the task of crushing the candy canes. I envisioned a gentle tap-tap-tap with a rolling pin. What ensued was a scene of glorious, peppermint-scented anarchy. She went full Thor on those poor candies, sending tiny red and white shards flying across the kitchen like festive confetti. We were finding peppermint dust in places I didn’t know existed for weeks! But her sheer, unadulterated joy, her face smudged with flour and her eyes shining as we folded those crushed candies into the dough, was everything. Now, that joyful chaos is part of the ritual. Every crunch of peppermint is a little reminder that the best memories are often the slightly messy ones, made with love and a lot of laughter.
Gathering Your Cookie Crew: The Ingredients
Here’s your shopping list for these minty marvels! This is a beautifully simple list of pantry staples, with a few festive twists. Let’s break it down.
- 1 cup (2 sticks) unsalted butter, softened – This is the foundation of our rich, chewy cookie. Pro Chef Tip: “Softened” means cool to the touch but your finger can leave a gentle indent. Don’t melt it! If you forget to take it out, cut it into chunks and let it sit for 15-20 minutes.
- ¾ cup packed brown sugar – The molasses in brown sugar is our secret weapon for that perfect chewy texture and deep, caramel-like flavor.
- ½ cup granulated sugar – This helps create a slight crispness on the edges while keeping the centers soft.
- 2 large eggs – Always use large eggs at room temperature! They bind everything together and create a lighter, fluffier cookie. To quickly bring them to room temp, place them in a bowl of warm water for 5-10 minutes.
- 2 tsp pure vanilla extract – The flavor backbone. It enhances all the other wonderful notes in the cookie. Don’t skip it!
- 2½ cups all-purpose flour – The structure of our cookie. For best results, fluff your flour with a spoon, spoon it into your measuring cup, and level it off. No packing!
- 1 tsp baking soda – Our leavening agent, which gives the cookies their perfect rise and spread.
- ½ tsp salt – A must! Salt balances all the sweetness and makes the flavors pop. If you only have salted butter, reduce this to a ¼ teaspoon.
- 1 cup white chocolate chips or chunks – I prefer chopped white chocolate bars for gorgeous, melty pockets, but chips work perfectly too! For the best results, seek out a quality brand.
- ¾ cup crushed peppermint candies or candy canes – The star of the show! You’ll need about 8-10 standard candy canes. See my note below on the best (least messy!) way to crush them.
Let’s Get Baking: The Step-by-Step Magic
Ready to create some magic? Follow these steps, and you’ll have perfect cookies every single time. I’ve sprinkled in all my best chef hacks for you!
- Preheat and Prep: Fire up your oven to 350°F (175°C). This is crucial for even baking. Line your baking sheets with parchment paper. Chef Hack: No parchment? A silicone baking mat is even better! It prevents spreading and ensures a perfect golden bottom every time.
- Creaming is Key: In the bowl of a stand mixer fitted with the paddle attachment (or a large bowl with a hand mixer), beat the softened butter, brown sugar, and granulated sugar together on medium-high speed for a full 2-3 minutes. We’re not just mixing; we’re creaming! This incorporates air into the dough, which is what gives us that dreamy, soft texture. The mixture should become noticeably lighter in color and fluffy.
- Incorporate the Wet Ingredients: Add the eggs one at a time, beating well after each addition until fully incorporated. Scrape down the sides and bottom of the bowl with a spatula—this is a hidden, crucial step! Now mix in the vanilla extract. Your dough should look smooth and creamy.
- Whisk the Dry Team: In a separate, medium-sized bowl, whisk together the flour, baking soda, and salt. Whisking ensures the baking soda and salt are evenly distributed, so every cookie rises and tastes the same.
- Combine with Care: With your mixer on low speed, gradually add the dry ingredients to the wet ingredients. Mix just until the flour streaks disappear. Do not overmix! Overworking the dough after adding the flour is the #1 cause of tough, dense cookies.
- The Fun Fold-In: Take the bowl off the mixer. Now, using your trusty spatula, gently fold in the white chocolate chips and the crushed peppermint candies. Be gentle so you don’t break up the candy too much more.
- Scoop and Space: Using a cookie scoop (a 1.5-tablespoon size is perfect), portion out the dough into balls. Place them about 2 inches apart on your prepared baking sheets. This gives them plenty of room to spread into perfect, round cookies without becoming one giant cookie sheet!
- Bake to Perfection: Bake for 9-11 minutes. You’re looking for golden edges and centers that still look slightly soft and just set. They might look a tiny bit underdone, but I promise, they are perfect! They will continue to cook on the hot pan as they cool. This is the secret to a chewy center.
- The Patient Cool-Down: Let the cookies cool on the baking sheet for at least 5 minutes. This allows them to set up enough to move without breaking. Then, transfer them to a wire rack to cool completely. Try to resist eating one straight from the pan… though I won’t judge if you do!
How to Serve These Holiday Showstoppers
Presentation is part of the fun! Pile these minty gems high on a beautiful vintage platter or a rustic wooden board for a gorgeous holiday dessert table. They pair beautifully with a cold glass of milk for the kids, a rich cup of hot cocoa for a cozy afternoon, or even a peppermint latte for the adults. For your cookie exchange, stack them in a clear cellophane bag tied with a festive ribbon—they make the most delightful edible gift!
Make Them Your Own: Delicious Twists & Swaps
Feel like playing? Here are a few ways to mix up this classic recipe:
- Double-Dipped Delight: Melt some extra white chocolate, dip half of each cooled cookie into it, and immediately sprinkle with a little extra crushed candy cane. Let them set on parchment paper for a professional, bakery-style finish.
- Minty Fresh Boost: Love a stronger mint flavor? Add ¼ to ½ teaspoon of peppermint extract to the dough along with the vanilla. A little goes a long way!
- Gluten-Free Friend: Simply swap the all-purpose flour for a 1:1 gluten-free baking blend. I’ve had great success with brands like Bob’s Red Mill or King Arthur.
- Dark Chocolate Dream: Not a white chocolate fan? Substitute an equal amount of semi-sweet or dark chocolate chips for a richer, deeper flavor that still pairs wonderfully with the peppermint.
- Sparkle and Shine:Right after pulling the cookies from the oven, while they’re still hot and soft, press a few whole mini candy cane pieces or a sprinkle of edible glitter on top for a truly magical look.
Anna’s Chef Notes & Kitchen Stories
This recipe has evolved so much since that first chaotic baking session! I’ve learned that chilling the dough for 30 minutes can prevent a little extra spreading if your kitchen is particularly warm, but it’s not strictly necessary for this recipe. The true game-changer for me was switching from chips to chopped chocolate bars—the pools of melted white chocolate are just *chef’s kiss*.
One funny story: I once brought these to a holiday potluck and a friend spent five minutes trying to pick off what she thought were “weird red sprinkles” before taking a bite. She finally gave in, took a bite, and her eyes went wide. “It’s peppermint! This is genius!” she exclaimed. Now she asks for them every year. So, if you’re worried about the candy, don’t be—it’s a delightful, crunchy surprise that everyone ends up loving.
Your Questions, Answered!
Q: What’s the best way to crush the candy canes without making a huge mess?
A: My favorite method is to place unwrapped candy canes inside a heavy-duty zip-top bag. Seal it almost all the way, leaving a small opening for air to escape. Then, use a rolling pin or the flat side of a meat mallet to crush them. You can also pulse them a few times in a food processor, but be careful not to turn them into dust!
Q: My cookies spread too much and became flat. What happened?
A: This is usually due to butter that was too warm or melted. Make sure your butter is softened but still cool. Another culprit could be an old baking soda that’s lost its potency, or not using enough flour (remember the spoon-and-level method!). If all else fails, pop the dough in the fridge for 30 minutes before baking to firm it up.
Q: Can I make the cookie dough ahead of time?
A: Absolutely! You can scoop the dough into balls, place them on a baking sheet, and freeze them solid. Then, transfer the frozen dough balls to a zip-top bag. You can bake them straight from the freezer, just add 1-2 minutes to the baking time. Hello, spontaneous cookie cravings!
Q: The peppermint candy melted and disappeared into the cookies. How do I prevent that?
A> This is a common one! The candy canes will melt and soften a bit, but to keep those beautiful red and white specks visible, make sure you’re using larger “crumbles” rather than a fine powder. Also, avoid overmixing the dough once you add them in. Gently fold to preserve those chunks.
Nutritional Information*
Per Cookie (1 of 24): Calories: ~180 | Total Fat: 9g | Saturated Fat: 5g | Cholesterol: 30mg | Sodium: 110mg | Total Carbohydrates: 24g | Sugars: 16g | Protein: 2g
*Please note: This is an estimated nutritional breakdown provided by an online calculator. Values can vary based on specific ingredients used and portion sizes.
Allergy Info: Contains dairy, gluten, eggs.

Final Thoughts: Cookies That Spark Joy
These White Chocolate Peppermint Christmas Cookies aren’t just treats—they’re little edible snowflakes of holiday joy. Soft, buttery, and dotted with creamy white chocolate and peppermint sparkle, they’re the kind of cookie that feels both festive and comforting, fancy enough for a party platter yet cozy enough for pajama snacking by the tree.
What I love most about them? They carry the spirit of the season—playful, a little messy, and completely magical. Every bite is a reminder that holiday traditions don’t have to be perfect to be unforgettable. So grab those candy canes, crank up your carols, and let this recipe become part of your own family’s cookie story. Because the sweetest memories always come sprinkled with love (and maybe a little peppermint dust).
*