Hey There, Kitchen Friend! Let’s Bake Something Cozy ✨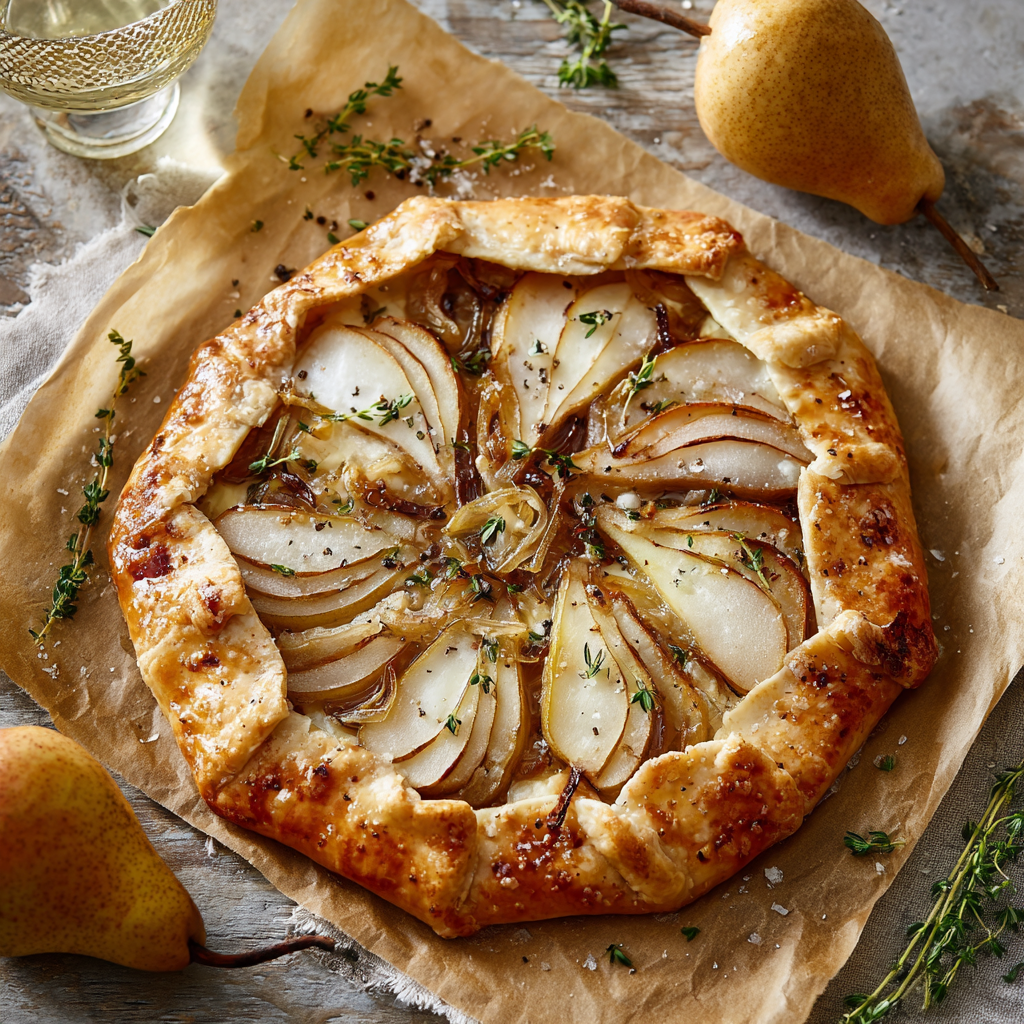
Picture this: It’s a crisp autumn afternoon. Golden light spills across your counter, and your kitchen smells like buttery pastry, sweet onions slow-dancing in a skillet, and ripe pears whispering promises of caramelized goodness. That’s the magic we’re making today with this Caramelized Onion & Pear Galette! If you’ve ever felt intimidated by fancy tarts, let me hug those worries away. A galette is your BFF – rustic, forgiving, and achingly beautiful in its imperfection. No pastry perfection required!
This isn’t just a recipe; it’s a flavor love story. Silky, deeply savory caramelized onions meet juicy, honeyed pears, all snuggled under slices of molten brie, wrapped in a flaky, golden crust. It’s sweet. It’s savory. It’s *chef’s kiss* balanced elegance that looks like you slaved for hours (spoiler: you won’t!). Perfect for a cozy weeknight dinner with a side salad, the star of your next wine-and-cheese night, or that holiday party where you want to casually drop, “Oh, this? Just something I whipped up.” 😉
Whether you’re a pastry pro or your rolling pin still has the price tag on it, I’m right here with you. Grab your favorite apron (the one with the questionable stain – no judgment!), and let’s turn simple ingredients into pure, uncomplicated magic. Ready to make your kitchen smell like a fall dream? Let’s go!
A Slice of Nostalgia: Why This Galette Steals My Heart
PrintCaramelized Onion & Pear Galette

Rustic, golden, and effortlessly elegant — this free-form tart layers silky caramelized onions, tender ripe pears, and melty brie inside a flaky, buttery crust. The sweet-savory balance makes it perfect for fall dinners, wine nights, or as a show-stealing appetizer at holiday gatherings.
- Prep Time: 20 min
- Cook Time: 30 min
- Total Time: 50 min
- Yield: 6 1x
Ingredients
1 sheet refrigerated pie crust (or homemade)
2 tbsp butter
2 large onions, thinly sliced
1 tbsp olive oil
1 tsp fresh thyme leaves (or ½ tsp dried)
2 ripe pears, thinly sliced
4 oz brie, sliced (rind on)
1 egg, beaten (for egg wash)
Salt & pepper, to taste
Instructions
Preheat oven to 400°F (200°C). Line a baking sheet with parchment.
In a skillet, melt butter with olive oil over medium heat. Add onions, thyme, salt, and pepper; cook slowly until golden and jammy (25–30 min).
Roll out crust on prepared sheet. Spread onions in the center, leaving a 2-inch border.
Arrange pear slices over onions, then lay brie slices on top.
Fold crust edges over filling, pleating as needed. Brush crust with egg wash.
Bake 25–30 min, until crust is golden and cheese is bubbly. Cool slightly before slicing.
Nutrition
- Calories: 260
- Fat: 15g
- Carbohydrates: 26g
- Fiber: 2g
- Protein: 6g
This galette? It tastes like my grandma’s kitchen in Vermont, circa 1998. Every October, we’d drive up to her farmhouse, where the air was sharp with apple cider and woodsmoke. One blustery afternoon, I was “helping” (read: sneaking apple slices) while she prepped lunch. She had a mountain of onions slowly wilting in her cast iron skillet and a bowl of windfall pears looking a little bruised. “Waste not, want not, Annie-girl,” she’d winked, rolling out her lard crust. What emerged from the oven wasn’t picture-perfect – the crust was lopsided, pear juice bubbling out one side – but the smell? Heavenly.
We ate it warm, standing at her counter, the cheese stretching comically between our plates. No fancy plating, just pure, messy joy. That humble tart taught me the best food isn’t about precision; it’s about heart, using what you have, and sharing the delicious, imperfect results. Every time I make this galette, I see her flour-dusted hands and taste that memory – sweet pears, savory onions, and all the love baked right in. It’s my edible hug. Now, let’s make some new memories in your kitchen!
Your Flavor Toolkit: Simple Ingredients, Big Impact
Gather these friends! Don’t stress – flexibility is our mantra.
- 1 sheet refrigerated pie crust (or homemade if you’re feeling fancy!): My weeknight hero! Thaw according to package. Chef’s Insight: Cold crust = flaky crust. Handle it minimally!
- 2 tbsp butter + 1 tbsp olive oil: The dynamic duo! Butter brings richness, olive oil prevents burning during the long onion slumber. Sub Tip: All butter works, but watch heat closely.
- 2 large onions, thinly sliced (about 4 cups): Yellow or sweet onions (like Vidalia) are perfect. Chef’s Secret: Slice pole-to-pole for longer strands that caramelize beautifully without mushiness!
- 1 tsp fresh thyme leaves (or ½ tsp dried): Earthy fragrance magic. Sub Tip: Rosemary or sage work wonders for a different vibe.
- 2 ripe but firm pears, thinly sliced: Bosc or Anjou hold their shape best. Chef’s Warning: Too soft? They’ll vanish into mush! A hint of lemon juice on slices prevents browning.
- 4 oz brie, sliced (rind on!): Creamy, melty luxury. Rind is edible & adds flavor! Sub Tip: Goat cheese, camembert, or even sharp cheddar for a punch.
- 1 egg, beaten (for egg wash): Your crust’s golden glow-up! Sub Tip: Heavy cream or milk works, but won’t shine as bright.
- Salt & pepper, to taste: The essential flavor boosters! Season onions well during cooking.
Let’s Build Your Masterpiece: Step-by-Step Magic
Follow along – I’ve got your back with all my favorite hacks!
- Preheat & Prep: Crank that oven to 400°F (200°C). Line a baking sheet with parchment paper. Why? No sticking, easy cleanup! Chef’s Tip: If using a baking stone, pop it in now to preheat for an extra-crispy bottom.
- Caramelize Those Onions (The Heart of the Matter!): In a large skillet, melt the butter and olive oil over medium heat. Add the onions, thyme, a big pinch of salt, and a few grinds of pepper. Stir to coat. Now, patience, grasshopper! Cook, stirring occasionally (don’t rush them!), for 25-30 minutes. Watch the magic: They’ll go from sharp and white, to soft and translucent, to a deep, sticky, golden-brown jam. Chef’s Hack: A tiny splash of water or balsamic vinegar (1 tsp) deglazes the pan and boosts depth if things stick. Low and slow wins the flavor race!
- Roll & Assemble: Unroll the pie crust onto your prepared baking sheet (no need for a perfect circle!). Spread the glorious caramelized onions evenly over the center, leaving a 2-inch border all around. Artfully arrange the pear slices over the onions. Top lovingly with the brie slices. Chef’s Flair: Overlapping pears look pretty, but messy is charming too!
- Fold & Seal (Rustic Chic!): Gently fold the bare crust edges up and over the filling, pleating as you go. No perfection needed – embrace the rustic! Pro Tip: Press folds lightly to seal any major cracks. If the dough tears? Patch it like a quilt with a scrap – egg wash is glue!
- Shine On: Brush the folded crust generously with the beaten egg. This gives that gorgeous, bakery-worthy golden sheen. Extra Sparkle: Sprinkle crust with flaky salt or cracked pepper!
- Bake to Golden Bliss: Slide your creation into the hot oven. Bake for 25-30 minutes until the crust is deeply golden brown and the cheese is gloriously bubbly. Watch Closely: Ovens vary! If crust browns too fast, tent edges loosely with foil.
- The Hardest Part: Wait! 😉 Let the galette cool on the sheet for at least 10-15 minutes before slicing. This lets the cheesy lava settle so your slices hold shape. Trust me, it’s worth the torture!
Plating Your Rustic Stunner (Easy Does It!)
This galette shines brightest when served warm and unfussy! Slide the whole parchment onto a cutting board or rustic wooden platter for that charming “farmhouse table” vibe. Use a sharp knife or pizza cutter for clean slices. Garnish? Keep it simple: a scattering of fresh thyme sprigs or microgreens adds a pop of color. Pair it with a bright arugula salad dressed in lemon vinaigrette to cut the richness, or for a heartier meal, add roasted chicken or sausages. It’s equally glorious as an appetizer (cut into smaller wedges), the main event, or even breakfast with a fried egg on top (yes, really!). Pour a glass of crisp white wine (Sauv Blanc!) or sparkling cider, and bask in the compliments.
Make It Your Own! Delicious Twists
This galette is your culinary playground!
- Cheese Swap: Try creamy goat cheese, nutty Gruyère, or sharp white cheddar instead of brie.
- Apple Adventure: Swap pears for thinly sliced, firm apples (like Honeycrisp). Add a pinch of cinnamon to the onions!
- Savory Boost: Stir 1 tbsp chopped fresh rosemary or sage into the onions. Add crispy chopped bacon or pancetta before baking!
- Nutty Crunch: Sprinkle ¼ cup chopped walnuts or pecans over the filling before adding cheese.
- Gluten-Free/Dairy-Free: Use your favorite GF pie crust. Swap butter for olive oil/vegan butter in onions, and use dairy-free cheese (melty vegan mozz or a soft cashew cheese).
Anna’s Extra Pinch of Insight (and Laughter!)
This recipe is my kitchen chameleon! I’ve made it with forgotten apples, added leftover roasted squash, even thrown in a handful of spinach wilting in the fridge. The crust has seen disasters – once I rolled it so thin it became a filling lace doily (we patched it triumphantly!). Embrace the wobbles! The beauty is in its free-form spirit. Over the years, I learned the true secret: those onions. Don’t skimp on time here – that deep, sweet-umami base is everything. My family now judges my caramelization level (“More jammy, Mom!”). It’s evolved from grandma’s humble “use-it-up” tart to my signature crowd-pleaser, but the heart remains: simple ingredients + patience = pure, unpretentious joy. Now go make some delicious messes!
Galette Gremlins? Let’s Troubleshoot!
Q: My onions are burning before caramelizing! Help!
A: Patience and heat control are key! Ensure your heat is truly medium (not medium-high). If they start browning too fast in spots, reduce heat slightly and add a teaspoon of water to deglaze/stall cooking. Stir more frequently!
Q: My galette bottom is soggy. Sad trombone.
A: A few culprits! 1) Ensure your onions are well-cooked and not watery before adding. 2) Preheat your baking sheet/stone for a hotter surface. 3) Don’t overload with super-juicy pears. 4) Make sure oven is fully preheated. Baking directly on parchment on a preheated surface helps immensely!
Q: Can I make any part ahead?
A: Absolutely! Caramelize the onions up to 3 days ahead; store covered in the fridge. Assemble the galette (without egg wash) up to 2 hours before baking; keep chilled. Brush with egg wash right before it goes in the oven. Leftovers? Reheat slices gently in a 300°F oven to crisp the crust.
Q: My crust cracked badly when folding. Is it ruined?
A: Not at all! Galettes are famously forgiving. Pinch the cracks together firmly. If needed, use a small scrap of dough moistened with water as a patch. The egg wash helps seal it, and once baked, no one will notice your delicious repairs!
Nutritional Info (Approximate per slice)
Calories: 260 | Protein: 6g | Carbohydrates: 26g | Fat: 15g | Fiber: 2g
Remember: This is an estimate. Values can vary based on specific ingredients and portion size.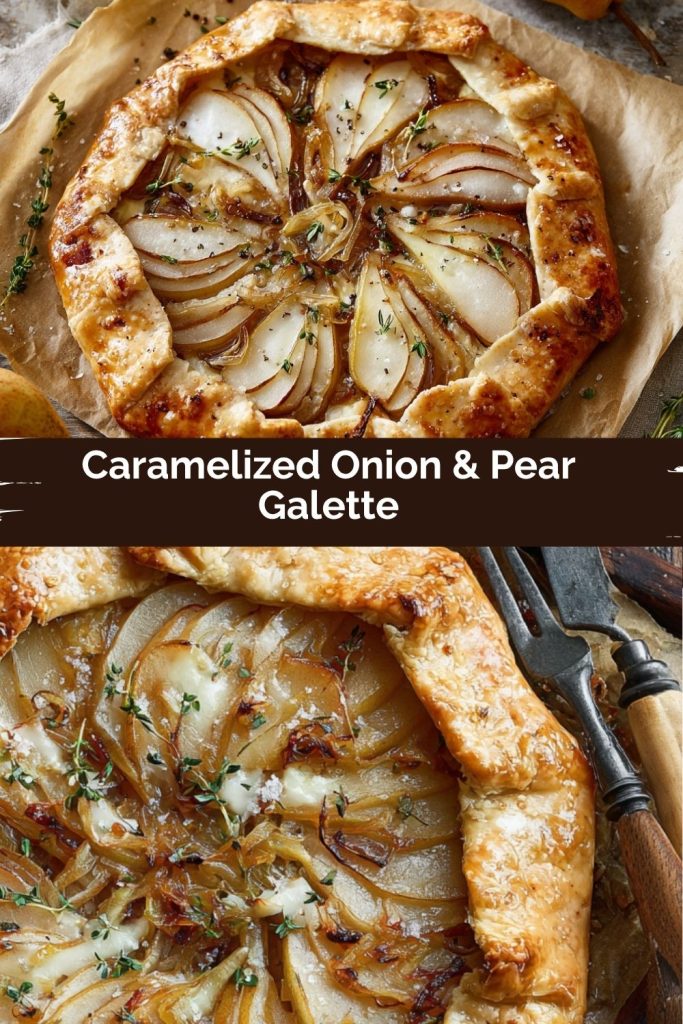
Final Thoughts
There’s something so comforting about a recipe that doesn’t demand perfection but still delivers elegance with every bite. This Caramelized Onion & Pear Galette is proof that simple ingredients and a little patience can create magic — the kind that feels just as at home at a holiday gathering as it does on a quiet Tuesday night. Every slice carries that sweet-savory dance of caramelized onions, ripe pears, and creamy brie, all wrapped in buttery, flaky pastry. It’s rustic charm meets sophisticated flavor, and it’s a dish that always sparks conversation (and second helpings). So roll out that crust, embrace the folds and pleats, and let your kitchen smell like autumn’s best day. The best part? You’ll not only feed the people you love, you’ll give them a memory worth keeping.