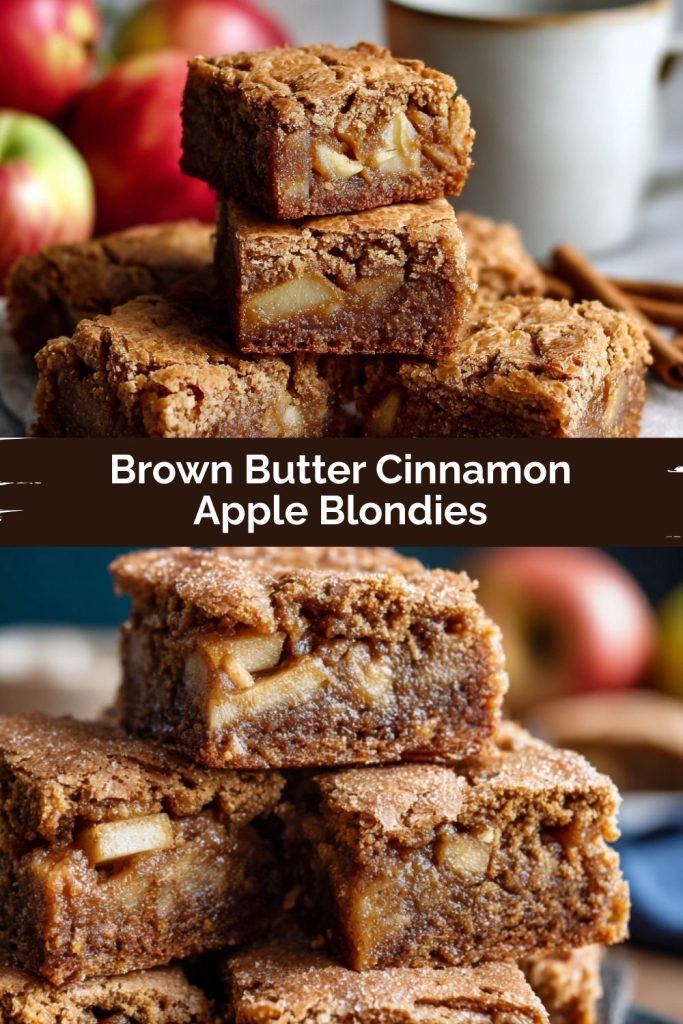
Brown Butter Cinnamon Apple Blondies: Your New Favorite Fall Treat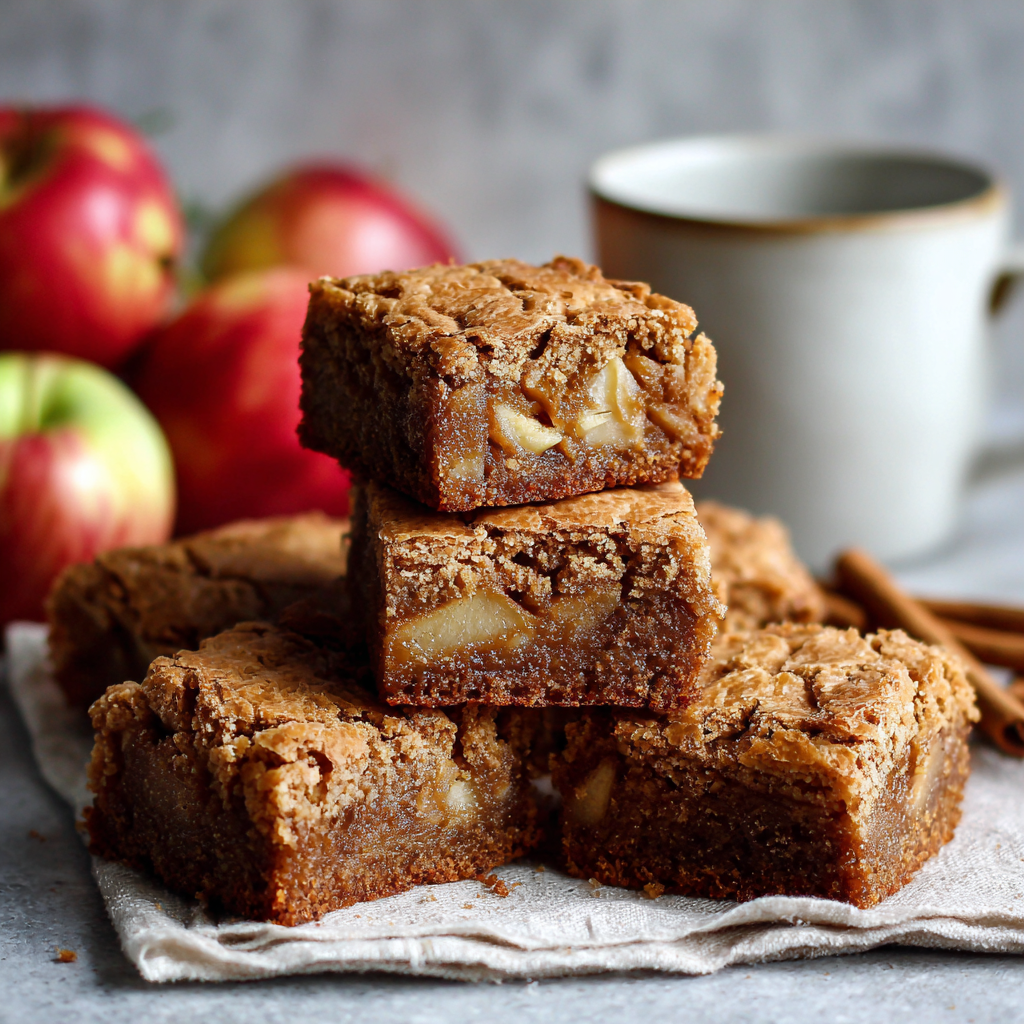
Hey there, friend! Anna here. Is there anything better than the smell of cinnamon and apples wafting through your kitchen on a crisp autumn day? It’s the kind of aroma that wraps you in a cozy hug, promises something delicious is on the way, and magically summons every member of your family to hover by the oven. If you’re craving that exact feeling but don’t want to fuss with a full-on pie, I have the most perfect, soul-warming solution for you: Brown Butter Cinnamon Apple Blondies.
Imagine this: a rich, chewy blondie base with the deep, nutty magic of brown butter, studded with little pockets of soft, tender apple and swirled with the warm spice of cinnamon. It’s like apple pie and a gooey chocolate chip cookie bar had the most delicious fall-inspired baby. These blondies are incredibly easy to whip up, require zero fancy equipment, and are guaranteed to turn an ordinary afternoon into something a little more special. They’re the ultimate treat for after-school snacks, potlucks, or just because you deserve a sweet moment with a cup of coffee. So, let’s preheat that oven and make some magic together!
A Slice of Autumn Nostalgia
PrintBrown Butter Cinnamon Apple Blondies

These blondies take the cozy warmth of apple pie and wrap it in a buttery, sweet bar. Brown butter brings a deep, nutty richness, while tender apple pieces add juicy bursts of flavor. Cinnamon ties it all together in a comforting, handheld dessert perfect for autumn.
- Prep Time: 15 minutes
- Cook Time: 20–25 minutes
- Total Time: 45 minutes (including cooling)
- Yield: 9–12 blondies 1x
Ingredients
1/2 cup (1 stick) unsalted butter
1 cup light or dark brown sugar, packed
1 large egg
1 teaspoon vanilla extract
1 cup all-purpose flour
1/2 teaspoon baking powder
1/4 teaspoon salt
1 teaspoon ground cinnamon
1 medium apple (such as Granny Smith or Honeycrisp), peeled and finely diced (about 1 cup)
Optional: pinch of nutmeg or a touch of ground ginger for extra warmth
Instructions
Brown the Butter: Melt the butter in a light-colored saucepan over medium heat. Swirl occasionally; continue until it turns golden-brown with a nutty aroma—about 4–5 minutes. Immediately pour into a heatproof bowl to stop cooking.
Mix Wet Ingredients: Stir the brown sugar into the warm browned butter until dissolved. Add the egg and vanilla, whisking until smooth.
Combine Dry Ingredients: In a separate bowl, whisk together flour, baking powder, salt, cinnamon (and nutmeg or ginger, if using).
Build the Batter: Gently stir the dry ingredients into the wet mixture until just combined—don’t overmix. Fold in the diced apple.
Bake: Preheat the oven to 350 °F (175 °C). Line an 8×8-inch (or similar) baking pan with parchment paper or grease it lightly. Spread batter evenly in the pan.
Bake for 20–25 minutes, until the top is lightly golden and a toothpick inserted into the center comes out with just a few moist crumbs.
Cool & Serve: Let cool completely in the pan before slicing into squares. For cleaner slices, chill briefly in the refrigerator.
Nutrition
- Calories: 160
- Sugar: 15 g
- Fat: 8 g
- Carbohydrates: 22 g
This recipe always takes me right back to my grandma’s kitchen. Every fall, we’d take a trip to the local orchard, coming home with bags of apples so crisp they’d snap when you bit into them. The deal was always that we had to bake something with them that very same day. While my sisters always lobbied for a complicated, lattice-topped pie, my vote was for something simpler, faster, and—most importantly—something we could eat sooner.
My grandma, being the wise woman she was, would often compromise by making what she called “apple slice bars.” They were quick, messy, and we’d eat them warm, leaning over the counter to catch any falling crumbs. These blondies are my grown-up, slightly more sophisticated homage to her recipe. I’ve added the nutty depth of brown butter, which feels very *chef-y*, but the soul of it—the joy of baking with seasonal fruit and sharing it immediately with people you love—is exactly the same. It’s a reminder that the best recipes aren’t just about taste; they’re about the memories you make while creating them.
Gathering Your Ingredients
Here’s your shopping list! The beauty of this recipe is in its simplicity. Let’s talk about each component and why it works so well.
- 1/2 cup (1 stick) unsalted butter – This is the star of the show! We’re browning it to unlock a deep, nutty, caramel-like flavor that makes these blondies truly exceptional. Using unsalted butter lets us control the salt level ourselves. Chef Insight: If you only have salted butter, that’s okay! Just reduce the added salt in the dry ingredients to a generous pinch.
- 1 cup light or dark brown sugar, packed – Brown sugar is non-negotiable for its molasses notes and moist, chewy texture. Dark brown sugar will give a deeper, richer flavor, while light brown sugar is a bit more subtle. Both are fantastic!
- 1 large egg – Our binding agent, bringing everything together and adding structure. Make sure it’s at room temperature to emulsify seamlessly into the brown butter and sugar.
- 1 teaspoon vanilla extract – The classic flavor enhancer that makes everything taste more like itself. A good quality vanilla makes a noticeable difference here.
- 1 cup all-purpose flour – The foundation of our blondie structure. Chef Hack: For a lighter, more cake-like texture, you can swap in 1:1 gluten-free flour. I’ve had great results with Bob’s Red Mill.
- 1/2 teaspoon baking powder – This gives our blondies just a tiny bit of lift, making them tender and easy to bite into, without making them cakey.
- 1/4 teaspoon salt – Crucial for balancing all that sweetness and enhancing the other flavors. Don’t skip it!
- 1 teaspoon ground cinnamon – The warm, cozy heart of this recipe. It’s the perfect partner for apples and brown sugar.
- 1 medium apple, peeled and finely diced (about 1 cup) – I love a tart Granny Smith for contrast, or a sweet-tart Honeycrisp for more apple flavor. The key is to dice it small so it disperses evenly and bakes through perfectly. Substitution Tip: No fresh apples? You can use 1 cup of well-drained, canned apple pie filling, chopped up!
- Optional: pinch of nutmeg or a touch of ground ginger – This is your chance to play! A tiny pinch of nutmeg adds classic pie warmth, while ginger adds a little spicy kick.
Let’s Make Some Magic: Step-by-Step Instructions
Ready? Apron on! This process is simple, but a few key steps make all the difference. Follow along for blondie perfection.
Step 1: Brown the Butter Like a Boss
This is the most important step, and it’s easier than you think! Melt your stick of butter in a light-colored saucepan or skillet over medium heat. Let it cook, swirling the pan occasionally. You’ll hear it sizzle and pop—that’s the water cooking off. Keep a close eye! After a few minutes, the sizzling will quiet down and you’ll see little golden-brown specks form at the bottom of the pan. The butter will smell incredibly nutty and toasted. This whole process takes about 4-5 minutes. Immediately pour it into a heatproof bowl to stop the cooking. This prevents it from burning. Let it cool for just a minute or two—you want it warm, not scalding hot.
Step 2: Create the Wet Mixture
Add your packed cup of brown sugar to the warm browned butter. Use a whisk or a spatula and stir until the sugar is completely dissolved and the mixture looks smooth and glossy. This is where you start building that fudgy, chewy texture. Now, whisk in the room temperature egg and the vanilla extract until the mixture is completely smooth and well-emulsified. It should be thick and beautiful!
Step 3: Whisk the Dry Goods
In a separate medium bowl, whisk together your flour, baking powder, salt, cinnamon, and any optional spices (like that pinch of nutmeg!). Whisking aerates the flour and ensures the baking powder and salt are evenly distributed, so you get a consistent bake in every single bite.
Step 4: Bring It All Together & Fold in the Goodness
Gently add the dry ingredients to the wet ingredients. Use a spatula and fold until the flour streaks just disappear. Do not overmix! Overmixing develops gluten and can make your blondies tough. Now, gently fold in your finely diced apple until they’re evenly distributed throughout the thick, luxurious batter.
Step 5: Bake to Perfection
Preheat your oven to 350°F (175°C). Line an 8×8-inch baking pan with parchment paper, leaving some overhang on two sides. This is my favorite chef hack for easy removal and clean slicing later! Lightly grease the pan and parchment if needed. Spread the batter evenly into the pan. It will be thick, so use your spatula to press it into all the corners.
Bake for 20-25 minutes. You’re looking for the top to be lightly golden and set, and a toothpick inserted into the center should come out with a few moist crumbs clinging to it—not wet batter, but not completely clean either. A clean toothpick means overbaked, dry blondies!
Step 6: The Hardest Part: Wait!
I know, I know. The smell is irresistible. But you must let the blondies cool completely in the pan set on a wire rack. This allows them to finish setting up. For the absolute cleanest, sharpest slices, I even pop the whole pan into the refrigerator for about 30 minutes after they’ve cooled to room temperature. It’s worth the wait, I promise!
How to Serve These Beauties
Once they’re completely cool, use the parchment paper overhang to lift the entire blondie slab out of the pan onto a cutting board. Slice into 9 or 12 squares. They are divine all on their own, but let’s get fancy! Serve them warm with a scoop of vanilla bean ice cream melting over the top for the ultimate à la mode experience. For a decadent brunch treat, drizzle them with a simple powdered sugar glaze. Or, just grab one with your afternoon coffee and savor a moment of pure, autumnal bliss.
Mix It Up! Delicious Recipe Variations
Feel free to make this recipe your own! Here are a few of my favorite twists:
- Apple Pie Blondies: Fold in 1/2 cup of white chocolate chips and 1/3 cup of chopped toasted pecans along with the apples.
- Oatmeal Cookie Blondies: Replace 1/4 cup of the all-purpose flour with 1/4 cup of old-fashioned oats for a chewy, hearty texture.
- Maple Glaze Drizzle: Whisk together 1/2 cup powdered sugar with 2 tablespoons of pure maple syrup and a splash of milk. Drizzle over the cooled blondies.
- Dairy-Free Delight: Use your favorite plant-based butter (it browns beautifully!) and a flax egg (1 tbsp ground flax + 3 tbsp water, let sit 5 mins).
- Pear & Ginger Twist: Swap the apple for finely diced ripe pear and add 1/2 teaspoon of ground ginger for a sophisticated flavor profile.
Anna’s Chef Notes & Kitchen Stories
This recipe has been through many iterations in my kitchen! The first time I made it, I was so excited about the brown butter that I accidentally added the egg to the scalding hot butter straight from the pan. Let’s just say I ended up with sweet, appley scrambled eggs—not the goal! That’s why I now always stress pouring the brown butter into a separate bowl to cool slightly. Lesson learned!
Over time, I’ve also learned that the type of apple really matters. A softer apple like a McIntosh will practically melt into the batter, creating a more uniform, moist bar. A firmer apple like Granny Smith or Honeycrisp will hold its shape and give you those distinct juicy bursts. I prefer the latter, but it’s totally a personal preference. This recipe is wonderfully forgiving, so don’t be afraid to experiment and find your perfect version!
Your Questions, Answered!
Q: My blondies turned out really cakey and puffy, not dense and chewy. What happened?
A: This usually means you either overmixed the batter after adding the flour (which develops gluten) or you used too much baking powder. Remember to fold until *just* combined! Also, double-check your baking powder measurement.
Q: The bottom of my blondies got really dark. How can I prevent this?
A: This is often an oven issue! Ovens can have hot spots, especially on the bottom. Try moving your rack to the center position and, if it’s still happening, place your baking pan on a second baking sheet to insulate the bottom from direct heat.
Q: My apple pieces sank to the bottom. How do I keep them suspended?
A: Great question! A little chef trick is to toss your diced apple in a teaspoon of the measured flour before folding them into the batter. The light coating of flour helps them “grip” the batter and stay suspended throughout the bars.
Q: Can I freeze these blondies?
A: Absolutely! They freeze beautifully. Let them cool completely, then slice and store in a single layer in an airtight container or freezer bag with parchment between layers. They’ll keep for up to 3 months. Thaw at room temperature or warm them gently in the microwave.
Nutritional Information*
*This is an estimate provided for informational purposes only. Actual values will vary based on specific ingredients used and portion size.
Yield: 12 blondies | Serving Size: 1 blondie
Calories: 160 | Carbohydrates: 22g | Sugars: 15g | Fat: 8g | Protein: 1.5g
And there you have it—brown butter, cinnamon, and apples all baked into one chewy, golden blondie that tastes like fall in every bite. Whether you serve them warm with a scoop of ice cream, tuck them into a lunchbox, or sneak one with your morning coffee (no judgment here), these bars are bound to become a go-to treat. Bake a pan, share with someone you love, and let the cozy flavors do the rest.