***
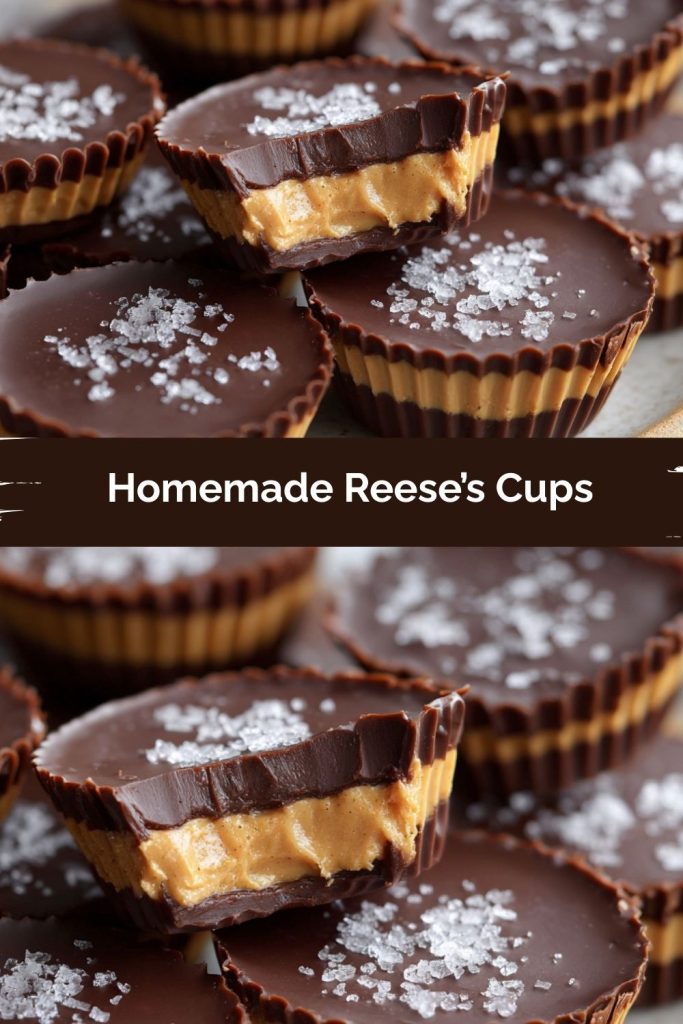
Homemade Reese’s Cups: Your New Favorite Sweet & Salty Obsession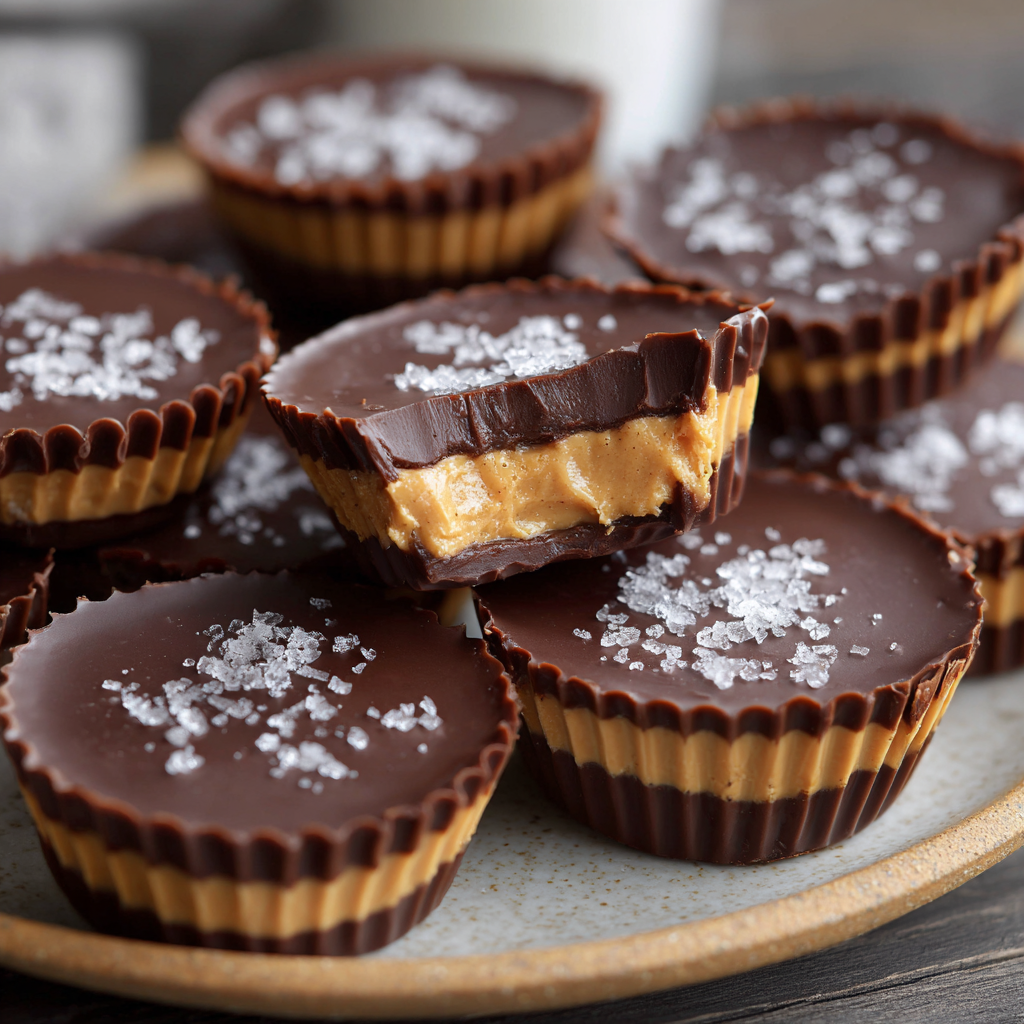
Hey there, friend! Let’s be real for a second: is there anything more perfectly, blissfully satisfying than that moment you break into a Reese’s Peanut Butter Cup? That crisp snap of chocolate giving way to a creamy, salty-sweet peanut butter center? It’s a tiny, foil-wrapped masterpiece of flavor and texture. But what if I told you that you could create something even more magical right in your own kitchen?
That’s right! Today, we’re ditching the checkout lane and whipping up a batch of our very own Homemade Reese’s Cups. And trust me, the homemade version isn’t just a copycat—it’s an upgrade. We’re talking about a richer chocolate shell, a peanut butter filling that’s impossibly creamy and bursting with real peanut flavor, and the incredible pride that comes from making a beloved treat from scratch. The best part? You only need a handful of simple ingredients and about 15 minutes of active kitchen time. No fancy equipment, no complicated techniques—just pure, unadulterated joy.
This recipe is my go-to for last-minute gifts, potluck desserts that disappear in seconds, or for stashing in the freezer for those… ahem… emergency chocolate cravings (you know the ones I’m talking about). So, grab your favorite mixing bowl and let’s turn a simple craving into a delicious, homemade reality. I promise, once you try these, you might just forget all about the store-bought kind!
A Sweet Slice of Nostalgia
PrintHomemade Reese’s Cups

These Homemade Reese’s Cups bring all the peanut butter-chocolate magic of the store-bought classic—only better. Rich, creamy, and ridiculously easy to make with just a few ingredients. Keep them in the fridge or freezer for a perfect snack or dessert fix that hits every time.
- Prep Time: 15 mins
- chill time: 30 mins
- Total Time: 45 mins
- Yield: 12 mini cups 1x
Ingredients
1 cup creamy peanut butter
1/4 cup powdered sugar
1/2 tsp vanilla extract
Pinch of salt
1 1/2 cups chocolate chips (semi-sweet or milk)
1 tbsp coconut oil (optional, for smoother melting)
Instructions
Line a mini muffin tin with paper liners.
In a bowl, mix peanut butter, powdered sugar, vanilla, and salt until smooth.
Melt chocolate chips with coconut oil (if using) in the microwave in 30-second bursts, stirring until smooth.
Spoon a little melted chocolate into each liner, spreading slightly.
Add a small scoop of the peanut butter mixture, then top with more chocolate to cover.
Tap the tray gently to level the tops.
Chill in fridge or freezer until set (about 30 mins).
Nutrition
- Calories: 180 |
- Sugar: 10g
- Fat: 13g
- Carbohydrates: 14g
- Protein: 4g
My love affair with the peanut butter-chocolate duo started young, but it wasn’t in a candy aisle. It was in my Nana’s kitchen on a rainy Sunday afternoon. She wasn’t one for store-bought sweets; her magic happened with a well-worn mixing bowl and a wooden spoon. Her signature move was what she called a “Peanut Butter Pocket”: a generous dollop of smooth peanut mixed with a touch of honey and powdered sugar, smushed between two plain milk chocolate squares. It was messy, imperfect, and absolutely heavenly.
She’d hand me one with a wink, her hands dusted with powdered sugar, and we’d sit at her formica table listening to the rain, our treat melting a little in our fingers. It was never about perfection; it was about the simple, shared joy of making something delicious together. This recipe is my grown-up, slightly more refined homage to Nana’s “Pockets.” It captures that same soul-satisfying combination of salty and sweet, creamy and crunchy, but in a tidy, beautiful little cup that makes me feel like a kitchen wizard. Every time I make them, I’m right back at that table with her, and that, my friend, is the real secret ingredient.
Gathering Your Magical Ingredients
One of the things I love most about this recipe is its beautiful simplicity. You likely have most of these pantry heroes already! Here’s what you’ll need to create your own candy counter magic:
- 1 cup creamy peanut butter – This is the star of the show! I recommend using a standard, no-stir variety like Jif or Skippy for the perfect creamy, spreadable consistency. The oils in natural peanut butters can separate and make the filling a bit greasy. Chef’s Insight: For a next-level flavor boost, try using a roasted peanut butter!
- 1/4 cup powdered sugar – This sweetens the filling and, crucially, helps it firm up to that classic Reese’s texture. Don’t be tempted to skip it! If you’re out, you can blitz regular white sugar in a blender until powdery.
- 1/2 tsp vanilla extract – A tiny splash adds a warm, complex depth of flavor that makes the peanut butter sing. Trust me on this one!
- Pinch of salt – This is non-negotiable! It balances the sweetness and enhances the peanut flavor. If you’re using unsalted peanut butter, you might want to use a slightly more generous pinch.
- 1 1/2 cups chocolate chips – Semi-sweet is my personal favorite for a perfect balance, but milk chocolate will give you that classic Reese’s vibe. Feel free to use high-quality chocolate bars chopped up for an even more decadent experience. Substitution Tip: Dark chocolate chips are a fantastic option for my fellow dark chocoholics!
- 1 tbsp coconut oil – This is listed as optional, but I highly recommend it! It makes the melted chocolate incredibly smooth, easy to work with, and gives the finished cups a gorgeous, professional-looking snap. You won’t taste the coconut.
Let’s Make Some Magic: Step-by-Step
Okay, apron on? Let’s do this! This process is so simple and fun—it’s a great one to do with helpers of all ages.
Step 1: Prep Your Station. Line a mini muffin tin with paper liners. This recipe makes about 12 mini cups, but you can easily double it! Using a mini tin gives you that perfect, bite-sized treat. Chef’s Hack: Give the liners a very light spritz with cooking spray. This isn’t essential, but it helps the chocolate release from the paper even more cleanly.
Step 2: Create the Dreamy Filling. In a medium bowl, combine the creamy peanut butter, powdered sugar, vanilla extract, and that all-important pinch of salt. Stir until it’s completely smooth and well-combined. It will be thick, fudgy, and taste amazing. Try not to eat it all with a spoon right now! Set this aside.
Step 3: Melt the Chocolate. Now, for the chocolate! Place the chocolate chips and coconut oil (if using) in a microwave-safe bowl. Heat in the microwave in 30-second bursts, stirring well after each burst, until the chocolate is completely smooth and glossy. Please don’t rush this! Burnt chocolate is a sad thing. Chef’s Hack: You can also melt the chocolate using a double boiler over simmering water if you prefer. The key is low, gentle heat.
Step 4: The First Chocolate Layer. Using a small spoon or a small cookie scoop, spoon a little of the melted chocolate into the bottom of each prepared muffin liner. You just want enough to create a solid base—about a teaspoon or so. Gently tap the muffin tin on the counter to help the chocolate spread evenly and settle. This is your foundation!
Step 5: Add the Peanut Butter Heart. Now, grab your peanut butter mixture. Roll small pieces of the filling into little balls (about ¾ tsp each) and gently flatten them into small discs. Place one disc into the center of each chocolate-lined cup. This helps ensure the peanut butter is centered and doesn’t touch the sides, which makes for a prettier final product with distinct layers.
Step 6: Seal the Deal! Finally, spoon more melted chocolate over each peanut butter center, covering it completely. Gently tap the whole tin on the counter again. This helps the top layer of chocolate settle into all the nooks and crannies, creating a smooth, even top and ensuring no peanut butter is peeking through.
Step 7: Chill Out. Carefully transfer the entire muffin tin to your refrigerator or freezer. Let them chill for at least 30 minutes, or until the chocolate is completely firm. This is the hardest part—the waiting!
How to Serve Your Homemade Masterpieces
Once they’re fully set, simply pop them out of the tin and peel away the liners! I love to arrange them on a cute little plate or platter for serving. They are perfect all on their own, but for a seriously decadent dessert, try placing one on top of a small scoop of vanilla bean ice cream. The contrast of the cold, creamy ice cream and the firm, snappy chocolate is pure bliss. They also make the most thoughtful, heartfelt homemade gift. Package them in a little clear box or bag tied with a ribbon, and you’ve instantly become everyone’s favorite person.
Get Creative! Fun Flavor Twists
The basic recipe is a classic for a reason, but half the fun is making it your own! Here are a few of my favorite ways to mix things up:
- Dark Chocolate Sea Salt: Use dark chocolate chips for the shell and sprinkle a tiny flake of flaky sea salt on top of each cup right after you add the final chocolate layer.
- Crunchy Peanut Delight: Use crunchy peanut butter for the filling, or stir 2-3 tablespoons of finely chopped roasted peanuts into the creamy peanut butter mixture.
- White Chocolate Raspberry: Swap the peanut butter for a mixture of ¾ cup almond butter, ¼ cup crushed freeze-dried raspberries, and the powdered sugar. Use white chocolate chips for the coating.
- Cookie Butter Cups: Replace the peanut butter with speculoos or biscoff cookie butter for a spiced, caramelized flavor explosion.
- Almond Joy Vibe: Add a sprinkle of shredded coconut and a slivered almond on top with the final chocolate layer.
Anna’s Chef Notes & Kitchen Stories
This recipe has been a work in progress for years! My first batch was… a learning experience. I tried to use natural peanut butter and skipped the coconut oil. The filling was oily and the chocolate was thick and clumpy. Let’s just say they were delicious in spirit but not exactly pretty! After a few more tests (and a very happy husband who got to eat all the “mistakes”), I landed on this foolproof formula.
One of my favorite things to do is make a double or triple batch and keep a stash in the freezer. They are the ultimate emergency dessert! They thaw in minutes, but I actually love eating them straight from the freezer—the chocolate has an amazing cold snap and the filling is like frozen peanut butter fudge. It’s a game-changer, I promise.
Your Questions, Answered!
Q: My chocolate got thick and clumpy when I melted it. What did I do wrong and can I fix it?
A: Ah, this is usually a case of the chocolate getting too hot or a tiny drop of water getting into the mix (water is chocolate’s enemy!). This is called “seizing.” To prevent it, always melt slowly and stir often. If it happens, don’t panic! Try stirring in a tiny bit more coconut oil or even a teaspoon of neutral oil (like vegetable or canola) to help smooth it back out.
Q: Can I make these without a muffin tin?
A: Absolutely! You can use a standard muffin tin to make giant cups (this recipe will make about 6). You can also use a square baking pan lined with parchment paper. Spread half the chocolate in the pan, freeze it, then spread the peanut butter layer on top, followed by the remaining chocolate. You’ll get one giant slab that you can cut into bars or squares.
Q: My peanut butter mixture is too soft/gooey to handle. Help!
A> No worries! Just pop the mixture into the fridge for 15-20 minutes. It will firm up significantly, making it much easier to roll into neat little balls.
Q: How long do these homemade cups last, and how should I store them?
A: Because they are fresh and lack preservatives, they are best stored in an airtight container in the refrigerator for up to 2 weeks. For longer storage, keep them in the freezer for up to 3 months. Let them thaw for a few minutes before eating for the best texture.
Nutritional Information
Please note: This is an estimate per mini cup (based on a yield of 12) and will vary based on specific ingredients used.
Calories: ~180 | Fat: 13g | Saturated Fat: 5g | Carbohydrates: 14g | Fiber: 1g | Sugar: 10g | Protein: 4g
Prep Time: 15 mins | Chill Time: 30 mins | Total Time: 45 mins | Servings: 12 mini cups
 Final Thoughts
Homemade Reese’s Cups are the ultimate reminder that sometimes the simplest recipes bring the most joy. With just a handful of pantry staples and a little chill time, you can create a treat that’s creamier, richer, and more personal than anything you’ll find in a wrapper.
These little cups aren’t just candy—they’re moments of comfort, nostalgia, and pure happiness. They’re perfect for gifting, sharing at a party, or stashing in the freezer for those late-night chocolate cravings. And once you start playing with the flavor variations, you’ll realize this recipe is more of a canvas than a rulebook—dark chocolate, sea salt, cookie butter, coconut…the possibilities are endless.
So, grab that mixing bowl, melt some chocolate, and roll yourself right back into the joy of homemade treats. I promise, one bite of these will have you wondering why you ever settled for store-bought.