***
Let’s Bake Some Holiday Magic: Reindeer Christmas Cookies!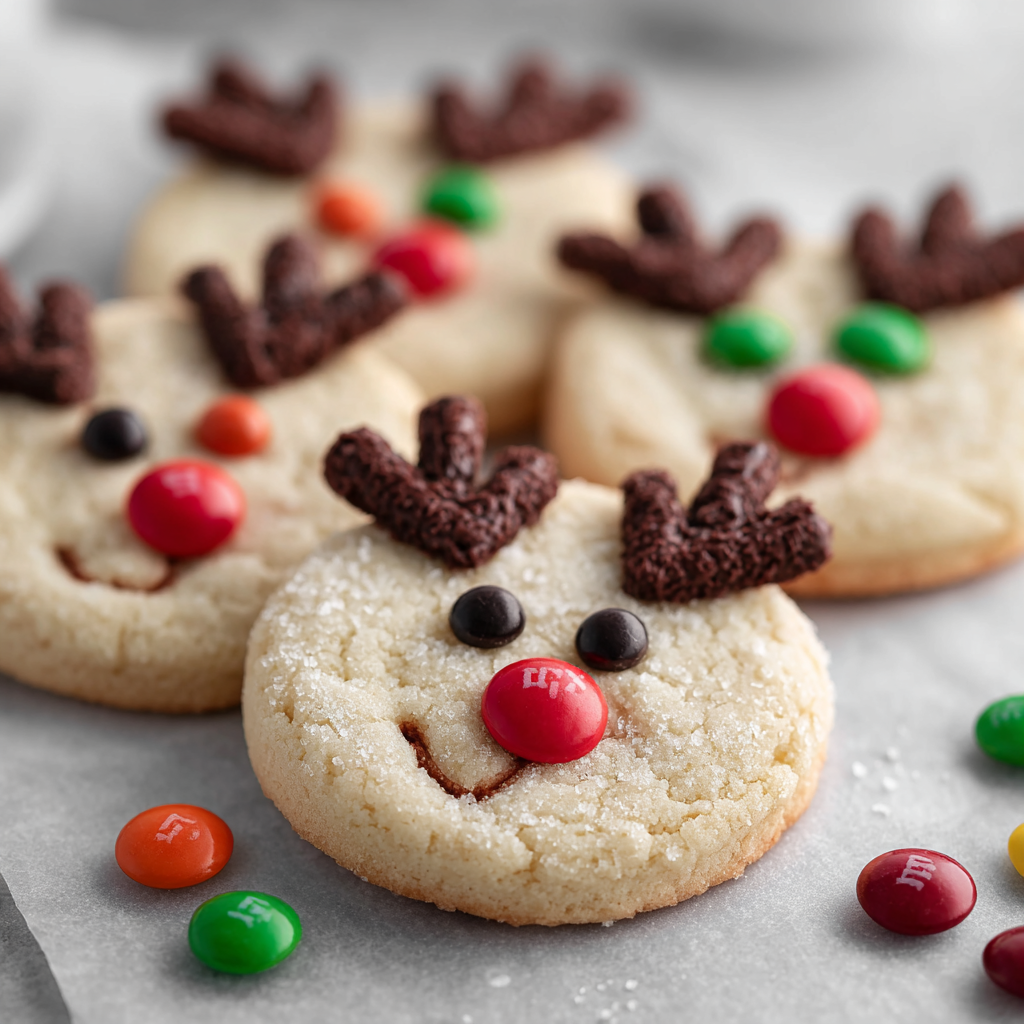
Hey there, friend! Is there anything that smells more like the holidays than butter, sugar, and vanilla wafting from a warm oven? I’m Anna, and if you’re anything like me, your favorite December memories are often tied to the kitchen. It’s where flour ends up on your nose, laughter fills the air, and simple ingredients transform into something truly magical. Today, we’re rolling up our sleeves (and probably getting a little messy) to create the most adorable, festive, and downright delicious treat: Reindeer Christmas Cookies!
These aren’t just any sugar cookies. Oh no. These are buttery, crisp, and perfectly sweet canvases waiting for a personality transplant into everyone’s favorite festive friend, Rudolph! With chocolate antlers and a bright candy nose, they’re a joy to make and an absolute showstopper on any cookie platter. They’re the perfect project for a cozy afternoon with kids, a fun addition to your holiday party spread, or a heartfelt homemade gift that says, “I made this just for you.” So, preheat those ovens, put on your favorite holiday playlist, and let’s cook up some Christmas cheer together. I promise, this is one baking adventure that’s as fun as the final result is tasty!
A Herd of Happy Memories
PrintReindeer Christmas Cookies

Bring some holiday magic into your kitchen with these charming Reindeer Christmas Cookies! Buttery, crisp sugar cookies become the perfect canvas for playful reindeer faces—complete with chocolate antlers and candy noses. Kid-friendly, party-perfect, and made to impress, they’re as fun to make as they are to eat.
- Prep Time: 25 minutes
- chill time: 1 hour
- Cook Time: 10–12 minutes
- Total Time: 48 minute
- Yield: About 36 cookies 1x
Ingredients
For the Cookies:
2 1/2 cups all-purpose flour
1/2 teaspoon baking powder
1/4 teaspoon salt
1 cup (2 sticks) unsalted butter, softened
3/4 cup granulated sugar
1 large egg
1 1/2 teaspoons vanilla extract
For Decorating:
1/2 cup semisweet or dark chocolate chips (for antlers and eyes)
36 colorful chocolate candies (like M&Ms or Smarties) – red, green, orange, etc.
Instructions
Make the Dough:
In a medium bowl, whisk together flour, baking powder, and salt.
In a large bowl, beat butter and sugar until light and fluffy (about 2–3 minutes).
Add egg and vanilla, beating until combined.
Slowly mix in the dry ingredients until a dough forms.
Chill the Dough:
Divide dough into two discs, wrap in plastic, and refrigerate for at least 1 hour.
Roll & Cut:
Preheat oven to 350°F (175°C). Line baking sheets with parchment paper.
Roll dough on a floured surface to 1/4-inch thickness.
Cut into 2–2.5 inch circles using a cookie cutter or glass.
Decorate:
Melt chocolate chips in a microwave-safe bowl in 20-second intervals, stirring between each, until smooth.
Transfer melted chocolate to a piping bag or a small zip-top bag with a tiny corner snipped off.
Pipe two dots for eyes and draw branched antlers above them.
Add a small dot of chocolate at the nose position and gently press in a chocolate candy.
Set:
Allow chocolate to set completely before storing in an airtight container.
Nutrition
- Calories: 140
- Sugar: 9g
- Fat: 7g
- Carbohydrates: 18g
- Protein: 1g
I have to share a little story with you. The very first time I made these reindeer cookies, it was a complete and beautiful disaster. I was about ten years old, “helping” my grandma in her wonderfully chaotic kitchen. We had flour everywhere, my “antlers” looked more like squiggly spider legs, and I may have “tested” a few too many of the M&Ms meant for the noses. But you know what? We laughed until our sides hurt. My grandma, with her infinite patience, showed me how to gently press the candies so the cookie didn’t crack, and she let me have full creative control over the reindeers’ expressions. Some were cross-eyed, some had one antler bigger than the other, and one particularly ambitious fellow had three eyes. They were perfectly imperfect.
That’s the magic of these cookies. It’s not about creating a flawless, magazine-worthy herd. It’s about the time spent together, the stories you tell while the dough chills, and the pride on a little one’s face when they present their quirky, chocolate-smeared creation. Every time I pipe on those antlers now, I’m transported back to that warm, vanilla-scented kitchen, and I smile. I hope these cookies create that same kind of joyful, nostalgic magic for you and your family.
Gathering Your Reindeer Cookie Squad
One of the things I love most about this recipe is that you likely have most of these ingredients in your pantry right now! Here’s your shopping list for the cookie base and its festive finery.
For the Cookies:
- 2 1/2 cups all-purpose flour: The sturdy foundation of our cookie. I always fluff my flour with a spoon before lightly scooping and leveling it off with a knife. This prevents over-measuring and keeps our cookies tender, not tough!
- 1/2 teaspoon baking powder: Our little leavening helper that gives the cookies a slight lift and a lovely, soft-yet-crisp texture.
- 1/4 teaspoon salt: Never skip the salt! It’s the flavor enhancer that makes the buttery sweetness truly sing.
- 1 cup (2 sticks) unsalted butter, softened: The star of the show! Using unsalted butter lets us control the salt level. And “softened” is key here – it should yield slightly to a gentle press. Pro tip: if you forgot to take it out, cut it into chunks and it will soften in about 15 minutes!
- 3/4 cup granulated sugar: For that classic, sweet sugar cookie taste and a hint of crispness on the edges.
- 1 large egg: Our binder, bringing the dough together beautifully. Make sure it’s at room temperature to play nicely with the butter.
- 1 1/2 teaspoons vanilla extract: The soul of the cookie! Use pure vanilla extract for the best, warmest flavor. For a fun twist, you could use almond extract, but just 1/2 a teaspoon as it’s more potent.
For Decorating:
- 1/2 cup semisweet or dark chocolate chips: This is for our antlers and eyes. I prefer dark chocolate for a richer, less sweet flavor that balances the cookie and candy, but semisweet works perfectly too!
- 36 colorful chocolate candies (like M&Ms or Smarties): The famous noses! Red is classic for Rudolph, but I love using a mix of green, orange, and red for a whole festive reindeer team. Let your creativity run wild!
Creating Your Cookie Herd: Step-by-Step
Ready to make some magic? Follow these steps, and don’t forget to read my little chef hacks along the way—they’re game-changers!
- Make the Dough:In a medium bowl, grab your whisk and give the flour, baking powder, and salt a good aerating. This is our dry team, and we want them perfectly combined! In a large bowl, using a hand mixer or stand mixer fitted with the paddle attachment, beat the softened butter and sugar together on medium-high speed. We’re not just mixing; we’re creaming! Do this for a full 2-3 minutes until the mixture is pale, fluffy, and wonderfully light. This incorporates air, which is a secret to a fantastic texture. Scrape down the sides of the bowl, then beat in the egg and vanilla until everything is smooth and homogenous. Now, with your mixer on low, gradually add the dry ingredients. Mix just until the flour disappears and a soft dough forms. Overmixing is the enemy of tender cookies!
Chef’s Hack: If the dough seems a bit soft, that’s perfect! It’s supposed to be. We’re about to chill it, which will make it easy to handle.
- Chill the Dough:Turn the dough out onto a clean surface and gently bring it together with your hands. Divide it into two equal discs (this makes rolling later much easier!). Wrap each disc tightly in plastic wrap. Now, the hardest part: patience! Pop them in the refrigerator for at least 1 hour, or up to 2 days.
Chef’s Hack: Chilling is NON-NEGOTIABLE. It firms up the butter, which prevents the cookies from spreading into sad, flat puddles in the oven. It also allows the flour to fully hydrate, giving us a cookie that holds its beautiful round shape.
- Roll & Cut:Preheat your oven to 350°F (175°C) and line your baking sheets with parchment paper. Lightly flour your rolling surface and rolling pin. Take one disc of dough out of the fridge and roll it to a consistent 1/4-inch thickness. Too thin, and they might over-bake; too thick, and they’ll be doughy. Use a 2 to 2.5-inch round cookie cutter (or the open end of a glass dipped in flour) to cut out your circles. Place them about 1 inch apart on your prepared baking sheets.
Chef’s Hack: If the dough gets too soft and sticky while you’re working, don’t add more flour to the surface! Just slide your spatula under it, pop it back on the parchment, and let it chill in the fridge for 10 minutes. Adding extra flour will make the cookies tough.
- Bake:Bake those beauties for 10-12 minutes. You’re looking for the edges to be just lightly, barely golden. The centers might still look slightly soft—that’s what we want! They will continue to set as they cool. Let them cool on the baking sheet for 5 minutes before transferring them to a wire rack to cool completely. I can’t stress this enough: they must be completely cool before we decorate. Warm cookies will melt our chocolate into a puddle!
Chef’s Hack: For perfectly even baking, rotate your baking sheets halfway through the bake time.
- Decorate:Time for the fun part! Place your chocolate chips in a microwave-safe bowl. Microwave in 20-second bursts, stirring vigorously between each burst, until the chocolate is smooth and melted. This low-and-slow method prevents the chocolate from seizing and becoming grainy. Transfer the melted chocolate to a piping bag or a small zip-top bag. Snip a TINY corner off the bag—you can always make it bigger, but you can’t make it smaller!
Now, let’s give these cookies life! Pipe two small dots for the eyes. Then, above the eyes, pipe your antlers. Don’t worry about them being perfect—organic, branched shapes look the most realistic (and adorable). Immediately add a small dot of chocolate where you want the nose to be and gently press a candy into it. The chocolate acts as delicious glue!
Chef’s Hack: If your chocolate starts to thicken up as you work, just give the bag a quick 5-second zap in the microwave and knead it with your hands.
- Set:Allow the chocolate to set completely at room temperature. This usually takes about an hour. If you’re in a hurry, you can pop them in the fridge for 15 minutes. Once set, they’re ready to be devoured or packaged up!
How to Serve Your Festive Friends
Presentation is part of the fun! Pile these cheerful reindeer high on a rustic wooden board or a festive holiday platter. They’re the ultimate cookie exchange contender and a guaranteed hit at any holiday party. I love leaving a few out for Santa with a glass of cold milk—he always appreciates the homemade touch. They also make incredible edible gifts; package them in clear cellophane bags tied with a red ribbon for a present that’s both personal and delicious.
Mix It Up! Creative Recipe Twists
Feel like playing? Here are a few ways to make this recipe your own:
- Chocolate Base: Replace 1/2 cup of the flour with 1/2 cup of unsweetened cocoa powder for a chocolate reindeer cookie!
- Peanut Butter Twist: Add 1/2 cup of creamy peanut butter to the dough when you add the egg and vanilla for a PB&Chocolate vibe. Use peanut M&Ms for the noses!
- Gluten-Free Gang: Use a 1:1 gluten-free all-purpose flour blend. I’ve had great success with Bob’s Red Mill and Cup4Cup.
- Citrus Zing: Add the zest of one orange to the dough for a bright, citrusy note that pairs wonderfully with chocolate.
- The “Blitzen”: Use white chocolate for the antlers and eyes and a blue M&M for a frosty, cool-looking reindeer.
Anna’s Chef Notes
This recipe has evolved so much since that first messy batch in my grandma’s kitchen. I’ve learned that the quality of vanilla and butter really does make a difference—splurge on the good stuff if you can! I also used to try and pipe intricate, symmetrical antlers, but I’ve since learned that the wobbly, free-handed ones have way more charm and character. They look homemade, and that’s the point! One year, my nephew decided every reindeer needed sunglasses made of chocolate, and you know what? They were fabulous. So don’t be afraid to break the rules and get creative. The best recipes are the ones that become a part of your own family’s story.
Your Reindeer Cookie Questions, Answered!
Q: My dough is too crumbly and won’t come together! What did I do wrong?
A: This usually means the flour was measured a little too heavily or the dough is just a tad too dry. Don’t panic! Add cold water, just one teaspoon at a time, and mix until it comes together. Alternatively, your butter might not have been soft enough, making it harder to incorporate. A few extra seconds of mixing can often solve it.
Q: My cookies spread too much and lost their round shape. Help!
A: The most common culprits are not chilling the dough long enough or your oven temperature being off. Always ensure your dough is firm and cold before baking. Also, make sure you’re using a light-colored, cool baking sheet. If you only have dark sheets, reduce the oven temperature by 25°F. An oven thermometer is a cheap and invaluable tool to ensure your oven is at the right temp!
Q: My melted chocolate is thick and clumpy, not smooth. Can I fix it?
A> You’ve overheated it and it’s “seized.” This happens to the best of us! Try stirring in a tiny amount of neutral oil (like vegetable or coconut oil) one teaspoon at a time until it becomes smooth again. The fat will help bring the chocolate back together.
Q: Can I make these cookies ahead of time?
A> Absolutely! You can make the dough and keep it wrapped in the fridge for up to 2 days, or freeze the dough discs for up to 3 months (thaw in fridge overnight before rolling). Baked, undecorated cookies freeze beautifully for up to 2 months in an airtight container. Decorate them after they’ve thawed!
Nutritional Information*
*This is an estimate per cookie, based on a recipe yielding 36 cookies.
- Calories: ~140
- Protein: 1g
- Carbohydrates: 18g
- Fat: 7g
- Sugar: 9g
Prep Time: 25 minutes | Chill Time: 1 hour | Cook Time: 10-12 minutes | Makes: About 36 cookies

Final Thoughts: A Herd Worth Baking For
At the end of the day, these Reindeer Christmas Cookies are about more than butter, sugar, and a splash of vanilla—they’re about the magic of making something joyful together. Whether your reindeer come out perfectly symmetrical or delightfully quirky with wobbly antlers and cross-eyed grins, every cookie carries a little piece of holiday spirit.
They’re the kind of treat that sparks laughter in the kitchen, brightens a cookie platter, and brings wide-eyed smiles to little ones (and adults!) alike. So grab your apron, queue up your favorite carols, and bake a batch of these sweet reindeer friends. Who knows—they just might trot their way into your family’s holiday traditions, one candy nose at a time.