***
Your New Kitchen BFF: The Perfect Pan-Seared Chicken Breast
Hey there, friend! Let’s have a little heart-to-heart about chicken breasts. We’ve all been there, right? You’re full of hope, ready to make a healthy, delicious dinner. But what often comes out of the pan is… sad. A pale, rubbery, tragically dry piece of chicken that feels more like a chore to eat than a joy. It’s enough to make you want to order takeout forever.
Well, I’m here to tell you that it doesn’t have to be that way. Not even a little bit. I’m on a mission to banish dry chicken from your kitchen forever and replace it with something truly glorious: a chicken breast with a crackly, golden-brown crust that gives way to the most juicy, tender, and flavorful interior you’ve ever tasted. And the best part? We’re going to do it in about 15 minutes, with just a handful of simple ingredients you probably already have in your spice cabinet.
This isn’t just a recipe; it’s your new weeknight superhero, your salad’s best friend, and your ticket to feeling like a total rockstar in the kitchen. It’s the foundation for a thousand amazing meals and the simple, satisfying dish you’ll come back to again and again. So, grab your favorite skillet and let’s turn the ordinary into the extraordinary, together.
The Chicken That Started It All
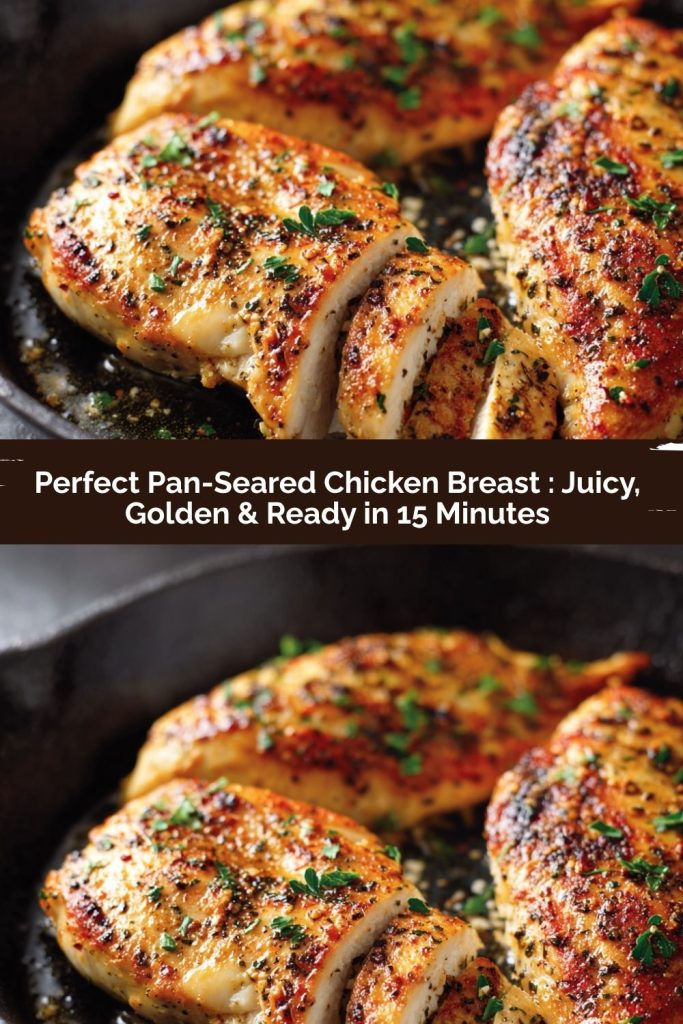
PrintPerfect Pan-Seared Chicken Breast : Juicy, Golden & Ready in 15 Minutes
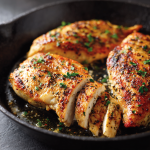
Say goodbye to dry, flavorless chicken. This Pan-Seared Chicken Breast recipe delivers golden, crispy edges and juicy, tender meat using simple spices and quick stovetop cooking. It’s fast, foolproof, and works with just about any side—from veggies to pasta to salads. A true weeknight hero that never disappoints.
- Prep Time: 5 minutes
- Cook Time: 10 minutes
- Total Time: 15 minutes
- Yield: 4 1x
Ingredients
2 large chicken breasts, halved lengthwise (or 4 small breasts)
3 tbsp olive oil, divided
¾ tsp garlic powder
¾ tsp smoked paprika
¾ tsp onion powder
¾ tsp dried oregano
¾ tsp salt
¼ tsp ground black pepper
¼ tsp cayenne pepper (optional)
2 tbsp butter
Instructions
Pat chicken dry and season both sides with garlic powder, paprika, onion powder, oregano, salt, black pepper, and cayenne (if using).
Heat 2 tbsp olive oil in a large skillet over medium-high heat until shimmering.
Add chicken to the pan and sear undisturbed for 4–5 minutes until golden. Flip and cook another 4–5 minutes, or until internal temp reaches 165°F.
Reduce heat to low, add 1 tbsp olive oil and butter. Spoon melted butter over chicken for 1–2 minutes to finish.
Let rest a few minutes before slicing. Serve warm.
Nutrition
- Calories: 279
- Sodium: 470mg
- Fat: 18g
- Saturated Fat: 5g
- Carbohydrates: 1g
- Protein: 27g
This recipe takes me right back to my first tiny apartment kitchen. It was barely bigger than a closet, with questionable linoleum and a stove that had exactly one reliable burner. I was fresh out of college, on a tight budget, and determined to learn how to cook for myself without living on instant noodles.
Chicken breasts were my go-to—they were affordable and versatile. But for weeks, my attempts were… well, let’s just call them “learning experiences.” I’d overcrowd the pan, flip the chicken incessantly, and cook it into tough, chewy submission out of a fear of undercooking. I’ll never forget the night I finally got it right. I was having a friend over for dinner, and in a moment of kitchen intuition (or maybe desperation!), I left the chicken alone in the hot pan. I didn’t poke it. I didn’t move it. I just let it sizzle. When I finally flipped it, I was greeted by the most beautiful, golden-brown crust. That was the “Aha!” moment. That single, simple change—trusting the sear—unlocked a world of flavor and juiciness I didn’t know was possible. It’s the lesson I carry with me every time I step up to the stove, and it’s the first secret I want to share with you.
Gathering Your Kitchen Allies
Here’s the beautiful part: the magic doesn’t come from a long list of fancy ingredients. It comes from a few simple staples and the technique we use to bring them all together. Let’s take a look at our team players:
- 2 large chicken breasts, halved lengthwise (or 4 small breasts): This is our non-negotiable first step for success! Halving large breasts horizontally (butterflying them all the way through) creates thinner, even cutlets. This ensures they cook quickly and evenly, so the outside is golden before the inside has a chance to dry out. If you can find thin-cut breasts, even better!
- 3 tbsp olive oil, divided: We use most of it to get a great sear, and a little at the end to help create our simple, flavorful pan sauce. A neutral oil like avocado oil works great too, but I love the fruity hint that good olive oil adds.
- ¾ tsp garlic powder & ¾ tsp onion powder: While I adore fresh garlic, powders are the secret weapon here. They don’t burn as easily as fresh minced garlic would in a hot pan, and they create a beautiful, even coating of flavor that clings to every inch of the chicken.
- ¾ tsp smoked paprika: This is the flavor MVP! It gives the chicken a subtle smokiness and a gorgeous, deep red color. If you only have sweet paprika, that works too, but the smoked version adds a whole extra dimension.
- ¾ tsp dried oregano: A little herbal, earthy note that makes the flavor profile sing. Feel free to swap in thyme or an Italian herb blend if that’s what you have on hand.
- ¾ tsp salt: Crucial for bringing out all the natural flavors of the chicken and spices. Don’t be shy with it!
- ¼ tsp ground black pepper: A classic for a reason. It adds a little warmth and bite.
- ¼ tsp cayenne pepper (optional): Just a tiny pinch adds a gentle, background warmth that won’t make it spicy, just more interesting. Omit it if you’re sensitive to heat, or add a bit more if you like a kick!
- 2 tbsp butter: Our finishing touch! Adding butter at the end with a splash of fresh oil creates a luxurious, quick pan sauce. Basting the chicken with this golden goodness infuses it with rich, nutty flavor and gives it a beautiful glossy finish.
Let’s Cook! Your Foolproof, Step-by-Step Guide
Ready to make some magic? Follow these steps, and you’ll have perfect chicken in no time. I’ve packed this section with all my favorite chef hacks to set you up for success.
Step 1: The Prep Work is Everything. First, pat your chicken cutlets completely dry with a paper towel. This is a non-negotiable step for that perfect crust! Moisture is the enemy of browning; steam is what turns chicken pale and sad. A dry surface means a beautifully seared, golden crust. Once they’re dry, sprinkle both sides evenly with all of your spices—the garlic powder, smoked paprika, onion powder, oregano, salt, black pepper, and that optional cayenne. Let it sit for just a minute while your pan heats up. This little rest allows the salt to start pulling the flavors deeper into the meat.
Step 2: Heat the Pan Like a Pro. Place a large, heavy-bottomed skillet (stainless steel or cast iron are my favorites for this) over medium-high heat. Add 2 tablespoons of your olive oil and let it heat up until it shimmers. You can test it by flicking a tiny drop of water into the pan—if it sizzles and dances immediately, you’re good to go! A properly hot pan is your second secret to a gorgeous sear.
Step 3: The Sizzle & Sear. Carefully place your seasoned chicken cutlets in the hot pan. You should hear an immediate, confident sizzle. Now, here’s the hard part: walk away. Well, not literally, but don’t touch it! Let it cook, undisturbed, for a solid 4-5 minutes. This is how you build that incredible, crispy, golden-brown crust. If you try to move it too early, it will stick and tear. Trust the process!
Step 4: The Flip & Finish. Using tongs, peek underneath one piece. Is it a deep, golden brown? Perfect! Flip each piece over. It will cook a little faster on this side. Cook for another 4-5 minutes. The best way to know if it’s done? Use an instant-read thermometer. Insert it into the thickest part of the chicken—you’re looking for 165°F (74°C). This is the single best way to guarantee perfectly cooked, never-dry chicken.
Step 5: The Butter Basting Finale. Once the chicken is cooked through, reduce the heat to low. Push the chicken to one side of the pan and add the remaining 1 tablespoon of olive oil and the 2 tablespoons of butter. As the butter melts and foams, tilt the pan slightly and use a spoon to continuously scoop the bubbling butter and oil over the top of the chicken breasts. Do this for 1-2 minutes. This final step is like a luxurious spa treatment for the chicken, adding incredible flavor and a gorgeous sheen.
Step 6: The Patient Rest. Transfer the chicken to a clean cutting board or plate. I know it’s tempting to cut right in, but you must let it rest for 5 minutes! This allows the frantic, hot juices inside the meat to relax and redistribute throughout the chicken. If you slice it immediately, all those precious juices will run out onto the cutting board, leaving you with dry chicken. A little patience here pays off in huge, juicy dividends.
Plating Up Your Masterpiece
Now for the fun part! You can slice your chicken against the grain into beautiful strips for serving over a vibrant salad, tucked into tacos, or piled on top of a creamy pasta. Or, you can serve the cutlets whole alongside your favorite sides. I love it with a big heap of garlicky mashed potatoes and some simple roasted broccoli to soak up any extra buttery pan juices. It’s also fantastic with a quick arugula salad dressed with lemon vinaigrette right on the same plate – the warm chicken slightly wilts the greens, and it’s absolutely divine.
Make It Your Own! 5 Delicious Twists
The beauty of this recipe is its versatility. Once you’ve mastered the basic technique, the flavor world is your oyster! Here are a few of my favorite ways to mix it up:
- Lemon Herb: Add the zest of one lemon to the spice rub. When you add the butter, also throw in a few fresh sprigs of thyme or rosemary and a squeeze of fresh lemon juice for a bright, fresh finish.
- “Everything Bagel” Chicken: Swap the spice blend for 2 tablespoons of Everything Bagel Seasoning. It’s savory, seedy, and absolutely addictive.
- Creamy Mushroom Sauce: After removing the chicken, sauté 8 oz of sliced mushrooms in the same pan. Add a minced garlic clove, then pour in ½ cup of heavy cream or half-and-half. Simmer until slightly thickened and pour over the chicken.
- Dairy-Free Delight: Simply omit the butter and use all olive oil (or avocado oil) for the entire process. It will still be incredibly flavorful and juicy!
- Mediterranean Magic: Season the chicken with a blend of dried oregano, lemon zest, and a pinch of cinnamon. After basting with butter, top with crumbled feta cheese and chopped Kalamata olives.
Anna’s Kitchen Chronicles
This recipe has been a constant in my kitchen for years, but it’s evolved in little ways. I used to be terrified of undercooking chicken, so I’d inevitably overcook it. Getting an instant-read thermometer was a complete game-changer for my confidence—it took the guesswork out and guaranteed perfection every single time. It’s the one kitchen tool I beg every home cook to invest in!
Another funny lesson? I learned the importance of a dry chicken breast the hard way. I was in a rush one night and skipped the pat-dry step. The chicken steamed and stuck to my brand new pan like glue. It was a mess! That one simple, 30-second task is the difference between a flawless sear and a frustrating cleanup. Trust me on this one, friends. Little steps, big rewards.
Your Questions, Answered!
Q: My chicken is sticking to the pan! What did I do wrong?
A: This usually means one of two things: 1) Your pan wasn’t hot enough before you added the chicken, or 2) The chicken wasn’t dry enough. Make sure you pat it thoroughly and wait for that oil to shimmer. Also, don’t try to move it too early! It will naturally release from the pan once a proper crust has formed.
Q: Can I use frozen chicken breasts?
A: I highly recommend thawing them first for the best results. Cooking frozen chicken will steam it and prevent browning, leading to a tough texture. The safest way is to thaw it overnight in the fridge. In a pinch, you can place sealed chicken in a bowl of cold water, changing the water every 30 minutes until thawed.
Q: Why is my chicken still pink inside after I followed the timing?
A: Stove temperatures and chicken thickness can vary! Timing is a helpful guide, but the internal temperature is your true north. This is exactly why an instant-read thermometer is your best friend. As long as it reads 165°F (74°C) in the thickest part, your chicken is perfectly safe to eat, even if it looks a little pink near the bones (this can sometimes happen due to the chicken’s physiology).
Q: Can I make this with chicken thighs?
A: Absolutely! Boneless, skinless chicken thighs are fantastic prepared this way. Because they have more fat, they are very forgiving and stay incredibly juicy. Just note that they may require an extra minute or two of cooking per side. Again, trust your thermometer!
Nutritional Information*
Per Serving (Serves 4): Calories: 279 | Fat: 18g | Saturated Fat: 5g | Carbohydrates: 1g | Protein: 27g | Sodium: 470mg
*Please note that this is an estimate provided for informational purposes only. Exact nutrition can vary based on specific ingredients used.
💭 Final Thoughts
Once you’ve made this Pan-Seared Chicken Breast, you’ll wonder how you ever did dinner without it. It’s simple, golden, and endlessly versatile — the kind of recipe that quietly becomes part of your kitchen DNA. Every sizzle in the skillet feels like a small victory, and every juicy bite is a reminder that great cooking doesn’t have to be complicated. So go ahead — grab that pan, trust the sear, and make yourself a little everyday magic. Because sometimes, the most ordinary ingredients lead to the most extraordinary meals.