***
Healthy Frozen Yogurt-Covered Fruit Bites (Easy Snack or Dessert)
Your New Favorite Freezer Staple Is Here!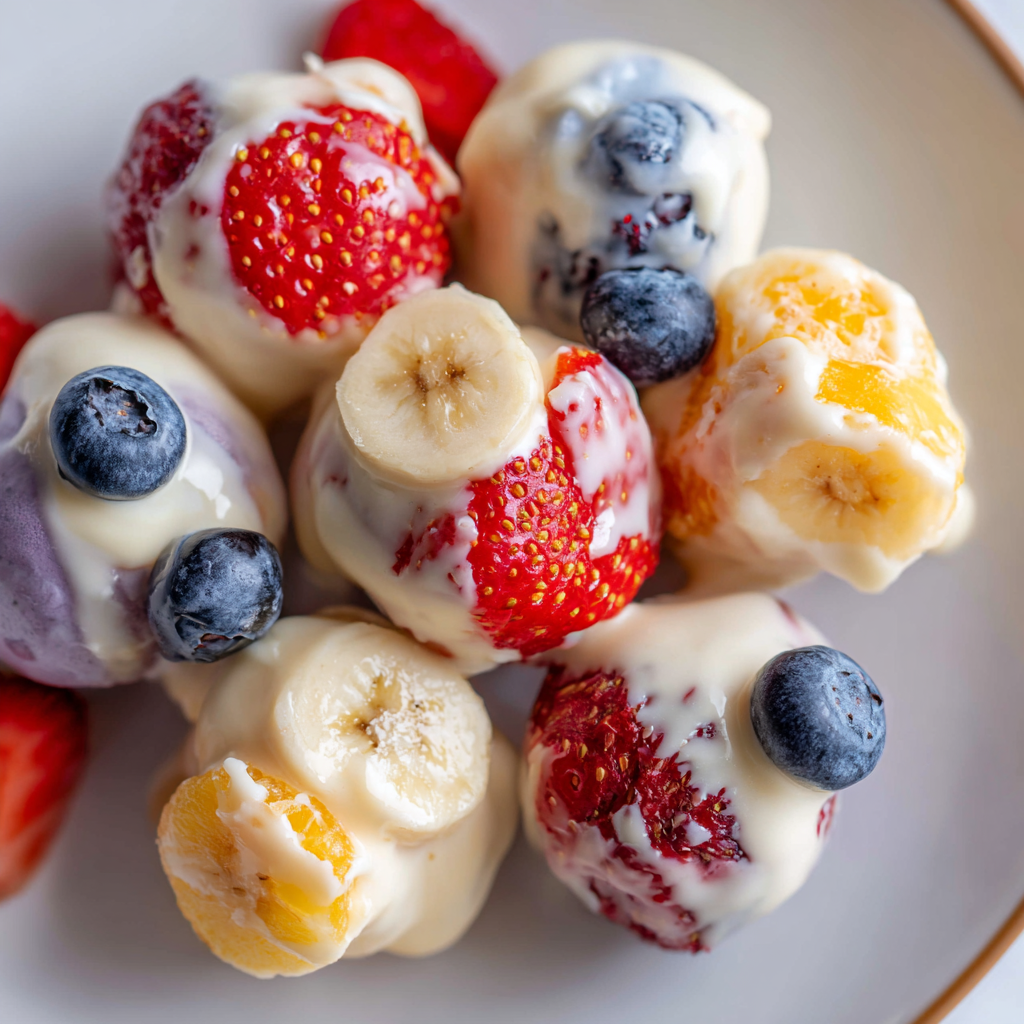
Hey there, friend! Let me ask you a question. Do you ever hit that 3 PM slump and find yourself staring into the pantry, willing a magical, delicious, and actually-good-for-you snack to appear? Or maybe you’re looking for a sweet treat after dinner that won’t leave you feeling heavy and regretful? I’ve been there more times than I can count, usually with a toddler tugging on my leg and my own stomach doing the rumbly-grumbly.
That’s exactly why I’m so head-over-heels in love with these Frozen Yogurt-Covered Fruit Bites. They are the little heroes of the snack world. Sweet, cool, creamy, and packed with real, simple ingredients, they’re the answer to so many of our snack-time prayers. The best part? They’re unbelievably easy to make. We’re talking no-bake, minimal mess, and maximum joy. This is the kind of recipe that makes you feel like a kitchen genius with very little effort. It’s all about turning simple ingredients—fresh fruit and creamy yogurt—into tiny, frozen jewels that are as fun to make as they are to eat. So, let’s ditch the packaged stuff and create a little magic in our freezers together!
A Sweet (and Slightly Sticky) Memory
PrintFrozen Yogurt-Covered Fruit Bites : Sweet, Cool & Guilt-Free

These yogurt fruit bites are the ultimate healthy snack: refreshing, creamy, and naturally sweet. Whether you use strawberries, blueberries, bananas, or mango, this easy no-bake recipe is perfect for kids, meal prep, or an afternoon energy boost. With optional honey or vanilla for extra flavor, they’re endlessly customizable and freezer-friendly too.
- Prep Time: 15 minutes
- freeze time: 1–2 hours
- Total Time: ~2 hours
Ingredients
Healthy Frozen Yogurt-Covered Fruit Bites (Easy Snack or Dessert)
Ingredients
Fresh fruit (blueberries, strawberries, bananas, or mango)
Greek or regular yogurt (plain or flavored)
Optional: 1–2 tsp honey or maple syrup
Optional: ½ tsp vanilla extract
Instructions
Prep the Fruit:
Wash and dry thoroughly. Cut larger fruits like bananas or mango into bite-sized chunks. Wet fruit will prevent the yogurt from sticking.
Flavor the Yogurt (Optional):
Stir in honey or vanilla for added sweetness if using plain yogurt.
Coat the Fruit:
Drop each fruit piece into the yogurt. Use a fork or skewer to swirl it around. Lift it out and let excess drip off.
First Freeze:
Place coated fruit on a parchment-lined tray, spaced out so they don’t touch. Freeze for 30 minutes.
Double Coat (Optional):
For a thicker yogurt shell, dip each piece again after the first freeze, then return to the tray.
Final Freeze:
Freeze for 1–2 hours until solid. Transfer to a freezer-safe container for storage.
Nutrition
- Calories: 60–80
- Sugar: 6g
- Fat: 1g
- Carbohydrates: 10g
- Fiber: 1g
- Protein: 2g
This recipe always takes me back to one sweltering summer afternoon with my niece, Lily. She was about five years old, covered in what I can only describe as a fine layer of popsicle juice and playground dust, and declared she wanted to “invent a new kind of ice cream.” My kitchen was a disaster zone from a morning of recipe testing, but her wide, hopeful eyes were impossible to resist. We didn’t have any fancy molds or equipment, just a bowl of washed blueberries, a container of vanilla yogurt, and a baking sheet. As we dipped those little berries, our fingers getting stickier by the minute, she chattered away about creating “snow-covered blueberry jewels.” When we pulled the tray out of the freezer a few hours later, her gasp of pure delight was everything. It wasn’t just a snack; it was a tiny, frozen adventure. That’s the spirit I want to bring into your kitchen today—the joy of creating something wonderful, together, without any stress.
What You’ll Need to Make Your Fruit Bites
Gathering your ingredients is the first little step to success! Here’s the simple lineup, plus my best chef-y insights to make your bites absolutely perfect.
- Fresh Fruit (about 2 cups): Think blueberries, strawberries (hulled and halved), banana (cut into ½-inch chunks), or mango (cubed). Chef’s Insight: The key here is dry fruit. Pat your fruit completely dry with a paper towel after washing. Any extra moisture is the arch-nemesis of a smooth, clingy yogurt coat!
- Greek or Regular Yogurt (1 cup): You can use plain or your favorite flavor. Greek yogurt gives you a thicker, tangier coating with a protein boost, while regular yogurt is a bit lighter and creates a more delicate shell. Both are fantastic!
- Optional: 1–2 tsp Honey or Maple Syrup: If you’re using plain yogurt and your fruit isn’t super sweet, a little drizzle of honey or maple syrup is a game-changer. Substitution Tip: For a sugar-free version, a drop of liquid monk fruit or stevia works beautifully.
- Optional: ½ tsp Vanilla Extract: This is my secret weapon! A splash of vanilla adds a warm, bakery-like depth that makes these taste like a truly decadent treat. Almond extract is also a fun twist with berries!
Let’s Make Some Magic: Step-by-Step
Ready to get your hands a little messy? This is the fun part. I’ll walk you through each step with all my favorite little hacks to ensure your fruit bites are flawless.
Step 1: The Great Fruit Prep
First things first, we give our fruit some TLC. Wash your berries, peel and cube your bananas or mangoes. Now, here’s the non-negotiable part: dry them thoroughly! I’m talking lay them on a clean kitchen towel or a few layers of paper towels and gently pat them dry. Any lingering water will make the yogurt slide right off, and we want a beautiful, even coat. This is the single most important step for picture-perfect bites!
Step 2: The Flavor Boost (Optional but Awesome)
Grab a medium-sized bowl and plop your yogurt into it. If you’re using the honey and vanilla, now’s the time to stir them in. Mix it all up until it’s smooth, creamy, and beautifully combined. Give it a little taste! Does it need a bit more sweetness for your palate? Adjust it now. Remember, the flavors will mellow a bit once frozen, so it’s okay if it tastes a tad strong now.
Step 3: The Coating Carnival
Line a baking sheet with parchment paper—this prevents sticking and makes cleanup a breeze. Now, for the main event! I like to use a fork for smaller fruits like blueberries and a skewer or toothpick for larger chunks like bananas and strawberries. Drop a piece of fruit into the yogurt bowl. Use your utensil to gently swirl it around, ensuring it’s completely enveloped in that creamy goodness. Lift it out, and gently tap the fork or skewer on the edge of the bowl to let the excess yogurt drip off. This gives you a neater, less-drippy final product. Place it on your prepared baking sheet. Repeat with all your fruit pieces, making sure they aren’t touching each other. A little space ensures they freeze individually and don’t become one giant fruit-yogurt blob!
Step 4: The First Freeze (The Patience Builder)
Carefully slide your tray into the freezer. We’re going to let them hang out for about 30 minutes for this first freeze. This isn’t to freeze them solid, but to “set” the yogurt coating. It creates a stable base for the next step, which is…
Step 5: The Double-Dip (For the Extra-Creamy Lovers)
This step is optional, but oh-so-worth it if you love a thicker, more substantial yogurt shell. After the first 30 minutes, pull the tray out. The yogurt should be firm to the touch. Now, just give each piece a second quick dip in the yogurt! You’ll find it’s much easier this time, as the base is solid. This double layer creates an incredible creamy-to-fruity ratio that is just divine.
Step 6: The Final Freeze
Once you’re happy with the coating (whether single or double!), pop the tray back into the freezer for a solid 1 to 2 hours, or until the bites are completely frozen through. You’ll know they’re ready when they’re firm and make a little “clink” when you drop them into a container. Speaking of which, once they’re solid, transfer them to a freezer-safe bag or airtight container. They’ll keep happily for up to 2 months!
How to Serve & Savor
I love serving a small bowl of these frozen bites straight from the freezer for a quick, refreshing snack. They’re also absolutely stunning scattered over a bowl of oatmeal or chia pudding to cool it down, or as a gorgeous (and healthy!) topping for a summer pavlova or ice cream sundae. For a party, stick a few on small skewers for an elegant, easy-to-eat frozen treat. Let them sit at room temperature for just a minute or two before biting in for the perfect, creamy-yet-firm texture.
Get Creative! Flavor Twists & Swaps
The beauty of this recipe is its versatility! Don’t be afraid to play and make it your own.
- Chocolate Dream: Stir 1 tablespoon of cocoa powder and an extra teaspoon of honey into the yogurt before dipping. Perfect for banana bites!
- Tropical Vacation: Use coconut yogurt and dip pineapple chunks. Roll them in unsweetened shredded coconut after the first freeze for a piña colada vibe.
- Nutty Buddy: After the first freeze, roll half the yogurt-coated bite in finely chopped pistachios, peanuts, or almonds for a wonderful crunch.
- Dairy-Free Delight: Simply use your favorite plant-based yogurt (almond, coconut, or soy all work great) and maple syrup.
- “Granola-Crusted” Bites: Press the yogurt-covered fruit into a small bowl of granola before the first freeze for a protein-packed, textured bite.
Anna’s Chef Notes & Kitchen Stories
This recipe has evolved so much in my kitchen over the years. It started with just blueberries and plain yogurt, but it’s become my go-to “clean out the fruit drawer” recipe. I’ve learned that slightly under-ripe strawberries hold up better than super ripe ones, and that banana pieces are best eaten within a couple of weeks as they can get a little icy over time. One time, I was in a huge rush and tried to use a bag of frozen mixed berries instead of fresh. Let’s just say it created a pink, yogurt-y soup that was a delicious smoothie base but a complete failure as a dipped bite! We laughed, we drank our smoothies, and we learned a valuable lesson about the importance of starting with fresh, dry fruit. It’s all part of the fun!
Your Questions, Answered!
I’ve gotten so many wonderful questions about this recipe over the years. Here are the most common ones to help you out!
Q: Why is my yogurt sliding off the fruit?
A: I can almost guarantee it’s one of two things: 1) Your fruit wasn’t completely dry, or 2) Your yogurt was too thin. If you’re using a runny regular yogurt, try straining it through a cheesecloth for 15 minutes or simply opt for thick Greek yogurt. And remember – pat, pat, pat that fruit dry!
Q: Can I make these with frozen fruit?
A: I don’t recommend it for the dipping process. Frozen fruit sweats a lot of water as it thaws, which will make your yogurt coating slip right off and become watery. Stick with fresh, firm fruit for the best results. Save the frozen fruit for your smoothies!
Q: How long do they last in the freezer?
A: They will keep for 1 to 2 months in an airtight container or freezer bag. After that, they’re still safe to eat but might start to develop a little freezer burn or become too icy. They never last that long in my house, though!
Q: My yogurt coating is cracking when I bite into it. What did I do wrong?
A> This usually happens if the bites are *too* frozen. Let them sit on the counter for 2-3 minutes before eating. This allows the yogurt shell to soften just enough to be creamy, not shatter. It’s the same principle as letting a pint of ice cream sit out for a few minutes before scooping!
Nutritional Info (A General Guide)
Please note: This is an approximate estimate for a serving of 6 blueberry bites made with non-fat plain Greek yogurt and no added sweeteners. Values will change based on your specific ingredients.
- Calories: ~60-80
- Protein: 2g
- Fat: 1g
- Carbohydrates: 10g
- Sugar: 6g (all natural from the fruit and yogurt)
- Fiber: 1g
Prep & Storage:
Prep Time: 15 minutes | Freeze Time: 1-2 hours | Total Time: ~2 hours | Servings: Varies

Final Thoughts
If you’ve been searching for a snack that’s as refreshing as it is wholesome, these Frozen Yogurt-Covered Fruit Bites might just become your new freezer obsession. They’re proof that healthy treats don’t have to be boring — they can be bright, creamy, and bursting with flavor. Whether you make them with your kids on a summer afternoon or prep a batch to grab between meetings, these little bites are simple joy in edible form. So go ahead — dip, freeze, and snack your way to a little moment of homemade happiness.