***
Your New Favorite Snack is Waiting in the Fridge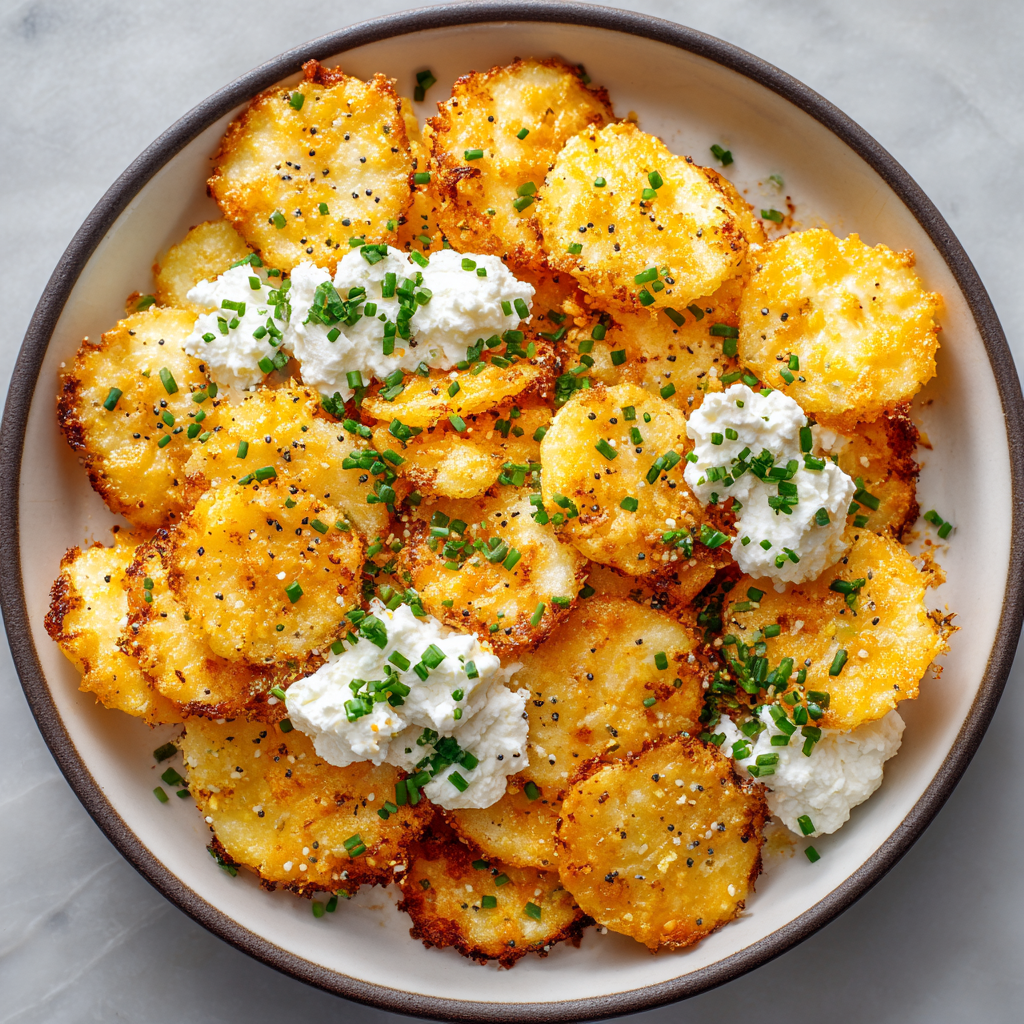
Hey there, friend! Let’s talk about cravings. You know the ones I mean—that mid-afternoon slump where your brain screams for something crunchy, salty, and deeply satisfying. For the longest time, my answer was a bag of potato chips. Don’t get me wrong, I love a good chip, but I always ended up feeling a bit… blah afterwards. Greasy fingers, that heavy feeling, and the sneaking suspicion that I’d just consumed a whole lot of nothing in terms of nutrition.
I was on a mission to find a better way. A snack that delivered that irresistible CRUNCH, but also made my body feel good. I wanted something I could munch on without an ounce of guilt, something that was actually packed with protein to keep me full and energized. And let me tell you, the answer was hiding in plain sight, right there in my fridge, in the form of a humble tub of cottage cheese.
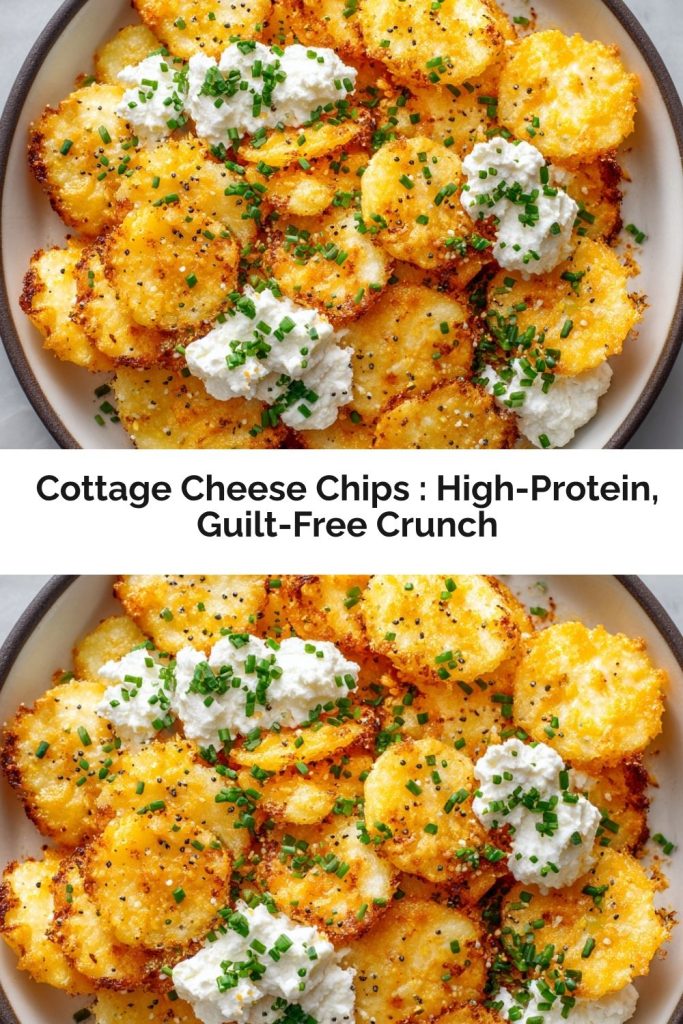
Yes, you read that right! I’m about to let you in on one of my all-time favorite kitchen magic tricks: Cottage Cheese Chips. These little wonders are a game-changer. They’re crispy, cheesy, and wildly addictive. With just a handful of simple ingredients and a little patience while they bake, you can transform that tub of cottage cheese into a high-protein, low-carb, guilt-free snack that truly satisfies every single crunchy craving. So, preheat that oven and grab your favorite seasonings—we’re about to cook up something amazing together!
The Day I Discovered Kitchen Alchemy
This recipe brings me right back to a rainy Sunday afternoon last fall. My daughter, Lily, and I were holed up inside, and the snack-cravings were hitting hard. We’d just finished a big batch of pancakes for a late breakfast, but by 3 PM, we were both peckish and a little restless. I had a container of cottage cheese I needed to use up, and a serious desire for something savory.
On a whim, I remembered seeing something online about baking cheese into crisps. “What if we tried it with cottage cheese?” I said to Lily. Her eyes lit up with that “Mom, you’re either a genius or crazy” sparkle. We drained the cottage cheese, mixed in some garlic powder, and carefully spooned little mounds onto a baking sheet. The smell that filled our kitchen was incredible—toasty, cheesy, and warm. When the timer finally dinged and we pulled out those golden, lacy crisps, we did a little happy dance right there on the kitchen tiles. They were PERFECT. Crispy, light, and so flavorful. We devoured the entire first batch and immediately made another. It was one of those happy, spontaneous kitchen experiments that turned into an instant family favorite, and it’s a memory I absolutely cherish.
Gather Your Ingredients: Simplicity at its Finest
One of the best things about this recipe is its beautiful simplicity. You likely have most of these ingredients in your pantry right now! Here’s what you’ll need to create this crunchy magic:
- 2 cups Full-Fat Cottage Cheese – This is our star player! I strongly recommend using full-fat for the best flavor and crispiness. The fat helps the chips get beautifully golden and gives them a richer, more satisfying taste. Low-fat versions can work, but they might be a bit less crispy and a tad more rubbery.
- ½ teaspoon Garlic Powder – This adds a warm, savory base note that’s just irresistible. Chef’s Insight: Using powder instead of fresh garlic ensures an even distribution of flavor without any risk of burning.
- ½ teaspoon Onion Powder – The perfect partner to garlic powder, it builds a foundation of savory depth that makes these chips taste like your favorite seasoned snack.
- 1 teaspoon Everything Bagel Seasoning – This is my go-to for a flavor explosion! The sesame seeds, poppy seeds, garlic, and salt create the most perfect crunchy topping. Substitution Tip: Don’t have any? No problem! Use just flaky sea salt, or get creative with your favorite spice blend—taco seasoning, ranch powder, or even just some dried herbs like Italian seasoning would be fantastic.
- A Generous Pinch of Black Pepper – A little sharpness to balance the richness of the cheese. Freshly cracked is always best!
- Optional: ¼ teaspoon Smoked Paprika – I highly recommend this for a smoky, savory twist! It adds a gorgeous color and a subtle campfire-like warmth that takes these chips to the next level.
Let’s Make Some Magic: Your Step-by-Step Guide
Ready to see the transformation? Follow these steps, and you’ll be a cottage cheese chip pro in no time. I’ve packed this section with all my little chef hacks to ensure your success!
- Preheat and Prep. Start by preheating your oven to 350°F (175°C). This is a low-and-slow process, so patience is key! While it’s warming up, line a large baking sheet with parchment paper. Chef’s Hack: Do NOT skip the parchment paper! These chips can stick like crazy, and parchment is your best friend for easy cleanup and chip removal.
- Drain that Cheese! This is the most crucial step for achieving maximum crispiness. If your cottage cheese has any excess liquid, it will steam in the oven instead of crisping up. Place your cottage cheese in a fine-mesh strainer and let it drain for a few minutes. You can also give it a gentle press with a paper towel to soak up any lingering moisture. Chef’s Tip: If you have the time, letting it drain for 10-15 minutes in the strainer over a bowl makes a world of difference.
- Mix and Season. In a medium-sized bowl, combine your well-drained cottage cheese, garlic powder, onion powder, smoked paprika (if using), and black pepper. Mix everything together until it’s fully incorporated. You’ll notice the mixture is still a bit lumpy—that’s perfect! We’re not looking for a completely smooth paste.
- Scoop and Flatten. Using a tablespoon measure, drop scoops of the cottage cheese mixture onto your prepared baking sheet. Make sure you leave about 1-2 inches of space between each one—they will spread a little as they bake! Now, here’s the secret to a perfectly crisp chip: use the back of your spoon or a small offset spatula to gently flatten each mound into a thin, even circle. The thinner and more uniform they are, the crispier they’ll get. Chef’s Insight: Don’t stress about them being perfect circles! Rustic, homemade-looking chips have so much charm.
- The Flavorful Finish. Now, generously sprinkle the top of each little circle with your everything bagel seasoning (or seasoning of choice). This step adds the final punch of flavor and texture right on top.
- Bake to Perfection. Slide your baking sheet into the preheated oven and bake for 35-45 minutes. The exact time will depend on your oven and how thick your chips are. You’re looking for golden brown edges and a firm, dry center. They should feel solid to the touch. Chef’s Hack: For extra-even baking, rotate your baking sheet halfway through the cooking time.
- The Patience Payoff. This might be the hardest step! Once they’re out of the oven, let the chips cool completely right on the baking sheet. I know it’s tempting to try one right away, but this cooling time is when they transform from chewy to shatteringly crisp. Trust me on this one!
How to Serve Your Crunchy Masterpiece
Once your chips are perfectly cool and crispy, the fun begins! I love serving these in a big, wide bowl so everyone can dig in. They are absolutely fantastic all on their own, but they also shine as a vehicle for your favorite dips. Try them with a cool and creamy dill dip, a spicy salsa, or my personal favorite, a scoop of zesty buffalo chicken salad. They’re also an incredible, high-protein topping crumbled over a big green salad or a bowl of soup in place of croutons!
Get Creative! Flavor Twists and Swaps
The beauty of this base recipe is its versatility. Once you’ve mastered the classic, play around with these fun variations!
- Pizza Party: Mix in ½ teaspoon of dried oregano and 1 tablespoon of finely grated Parmesan cheese into the cottage cheese base. After baking, while they’re still warm, sprinkle with a few tiny pieces of pepperoni.
- Jalapeño Cheddar: Fold 1-2 tablespoons of finely diced pickled jalapeños and 2 tablespoons of shredded sharp cheddar cheese into the mixture before scooping.
- Herb Garden: Use a blend of fresh, finely chopped herbs like chives, dill, and parsley for a fresh, bright flavor.
- Everything Rye: Add ½ teaspoon of caraway seeds to your everything bagel topping for a flavor that tastes just like an everything rye bagel!
Anna’s Chef Notes & Kitchen Stories
This recipe has truly evolved in my kitchen. The first time I made them, I was so impatient I tried one straight from the oven. It was chewy, soft, and I was so disappointed! I almost wrote the whole idea off as a failure. But then I got distracted by a spilled juice box (ah, the glamorous chef life), and by the time I came back to them, they had cooled and transformed into the crispiest little bites you can imagine. It was a wonderful reminder that sometimes, both in cooking and in life, good things come to those who wait!
I’ve also learned that not all cottage cheeses are created equal. Some brands are naturally creamier, while others are more curdy. Don’t be afraid to try a few different brands to find your favorite for chip-making. The curd size can affect the final texture, giving each batch its own unique, rustic character.
Your Questions, Answered!
I’ve gotten so many wonderful questions about these chips from readers! Here are the most common ones, answered just for you.
Q: My chips are chewy, not crispy! What did I do wrong?
A: The number one culprit for chewy chips is not letting them cool completely on the baking sheet. They need that cooling time to crisp up. The second most common issue is not draining the cottage cheese well enough. Excess moisture is the enemy of crispiness! Finally, make sure you’re flattening them thinly enough. Thick blobs will stay soft in the middle.
Q: Can I make these in an air fryer?
A: You absolutely can! The method is very similar. Line your air fryer basket with parchment paper (make sure it’s weighed down so it doesn’t fly around!), arrange your flattened scoops in a single layer, and air fry at 350°F for about 10-15 minutes, checking frequently towards the end as air fryers can vary. They may cook faster, so keep an eye on them!
Q: Why did my chips stick to the parchment paper?
A: This usually happens if you try to move them before they’ve cooled and firmed up. Let them cool completely, and they should release easily. If you’re still having issues, a light spritz of cooking spray on the parchment before adding the cottage cheese can help.
Q: How should I store leftovers?
A> These chips are truly best eaten the day they are made. However, if you have leftovers, store them in a paper bag (which helps absorb moisture) or a single layer in an airtight container at room temperature for up to a day. If they lose their crispness, you can pop them back in a 350°F oven for 5 minutes to re-crisp.
Quick Nutritional Snapshot
Please note: These are estimates and can vary based on the specific ingredients you use.
- Prep Time: 10 minutes
- Cook Time: 40 minutes
- Total Time: 50 minutes
- Makes: 20-24 chips
- Per Chip (estimate): ~18 calories, 2g protein, 1g fat, <1g carbs
Final Thoughts
At the end of the day, it’s the simple kitchen moments that make the biggest magic, isn’t it? A quiet afternoon, a curious idea, a little tub of cottage cheese—and suddenly you’ve got a bowl full of crispy, golden chips that feel like a tiny triumph. These Cottage Cheese Chips have become one of those snacks I return to again and again, not just because they’re high-protein or low-carb or any of that good-for-you stuff… but because they’re fun. They’re nostalgic. They’re a reminder that cooking doesn’t have to be complicated to be joyful.
Whether you season yours with everything bagel spice, go bold with jalapeños, or dream up your own flavor twist, I hope this recipe brings a little spark of creativity and comfort to your kitchen. Share them with the kids, set them out for guests, or keep the whole batch for yourself (no judgment—I’ve been there). However you enjoy them, savor that shatter-crisp bite and the knowledge that you made something delicious from the simplest of ingredients. Happy snacking, friend—and here’s to many more crunchy moments ahead.