The Bite-Sized Showstopper That Steals Every Spring Gathering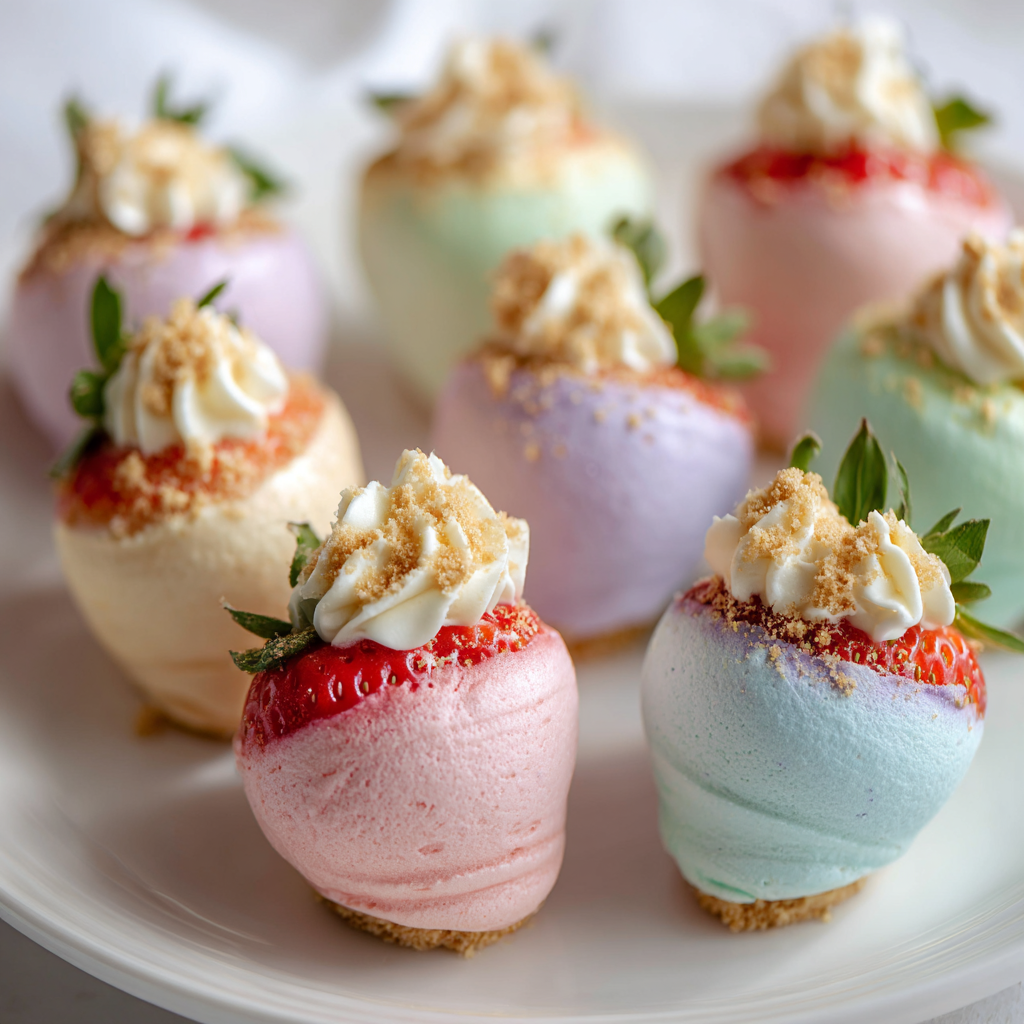
Hey there, friend! Anna here. Can we just take a moment to appreciate those recipes that look like you spent hours in a fancy pastry kitchen, but secretly come together with a few simple steps and a whole lot of joy? That’s the magic I’m always chasing, and today, I’m beyond excited to share one of my all-time favorite party tricks: Pastel Mini Cheesecake Stuffed Strawberries.
Imagine this: plump, juicy strawberries, transformed into elegant edible cups. They’re filled with a cloud of the dreamiest, creamiest no-bake cheesecake filling you’ve ever tasted, then tinted in the softest blush pinks, mint greens, and sunshine yellows. They look like something from a storybook spring table, but I promise you, there’s no oven, no water bath, and no stress involved. Just pure, delicious fun.
These little gems are my secret weapon for everything from Easter brunch and baby showers to Mother’s Day teas and “just because” weekend treats. They’re light, fresh, and offer that perfect hit of sweet creaminess without being overly heavy. Whether you’re a seasoned dessert maker or someone who gets nervous just looking at a pie crust, this recipe is your new best friend. It’s all about assembly, creativity, and that wonderful moment when you set them down and watch everyone’s eyes light up. So, let’s put on our favorite playlist, clear a little counter space, and create something truly magical together. Ready? Let’s get stuffing!
A Strawberry Revelation at Nana’s Easter Table
PrintPastel Mini Cheesecake Stuffed Strawberries : No-Bake Elegant Dessert

These Pastel Mini Cheesecake Stuffed Strawberries are the ultimate no-bake showstopper. Fresh strawberries are hollowed and filled with silky cheesecake cream, then tinted in soft pastel shades for a beautiful spring-ready finish. They’re elegant, bite-sized, and require zero oven time. Perfect for baby showers, Easter tables, brunch spreads, or any event where you want something fresh, light, and visually stunning.
- Prep Time: 20 minutes
- chill time: 45 minutes
- Total Time: bout 1 hour 5 minutes
- Yield: 18–24 stuffed strawberries 1x
Ingredients
18–24 large fresh strawberries
8 oz cream cheese, softened
½ cup powdered sugar
½ teaspoon vanilla extract
1 tablespoon heavy cream (if needed for piping consistency)
Gel food coloring (pastel shades, optional)
Optional garnish: crushed graham crackers, white chocolate drizzle, or sprinkles
Instructions
Prep the Strawberries: Wash and dry strawberries thoroughly. Slice off the tops and carefully hollow out the centers using a small knife or melon baller. Pat insides dry.
Make the Filling: Beat cream cheese, powdered sugar, and vanilla until smooth and fluffy. Add heavy cream if needed to loosen for piping.
Color (Optional): Divide filling into small bowls and tint with gel food coloring for pastel shades.
Pipe: Transfer filling into piping bags and pipe into each hollowed strawberry, slightly overfilling for a decorative swirl.
Chill: Refrigerate for at least 30–60 minutes to firm up before serving.
Garnish: Sprinkle with crushed graham crackers or drizzle with white chocolate if desired.
Nutrition
- Calories: 45 kcal
- Carbohydrates: 4g
This recipe has its roots in one of my favorite kitchen memories. Picture a sunny, chaotic Easter at my Nana’s house. The table groaned under platters of ham and scalloped potatoes, but my eyes, even as a kid, were always locked on the dessert spread. One year, alongside the classic coconut cake, Nana placed this stunning platter of strawberries filled with something fluffy and white. They weren’t pastel then—just pure, snowy white cream cheese filling. She called them “cheesecake berries,” and I was mesmerized.
I remember helping her (or, more accurately, “helping” by sneaking strawberry tops) as she patiently hollowed each one. She told me the secret was in the drying—a quick pat inside each berry to keep the filling from getting watery. To me, it felt less like cooking and more like crafting tiny, edible treasures. The way they disappeared from the platter first, with guests happily popping whole strawberries in their mouths, proved their genius. Years later, when I wanted to create a spring dessert that captured that same feeling of effortless elegance and sheer delight, Nana’s “cheesecake berries” came straight to mind. Adding the pastel colors was my own twist—a way to paint with food and make the celebration even brighter, just like those spring days at her table.
Gathering Your Magical Ingredients
Here’s the beautiful part: the ingredient list is short, sweet, and forgiving. Quality matters, but perfection isn’t required. Let’s break it down:
- 18–24 large fresh strawberries: Look for berries that are bright red, fragrant, and have a nice, broad base so they can stand up proudly. The bigger, the better for stuffing! If they’re a little uneven, that’s just character.
- 8 oz (one block) cream cheese, softened: This is non-negotiable—full-fat is best here for that iconic rich, silky texture. Let it sit on the counter for a good 45-60 minutes until it’s perfectly spreadable. This is the key to a lump-free, dreamy filling.
- ½ cup powdered sugar: Also called confectioners’ sugar. I love it for this because it dissolves instantly into the cream cheese, giving us a smooth filling without any graininess. You can adjust this to taste if you like things a touch less sweet.
- ½ teaspoon pure vanilla extract: Our flavor enhancer! It adds a warm, comforting depth that takes the filling from “good” to “where-has-this-been-all-my-life” fantastic.
- 1 tablespoon heavy cream (if needed): Think of this as your consistency insurance. After mixing, if your filling seems a tad too thick to pipe smoothly, a splash of cream will loosen it right up.
- Gel food coloring (pastel shades, optional but so fun!): I’m a gel color evangelist for projects like this. They provide vibrant color without adding liquid, so your filling stays perfectly thick. A tiny dot on a toothpick is all you need!
- Optional garnishes: This is your playground! A sprinkle of crushed graham crackers gives that classic cheesecake crunch. A delicate white chocolate drizzle adds sweetness and flair. Or, for a party, a few tiny, elegant sprinkles make everything more festive.
Let’s Build Our Berry Masterpieces: A Step-by-Step Guide
Now for the fun part! We’re going to walk through this together, and I’ll share all my little kitchen hacks along the way. You’ve got this.
Step 1: Prep Your Strawberries (The Foundation)
Wash your strawberries gently and then dry them THOROUGHLY with paper towels. Any leftover water is the enemy of our creamy filling. Next, with a small paring knife, slice off the green top (the hull). Don’t cut too deep—just enough to remove the stem and leaves. Now, for the hollowing: using the tip of that same knife or a small ¼-teaspoon measuring spoon/melon baller, carefully carve out a little cone-shaped cavity in the top of each strawberry. You’re aiming to remove the white core and make room for our filling. Chef’s Hack: Give the inside of each hollowed berry a quick dab with a paper towel. This simple step is Nana’s secret and ensures a perfect filling-to-berry ratio in every bite.
Step 2: Whip Up the Dreamy Filling
In a medium bowl, using a hand mixer or stand mixer fitted with the paddle attachment, beat your softened cream cheese on medium speed for about 30 seconds until it’s smooth and creamy. Scrape down the sides. Add in the powdered sugar and vanilla. Start mixing on low so the sugar doesn’t fly everywhere, then increase to medium-high and beat for 1-2 minutes. You’re looking for a light, fluffy, and completely homogeneous mixture. Give it a taste—is it heaven? Yes, it is. If it seems too stiff to pipe easily, beat in that tablespoon of heavy cream until it’s smooth and pipeable.
Step 3: Paint with Flavor (The Pastel Magic)
This is where your artistic side shines! If you’re going for pastels, divide your filling into separate small bowls—one for each color you want. Using a toothpick, add a tiny, tiny dab of gel food coloring to each bowl. Stir with a spoon or spatula until the color is even. Remember, you can always add more color, but you can’t take it away! We’re aiming for soft Easter egg shades.
Step 4: The Grand Pipe & Fill
Spoon each color of filling into its own piping bag fitted with a star tip (for a pretty swirl) or simply snip the corner off a zip-top bag. No piping bags? A small spoon works perfectly—this is about flavor, not fuss! Hold a strawberry in one hand and pipe or spoon the filling into the hollow, swirling slightly upward to create a beautiful, generous mound. Don’t be shy! A generous filling looks luxurious.
Step 5: The Chill-Out Session
Carefully place your filled strawberries on a plate or baking sheet lined with parchment paper. Pop them into the refrigerator for at least 30-60 minutes. This chilling time is crucial—it firms up the filling, melds the flavors, and makes them much easier to serve. Consider this your mandatory intermission to tidy up and pour yourself a well-deserved drink!
Step 6: The Finishing Flourish (Garnish!)
Once they’re chilled and set, it’s garnish time! A light sprinkle of fine graham cracker crumbs, a zigzag of melted white chocolate, or a single tiny sprinkle adds that final professional touch. Do this right before serving to keep everything crisp.
How to Serve Your Stuffed Strawberries for Maximum Wow Factor
Presentation is half the fun! I love using a simple white platter or a rustic wooden board to let the colors of the berries truly pop. Arrange them in a loose circle or cluster them by color for an ombre effect. For a truly stunning centerpiece, nestle them among some fresh mint or lemon leaves. They’re perfect as a finger-food dessert passed around at a party, or as the elegant finale to a sit-down brunch. Just be ready with the recipe link, because someone will ask for it!
Make It Your Own: Delicious Twists & Swaps
- Lemon Zest Delight: Add the zest of one lemon to the filling for a bright, sunny citrus kick.
- Chocolate Lover’s Dream: Mix 2 tablespoons of sifted cocoa powder into the filling and use a chocolate drizzle for garnish.
- Berry Swirl: Before piping, add a tiny dollop of seedless raspberry or strawberry jam to the center of each strawberry before adding the filling for a fruity surprise.
- Dairy-Free/Vegan: Use your favorite plant-based cream cheese and powdered sugar, and swap the heavy cream for a non-dairy milk or cream if needed.
- “Everything Bagel” Sweet Style: For a fun brunch twist, skip the food coloring and roll the filled tops in a mixture of crushed graham crackers, a pinch of brown sugar, and a sprinkle of cinnamon.
Anna’s Kitchen Notes & Stories
This recipe has become such a staple in my entertaining playbook that it’s evolved in the funniest ways. One time, during a last-minute baby shower prep, I realized I was out of piping tips. In a pinch, I used a plastic sandwich bag and just snipped the corner—the filling came out in cute little dollops, and everyone loved the “rustic” look! Another time, my nephew wanted to help and turned our pastel palette into a vibrant rainbow of neon berries. They were wildly colorful and a huge hit with the kids. The moral? Don’t sweat the small stuff. The recipe is wonderfully forgiving. Over the years, I’ve also started adding just a tiny pinch of salt to the filling—it sounds odd, but it makes the vanilla and cheesecake flavor sing. Try it! The best part of cooking is making a recipe your own, so play, experiment, and have fun with it.
Your Questions, Answered!
Q: My filling is too runny! What happened?
A: This usually means the cream cheese wasn’t quite firm enough or the berries introduced moisture. First, pop the whole bowl of filling into the fridge for 15-20 minutes to firm up. For next time, make sure your cream cheese is softened but still cool, and double-check that you’ve patted those berry insides bone-dry.
Q: Can I make these ahead of time?
A: Absolutely! They are a fantastic make-ahead dessert. You can assemble them fully, cover the platter loosely with plastic wrap, and refrigerate for up to 24 hours. Add any crumb or sprinkle garnishes right before serving so they stay crunchy.
Q: What’s the best way to hull and hollow the strawberry?
A: My favorite easy method is to use a small paring knife. Insert it at an angle around the green stem, twist, and pull it out. Then, use the tip of the knife to gently carve out a small cone from the top. A small measuring spoon (like a ¼ tsp) is also a fantastic, safe tool for scooping.
Q: My strawberries won’t stand up straight. Help?
A: No worries! Simply take a very thin slice off the very bottom (the tip) of the berry to create a flat, stable base. Just don’t slice so much that you create a hole.
Nutritional Information*
*Please note: These values are approximate estimates calculated for one strawberry, assuming 24 strawberries from the batch and using all the filling. Values will vary based on specific ingredients used and the exact size of your berries.
- Calories: ~45 kcal
- Carbohydrates: 4g
- Protein: 1g
- Fat: 3g
- Saturated Fat: 2g
- Sugar: 3g
- Sodium: 25mg
Prep Time: 20 minutes | Chill Time: 45 minutes | Total Time: 1 hour 5 minutes | Yield: 18-24 stuffed strawberries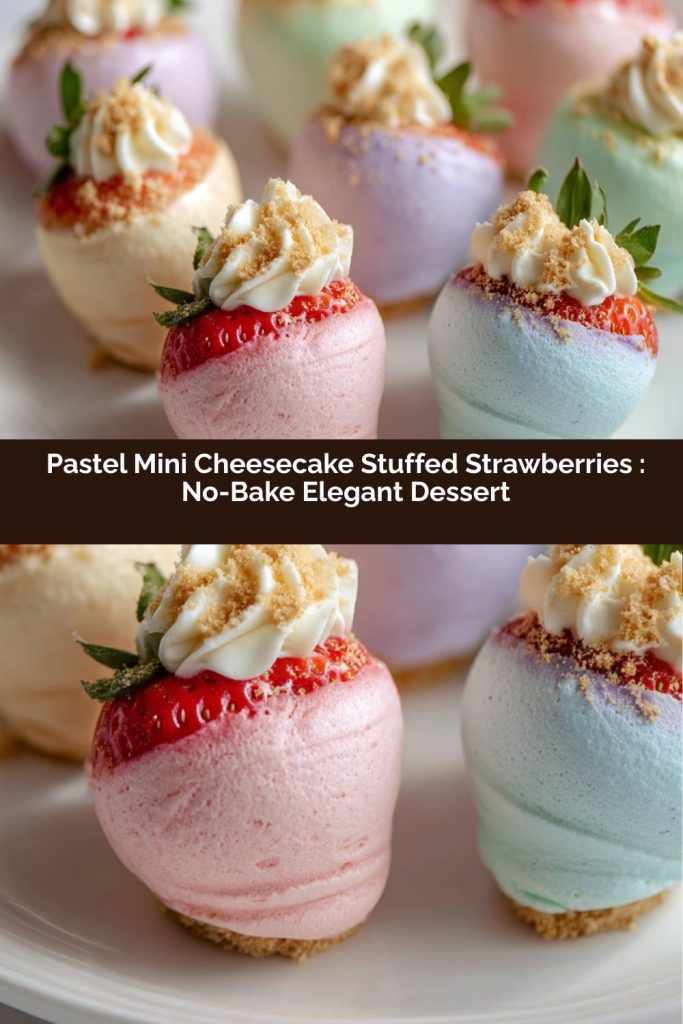
Final Thoughts
These Pastel Mini Cheesecake Stuffed Strawberries are the ultimate springtime showstopper. They’re light, fresh, and delightfully creamy—perfect for Easter brunch, baby showers, Mother’s Day, or any celebration that could use a little edible joy. Every bite brings together the juicy sweetness of strawberries, the rich tang of cheesecake filling, and a playful pop of pastel color that’s impossible not to smile at.
What I love most is how approachable they are. No baking, no water baths, and no stress—just simple assembly and a few little tricks to make them look spectacular. They’re versatile, too: add a hint of lemon zest, a drizzle of chocolate, or a swirl of berry jam, and suddenly each batch feels brand-new.
The best part? Watching your guests’ eyes light up as they pick them up. These little gems embody that magical combination of effortless elegance and joyful flavor—a dessert that tastes as wonderful as it looks. Keep them chilled until serving, garnish last-minute for maximum wow, and enjoy the little burst of spring in every bite.