Strawberry Matcha No-Bake Bars: The Pretty-in-Pink (& Green) Dessert You Need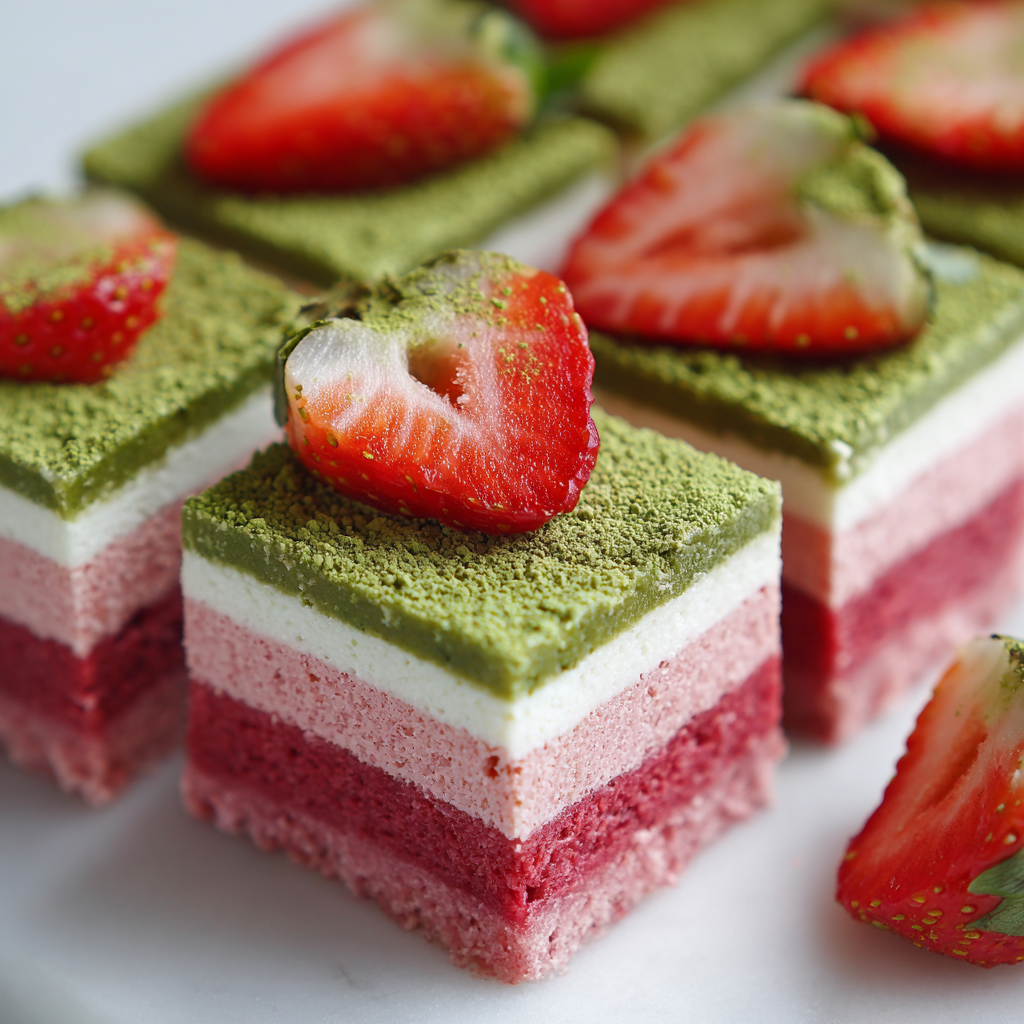
Hey there, friend! Anna here, ready to whisk you away on a no-bake adventure that’s equal parts stunning and simple. Have you ever looked at a dessert in a fancy bakery case and thought, “I could never make that at home”? Well, I’m here to tell you—with a wink and a whisk—that you totally can. Today, we’re ditching the oven and creating something truly magical: Strawberry Matcha No-Bake Bars.
Imagine this: a vibrant, earthy-sweet matcha base that feels like a lush green velvet carpet. On top, a layer of creamy, blush-pink strawberry filling that tastes like the first ripe berry of summer. Together, they create a contrast so beautiful, you’ll almost hesitate to take a bite. (Almost!) The best part? These bars are a breeze to make. We’re talking simple ingredients, a food processor or a couple of bowls, and a little patience while they chill. They’re the perfect answer for a warm day, a last-minute gathering, or when you just need a little kitchen therapy that ends in a gorgeous, Instagram-worthy treat. So, let’s put on our favorite playlist, clear a little counter space, and create some edible art together. This is the kind of recipe that makes you feel like a kitchen rockstar, and I am so here for it.
A Sweet Slice of Spring Nostalgia
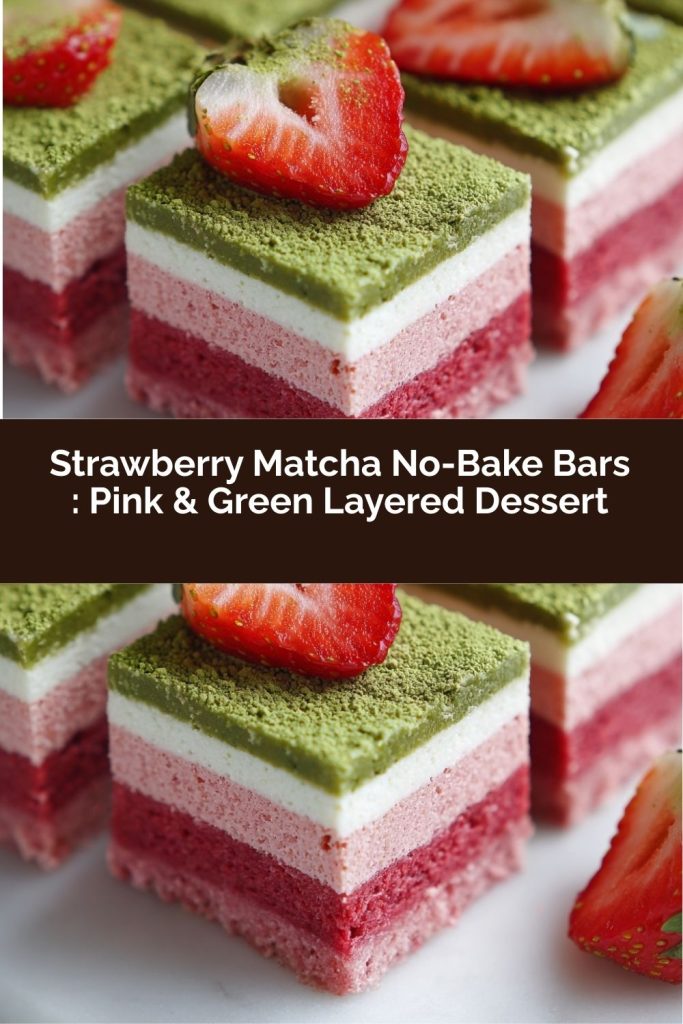
PrintStrawberry Matcha No-Bake Bars : Pink & Green Layered Dessert

These Strawberry Matcha No-Bake Bars are the ultimate pink and green contrast dessert. A naturally vibrant matcha base is topped with a creamy strawberry layer for a stunning two-tone effect that looks straight out of a bakery display case. They’re fresh, lightly sweet, and require zero oven time. Perfect for spring gatherings, tea parties, content-worthy dessert boards, or meal-prep treats with a visual pop.
- Prep Time: 20 minutes
- chill time: 3 hours
- Total Time: 3 hours 20 minutes
- Yield: 12 bars 1x
Ingredients
For the Matcha Base:
1 ½ cups almond flour
2 tablespoons matcha powder
¼ cup maple syrup
3 tablespoons melted coconut oil
½ teaspoon vanilla extract
Pinch of salt
For the Strawberry Layer:
1 cup fresh strawberries
8 oz cream cheese, softened
¼ cup powdered sugar
1 tablespoon lemon juice
½ cup whipped cream or whipped topping
Instructions
Prepare Pan: Line an 8×8-inch pan with parchment paper.
Make Matcha Base: In a bowl, mix almond flour, matcha powder, maple syrup, melted coconut oil, vanilla, and salt until a soft dough forms. Press evenly into the prepared pan. Chill 20 minutes.
Blend Strawberry Layer: Blend strawberries until smooth. In a bowl, beat cream cheese and powdered sugar until creamy. Mix in lemon juice and strawberry purée.
Fold: Gently fold in whipped cream until light and smooth.
Layer: Spread strawberry mixture evenly over chilled matcha base.
Chill: Refrigerate at least 2–3 hours until firm.
Slice: Cut into clean squares using a warm knife for sharp layers.
Nutrition
- Calories: 210 kcal
- Carbohydrates: 14g
- Protein: 4g
This recipe always takes me back to my first tiny apartment kitchen, where the counters were the size of postage stamps and my “fine china” was a motley collection of mismatched mugs. I was hosting my first proper spring tea for a few friends and wanted to make something that felt special but wouldn’t require me to juggle trays in a microscopic oven. I had a beautiful tin of ceremonial-grade matcha a friend had brought me from Japan and a pint of strawberries that were begging to be used.
Playing around, I created a version of these bars. When I turned them out onto a plate and saw that clean line of pink and green, I literally did a little happy dance right there in my galley kitchen. My friends’ eyes went wide when they saw them. That moment—the shared “oohs” and “aahs,” the creamy strawberry meeting the earthy matcha, the sheer joy of creating something beautiful from simple things—that’s the heart of my kitchen philosophy. It’s not about perfection; it’s about the shared experience, the burst of flavor, and the memory you’re making along the way. Every time I make these now, I think of that sunny afternoon, cramped kitchen and all, and smile.
Gathering Your Pink & Green Magic
Here’s everything you need to create this masterpiece. I’ve added my little chef’s notes to each ingredient because knowing the “why” makes you more confident in the kitchen!
For the Matcha Base:
- 1 ½ cups almond flour: This gives us a tender, slightly nutty, and gluten-free crust that holds together beautifully. If you need a nut-free option, try using gluten-free oat flour, though the texture will be a bit more crumbly.
- 2 tablespoons matcha powder: The star! Use a culinary-grade matcha for best results—it’s balanced for flavor and color without the premium price of ceremonial grade. A vibrant green powder means a fresher, more flavorful bar.
- ¼ cup pure maple syrup: Our natural sweetener and binder. It adds a lovely depth. Agave nectar or honey (if not strictly vegan) work in a pinch.
- 3 tablespoons melted coconut oil: This helps the crust set up firmly when chilled. Make sure it’s melted but not hot. Unsalted butter is a delicious dairy-full substitute.
- ½ teaspoon pure vanilla extract: A flavor bridge that complements both the matcha and strawberry. Don’t skip it!
- A generous pinch of salt: This is my secret weapon! It makes the sweet flavors pop and balances the earthiness of the matcha.
For the Strawberry Layer:
- 1 cup fresh strawberries, hulled: Fresh is best for that bright, true strawberry flavor! If you’re making this off-season, frozen and thawed strawberries will work—just drain any excess liquid well.
- 8 oz (one block) cream cheese, fully softened: This is the body of our creamy layer. Take it out of the fridge at least an hour ahead. For a dairy-free version, a good-quality vegan cream cheese works wonderfully.
- ¼ cup powdered sugar: It dissolves instantly and sweetens without grittiness. You can adjust this up or down a tablespoon based on your strawberry’s sweetness.
- 1 tablespoon fresh lemon juice: The acid brightens the entire strawberry layer and prevents it from tasting overly flat or creamy. It’s a tiny ingredient with big impact!
- ½ cup whipped cream or whipped topping: This is what gives the strawberry layer its dreamy, cloud-like lightness. Use freshly whipped cream, canned whipped cream (not frosting!), or a non-dairy whipped topping for flexibility.
Let’s Build Some Layers! (Step-by-Step)
Ready to create? Follow these steps, and you’ll have picture-perfect bars. I’ve tucked my favorite little hacks right in with the instructions.
- Line Your Stage: Grab an 8×8-inch baking pan. Take a sheet of parchment paper and line the pan, leaving some overhang on two opposite sides. This is your “slingshot” for lifting the whole dessert out later for pristine slicing. A quick spritz of cooking spray on the pan first helps the parchment stick in place. Chef’s Hack: I cut two strips to criss-cross for even easier removal!
- Create the Green Velvet Foundation: In a medium bowl, add the almond flour, matcha powder, and that all-important pinch of salt. Whisk them together. This breaks up any lumps in the almond flour and ensures the matcha is evenly distributed so you don’t get any green clumps. Now, pour in the maple syrup, melted (and slightly cooled) coconut oil, and vanilla. Stir with a spatula until it comes together into a soft, slightly crumbly dough that holds together when pinched. It should look like wet sand.
- Press and Chill: Dump the matcha dough into your prepared pan. Using your fingers, the bottom of a measuring cup, or a small flat glass, press it down into a firm, even, and beautifully green layer. Get it nice and compact—this is your foundation! Pop the whole pan into the freezer for a solid 20 minutes. This quick-chill sets the crust so our pink layer glides on top without disturbing it.
- Wake Up the Strawberries: While the base chills, let’s make the pink layer! Toss your hulled strawberries into a blender or food processor and puree until completely smooth. No big chunks allowed! You should have about ½ cup of puree. Pro Tip: If you want a seed-free puree, you can strain it, but I love the little flecks of authenticity.
- Build the Creamy Dream: In a large bowl, beat the softened cream cheese with the powdered sugar using a hand mixer (or a very determined whisk and some arm power) until it’s completely smooth and creamy. Scrape down the sides. Beat in the fresh lemon juice and then all of that gorgeous strawberry puree until the mixture is uniformly pink.
- Fold in the Fluff: Here’s where we get gentle. Add your whipped cream to the strawberry-cheese mixture. Using your spatula, fold it in. Think of it as gently turning the mixture over onto itself from the bottom of the bowl, rather than stirring. We want to keep all that lovely air in the whipped cream to maintain a light, mousse-like texture. Fold until no white streaks remain.
- The Grand Layer: Pull your now-firm matcha base from the freezer. Scoop the strawberry mixture on top and gently spread it into a smooth, even layer, reaching all the way to the corners. I like to give the pan a few gentle taps on the counter to settle everything and remove air pockets.
- The Final Chill (The Hardest Part!): Cover the pan and refrigerate for at least 3-4 hours, but ideally overnight. This patience is non-negotiable—it’s what allows the bars to set up perfectly so you get those crisp, clean layers when you cut. Trust me, it’s worth the wait!
- Slice with Style: When it’s finally time, use the parchment paper sling to lift the whole block out onto a cutting board. Warm a sharp knife under hot water, wipe it dry, and make your cuts. Re-warm and wipe the knife between each cut for absolutely stunning, restaurant-sharp edges. Admire your handiwork!
How to Serve These Showstoppers
Presentation is half the fun! I love arranging these bars on a simple white platter or a rustic wooden board. For an extra touch, you can dust the tops with a little extra matcha powder or a light sprinkle of freeze-dried strawberry powder. A tiny fresh mint leaf or a single perfect strawberry slice on each bar takes it to “gourmet gift” level. They’re perfect with a cup of green tea, a cold glass of sparkling water, or a flute of prosecco for a celebratory brunch. They’re rich, so small squares are ideal!
Play With Your Food: Delicious Twists
Feel like mixing it up? Here are some of my favorite riffs on this theme:
- Raspberry Matcha Bars: Swap the strawberries for raspberries. Their tartness is incredible with the sweet matcha base.
- Lemon Blueberry: Use lemon juice and zest in the cream cheese layer and fold in a handful of fresh blueberries instead of pureeing. A lemon-almond crust (omit matcha) is divine here.
- Chocolate Matcha: Add 2 tablespoons of cocoa powder to the almond flour base for a chocolate-matcha combo. Top with the strawberry or a plain vanilla layer.
- Vegan & Dairy-Free: Use vegan cream cheese, coconut whipped cream, and ensure your matcha and sugar are vegan. It works like a charm!
- Mini Tartlets: Press the matcha dough into a mini muffin tin, chill, then pipe in the strawberry filling for adorable, single-serving bites.
Anna’s Kitchen Corner: Notes & Stories
This recipe has become a spring and summer staple in my house, and it’s evolved a bit over the years. I initially tried it with a graham cracker crust, but the almond flour version just feels more special and harmonizes so well with the flavors. My husband’s favorite “hack” is to sprinkle a few mini chocolate chips on top of the matcha layer before adding the strawberry—it adds a nice little crunch!
A funny story: once, I was filming a reel for these bars and my cat, Biscuit, decided the vibrant green matcha powder looked like fabulous litter. He very daintily stepped right into the bowl of powder mid-shot, leaving perfect little paw prints across my counter. We had to take a break for a feline foot-washing session! So, my tip? Keep pets (and curious kids) at a safe distance from your matcha. Life in a food-loving kitchen is never boring!
Your Questions, Answered!
Q: My strawberry layer is a bit runny/soft even after chilling. What happened?
A: This usually comes down to two things: 1) The strawberries had a lot of extra water. If using frozen/thawed, drain them very well. You can even reduce the puree in a saucepan for a few minutes to concentrate the flavor and remove moisture. 2) The bars might just need more time. Pop them in the freezer for 30-60 minutes to firm up sharply before slicing.
Q: Can I use frozen strawberries?
A: Absolutely! Thaw them completely in a strainer over a bowl to catch all the excess liquid. Using that liquid will make your filling too soft. The leftover strawberry juice is delicious in sparkling water, by the way!
Q: My matcha tastes bitter. How can I prevent that?
A> Bitterness usually means the matcha is either old (it loses its sweetness over time) or it was lower quality. Using a culinary grade matcha is key. Also, make sure you’re not using “green tea powder” meant for drinking—it’s often not the same thing. And that pinch of salt in the base is crucial for balancing any potential bitterness!
Q: How long do these bars keep?
A: Store them in an airtight container in the refrigerator for up to 5 days. They also freeze beautifully for up to 2 months! Slice them first, then freeze on a parchment-lined tray before transferring to a container. Thaw in the fridge overnight.
Nutritional Information*
Prep Time: 20 mins | Chill Time: 3 hours | Total Time: 3 hours 20 mins | Servings: 12 bars
*Please note: These are estimates provided by an online nutrition calculator. Actual values will vary based on specific ingredients and brands used.
- Calories: ~210 kcal
- Carbohydrates: 14g
- Protein: 4g
- Fat: 16g
- Saturated Fat: 7g
- Fiber: 2g
- Sugar: 9g
- Sodium: 95mg
Final Thoughts
These Strawberry Matcha No-Bake Bars are the perfect combination of beauty and simplicity. The vibrant green matcha base paired with the soft pink strawberry layer creates a dessert that’s as stunning as it is delicious. They’re light, refreshing, and elegant—ideal for spring brunches, tea parties, or any occasion that calls for a dessert that wows without the stress of baking.
What I love most is how approachable they are. A few simple ingredients, no oven, and a little patience in the fridge yield a dessert that looks like it belongs in a boutique patisserie. And the flavor? Earthy, creamy, sweet, and bright—all in one perfect bite.
These bars are versatile, too: swap berries, add citrus zest, sprinkle chocolate, or make them vegan—the recipe adapts beautifully. Keep them chilled until serving for clean layers, slice with a warm knife for crisp edges, and watch everyone marvel at your creation.