Honey Teriyaki Chicken and Rice Bowls – Your New Weekly MVP
Hey friend! Let’s talk about that magical intersection where delicious meets doable. You know the spot: where a craving for something sticky, sweet, and savory crashes right into the reality of a busy week. You *could* order takeout… but what if I told you that in the time it takes for delivery to arrive, you could whip up a batch of Honey Teriyaki Chicken and Rice Bowls that are not only better than any cardboard container could hope to be, but will also fuel your next four lunches with zero extra effort?
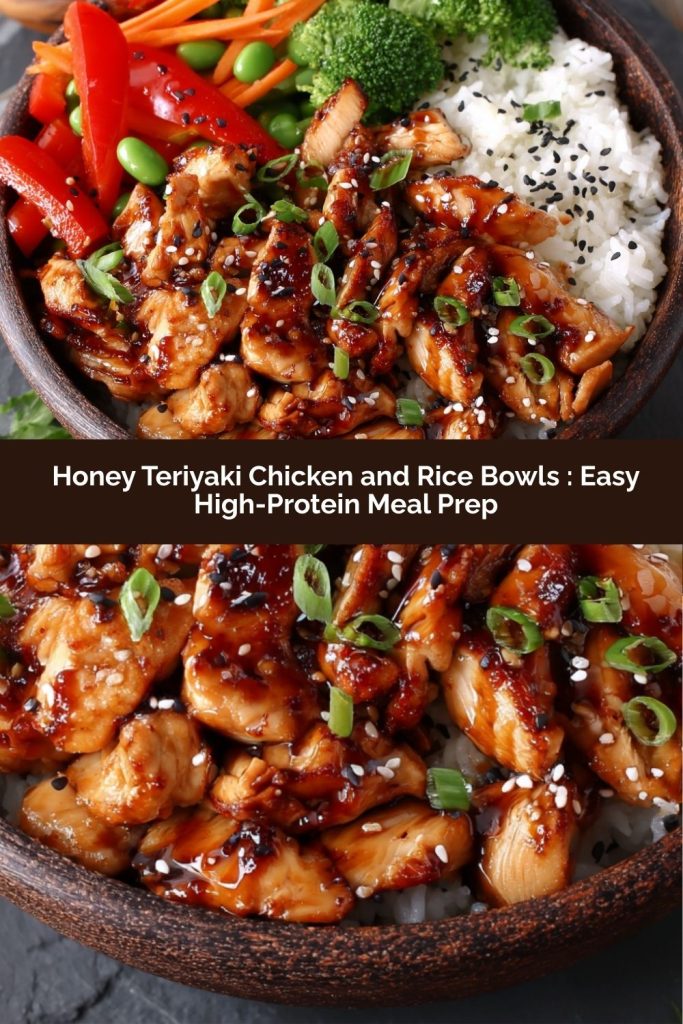
That’s the power of this recipe. It’s my absolute go-to for high-protein meal prep that actually makes you look forward to Tuesday’s lunch. We’re talking tender, golden bites of chicken wearing a glossy, finger-licking-good honey teriyaki glaze, all piled high over a cloud of fluffy jasmine rice with a confetti of crisp, colorful veggies. It’s a complete, balanced, and wildly satisfying meal that proves healthy eating doesn’t have to be boring, and cooking doesn’t have to be complicated.
I’ve packed this guide with all my best kitchen stories, chef hacks, and encouragement. So, grab your favorite skillet and let’s turn a little bit of prep into a whole lot of delicious magic for your week ahead. Trust me, your future self will be doing a happy dance by the office microwave.
The Takeout Pivot That Started It All
PrintHoney Teriyaki Chicken and Rice Bowls : Easy High-Protein Meal Prep
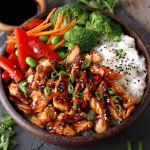
Honey Teriyaki Chicken and Rice Bowls are the perfect balance of sticky sweetness and rich umami flavor. Tender chicken is coated in a glossy honey teriyaki glaze, then layered over fluffy rice with crisp vegetables for a complete, satisfying meal. It’s simple to prepare, packed with protein, and ideal for stress-free lunches throughout the week. One batch, four flavorful meals.
- Prep Time: 15 minutes
- Cook Time: 20 minutes
- Total Time: 35 minutes
Ingredients
For the Chicken
1 ½ lbs boneless skinless chicken breast, diced
1 tbsp olive oil
Salt and black pepper to taste
For the Honey Teriyaki Sauce
⅓ cup low-sodium soy sauce
2 tbsp honey
1 tbsp brown sugar
1 tbsp rice vinegar
2 cloves garlic, minced
1 tsp fresh ginger, grated
1 tsp cornstarch + 1 tbsp water (slurry)
For the Bowls
2 cups jasmine rice (uncooked)
1 cup steamed broccoli
1 red bell pepper, sliced
1 cup shredded carrots
½ cup snap peas
Green onions and sesame seeds for garnish (optional)
Instructions
Cook jasmine rice according to package instructions. Fluff and set aside.
Heat olive oil in a large skillet over medium-high heat. Season chicken with salt and pepper. Cook 6–8 minutes until golden and fully cooked. Remove and set aside.
In the same pan, sauté garlic and ginger for 30 seconds. Stir in soy sauce, honey, brown sugar, and rice vinegar. Simmer for 2–3 minutes.
Add cornstarch slurry and cook until the sauce thickens into a glossy glaze.
Return chicken to the pan and toss until evenly coated.
Divide rice into four containers. Top with glazed chicken and vegetables. Garnish as desired.
Nutrition
- Calories: 510
- Fat: 12g
- Carbohydrates: 57g
- Protein: 40g
This recipe was born from a classic case of “takeout temptation.” A few years ago, during a particularly hectic week of recipe testing and school runs, my family was deep in a teriyaki stir-fry delivery loop. It was easy, yes, but my wallet was groaning, and I started missing the simple joy of cooking something we all loved together. One Friday, I decided to stage a kitchen coup. I gathered my kids, put on some music, and declared we were making our *own* “fakeaway” night.
We whisked, we taste-tested (my daughter’s insistence on an extra spoonful of honey was a genius move), and we danced around the sizzling skillet. The smell that filled our kitchen—ginger, garlic, and that caramelizing honey—was a hundred times better than anything wafting from a paper bag. As we sat down to eat, my son looked up, sauce on his chin, and said, “Mom, this is way better than the box.” Game over. That moment of messy, joyful, homemade connection became our new Friday ritual. It taught me that the best recipes aren’t just about flavor; they’re about reclaiming a little bit of magic in the everyday.
Gathering Your Flavor Arsenal
Here’s everything you’ll need to create these glorious bowls. I’ve added my little chef insights next to each one because knowing the *why* makes you a more confident cook!
For the Chicken
- 1 ½ lbs boneless, skinless chicken breast, diced: The protein powerhouse! Dicing it ensures quick, even cooking and perfect bite-sized pieces for the bowl. Chef’s Tip: For even more tender chicken, you can use boneless, skinless chicken thighs. They’re a bit richer and stay super juicy.
- 1 tbsp olive oil: Our cooking workhorse. Any neutral oil like avocado or grapeseed works here too.
- Salt and black pepper to taste: The essential foundation of flavor. Don’t skip seasoning your chicken directly!
For the Honey Teriyaki Sauce
- ⅓ cup low-sodium soy sauce: The salty, umami backbone. Using low-sodium lets you control the salt level, especially since the sauce reduces. For a gluten-free swap: Tamari or coconut aminos are fantastic.
- 2 tbsp honey: Nature’s golden sweetener that gives the sauce its signature sticky gloss and delicate floral note. Pure maple syrup works in a pinch.
- 1 tbsp brown sugar: A touch of molasses-rich depth to round out the sweetness. You can use all honey if you prefer.
- 1 tbsp rice vinegar: The secret weapon! It adds a bright, clean tang that balances the sweetness and prevents the sauce from being cloying.
- 2 cloves garlic, minced: Fresh is best here for that pungent, aromatic kick. Don’t be shy with it!
- 1 tsp fresh ginger, grated: The zesty, warm soul of the sauce. That little microplane is worth its weight in gold. In a true emergency, ¼ tsp of ground ginger can sub in.
- 1 tsp cornstarch + 1 tbsp water (slurry): Our thickening magic trick. Mixing the cornstarch with cold water first prevents lumps and creates that restaurant-quality glossy glaze.
For Building Your Bowls
- 2 cups jasmine rice (uncooked): My favorite for its fragrant, slightly sticky texture that clings to the sauce. White or brown rice, quinoa, or even cauliflower rice are all great canvases.
- 1 cup steamed broccoli, 1 red bell pepper (sliced), 1 cup shredded carrots, ½ cup snap peas: The crunch crew! This is your chance to play with color and texture. Use what’s in season or what you love—asparagus, edamame, or thinly sliced cabbage all work beautifully.
- Green onions and sesame seeds for garnish (optional): The finishing confetti! These aren’t just pretty; they add a fresh oniony bite and a nutty crunch that takes the bowl to the next level.
Let’s Cook! Your Step-by-Step Roadmap to Delicious
Follow these steps, lean into the process, and you’ll have a kitchen that smells like a dream in no time. I’m with you every sizzle of the way!
- Rice First, Always. Cook your jasmine rice according to the package directions. I use a rice cooker for foolproof fluffiness, but a pot on the stove works just as well. Once it’s done, fluff it with a fork, give it a lid, and let it hang out. Chef’s Hack: For next-level flavor, cook your rice in chicken or vegetable broth instead of water.
- Chicken, Meet Pan. While the rice is cooking, heat the olive oil in a large skillet or wok over medium-high heat. Season your diced chicken generously with salt and pepper. When the oil shimmers (that’s your cue it’s hot enough!), add the chicken in a single layer. Let it sear undisturbed for 4-5 minutes to get gorgeous golden color, then stir and cook for another 3-4 minutes until fully cooked through. Transfer to a clean plate. Pro Tip: Don’t crowd the pan! If you need to, cook the chicken in two batches. Crowding steams it instead of searing it.
- Sauce Symphony. In that same glorious pan (all those browned bits = flavor gold!), lower the heat to medium. Add the minced garlic and grated ginger. Sauté for just 30 seconds until fragrant—don’t let it burn! Pour in the soy sauce, honey, brown sugar, and rice vinegar. Give it a good whisk and let it come to a gentle simmer for 2-3 minutes. You’ll smell the magic happening.
- Glaze Time! Give your cornstarch slurry a quick re-stir (it settles) and drizzle it into the simmering sauce while whisking constantly. Watch in awe as it transforms from thin liquid to a luxurious, glossy glaze in about 60 seconds. This is the money shot!
- The Grand Reunion. Slide all the cooked chicken and any accumulated juices back into the pan with that beautiful glaze. Toss, toss, toss until every single piece is lovingly coated. Let it bubble together for another minute so the chicken soaks up all that flavor. Oh, it’s a beautiful thing.
- Veggie Prep (Choose Your Adventure!). For your veggies, you can quickly sauté the bell pepper and snap peas in a separate pan for 2-3 minutes for a vibrant crunch, or steam your broccoli and keep the carrots raw for freshness. I often do a mix for maximum texture!
- Bowl Assembly. Now for the fun part! Divide your fluffy rice among four meal prep containers. Top with a generous portion of that glazed honey teriyaki chicken and arrange your colorful vegetables around it. Sprinkle with green onions and sesame seeds if you’re feeling fancy.
How to Serve & Savor
If you’re eating this right away, serve it hot in a deep bowl! I love to add a little extra drizzle of sauce, a sprinkle of sesame seeds, and maybe even a quick splash of sriracha for heat. For meal prep, let the components cool completely before sealing the containers and storing them in the fridge. When lunchtime hits, just reheat and enjoy. The flavors meld and get even better overnight, making every bite a treat you actually look forward to.
Make It Your Own: Delicious Twists & Swaps
The beauty of this bowl is its versatility. Don’t be afraid to play!
- Pineapple Pleaser: Add 1 cup of fresh pineapple chunks to the pan when you’re cooking the sauce for a sweet-tropical burst.
- Spicy Kick: Whisk 1-2 teaspoons of sriracha or a pinch of red pepper flakes into the sauce as it simmers.
- Grain-Free/Greens Base: Serve the chicken and veggies over a bed of fresh spinach, kale, or cauliflower rice for a lower-carb option.
- Protein Swap: This glaze is incredible on shrimp (cook for 2-3 minutes), salmon fillets, or even crispy baked tofu cubes.
- Extra Veggie Power: Roast a sheet pan of broccoli, bell peppers, and red onion tossed in a bit of oil and salt at 400°F for 20 minutes, and use those as your bowl base instead of steaming.
Anna’s Kitchen Notes
This recipe has evolved from a simple stir-fry into my meal-prep security blanket. Over the years, I’ve learned a few things: First, the cornstarch slurry is non-negotiable for that perfect clingy glaze—no more runny sauce! Second, grating the ginger straight into the pan (watch your knuckles!) gives you every last drop of its zingy juice. And third, this recipe is incredibly forgiving. Out of snap peas? Use green beans. Don’t have fresh ginger? A squeeze of the paste from the tube works. The goal is to get a delicious, healthy meal on the table (or in your lunchbox), not culinary perfection. Some of my best kitchen memories are of my kids “customizing” their bowls with extra sprinkles of this or that. Make it yours!
Your Questions, Answered
My sauce didn’t thicken! What happened?
No worries! This usually means the cornstarch slurry wasn’t mixed with *cold* water, or the sauce wasn’t at a simmer when it was added. For a quick fix, mix another teaspoon of cornstarch with a tablespoon of cold water. Push your chicken to one side of the pan, pour in the new slurry into the simmering sauce, and whisk until it thickens, then toss everything together.
How long do these meal prep bowls last in the fridge?
They keep beautifully for up to 4 days in airtight containers. The rice stays perfect, and the flavors continue to develop. I don’t recommend freezing, as the texture of the vegetables can become mushy upon thawing.
Can I make this sauce ahead of time?
Absolutely! You can whisk the sauce ingredients (except the cornstarch slurry) together up to 3 days in advance and store it in the fridge. When you’re ready to cook, just pour it into the pan, bring it to a simmer, and add the slurry to thicken as directed.
Is there a way to make this less sweet?
Of course! Start by reducing the honey to 1 tablespoon. You can also increase the rice vinegar by half a teaspoon to add more balancing acidity. Taste as you go—you’re the boss of your bowl!
Nutritional Info* (Per Serving)
Calories: ~510 | Protein: 40g | Carbohydrates: 57g | Fat: 12g | Fiber: 5g
Prep Time: 15 mins | Cook Time: 20 mins | Total Time: 35 mins | Servings: 4
*Nutritional information is an estimate calculated using an online tool and will vary based on specific ingredients and portion sizes used.
Final Thoughts
These Honey Teriyaki Chicken and Rice Bowls are proof that meal prep doesn’t have to be boring—or complicated. Tender, glossy chicken, perfectly cooked rice, and a rainbow of vegetables make each bowl feel like a restaurant-worthy dinner you can enjoy all week long. The honey teriyaki glaze strikes the perfect balance of sweet, savory, and umami, and the versatility of this recipe means you can swap grains, veggies, or proteins to keep it fresh and exciting.
What I love most is how forgiving this recipe is: even if your week is hectic, it comes together quickly, tastes incredible, and stores beautifully. It’s perfect for lunches, weeknight dinners, or even a make-ahead “fakeaway” night. With just a few simple ingredients and a little love, you’re not just feeding your body—you’re creating meals that make you look forward to every bite.