
Death-by-Chocolate No-Bake Cheesecake Bars: An Indulgent Delight
Hey there, kitchen adventurers! 🎉 Today, I’m so excited to share a dessert that’s sure to make your chocolate-lovin’ hearts skip a beat — the Death-by-Chocolate No-Bake Cheesecake Bars. Trust me, these bars are not just an innocent treat; they’re a full-blown chocolate explosion that will have you coming back for seconds (or thirds!). The layers of creamy cheesecake, rich dark chocolate, and crunchy Oreo crust meld beautifully together, creating a sweet symphony of flavors and textures that will tantalize your taste buds.
Now, I know what you might be thinking: “No-bake? Is it really that easy?” Yes, dear friend, it is! Cooking should feel fun and approachable, and that’s exactly what this recipe is all about. No need to sweat over a hot oven. Just grab a few simple ingredients, and before you know it, you’ll be chilling your way to dessert heaven!
I’ll also share some of my personal cooking stories related to this treat, giving you a peek into why this recipe is so special to me. So, roll up your sleeves, and let’s dive into the amazing world of desserts that know how to show off while making you look like a kitchen rock star!
Personal Story
Ah, chocolate — my true kitchen love! I remember one rainy afternoon when my kids and I decided we needed a little pick-me-up. It was one of those days where staying inside felt cozy yet slightly murky. We rummaged through the kitchen and came across a pack of Oreo cookies tucked away in the pantry. That’s when the lightbulb went off — why not create something deliciously rich to brighten the gloomy day?
In a flurry of excitement, we crushed the Oreos, melted some butter, and threw everything into a bowl. The kitchen became a fun chaos of laughter, chocolate smudges, and the delightful aroma of melting chocolate wafting through the air. After what felt like an eternity of patiently waiting for the bars to chill in the fridge, we dug in, and oh boy, the taste was magical!
That rainy day turned into a cherished memory and a favorite recipe in our house, where every bite reminds us that even the gloomiest of days can end on a sweet note. Plus, it has become a go-to dessert for family gatherings, always eliciting oohs and aahs at the first bite!
Ingredients
Let’s gather our delightful ingredients to whip up this Death-by-Chocolate No-Bake Cheesecake Bars! Here’s what you’ll need:
- 1 package Oreo cookies (crushed): These crunchy, chocolatey cookies serve as the perfect base for our cheesecake bars. You can substitute them with any chocolate sandwich cookie if you want to mix it up!
- 1/2 cup unsalted butter (melted): This acts as the glue that holds our crust together. Please don’t use margarine as it might affect the richness of the flavor!
- 16 oz cream cheese (softened): This star ingredient gives the bars their luxurious creaminess. Make sure to let it sit out for about 30 minutes to soften, or you can microwave it in 10-second increments (just don’t overdo it!).
- 1 cup powdered sugar: This sweetener helps achieve that melt-in-your-mouth texture. If you’re in a pinch, granulated sugar will work, though it won’t dissolve as easily.
- 1 teaspoon vanilla extract: This aroma enhancer brings out the flavors in our cheesecake. Feel free to use a good quality brand for best results.
- 2 cups whipped topping: This gives our filling a light and airy feel. If you’d like to keep it lighter, homemade whipped cream is a fantastic, fresh option.
- 1 cup chocolate chips (melted): Rich and decadent, these will elevate our cheesecake to new depths of chocolate bliss. Semi-sweet, dark, or even white chocolate can make an appearance here!
- Chocolate shavings or cocoa powder (for garnish): Just a little sprinkle on top to make it look extra tempting! You can also use crushed nuts or sprinkles if you’re feeling fancy.
Step-by-Step Instructions
Now that we have our goodies, let’s assemble our delectable dessert. Trust me, it’s simpler than you think!
Step 1: Prepare the Crust
- Crush the Oreos: Grab those Oreo cookies and toss them into a food processor. Pulse until they form fine crumbs, or if you prefer the old-school method, place them in a resealable bag and crush them using a rolling pin. It’s a great way to release some stress!
- Mix with Melted Butter: Transfer the crushed Oreos to a mixing bowl and pour in the melted butter. Use a spatula to mix until all the crumbs are evenly coated. The mixture should resemble wet sand at this point.
- Press into the Pan: Line an 8×8 inch baking dish with parchment paper or foil for easy removal. Then, press the crust mixture evenly into the bottom of the dish. You can use the bottom of a drinking glass to really pack it down.
Step 2: Make the Cheesecake Filling
- Beat the Cream Cheese: In a large mixing bowl, beat the softened cream cheese with an electric mixer until smooth and creamy. This gives your filling a fabulous, fluffy texture.
- Add Sugar and Vanilla: Gradually add in the powdered sugar and the vanilla extract. Continue mixing until there are no lumps left. This step is crucial because lumps can sabotage the velvety texture we’re after!
- Fold in the Whipped Topping: Gently fold in the whipped topping using a spatula. Be careful not to deflate it too much; we want to keep that airy quality.
- Incorporate the Melted Chocolate: Finally, add in the melted chocolate chips, stirring until everything is combined and turns into a luscious chocolate cream!
Step 3: Assemble the Bars
- Spread the Filling: Take your chocolate cheesecake mixture and pour it over the prepared crust. Use an offset spatula to spread it into an even layer, making sure to get into every corner.
- Chill to Perfection: Cover the dish with plastic wrap and place it in the fridge for at least 4 hours, or preferably overnight. This allows the bars to set properly and lets the flavors meld.
Step 4: Garnish and Serve
- Slice and Serve: Once set, remove the bars from the dish using the parchment paper. Slice them into squares and serve on a beautiful platter. Sprinkle with chocolate shavings or a dusting of cocoa powder for a fancy touch. Be prepared for a chorus of “Wow!” from your lucky guests!
Tips Along the Way
- Patience is Key: Don’t skip the chilling step; this is what gives the bars their perfect consistency.
- Go for Quality: Use high-quality chocolate for the best flavor outcomes. It really makes a difference!
- Double the Recipe: If you’ve got a crowd coming over, don’t hesitate to double the recipe! Just use a larger baking pan.
Serving Suggestions
These Death-by-Chocolate No-Bake Cheesecake Bars are a showstopper on any dessert table. I recommend serving them alongside a dollop of whipped cream and a fresh raspberry or two for a pop of color! If you feel adventurous, drizzle a bit of chocolate sauce over the top or serve with a scoop of vanilla ice cream on the side. Trust me, your guests won’t be able to resist going back for more!
Recipe Variations
Feeling creative? Here are a few delicious twists to try with your cheesecake bars:
- Mint Chocolate: Add 1 teaspoon of mint extract into the filling for a refreshing minty flavor that pairs beautifully with the chocolate.
- Peanut Butter Swirl: Fold in 1/2 cup of creamy peanut butter with the melted chocolate for a delightful surprise.
- Caramel Drizzle: Drizzle homemade or store-bought caramel sauce over the top before chilling for a salted caramel version!
- Alcohol-Infused: Stir in a tablespoon of your favorite liqueur (like Bailey’s or Kahlua) into the filling for an adult-only treat!
Chef’s Notes
This recipe has been a go-to in my house for years. It’s one of those crowd-pleaser desserts that can save the day — whether you forgot a birthday or are simply craving something divine. My kids love helping out with the mixing and the licking of spoons (the best part, if you ask me!). Over the years, I’ve experimented with different kinds of toppings and flavor additions, and it always turns out delicious!
There was even a time I accidentally grabbed the wrong chocolate chips; instead of semi-sweet, I used butterscotch! It turned out to be a happy accident, and oh man, what a flavor combo! That’s the beauty of cooking — it’s all about enjoying the journey, so don’t be afraid to make it your own!
FAQs and Troubleshooting
Q1: My cheesecake bars turned out too soft. What went wrong?
It’s essential that you give them the full chilling time to set properly. If they are still too soft when you try to slice them, just pop them back in the fridge for another hour or so.
Q2: Can I make these bars ahead of time?
Absolutely! These bars actually taste better the day after preparation, as the flavors have more time to develop. They can last in the fridge for up to 5 days — if they last that long, that is!
Q3: How do I store the leftover bars?
Once cut, you can store them in an airtight container in the refrigerator for optimal freshness. Make sure to separate layers with parchment paper to avoid sticking.
Q4: Can I freeze these bars?
Yes! Just make sure they are well wrapped in plastic wrap and then placed in an airtight container. You can freeze them for up to 2 months. Thaw them in the fridge overnight before serving.
Nutritional Info
(Nutritional info varies per serving, depending on portion size and ingredient variations.)
- Calories: ~320
- Protein: 4g
- Carbohydrates: 40g
- Fat: 18g
- Sugar: 26g
Final Thoughts
There you have it, my fellow dessert lovers! This Death-by-Chocolate No-Bake Cheesecake Bars recipe is not just a treat but a beautiful reminder that cooking can be an enjoyable experience filled with laughter, stories, and, of course — delicious results!
So, when you’re looking for an easy yet showstopping dessert, remember this recipe. Who knew a few simple ingredients could create such joy?
Let me know how your cheesecake bars turn out — I can’t wait to hear your kitchen stories! Happy baking, and until next time, keep cooking up magic! 🍰✨
PrintDeath-by-Chocolate No-Bake Cheesecake Bars
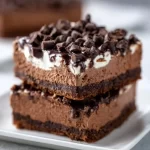
Indulge in a rich chocolate explosion with these no-bake cheesecake bars, featuring a creamy filling and a crunchy Oreo crust.
- Prep Time: 15 minutes
- Cook Time: 0 minutes
- Total Time: 240 minutes
- Yield: 16 servings 1x
- Category: Dessert
- Method: No-Bake
- Cuisine: American
- Diet: Vegetarian
Ingredients
- 1 package Oreo cookies (crushed)
- 1/2 cup unsalted butter (melted)
- 16 oz cream cheese (softened)
- 1 cup powdered sugar
- 1 teaspoon vanilla extract
- 2 cups whipped topping
- 1 cup chocolate chips (melted)
- Chocolate shavings or cocoa powder (for garnish)
Instructions
- Crush the Oreos: Toss them into a food processor and pulse until fine crumbs form or crush them in a resealable bag with a rolling pin.
- Mix with melted butter: Transfer the crushed Oreos to a mixing bowl, pour in the melted butter, and mix until evenly coated.
- Press into the pan: Line an 8×8 inch baking dish with parchment paper and press the crust mixture evenly into the bottom.
- Beat the cream cheese: In a large mixing bowl, beat the softened cream cheese with an electric mixer until smooth.
- Add sugar and vanilla: Gradually add in the powdered sugar and vanilla extract, mixing until there are no lumps.
- Fold in the whipped topping: Gently fold in the whipped topping using a spatula.
- Incorporate the melted chocolate: Add the melted chocolate chips and stir until combined.
- Spread the filling: Pour the chocolate cheesecake mixture over the prepared crust and spread into an even layer.
- Chill to perfection: Cover and place in the fridge for at least 4 hours, preferably overnight.
- Slice and serve: Remove the bars using parchment paper, slice into squares, and garnish with chocolate shavings or cocoa powder.
Notes
Use high-quality chocolate for the best flavor. These bars can be made ahead of time and are even better the next day!
Nutrition
- Serving Size: 1 square
- Calories: 320
- Sugar: 26g
- Sodium: 300mg
- Fat: 18g
- Saturated Fat: 10g
- Unsaturated Fat: 6g
- Trans Fat: 0g
- Carbohydrates: 40g
- Fiber: 2g
- Protein: 4g
- Cholesterol: 30mg
Keywords: no-bake cheesecake, chocolate dessert, easy dessert, creamy cheesecake, chocolate lovers