
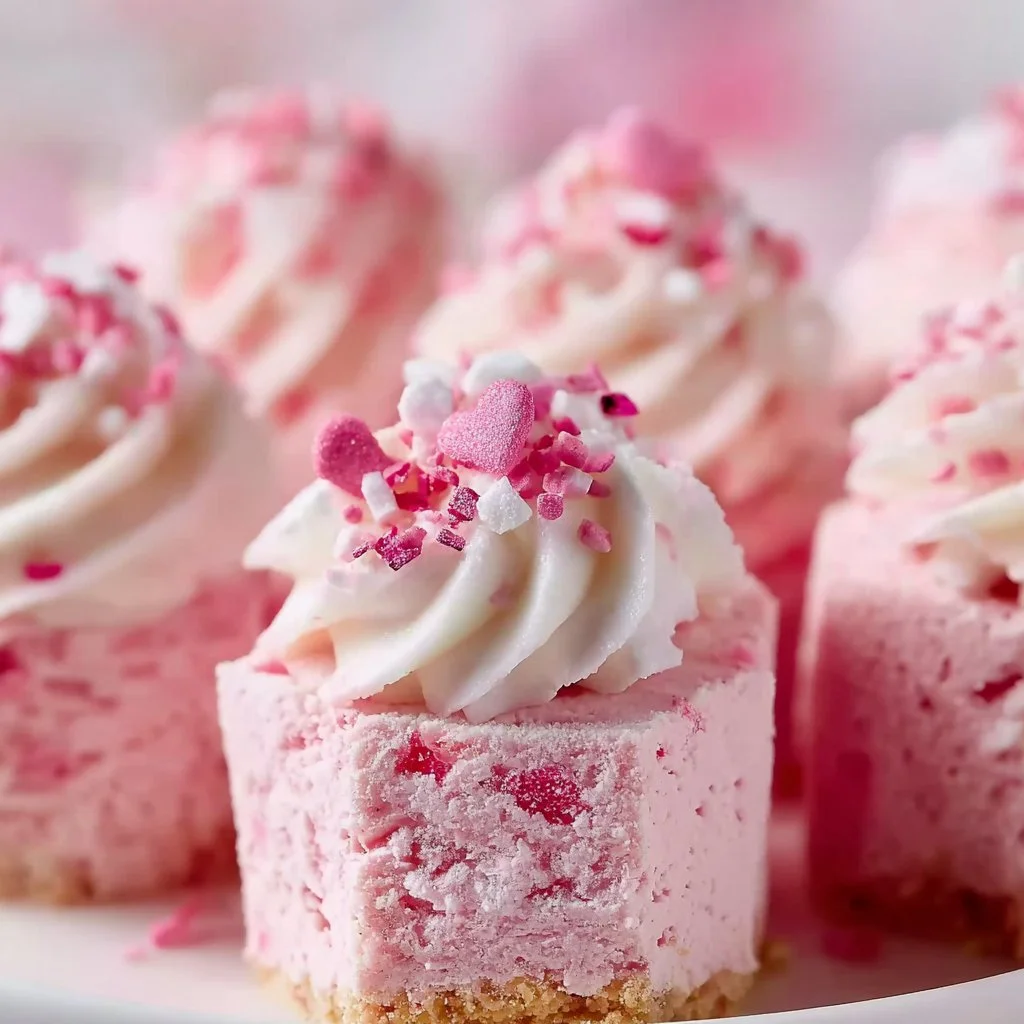
No Bake Pink Velvet Cheesecake Bites for Festive Sweetness
Hey there, friends! 🌸 If you’re anything like me, the holiday season is a magical time filled with laughter, love, and of course, delicious treats. There’s something about the aroma of baked goods wafting through the house that sparks joy and nostalgia all at once. But what if I told you that you can create an equally delightful dessert without turning on the oven? Enter my No Bake Pink Velvet Cheesecake Bites!
These little gems are not just visually captivating with their charming pink hue, but they’re also incredibly creamy, rich, and oh-so-addictive. I crafted this recipe with the vision of bringing a touch of sweetness and magic to your gatherings, whether it’s a festive party or just a cozy night in with family. And the best part? Every bite is a nod to classic cheesecake, but with a flirtatious twist that dances on your taste buds.
As you embark on this culinary adventure with me, prepare to put on your favorite apron and let the good times roll! The beauty of this recipe lies in its simplicity. You won’t need to spend hours in the kitchen; instead, you’ll be whipping up these delightful bites in no time at all. So, let’s sprinkle a little fun into our kitchens and bring our loved ones together with these luscious cheesecake bites. Are you ready? Let’s dive right in!
Personal Story
I have a cherished memory from when I was a kid, huddled around the kitchen island with my siblings, eagerly waiting for our mom to finish preparing dessert for our family gatherings. One holiday season, she surprised us with her famous pink velvet cake. I remember my eyes lighting up when she revealed it—a stunning, fluffy cake layered with luscious cream cheese frosting that was just to die for! It quickly became the highlight of our celebrations, bringing us closer together each year.
Years passed, and while my mom still made that cake, I wanted to create my own spin on it that was just as fun and festive but a little more manageable. That’s where these No Bake Pink Velvet Cheesecake Bites came to life! They remind me of those joyful kitchen moments, bringing a touch of nostalgia while also adding a modern twist to our dessert table. I can’t wait to see the smiles on your faces when you take your first bite!
Ingredients
Here’s everything you’ll need to whip up these delightful cheesecake bites:
- 8 oz Cream Cheese
- Opt for low-fat for a lighter version, or go full decadence with regular cream cheese. Just be sure it’s softened to room temperature for easy mixing!
- 1 cup Confectioners’ Sugar
- This sugar adds the sweet goodness that perfectly balances out the tanginess of the cream cheese. Granulated sugar can substitute, but it might take a bit longer to dissolve and mix evenly.
- 1 tsp Vanilla Extract
- A must-have for that warm, comforting flavor. If you’re feeling adventurous, swap it out for almond extract for a unique twist that’ll surprise your taste buds!
- 1 drop Pink Food Coloring
- This is purely for aesthetics! Whether you prefer classic dye or natural food coloring is up to you. Natural versions are healthier and less processed!
- 1.5 cups Graham Cracker Crumbs
- This will form the delightful crust. If you’re feeling fancy, digestive biscuits can substitute, giving it a slightly buttery taste!
- 0.5 cup Unsalted Butter
- Melted to bring our crust together beautifully. If you want to skip the dairy, coconut oil is a fantastic dairy-free swap that adds a lovely hint of coconut flavor!
Chef Insight
The beauty of this recipe is its versatility! Each ingredient plays a significant role in building textures and flavors, so don’t hesitate to make it your own!
Step-by-Step Instructions
Let’s dive into the fun part—making these delicious No Bake Pink Velvet Cheesecake Bites!
Step 1: Prepare Your Crust
- Crush the Graham Crackers
- Start by placing the graham crackers (or your chosen substitute) in a food processor and pulse until fine crumbs form. If you don’t have a processor, a zip-top bag and rolling pin will do the trick! Just place the crackers in the bag and crush away!
- Chef’s Tip: You want your crumbs to be fine; this helps them bind together better with the melted butter.
- Mix with Butter
- In a mixing bowl, combine the graham cracker crumbs with melted butter until everything is evenly coated. The mixture should resemble wet sand.
- Little Chef Hack: If it crumbles apart and doesn’t hold together when pressed, just add a little more melted butter until you get the right consistency!
Step 2: Form Your Base
- Press it Down
- Line a baking dish (around 8×8 inches works beautifully!) with parchment paper, and press the crumb mixture firmly into the bottom. Use your fingers or the bottom of a measuring cup to ensure it’s nice and compact.
- Chef Insight: This step is crucial; a firm base means your cheesecake bites will hold together when you cut them!
Step 3: Make the Cheesecake Mixture
- Beat the Cream Cheese
- In a large bowl, use a hand mixer or stand mixer to beat the softened cream cheese until it’s smooth and creamy. Aim for a fluffy texture without any lumps.
- Add Sugar and Vanilla
- Gradually add in the confectioners’ sugar and vanilla extract, mixing on low speed until everything is blended well. Taste and adjust if needed—sweetness is key here!
- Incorporate Coloring
- Add the drop of pink food coloring and mix until you achieve your desired shade. Remember, it takes less than you think to get that perfect pink!
Step 4: Combine and Chill
- Spread the Cheesecake Mixture
- Pour the luscious cheesecake mixture onto your graham cracker crust. Use a spatula to smooth it out evenly, creating a beautiful surface.
- Chill to Set
- Cover the dish with plastic wrap and pop it in the fridge for at least 2-3 hours, or until it’s set. This step is necessary, so don’t rush it!
- Little Chef Hack: If you’re in a hurry, placing it in the freezer for about an hour can do the trick, too!
Step 5: Cut and Serve
- Slice into Bites
- Once set, carefully lift the parchment paper to remove the cheesecake from the dish. Use a sharp knife to cut into small, bite-sized squares (or any shape you fancy!).
- Plate with Style
- Serve chilled on a decorative platter, and maybe sprinkle a little extra graham cracker crumb over the top for an extra pop of flavor!
Serving Suggestions
To really amp up your presentation, consider garnishing your cheesecake bites with fresh berries or a light dusting of confectioners’ sugar. A drizzle of chocolate sauce or a dollop of whipped cream would also do wonders in elevating this dessert from simple to festive!
Recipe Variations
Feeling adventurous? Here are some creative twists you can try:
- Lemon Zing: Add the zest of one lemon for a refreshing citrus flavor that brightens the cheesecake.
- Chocolate Lovers: Mix in some cocoa powder to the cheesecake mixture for a chocolate-hued, chocolate-flavored version.
- Nutty Delight: Stir in some finely chopped nuts (e.g., almonds or pecans) into the crust for added crunch.
- Fruit Fusion: Top with a layer of your favorite fruit preserves before chilling for a fruity explosion in every bite!
Chef’s Notes
The idea for these No Bake Pink Velvet Cheesecake Bites evolved from endless experimentation in my kitchen. At first, I wanted to create something that reminded me of mom’s pink velvet cake, but along the way, I stumbled upon the delightful realization that these bites were not only easy to make but also perfect for any occasion! Now, they are a staple at every family gathering, celebrating both memories and new traditions. Embrace the joy of creating, let your creativity shine, and don’t forget to infuse your personality into your cooking!
FAQs and Troubleshooting
1. Why did my cheesecake bites turn out too soft?
If they aren’t setting properly, ensure you’ve allowed enough chill time. If they’re still too soft after that, you can mix in a tad more confectioners’ sugar to help stabilize them.
2. Can I make these vegan?
Absolutely! Use vegan cream cheese and coconut oil. You can even opt for a nut-based crust for a complete vegan version!
3. How do I store leftovers?
These bites can typically be stored in an airtight container in the fridge for up to 5 days. Just make sure to separate layers with parchment paper to prevent sticking.
4. What’s the best way to cut them?
For clean cuts, warm your knife under hot water before slicing, and wipe it clean between cuts. This helps avoid a sticky mess!
Nutritional Info (optional)
For those of you watching your nutritional intake, here’s an approximate breakdown per cheesecake bite, based on cutting into 24 pieces:
- Calories: 120
- Protein: 2g
- Carbohydrates: 16g
- Fat: 6g
- Sugar: 8g
Please note that values can vary based on ingredients used.
Final Thoughts
There you have it—my joyful journey to creating No Bake Pink Velvet Cheesecake Bites! I encourage you to gather your loved ones, whip up this delightful dessert, and create unforgettable memories in your kitchen. These cheesecake bites aren’t just about satisfying a sweet tooth; they’re about embracing the moments that bring us together, sprinkling a little magic into our everyday lives. So, what are you waiting for? Grab those ingredients, and let’s make something sweet that’ll charm everyone’s hearts! Happy cooking! 🎉💖
No Bake Pink Velvet Cheesecake Bites

Delightful, creamy cheesecake bites with a charming pink hue, perfect for festive gatherings.
- Prep Time: 15 minutes
- Cook Time: 0 minutes
- Total Time: 180 minutes
- Yield: 24 servings 1x
- Category: Dessert
- Method: No-Bake
- Cuisine: American
- Diet: Vegetarian
Ingredients
- 8 oz Cream Cheese, softened
- 1 cup Confectioners’ Sugar
- 1 tsp Vanilla Extract
- 1 drop Pink Food Coloring
- 1.5 cups Graham Cracker Crumbs
- 0.5 cup Unsalted Butter, melted
Instructions
- Prepare Your Crust
Crush the Graham Crackers in a food processor until fine crumbs form. Mix with melted butter until evenly coated. - Press it Down
Line a baking dish with parchment paper and press the crumb mixture firmly into the bottom. - Beat the Cream Cheese
In a bowl, beat the cream cheese until smooth. Gradually add sugar and vanilla, then mix in food coloring. - Spread the Cheesecake Mixture
Pour the cheesecake mixture onto the crust and smooth it out. - Chill to Set
Cover and refrigerate for 2-3 hours or until set. - Slice into Bites
Remove from the dish and cut into small squares.
Notes
Garnish with fresh berries or a drizzle of chocolate sauce for an elevated presentation.
Nutrition
- Serving Size: 1 bite
- Calories: 120
- Sugar: 8g
- Sodium: 150mg
- Fat: 6g
- Saturated Fat: 4g
- Unsaturated Fat: 2g
- Trans Fat: 0g
- Carbohydrates: 16g
- Fiber: 1g
- Protein: 2g
- Cholesterol: 30mg
Keywords: cheesecake bites, no bake dessert, pink velvet dessert