
# No-Bake Simple Oreo Cheesecake Bars: Whip Up a Slice of Heaven

## Introduction

Hey friends!

Let’s take a delightful journey into the world of desserts, where we’ll uncover the magic of No-Bake Simple Oreo Cheesecake Bars. As someone who believes that good food should spark joy in the kitchen and create sweet memories, I can’t wait to share this easy yet indulgent treat with you. These cheesecake bars are creamy, dreamy, and oh-so-delicious—perfect for satisfying that sweet tooth without a lot of fuss.

Picture this: you’re in your cozy kitchen, the sun streaming through the window, and the soothing sound of crushing Oreos fills the air. With just a handful of ingredients, you can whip up a dessert that feels totally fancy but doesn’t require a culinary degree or hours in the oven. Trust me, these bars will become a staple in your home, gathering friends and family around the table like a warm hug.

What I love most about these No-Bake Oreo Cheesecake Bars is how kid-friendly and forgiving they are. Whether you’re a seasoned home cook or just starting your culinary journey, this recipe will guide you step by step with easy-to-follow instructions and plenty of tips along the way. Best of all, you can make this gorgeous dessert ahead of time, leaving you free to enjoy the sweet moments in life—like lounging around with your loved ones or binge-watching your favorite series while waiting for that perfect cheesecake spice to chill.

So, roll up those sleeves, grab your apron, and let’s create some kitchen magic together!

## Personal Story

I remember the first time I made cheesecake bars—what a wonderful disaster that was! I was in high school, and it was my turn to bring dessert to a family gathering. I thought, “How hard can it be?” Armed with a simple recipe and an oversized bag of Oreos, I dove right in.

The kitchen filled with laughter as my younger brother attempted to crush the Oreos, sending crumbs flying everywhere. We managed to whip up something semi-decent, but in our excitement, we forgot to let our cheesecake chill long enough. As we gathered around the table, the bars slumped under their weight, looking more like sad puddles than dignified desserts.

To our surprise, everyone loved them, loving the flavors despite the mishap. The laughter and joy of those moments cemented my love for sharing food with loved ones. Since then, I’ve learned a few tricks, and now I’m excited to pass on these easy and impressive cheesecakes to you!

## Ingredients

For these fantastic No-Bake Oreo Cheesecake Bars, you'll need the following ingredients:

### Crust Ingredients:
- **20 Oreos, crushed (about 2 cups)**: These classic cookies are the backbone of our crust. Feel free to use any chocolate sandwich cookies if you’re searching for a gluten-free option!
- **5 tablespoons of unsalted butter, melted**: Butter adds richness and creates the perfect binding agent for your crust. If you're looking to reduce fat, you can substitute with coconut oil.

### Cheesecake Layer Ingredients:
- **12 ounces of cream cheese, softened**: Ensure it’s softened to avoid lumps and create a creamy texture. You can use low-fat cream cheese if you're aiming for a lighter version!
- **1 cup powdered/confectioners sugar**: This sweetener dissolves easily and provides a smooth consistency. Regular granulated sugar can be substituted but might create a grainier texture.
- **2/3 cup regular sour cream**: Adds tanginess and creaminess. For a tang-free alternative, use Greek yogurt.
- **1 teaspoon pure vanilla extract**: Always opt for pure vanilla for the best flavor; imitation vanilla lacks depth.
- **15 Oreos, crushed**: Mixing these right into the cheesecake layer adds that delightful cookie crunch and flavor.

### Topping Ingredients:
- **1/2 cup mini semi-sweet chocolate chips**: These little morsels add a delightful finish. Dark chocolate can be used if you’re a fan of a richer taste!
- **Crushed Oreos (about 8)**: I like to take out the filling for topping, but it’s up to you! These add a fun crunch on top—who doesn’t love more Oreos?

## Step-by-Step Instructions

Ready to bring it all together? Let's make these scrumptious No-Bake Oreo Cheesecake Bars!

1. **Prepare the Crust**:
   - In a mixing bowl, combine the crushed Oreos and melted butter. Use a fork to mix until all the Oreo crumbs are evenly coated in butter. The mixture should resemble wet sand.
   - Press the crumb mixture firmly into the bottom of a 9x9 inch baking dish. You can use the flat bottom of a measuring cup to help pack it tightly. A firm base ensures sturdy dessert bars!

2. **Make the Cheesecake Layer**:
   - In a large mixing bowl, beat the softened cream cheese with an electric mixer until creamy and smooth. Scraping down the sides is crucial here—don’t skip it!
   - Gradually add the powdered sugar and continue to beat until fully combined, ensuring there are no lumps.
   - Toss in the sour cream and vanilla extract. Beat until mixed well.
   - Gently fold in the crushed Oreos. A spatula is perfect for this, ensuring all those delicious cookie bits are evenly dispersed!

3. **Assemble the Bars**:
   - Pour the cheesecake mixture over the Oreo crust, using a spatula to spread it evenly.
   - Tap the dish gently on the counter to remove any air bubbles; this will help ensure an even texture.
   - Cover the dish with plastic wrap or aluminum foil and refrigerate for at least 4 hours, or ideally overnight, to allow the cheesecake to firm up.

4. **Add Toppings**:
   - Once set, remove the cheesecake from the fridge. Melt the mini chocolate chips in the microwave in short bursts (10-15 seconds) until smooth, stirring in between.
   - Drizzle the melted chocolate over the top, then sprinkle crushed Oreos on top. This not only looks fantastic but adds that extra crunch we all love.

5. **Slice & Serve**:
   - To serve, lift the bars out using the edges of the parchment paper (if you lined it) or use a spatula. Slice into squares with a sharp knife for neat edges—wiping the knife between cuts also helps make cleaner slices!

## Serving Suggestions

Serve these Oreo Cheesecake Bars chilled for the ultimate treat! Place them on a lovely dessert platter, and don’t forget to add sprigs of fresh mint for a pop of color. They make excellent party fare or a delightful finish to a family dinner. Pair them with a scoop of vanilla ice cream, fresh berries or a dollop of whipped cream for an added touch of indulgence!

## Recipe Variations

Want to get creative? Here are a few easy twists for your No-Bake Oreo Cheesecake Bars:
- **Mint Oreo Version**: Swap regular Oreos for mint-flavored Oreos for a refreshing twist.
- **Peanut Butter Swirl**: Fold creamy peanut butter into the cheesecake layer for a nutty edition.
- **Fruit Topping**: Add a layer of fresh fruit, such as strawberries or blueberries, on top for a sweet burst of flavor.
- **Orange Zest**: Add some orange zest to the filling for a zesty citrus kick.
- **Gluten-Free Option**: Use gluten-free Oreos to make this dessert accessible for those with gluten sensitivities!

## Chef’s Notes

Creating these Oreo Cheesecake Bars has definitely been an evolution. I started out with a basic recipe but soon learned that little adjustments made a big difference in flavor and texture. I also now prefer making a double batch because they disappear so quickly! Plus, the joy and nostalgia it brings me when I see loved ones enjoying this treat makes it all worthwhile. Remember, cooking is just as much about the process and sharing love as it is about the ingredients, so have fun with it!

## FAQs and Troubleshooting

1. **Why does my cheesecake look too soft after refrigerating?**
   - If your cheesecake doesn’t set well, it may not have chilled long enough. Make sure to let it sit in the fridge for at least 4 hours to firm up properly.

2. **Can I use a different cookie for the crust?**
   - Absolutely! Feel free to experiment. Golden Oreos, chocolate graham crackers, or even digestive biscuits work great as alternatives.

3. **Why are my cheesecake bars cracking?**
   - Overmixing or too much air in your batter can cause cracks. Be gentle when mixing, and ensure you’re not adding too much air into the batter.

4. **How can I store leftovers?**
   - Store any leftovers in an airtight container in the refrigerator for up to 5 days. Just be sure to let them come to room temperature for the best flavor before devouring!

## Nutritional Info

(approximately per serving if cut into 12 servings)
- Calories: 290
- Total Fat: 19g
- Saturated Fat: 10g
- Cholesterol: 60mg
- Sodium: 160mg
- Total Carbohydrates: 27g
- Dietary Fiber: 0g
- Sugars: 12g
- Protein: 4g

*(Nutritional information is approximate and varies based on specific ingredients used.)*

## Final Thoughts

There you have it, friends—a delightful recipe for No-Bake Oreo Cheesecake Bars that combines simplicity, nostalgia, and unbeatable flavor. I hope you enjoyed this delicious adventure as much as I loved sharing it with you. And remember, every great kitchen story starts with a little experimentation and a lot of love. Get ready to impress your family and friends, and don’t forget to share your delicious creations with me! Happy baking!
Print
No-Bake Simple Oreo Cheesecake Bars
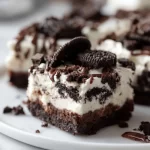
Delicious and creamy No-Bake Oreo Cheesecake Bars perfect for satisfying sweet cravings with minimal effort.
- Prep Time: 15 minutes
- Cook Time: 0 minutes
- Total Time: 240 minutes
- Yield: 12 servings 1x
- Category: Dessert
- Method: No-Bake
- Cuisine: American
- Diet: Vegetarian
Ingredients
Scale
- 20 Oreos, crushed (about 2 cups)
- 5 tablespoons unsalted butter, melted
- 12 ounces cream cheese, softened
- 1 cup powdered sugar
- 2/3 cup regular sour cream
- 1 teaspoon pure vanilla extract
- 15 Oreos, crushed
- 1/2 cup mini semi-sweet chocolate chips
- Crushed Oreos (about 8)
Instructions
- Prepare the Crust: In a mixing bowl, combine the crushed Oreos and melted butter. Use a fork to mix until all the Oreo crumbs are evenly coated in butter. Press the crumb mixture firmly into the bottom of a 9×9 inch baking dish.
- Make the Cheesecake Layer: In a large mixing bowl, beat the softened cream cheese with an electric mixer until creamy and smooth. Gradually add the powdered sugar and continue to beat until fully combined. Toss in the sour cream and vanilla extract. Beat until mixed well. Gently fold in the crushed Oreos.
- Assemble the Bars: Pour the cheesecake mixture over the Oreo crust, using a spatula to spread it evenly. Tap the dish gently on the counter to remove any air bubbles. Cover the dish with plastic wrap and refrigerate for at least 4 hours, or ideally overnight.
- Add Toppings: Once set, melt the mini chocolate chips in the microwave until smooth. Drizzle the melted chocolate over the top, then sprinkle crushed Oreos on top.
- Slice & Serve: Lift the bars out using the edges of the parchment paper or a spatula. Slice into squares with a sharp knife for neat edges.
Notes
Store leftovers in an airtight container in the refrigerator for up to 5 days. For best flavor, allow to reach room temperature before serving.
Nutrition
- Serving Size: 1 serving
- Calories: 290
- Sugar: 12g
- Sodium: 160mg
- Fat: 19g
- Saturated Fat: 10g
- Unsaturated Fat: 5g
- Trans Fat: 0g
- Carbohydrates: 27g
- Fiber: 0g
- Protein: 4g
- Cholesterol: 60mg
Keywords: cheesecake, dessert, no-bake, Oreo, easy recipe