
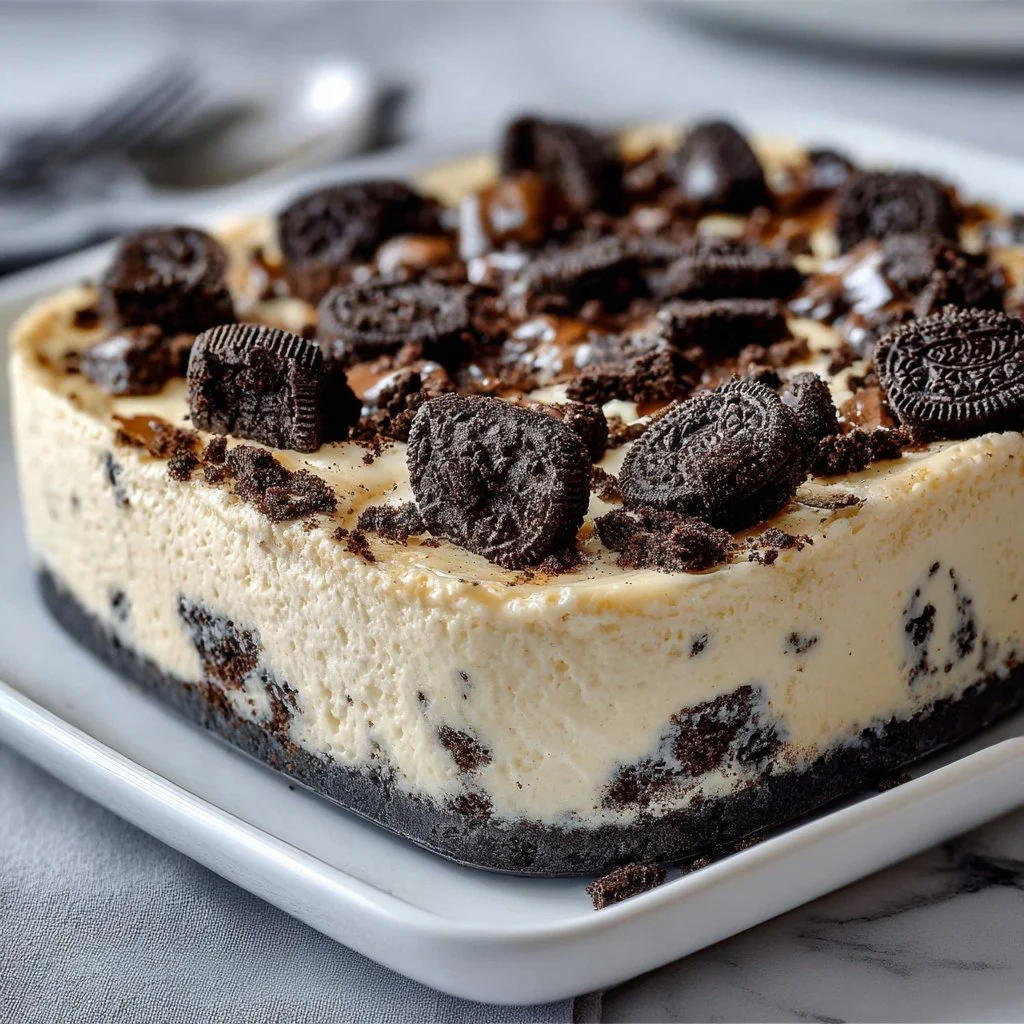
Gluten-Free Oreo Cheesecake: Indulgence Awaits!
Hey there, my fellow kitchen adventurers! Today, I’m thrilled to whisk you away to the magical world of desserts with a recipe that’s guaranteed to make your heart (and taste buds) skip a beat: Gluten-Free Oreo Cheesecake! Now, I know what you might be thinking: can a gluten-free dessert really deliver the joy and decadence of a classic cheesecake? Absolutely! This creamy, heavenly dessert is perfect for everyone, regardless of dietary restrictions, and I can’t wait to share it with you.
There’s something so delightful about cheesecake—the way it melts softly in your mouth while balancing richness with just the right hint of sweetness. And then we add the beloved Oreo cookies into the mix? Total game changer! Each bite is a delightful journey into a world of chocolatey goodness. Whether you’re celebrating a special occasion, hosting a cozy gathering, or just treating yourself after a long day, this cheesecake is bound to make any moment feel extraordinary.
As we dive into this recipe, I want you to feel the excitement bubbling within you. I’m here to guide you through every step, so grab that apron, turn on your favorite tunes, and let’s create something delicious together! And don’t worry if you’re a bit nervous about baking; just think of me as your friendly cheerleader, ready to encourage you every step of the way.
So, without further ado, let’s roll up our sleeves and explore the world of Gluten-Free Oreo Cheesecake!
Personal Story
I can still remember the first time I made cheesecake; it was a rainy Saturday afternoon, and my cousin Tara was visiting. We were both in high school, and I had just discovered the wonders of baking from my grandma’s old recipe book. After carefully studying the instructions (and making a couple of messes along the way), we finally got a creamy cheesecake out of the oven, filled with the spirit of youthful excitement.
But here’s the kicker: we didn’t have any traditional graham crackers in the pantry. So, with a little creativity and a lot of giggles, we crushed up some chocolate cookies instead—those very cookies that were sold out every time we went to the store: Oreos! With a hint of mischievousness, we added them to our cheesecake crust, looking at each other like we had just discovered the best-kept secret in the dessert world.
That day, I fell in love with baking, and we made a memory that would stay with me forever. Since then, I’ve played around with many variations of cheesecake, but there’s something incredibly special about revisiting that nostalgic first attempt with Oreos. Fast forward to today, and here we are, ready to recreate that magic with this gluten-free version!
Ingredients
Here’s what you’ll need to whip up this luxurious Gluten-Free Oreo Cheesecake. I’ll also sprinkle in a few chef insights and substitution tips for each ingredient, so you’ve got all the info at your fingertips!
- 49 Gluten Free Chocolate Vanilla Creme Cookies
- These delightful cookies are the foundation of our luscious crust. They provide a chocolatey crunch that complements the smooth cheesecake filling perfectly. If you can’t find the gluten-free version, you can use any gluten-free chocolate cookie instead or even try those addictive gluten-free ginger snaps for a unique flavor!
- 1/2 Cup Unsalted Butter
- Melted butter binds the crushed cookies together, giving your crust that delicious, rich flavor. If you’re in a pinch or looking for a healthier option, coconut oil works wonders too!
- 32 Ounces Cream Cheese, Softened
- This is the star of our show! Cream cheese adds that signature velvety texture and tangy flavor. If you’re looking for a lighter option, try low-fat cream cheese or a vegan cream cheese alternative.
- 3/4 Cup Granulated Sugar
- A bit of sweetness is essential for that perfect balance! If you prefer, you can use coconut sugar or a sugar substitute, but you may need to adjust the quantity to taste.
- 1 Teaspoon Vanilla Extract
- Pure vanilla extract brings warmth and depth to the cheesecake. Homemade vanilla extract is a fabulous addition if you have it on hand (just make sure to use it sparingly!).
- 8 Ounces Whipped Topping
- This ingredient gives your cheesecake an airy texture, making it feel light and fluffy despite its indulgence. For a dairy-free option, look for almond or coconut whipped topping!
Step-by-Step Instructions
Now that we have our ingredients, it’s time for the real fun to begin! Here’s how we’ll create our decadent Gluten-Free Oreo Cheesecake in just a few simple steps. Follow along, and let’s make dessert magic!
Step 1: Prepare the Crust
- Preheat Your Oven: Start by setting your oven to 350°F (175°C). This will ensure it’s nice and hot when it’s time for the cheesecake to bake.
- Crush the Cookies: In a large bowl, crush the gluten-free chocolate cookies until they resemble coarse crumbs. If you want to make this easier, toss the cookies into a food processor to do the job quickly. Just be careful not to turn them into dust—some texture is great!
- Mix with Butter: Pour the melted unsalted butter over the cookie crumbs. Mix until the crumbs are evenly coated and crumbly. If you find the mixture is too dry, a splash of milk can help bind it together.
- Press into the Pan: Grease a 9-inch springform pan and press the cookie mixture firmly into the bottom. You want an even layer to create a solid base for your cheesecake. Use the back of a measuring cup to help pack it down tightly!
- Bake the Crust: Pop your crust into the preheated oven for 10 minutes. This will help it set up nicely and create a slight crunch. Once done, remove it and let it cool while you prepare the filling.
Step 2: Make the Filling
- Beat the Cream Cheese: In a large mixing bowl, beat the softened cream cheese with a hand mixer on medium speed until it’s smooth and creamy. Make sure there are no lumps—I like to start with my cream cheese at room temperature for a smoother blend!
- Add Sugar and Vanilla: Gradually add the granulated sugar and the vanilla extract, continuing to mix until combined. You can scrape down the sides of the bowl to ensure everything is well combined.
- Fold in Whipped Topping: Now for the secret ingredient! Gently fold in the whipped topping using a spatula. This will create that airy texture we adore in cheesecake. Be careful not to overmix; you want to keep as much air in there as possible!
- Transfer to The Crust: Spoon the cheesecake filling over the cooled cookie crust. Use a spatula to spread it evenly and create a smooth top.
Step 3: Bake and Chill
- Bake the Cheesecake: Bake in the preheated oven for approximately 50-60 minutes or until the edges are set and the center is slightly jiggly. It will firm up as it cools.
- Cool Down: Once the baking time is up, turn off the oven and crack the oven door open to let the cheesecake cool gradually. After about an hour, transfer it to the fridge. Refrigerate for at least 4 hours, but overnight is even better! This allows the flavors to meld and gives it a perfect slice.
Step 4: Serve and Enjoy!
- Prepare for Serving: Before serving, feel free to add any toppings you like—think whipped cream, extra crushed cookies, or a drizzle of chocolate sauce.
- Slice and Serve: Carefully remove the cheesecake from the springform pan and slice it into beautiful wedges. Serve chilled, and watch everyone’s faces light up with joy!
Serving Suggestions
This Gluten-Free Oreo Cheesecake is a star on its own, but you can elevate the presentation with a few simple twists! Serve individual slices on beautiful dessert plates, and adorn each one with a dollop of whipped cream and a sprinkle of crushed gluten-free cookie crumbs. If you’re feeling extra fancy, try garnishing it with fresh raspberries or a drizzle of chocolate sauce for a pop of color and flavor!
Recipe Variations
Now that you’ve perfected the classic Gluten-Free Oreo Cheesecake, why not get creative? Here are some delicious variations to spark your imagination:
- Mint Chocolate Oreo Cheesecake: Add a few drops of peppermint extract to the filling for a refreshing twist. Top it off with crushed mint-flavored Oreos!
- Peanut Butter Swirl: Mix in some creamy peanut butter into the filling and swirl it through before baking. The combo of chocolate and peanut butter is unbeatable!
- Salted Caramel: Drizzle some salted caramel sauce over the top of the cheesecake after you take it out of the fridge. This sweet and savory addition will have everyone coming back for seconds.
- Berry Bliss: Puree fresh berries like strawberries or blueberries and swirl them through the cheesecake filling before baking for a fruity kick!
- Chocolate Ganache Topping: For a rich, decadent finish, pour a chocolate ganache over your cooled cheesecake. Simply heat heavy cream and pour it over chocolate chips, stirring until smooth, then let it set over your cheesecake before serving.
Chef’s Notes
Over the years, I’ve experimented with this cheesecake recipe in countless ways—from adding different flavorings to trying various crusts. One time, I even baked it in a muffin tin to create mini cheesecakes for a party, and they were a massive hit! Each variation has taught me a little more about balancing flavors and textures, which is the beauty of cooking—you’re always learning and building on your experiences.
Sometimes, the best corner-cutting advice is to take it easy. If you’re short on time, using store-bought whipped topping and cookie crust can totally save the day. Just don’t forget to add your personal touch, whether it’s a sprinkle of love or an extra layer of toppings, and trust me, you’ll impress everyone at the table!
FAQs and Troubleshooting
1. My cheesecake cracked while baking. What did I do wrong?
Cracking can happen if your cheesecake bakes too quickly. Make sure to bake it low and slow, and let it cool gradually in the oven to avoid drastic temperature changes.
2. Why did my cheesecake turn out runny?
A runny cheesecake often points to under-baking. Double-check your oven temperature, and consider adding a bit of extra time if it’s not fully set when you take it out.
3. Can I freeze my gluten-free cheesecake?
Absolutely! To freeze, wrap the cheesecake tightly in plastic wrap and foil to avoid freezer burn. Thaw overnight in the fridge when you’re ready to enjoy it again.
4. What can I do with leftovers?
Lucky you! Leftover cheesecake can be stored in an airtight container in the fridge for up to a week. Try it crumbled over a bowl of yogurt or paired with your morning coffee for a treat!
Nutritional Information (Optional)
Serving Size: 1 slice (1/12 of the cheesecake)
- Calories: Approximately 300
- Total Fat: 22g
- Saturated Fat: 12g
- Cholesterol: 80mg
- Sodium: 250mg
- Carbohydrates: 29g
- Dietary Fiber: 1g
- Sugars: 16g
- Protein: 4g
(Nutritional values may vary based on specific ingredients used)
Final Thoughts
And there you have it—your very own Gluten-Free Oreo Cheesecake, made with love and inspired by memories of baking with friends and family. I hope this recipe brings joy to your kitchen and that each slice is shared with laughter and love.
Remember, cooking is all about experimenting, so feel free to play around with flavors and make this cheesecake your own. I’m cheering for you and can’t wait to hear how your cheesecake turns out! Happy baking, friends, and may your culinary adventures always be deliciously magical! 🍰✨
Gluten-Free Oreo Cheesecake
A rich and creamy gluten-free cheesecake infused with chocolatey Oreo goodness for a delightful dessert experience.
- Prep Time: 20 minutes
- Cook Time: 60 minutes
- Total Time: 80 minutes
- Yield: 12 servings 1x
- Category: Dessert
- Method: Baking
- Cuisine: American
- Diet: Gluten-Free
Ingredients
- 49 Gluten Free Chocolate Vanilla Creme Cookies
- 1/2 cup Unsalted Butter, melted
- 32 ounces Cream Cheese, softened
- 3/4 cup Granulated Sugar
- 1 teaspoon Vanilla Extract
- 8 ounces Whipped Topping
Instructions
- Preheat your oven to 350°F (175°C).
- Crush the gluten-free chocolate cookies in a large bowl until they resemble coarse crumbs.
- Mix the melted butter into the cookie crumbs until evenly coated.
- Press the cookie mixture into a greased 9-inch springform pan.
- Bake the crust for 10 minutes and let it cool.
- Beat the softened cream cheese in a mixing bowl until smooth and creamy.
- Add the granulated sugar and vanilla extract, mixing until combined.
- Fold in the whipped topping gently until well combined.
- Transfer the cheesecake filling over the cooled crust, smoothing the top.
- Bake for 50-60 minutes until the edges are set and the center jiggles slightly.
- Cool in the oven with the door cracked for about an hour, then refrigerate for at least 4 hours.
- Serve chilled and enjoy!
Notes
For variations, consider adding peppermint extract for mint chocolate, or swirl in peanut butter, caramel, or fruit before baking.
Nutrition
- Serving Size: 1 slice
- Calories: 300
- Sugar: 16g
- Sodium: 250mg
- Fat: 22g
- Saturated Fat: 12g
- Unsaturated Fat: 10g
- Trans Fat: 0g
- Carbohydrates: 29g
- Fiber: 1g
- Protein: 4g
- Cholesterol: 80mg
Keywords: cheesecake, gluten-free, dessert, chocolate, Oreo, baking