Easy Cottage Cheese Chips: Your New Go-To, High-Protein Crunch
Hey friend! Let’s talk about that 3 p.m. moment. You know the one. Your stomach starts doing that low grumble, your energy dips, and you’re staring into the pantry abyss, willing something both satisfying and not-guilt-inducing to magically appear. You want a chip. You crave that crunch. But maybe you don’t want the heavy, greasy aftermath. What if I told you the secret weapon for this exact moment is already sitting in your fridge, looking all innocent in its little tub?
I’m talking about cottage cheese chips. And before you give me that skeptical side-eye—trust me, I get it. Cottage cheese? For chips? But hold on, because these little crispy clouds are about to change your snack game forever. They’re the internet’s latest food crush for the best reasons: they take minutes to prep, they’re packed with protein to keep you full, and they are so, so satisfyingly crunchy. This isn’t a complicated kitchen project; it’s a simple, smart hack that feels like a treat. Whether you’re just home from a workout, need a study buddy, or are simply a human who enjoys delicious things, this recipe is your new best friend. So, let’s grab that tub and turn the ordinary into something absolutely magical. Your snack time is about to get a major upgrade.
My Cottage Cheese Crunch Epiphany
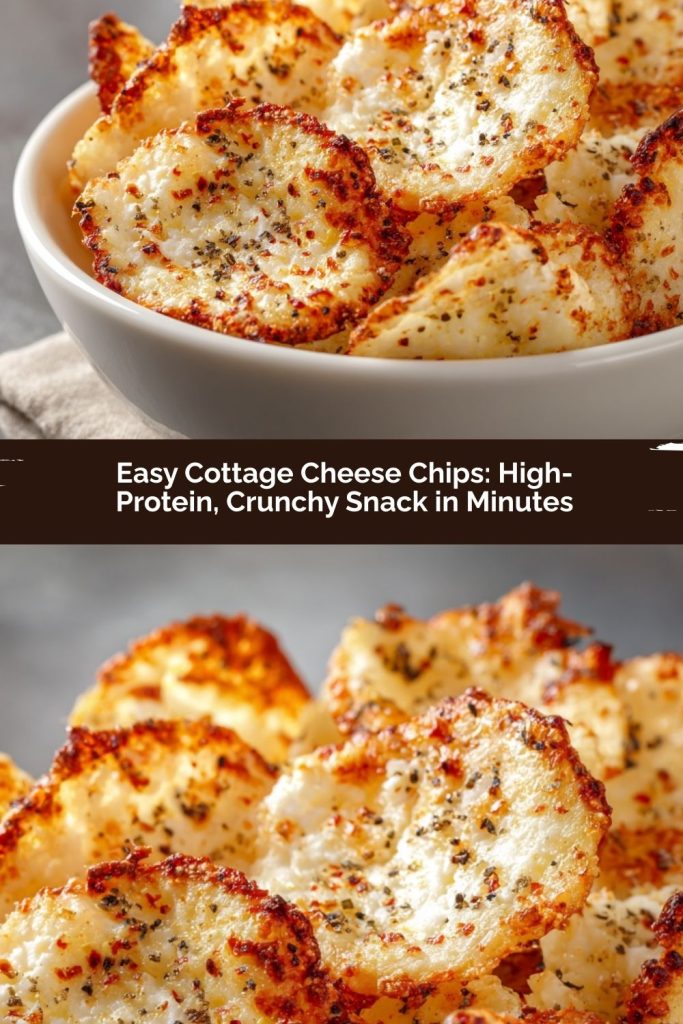
PrintEasy Cottage Cheese Chips: High-Protein, Crunchy Snack in Minutes

What if your next favorite snack came straight from your fridge? These crispy cottage cheese chips are going viral for a reason—they’re ridiculously simple, high in protein, and totally satisfying. No fancy tools, no long prep, just a quick bake and you’re snacking smarter. Great after a workout or when cravings hit, this is one recipe worth saving.
- Prep Time: 5 mins
- Cook Time: 35 mins
- Total Time: 40 mins
- Yield: 12 chips 1x
Ingredients
1 cup cottage cheese (small curd works best)
Your choice of seasonings: garlic powder, onion powder, paprika, chili flakes, or everything bagel seasoning
Optional: shredded Parmesan or cheddar for extra crisp and flavor
Instructions
Preheat oven to 375°F (190°C). Line a baking sheet with parchment paper.
Spoon cottage cheese into small rounds or mounds (about 1–2 tbsp each), spaced apart on the sheet.
Sprinkle with your favorite seasonings.
Bake for 30–40 minutes or until golden brown and crispy around the edges.
Let cool completely to crisp up. Enjoy fresh or store in an airtight container for up to 2 days.
Nutrition
- Calories: 100
- Fat: 4g
- Carbohydrates: 2g
- Protein: 10g
My love affair with cottage cheese started young, thanks to my grandma. She’d eat it with peaches, claiming it was “nature’s perfect food.” I loved it, but I always saw it as a soft, creamy thing. The idea of transforming it into something crunchy never crossed my mind until a few years ago. I was deep in a “recipe testing rabbit hole” (as my family calls it), trying to create a high-protein cracker with a million ingredients. It was a mess. Flour everywhere, dough that wouldn’t cooperate… you get the picture.
Frustrated, I looked at the lonely container of cottage cheese on the counter, a remnant from breakfast. On a total whim, I plopped a spoonful onto the parchment paper already in my oven. “What’s the worst that could happen?” I thought. Twenty minutes later, my kitchen smelled toasty and savory. What came out was a little golden-brown crisp. I let it cool, snapped it in half, and the sound was pure music. It was light, airy, and had this incredible cheesy, rich flavor. I literally did a little happy dance right there by the oven. It was one of those beautiful, accidental kitchen discoveries that reminds you: the best ideas are often the simplest. Now, every time I make a batch, I think of my grandma and smile, knowing she’d get a kick out of her “perfect food” getting a crispy makeover.
What You’ll Need
Here’s the beautiful part: the ingredient list is blissfully short. This is more about technique and flavor-play!
- 1 Cup Small-Curd Cottage Cheese: This is your star player! I recommend using small-curd, as it tends to bake up a bit more uniformly. Full-fat will give you the richest flavor and best crisp, but low-fat works too—just know the chips might be a touch less golden. If you’re dairy-free, see the variations section for a great swap!
- Your Choice of Seasonings: This is where you make it yours! My classic trio is:
- Garlic Powder & Onion Powder: The dynamic duo of savory depth. They bake into the chip perfectly.
- Smoked Paprika: Adds a gorgeous color and a subtle, smoky sweetness. Regular paprika works too!
- Kosher Salt & Cracked Black Pepper: Don’t skip these! They elevate all the other flavors. Season well.
- Optional Boosters:
- Everything Bagel Seasoning: An absolute game-changer. Sesame, garlic, onion, salt—it’s all there.
- Crushed Red Pepper Flakes: For a lovely kick of heat. Add them sparingly at first.
- Shredded Parmesan or Cheddar: A little sprinkle on top before baking adds an extra layer of cheesy flavor and helps with browning.
Making Your Crispy, High-Protein Chips
Ready to see the magic happen? Let’s do this. It’s less about precise cooking and more about trusting the process. You’ve got this!
- Preheat & Prep: First, get that oven roaring to 375°F (190°C). This is the sweet-spot temperature—hot enough to crisp and brown, but not so hot that the outside burns before the inside dries out. While it heats, line a large baking sheet with parchment paper. Chef’s Tip: Do not skip the parchment! These little guys can stick, and the paper makes cleanup a dream. No need to grease it.
- Form Your “Chip Mounds”: Grab a tablespoon or a small cookie scoop. Spoon the cottage cheese onto your prepared sheet, using about 1 to 2 tablespoons per mound. You’re not spreading it thin; you want little, dollop-like piles. Think silver dollar-sized. They will spread a bit as they bake, so leave about 1.5 inches of space between them. This is crucial for proper airflow and crisping! Chef’s Hack: For super-uniform chips, you can gently flatten the tops of the mounds with the back of your spoon, but I love the rustic, craggy look of leaving them as-is.
- Season Generously: Now, the fun part! Shower those mounds with your chosen seasonings. Don’t be shy—the flavor needs to stand up to the transformation. A good pinch of salt on each is essential. If you’re using shredded cheese, sprinkle a little on top now. Chef’s Insight: Seasoning on top bakes into a delicious crust. You can also gently fold some seasoning into the cottage cheese before dolloping for flavor all the way through.
- Bake to Golden Perfection: Slide your sheet into the preheated oven. Now, patience is your friend. Bake for 30 to 40 minutes. You’ll know they’re done when they are deeply golden brown all over and the edges look dry and crisp. The centers should feel firm to the touch. Important Note: Ovens vary! Start checking at 25 minutes. If they’re browning too fast on the bottom, your oven runs hot—it’s okay!
- The All-Important Cool Down: This might be the hardest step! Once they’re out of the oven, let the chips cool completely on the baking sheet. I’m talking 15-20 minutes. They will continue to crisp up as they cool. If you try one too early, it might still be a bit soft or chewy in the middle. Trust me, the wait is worth it for that perfect, shatteringly crisp texture.
How to Serve & Savor
Once your chips are fully cooled and crispy, it’s time to enjoy! I love serving them in a big, wide bowl so everyone can grab a handful. They are fantastic all on their own, straight off the parchment. For next-level snacking, pair them with a creamy dip like tzatziki, a spicy salsa, or even a whipped feta spread. They’re also incredible crumbled over a salad for an instant protein crunch, or as a fun, low-carb side to a big bowl of soup instead of crackers. However you eat them, do it with joy—you just made chips from cottage cheese!
Get Creative: Flavor Twists & Swaps
- Ranch Everything: Mix in 1 tsp of dried dill, chives, and a bit of onion powder before baking. Instant ranch chips!
- Spicy Nacho: Add a pinch of cumin, chili powder, and cayenne to the seasoning. A little cheddar on top makes it perfect.
- Herb Garden: Stir in finely chopped fresh rosemary, thyme, or oregano for a fragrant, gourmet feel.
- Dairy-Free/Vegan: Use a firm, plain almond-milk or soy-based “ricotta” or “cottage style” cheese alternative. The results are surprisingly similar!
- Sweet Cinnamon: For a dessert chip, skip the savory spices. Mix a little cinnamon and a tiny drizzle of maple syrup or a pinch of a granulated sweetener into the cheese before baking. Amazing with yogurt dip.
Anna’s Kitchen Notes
This recipe has become such a staple in my house that my kids now call them “Magic Crunchies.” We’ve had a few hilarious fails along the way—like the time I tried to rush the process and cranked the oven to 425°F. Let’s just say I invented “cottage cheese charcoal briquettes” that day. Lesson learned: low and slow(ish) is the way! I’ve also learned that the brand of cottage cheese can make a slight difference in texture. Some have more moisture than others. If your first batch isn’t as crisp as you’d like, just bake the next one a few minutes longer. Over time, this recipe has evolved from a simple snack to my favorite blank canvas. I hope it becomes that for you, too—a starting point for countless delicious, crunchy experiments.
Your Questions, Answered
Q: My chips came out soft/chewy in the middle. What happened?
A: This is almost always a cooling issue! They need to cool completely on the sheet to finish crisping up. If they’re still soft after cooling, they likely needed a few more minutes in the oven. Next time, bake until they are a deep, golden brown with no moist-looking spots in the center.
Q: Can I make these in an air fryer?
A: Absolutely! It’s a great method. Dollop the cheese into your air fryer basket (lined with parchment if possible), ensuring space between. Cook at 370°F for about 10-15 minutes, checking often, until golden and crisp. Batch size will be smaller, so you may need to cook in rounds.
Q: How do I store them, and how long do they last?
A: Once completely cool, store them in an airtight container at room temperature for up to 2 days. They are best enjoyed the day they’re made. If they lose a little crunch, you can pop them back in a 350°F oven for 3-5 minutes to re-crisp.
Q: Can I use large-curd or flavored cottage cheese?
A> Large-curd works, but you might want to chop the curds slightly for more even chips. As for flavored kinds (like pineapple), I’d stick to plain. The sweet flavors can burn and the texture might be off. It’s better to add your own flavors to a neutral base.
Nutritional Information*
*This is an estimate for 4-5 chips made with full-fat, small-curd cottage cheese and basic seasonings.
Calories: ~100 | Protein: 10g | Fat: 4g | Carbohydrates: 2g | Sodium: Varies based on seasoning.
 Final Thoughts
Who knew that a humble tub of cottage cheese could turn into something so crispy, flavorful, and downright addictive? These chips are proof that the simplest ingredients often make the most satisfying snacks. They deliver that crunchy, cheesy punch you crave while packing a protein punch that keeps you full and energized—no guilt, no grease, no compromise.
The best part? They’re endlessly customizable. From smoky paprika to everything bagel seasoning, or even a sweet cinnamon twist, these chips are a canvas for your snack-time creativity. Whether you enjoy them straight from the tray, paired with a creamy dip, or sprinkled over a salad for an instant protein boost, they never fail to impress.
Next time hunger strikes mid-afternoon—or whenever the craving for crunch hits—skip the chips aisle and grab your cottage cheese. In under 40 minutes, you’ll have a golden, crispy snack that tastes indulgent but fuels you like a champion. Trust me, once you try them, these little magic crunchies will become your new go-to snack.