Sunshine in a Jar: Your New Favorite No-Bake Summer Treat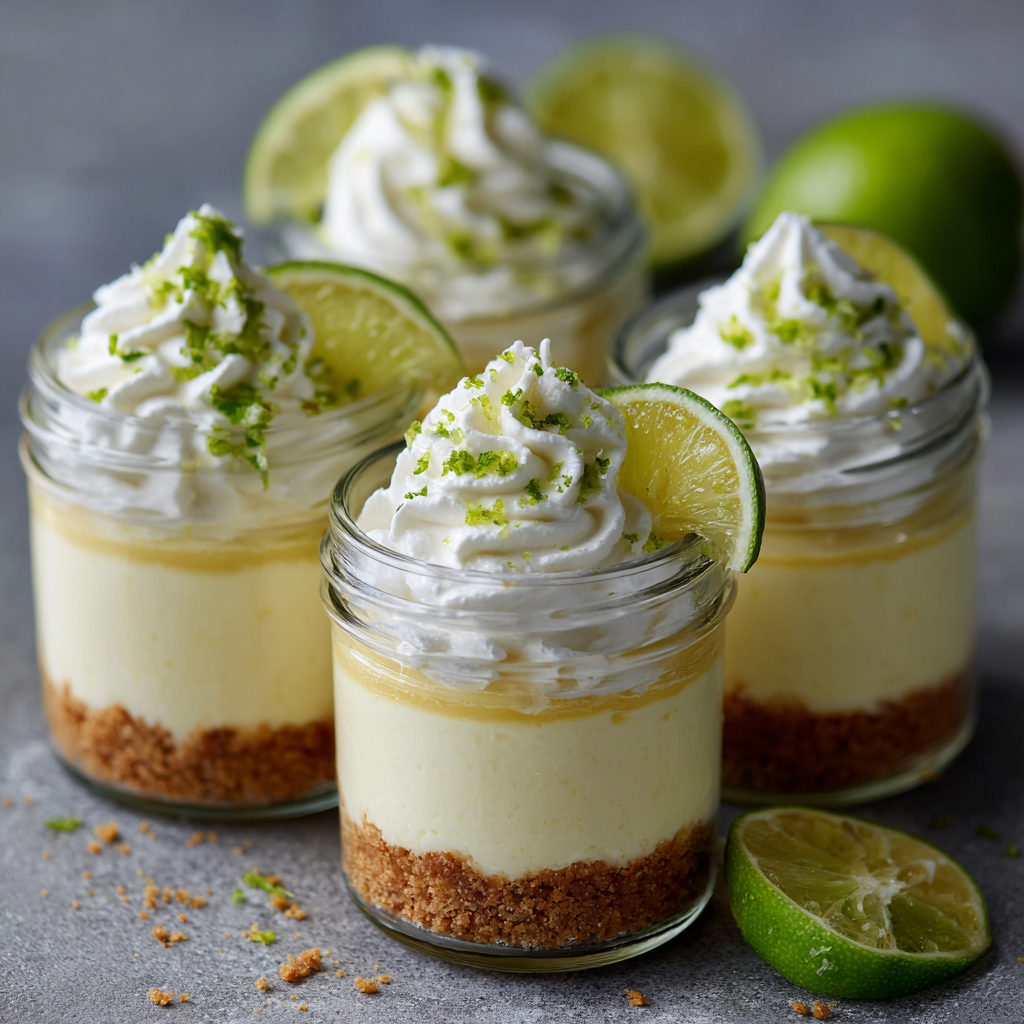
Hey there, friend! Come on in – I’ve got something incredible chilling in the fridge that I just have to share with you. Picture this: a buttery, crunchy graham cracker crust, a layer of impossibly creamy, tangy-sweet key lime cheesecake filling, and a fluffy cloud of whipped cream on top. All of it layered in a cute little jar, ready to grab with a spoon. No oven required, no fuss, just pure, unadulterated joy.
If your idea of a perfect summer dessert involves something cool, refreshing, and bursting with bright citrus flavor, then you and I are on the same page. These No-Bake Key Lime Cheesecake Jars are my absolute go-to when the sun is blazing, I’m craving something sweet, and the thought of turning on the oven makes me sweat just thinking about it. They’re individual portions of happiness, perfect for backyard barbecues, picnics, or just treating yourself on a Tuesday night because, well, you deserve it.
This recipe is the embodiment of my cooking philosophy: magical, memorable food that doesn’t stress you out. We’re talking about 20 minutes of active, fun kitchen time and a couple of hours of letting the fridge do the work. The result? A dessert that tastes like a slice of summer vacation – creamy, dreamy, and zesty with every single spoonful. So, let’s ditch the complicated baking and whip up some sunshine together. Trust me, once you try these, you’ll be hooked.
A Florida Keys Memory & The Birth of a Jarred Dream
PrintNo-Bake Key Lime Cheesecake Jars : Creamy & Refreshing Summer Dessert

These No-Bake Key Lime Cheesecake Jars are fresh, creamy, and bursting with zesty lime flavor! With a buttery graham cracker crust, silky smooth lime cheesecake filling, and a swirl of whipped cream on top, they’re the perfect individual dessert for spring and summer gatherings. Bright, tangy, and irresistibly smooth — this is the kind of treat that tastes like sunshine in every spoonful. Make them once, and they’ll become your go-to citrus dessert!
Ingredients
1 ½ cups graham cracker crumbs
4 tbsp melted butter
8 oz cream cheese, softened
½ cup sweetened condensed milk
¼ cup fresh lime juice
1 tbsp lime zest
1 cup whipped cream (plus extra for topping)
Lime slices for garnish
Instructions
In a bowl, mix graham cracker crumbs with melted butter until combined.
Spoon 2–3 tablespoons of the mixture into the bottom of each jar and press down firmly to form the crust.
In a mixing bowl, beat cream cheese until smooth and creamy.
Add sweetened condensed milk, lime juice, and lime zest. Mix until fully incorporated.
Gently fold in whipped cream to create a light, airy texture.
Spoon or pipe the filling over the crust layer.
Chill for at least 2 hours to set.
Before serving, top with whipped cream and a thin lime slice for a beautiful finish.
Nutrition
- Calories: 320
- Sugar: 18g
- Carbohydrates: 28g
This recipe always takes me back to a wildly humid, utterly perfect trip to the Florida Keys with my family years ago. We’d spent the day swimming in water so clear it looked fake, and we stumbled into a little waterfront shack that claimed to have “The Best Key Lime Pie in the World.” Now, that’s a bold statement, but one bite of their version – tart, cold, and crumbling with a thick graham crust – and we were all believers. We bought a whole pie and ate it right there on the dock, laughing as the lime zest hit our tongues and the sea breeze tried to steal our napkins.
I’ve been chasing that flavor combination ever since. But let’s be real – making a whole pie, even a no-bake one, can feel like a commitment. Then one day, during a particularly chaotic week, I wanted that taste but needed simplicity. I grabbed some mason jars from the cabinet, layered the components, and popped them in the fridge. The “jar” idea was born out of a desire for instant portion control, adorable presentation, and maximum ease. It was a hit! It captured every bit of that Keys magic but in a personal, portable, and wonderfully easy package. Now, every time I take a bite, I’m back on that sunny dock, and I love that I can share that feeling with you, no flight required.
Gathering Your Sunshine: Ingredients & Insights
Here’s what you’ll need to create this creamy, dreamy dessert. The beauty lies in its simplicity! I’ve added my little chef notes next to each one to help you shop and substitute like a pro.
- 1 ½ cups graham cracker crumbs: This is the foundation of our crunchy, sweet crust. You can buy pre-crumbled crumbs or toss whole sheets into a zip-top bag and roll with a rolling pin – super therapeutic! Chef’s Insight: For a fun twist, try using gingersnap crumbs for a spicy kick, or vanilla wafer crumbs for a more buttery flavor.
- 4 tbsp melted butter: This is the glue that holds our crust together and gives it that rich, toasty flavor. Unsalted is best so we control the salt level. Substitution Tip: For a dairy-free version, coconut oil works beautifully and adds a subtle tropical note that’s fantastic with lime.
- 8 oz cream cheese, softened: The star of our creamy filling! Full-fat is non-negotiable here for the silkiest texture. Let it sit on the counter for a good 30-60 minutes before you start. A softened block blends smoothly, leaving no lumpy surprises. Chef’s Insight: Beat the cream cheese alone first until it’s completely smooth – this is the secret to a lump-free filling.
- ½ cup sweetened condensed milk: This magical ingredient adds sweetness and helps create that lush, thick cheesecake consistency without any baking. It’s the key to the perfect texture. Substitution Tip: Looking for a lighter option? You can use the same amount of full-fat coconut cream (just the solid part from the can) mixed with 2-3 tablespoons of powdered sugar, though the texture will be slightly less firm.
- ¼ cup fresh lime juice: The “key” to key lime flavor! Fresh juice is a million times brighter than bottled. Roll your limes on the counter under your palm before juicing to get every last drop. Chef’s Insight: No key limes? No problem! Regular Persian limes (the ones you find at any grocery store) work absolutely perfectly and are much easier to juice.
- 1 tbsp lime zest: This is where the powerful, aromatic lime oil lives. Don’t skip it! That vibrant green zest adds a huge punch of flavor and a gorgeous flecked appearance. Pro Tip: Zest your limes before you juice them. Trying to zest a juiced lime half is a frustrating, slippery mission.
- 1 cup whipped cream (plus extra for topping): This lightens the filling, making it cloud-like. You can use store-bought whipped topping for convenience, or make your own by whipping ½ cup of heavy cream with a tablespoon of powdered sugar until stiff peaks form. Chef’s Insight: If making your own, a metal bowl and chilled beaters will help you whip it up faster and fluffier.
- Lime slices for garnish: A thin, pretty slice on top of each jar is the perfect finishing touch. It says, “I’m fresh, I’m zesty, and I’m ready for your spoon.”
Let’s Layer the Magic: Step-by-Step Instructions
Okay, apron on? Let’s do this! I’ll walk you through each step with all my favorite tips and tricks to ensure your jars are nothing short of perfect.
- Make the Crust: In a medium bowl, mix your graham cracker crumbs and melted butter together with a fork. You’re looking for a texture like wet sand – when you pinch it, it should hold together. Little Chef Hack: If you want a slightly sweeter crust, add a tablespoon of granulated sugar to the crumb mix. It’s a simple upgrade with delicious results!
- Layer the Base: Grab your jars, glasses, or even pretty cups! Spoon 2-3 tablespoons of the crumb mixture into the bottom of each one. Now, use the bottom of a small glass, a measuring spoon, or your fingers to press the crumbs down firmly and evenly. A solid, packed base is crucial so you get a perfect crust layer in every bite. Chef’s Commentary: I love using 8-oz mason jars because they’re the perfect size and look so cute, but get creative with what you have!
- Whip the Star: In a large mixing bowl, beat your softened cream cheese with a hand mixer or stand mixer fitted with the paddle attachment. Start on low, then move to medium-high. Beat it for a good 1-2 minutes until it’s completely smooth, creamy, and there’s not a single lump in sight. Scrape down the sides of the bowl halfway through. This step is your texture insurance – don’t rush it!
- Build the Filling: To the beautiful, smooth cream cheese, add the sweetened condensed milk, fresh lime juice, and lime zest. Mix on medium speed until everything is fully incorporated and the mixture is uniformly smooth and slightly thickened. Give it a taste – is it the perfect balance of sweet and tangy for you? Add a touch more zest if you want an extra zing!
- Fold in the Fluff: Now, take your whipped cream. If you’re using a store-bought tub or your freshly whipped cream, add about one cup to the lime-cheesecake mixture. Here’s the key move: use a rubber spatula and fold gently. Turn the bowl as you sweep the spatula down through the center and up the side. We want to keep all that lovely air in the whipped cream to create a light, mousse-like texture. Mix just until no white streaks remain.
- Layer & Chill: Spoon or pipe the creamy filling over your crust layers, dividing it evenly among the jars. Leave a little room at the top for the final whipped cream flourish! Gently tap the jars on the counter to settle the filling. Pop the lids on or cover them with plastic wrap and chill in the refrigerator for at least 2 hours, but ideally 4 or even overnight. This chill time is what sets the filling perfectly, making it sliceable (or spoonable) and incredible.
- The Grand Finale: Right before serving, top each jar with a dollop of fresh whipped cream and a thin lime slice. This not only looks gorgeous but adds one last hit of fresh creaminess. And there you have it – your very own jars of sunshine!
How to Serve These Sunny Jars
Presentation is part of the fun! I love serving these straight from the fridge, the jars cold in my hands. You can line them up on a tray for a gathering, letting everyone grab their own. For an extra special touch, place the jars on small plates with a little doily or a decorative napkin. Add a sprig of mint next to the lime slice for a pop of green, or sprinkle a tiny bit of extra lime zest over the whipped cream. The beauty is in their simplicity – the layers do all the talking! Serve with a long spoon so you can dig all the way down to get crust, filling, and cream in one perfect bite.
Make It Your Own: Delicious Twists & Swaps
Once you’ve mastered the classic, have fun playing with flavors!
- Tropical Twist: Add ½ cup of finely chopped toasted coconut to the graham cracker crust. Fold ¼ cup of crushed pineapple (well-drained) into the filling along with the whipped cream.
- Berry Swirl: Before chilling, drop a spoonful of your favorite berry jam or compote (raspberry is divine) into the top of the filling in each jar. Use a toothpick to gently swirl it for a marbled, fruity effect.
- Chocolate-Lime Dream: Swap the graham crust for a crust made from chocolate wafer cookie crumbs. You can even shave a little dark chocolate on top of the whipped cream for a garnish.
- Dairy-Free Delight: Use dairy-free cream cheese and coconut whipped cream. For the crust, use coconut oil instead of butter. The coconut flavor pairs amazingly with lime!
- Mini Parfait Party: Use smaller jars or even clear plastic cups to make bite-sized versions for a party. They’re adorable and perfect for a dessert buffet.
Anna’s Kitchen Notes & Stories
This recipe has become such a staple in my house that my family now calls it “Sunshine in a Jar.” It’s evolved from that first experimental batch – I’ve learned that the longer it chills, the better it gets, so I often make it the night before a get-together. One funny kitchen story: I once, in a pre-coffee haze, tried to zest a lime after I’d already juiced it. Let’s just say it was a slippery, futile battle that ended with lime zest flying across the room. Now “Zest First, Juice Later” is my kitchen mantra! I also love that this recipe is so forgiving. Too tangy? A little more whipped cream on top balances it. Too sweet? An extra squeeze of lime juice in the filling does the trick. Make it your own, and most importantly, have fun with it.
Your Questions, Answered: FAQs & Troubleshooting
Q: My filling seems too runny. What did I do wrong?
A: Don’t panic! This usually means it needs more chill time. The filling sets and firms up in the fridge. Ensure you chill for the full 2 hours minimum, but 4 is better. Also, make sure your whipped cream was fully whipped to stiff peaks before folding it in. If it was soft, it can thin the mixture.
Q: Can I make this ahead of time?
A: Absolutely! In fact, I recommend it. You can assemble the jars completely (minus the final whipped cream topping) up to 2 days in advance. Keep them covered in the fridge. Add the fresh whipped cream and garnish just before serving for the best texture and look.
Q: I can’t find key limes. Is it okay to use regular limes?
A> Yes, 100%! Regular Persian limes are easier to find and juice, and they work beautifully in this recipe. The flavor is slightly different but still wonderfully bright and tangy. The “key” is really just the fresh citrus vibe.
Q: Can I freeze these cheesecake jars?
A> You can, but with a caveat. The texture of the whipped cream and cream cheese filling will change slightly after thawing, becoming a bit more crystalline. For best results, enjoy them chilled from the fridge. If you do freeze, thaw overnight in the refrigerator and add fresh whipped cream before serving.
Nutritional Information*
*Please note: This is an approximate estimate for one jar (based on a yield of 5 jars) using the standard ingredients. Values may vary based on specific brands and any substitutions you make.
- Calories: ~320
- Total Fat: 22g
- Saturated Fat: 13g
- Carbohydrates: 28g
- Sugar: 18g
- Protein: 5g
Prep Time: 20 minutes | Chill Time: 2 hours | Total Time: 2 hours 20 minutes | Yield: 4-6 jars | Difficulty: Easy | Storage: Refrigerate in sealed jars for up to 3 days.

Final Thoughts
These No-Bake Key Lime Cheesecake Jars are everything I want summer desserts to be—cool, bright, unfussy, and deeply satisfying. They capture that perfect balance of creamy richness and citrusy zing, all without ever asking you to turn on the oven. When a recipe delivers big flavor and keeps your kitchen calm, that’s a true win in my book.
What makes these extra special is how effortlessly they fit into real life. Make them ahead, serve them straight from the fridge, dress them up for guests, or keep one tucked in the back as a well-earned midweek treat. They’re proof that dessert doesn’t have to be complicated to feel memorable. Sometimes, the best recipes are the ones that slow you down just long enough to savor a spoonful of sunshine.