Peach Raspberry Cheesecake – Creamy, Fresh & Irresistibly Beautiful
The Dessert That Tastes Like a Golden Hour Hug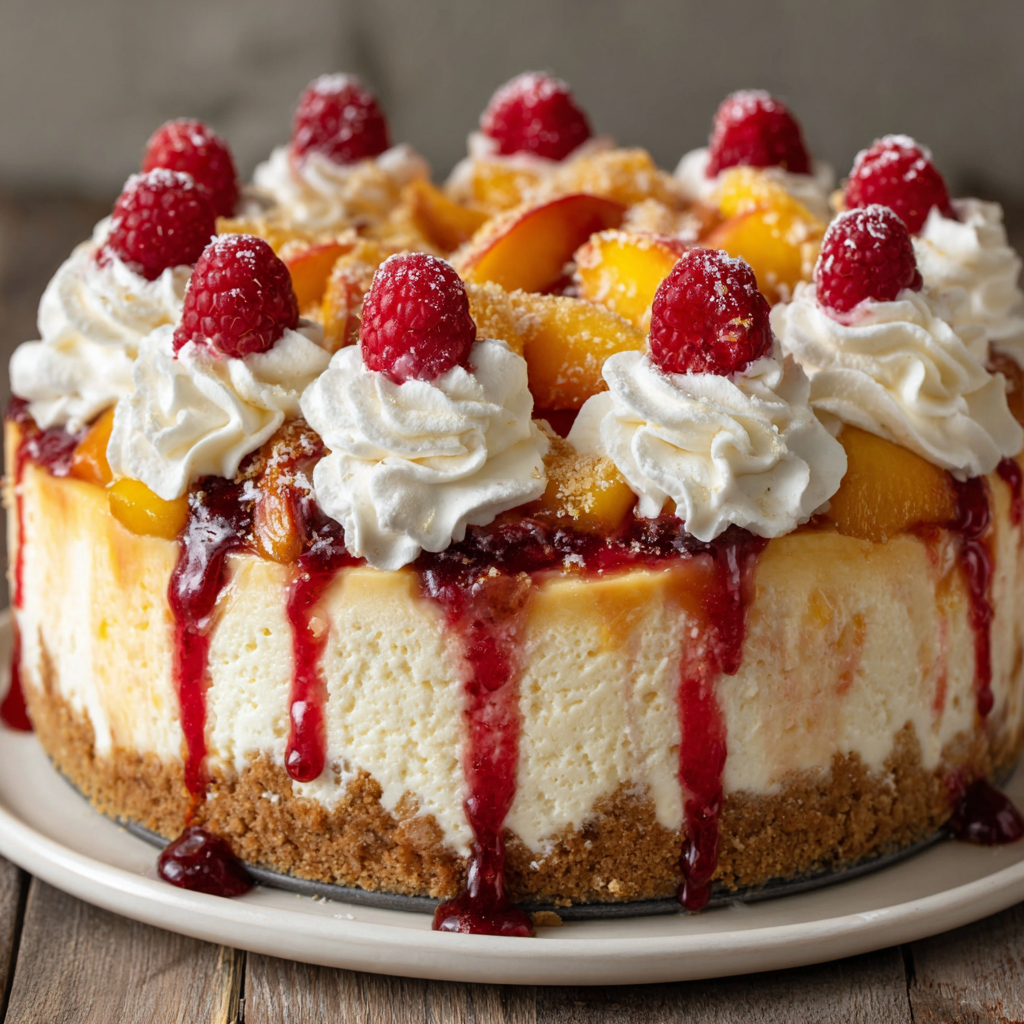
Hello, my friend! Come on in, grab a wooden spoon, and pull up a stool. Today, we’re making magic. Not just any magic, but the kind that happens when sweet, sun-kissed peaches meet those bright, punchy raspberries, all wrapped up in the creamiest, dreamiest cheesecake you can imagine. This Peach Raspberry Cheesecake isn’t just a dessert; it’s a mood. It’s the taste of a slow summer evening, of lazy brunches with your favorite people, and of that proud, happy sigh you let out when you present something truly stunning on the table.
I know cheesecake can sometimes feel intimidating—all that talk of water baths and cracks! But trust me, we’re throwing fear out the kitchen window today. This recipe is designed for joy, not stress. We’re keeping it beautifully straightforward, with a few of my favorite “no-fuss” chef hacks baked right in. The result? A show-stopping masterpiece that’s deceptively simple to make. That gorgeous swirl of fruit through the rich filling, that buttery crumb crust, the cloud of whipped cream on top… it’s a symphony of textures and flavors that will have everyone asking for the recipe. So, let’s tie on those aprons, put on some good music, and cook up something amazing—and unforgettable—together.
A Slice of Summer, Circa 1998
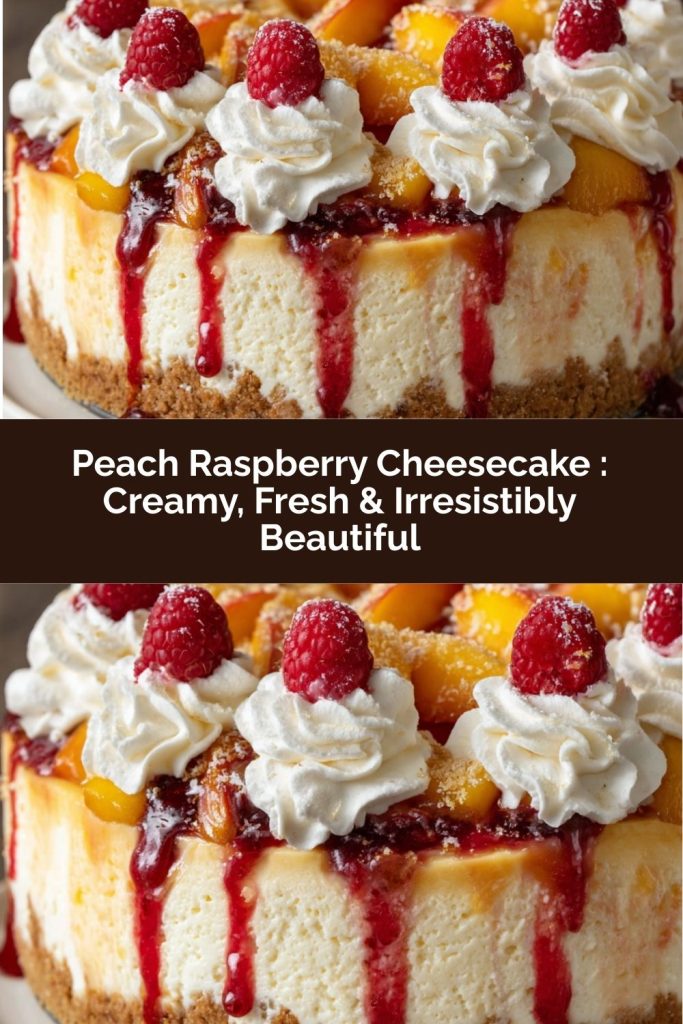
PrintPeach Raspberry Cheesecake : Creamy, Fresh & Irresistibly Beautiful

This peach raspberry cheesecake is a true dessert masterpiece. A buttery graham cracker crust supports a rich, velvety cheesecake layered with sweet peaches and vibrant raspberries. Finished with whipped cream swirls and a light fruit drizzle, it’s the perfect balance of creamy, tangy, and naturally sweet. Ideal for summer gatherings, brunches, or special occasions when you want something both elegant and unforgettable.
- Prep Time: 20 minutes
- chill time: 4 hours
- Cook Time: 60 minutes
- Total Time: 5 hours 20 minutes
- Yield: 8–10 1x
Ingredients
Crust:
1 ½ cups graham cracker crumbs
¼ cup granulated sugar
½ cup unsalted butter, melted
Filling:
16 oz (450 g) cream cheese, softened
¾ cup granulated sugar
3 large eggs
1 teaspoon vanilla extract
½ cup sour cream
1 cup fresh peaches, diced
¾ cup raspberries
Topping:
Whipped cream
Fresh peach slices
Fresh raspberries
Powdered sugar (for dusting)
Optional berry sauce drizzle
Instructions
Preheat oven to 325°F (165°C). Line a 9-inch springform pan and grease lightly.
Mix graham crumbs, sugar, and melted butter. Press firmly into the bottom of the pan. Bake 8–10 minutes, then cool.
Beat cream cheese and sugar until smooth and creamy.
Add eggs one at a time, mixing gently. Stir in vanilla and sour cream.
Fold in diced peaches and raspberries carefully to avoid crushing.
Pour filling over crust and smooth the top.
Bake 50–60 minutes until the center is just set with a slight jiggle.
Turn off oven and let cheesecake cool inside with door slightly open.
Chill at least 4 hours or overnight.
Decorate with whipped cream, peach slices, raspberries, and a light dusting of powdered sugar before serving.
Nutrition
- Calories: ~410 kcal
- Carbohydrates: 34 g
- Protein: 7 g
This cheesecake always takes me right back to my grandma’s backyard. She had this enormous, gnarled peach tree that seemed to produce fruit by sheer force of will. Every August, we’d be swimming in peaches. My job, as the “official kitchen helper” (read: kid covered in sugar), was to carefully slice them for her famous pies and cobblers. One sweltering afternoon, she looked at a bowl of peaches and a pint of raspberries from the farmer’s market and declared, “We’re not making pie today. We’re inventing.”
What we “invented” was a rustic, freeform peach-raspberry galette. It was messy and juicy and perfect. But the memory of those two fruits together—the floral sweetness of the peach cutting the raspberry’s tang—stuck with me for decades. When I created this cheesecake, I wanted to capture that same magical pairing but in a form fit for celebrations. It’s my grown-up, elegant homage to Grandma’s spirit of kitchen adventure and that sticky-sweet taste of childhood summers. Every bite is a little nod to her.
Gathering Your Sunshine & Berries
Here’s your shopping and prepping list! The beauty of this recipe is in its simplicity and quality. Let’s chat about each player in our dessert symphony.
- Graham Cracker Crumbs (1 ½ cups): The sweet, toasty foundation. I buy pre-crushed to save time, but crushing 10-12 full sheets in a bag with a rolling pin is therapeutic! Chef’s Insight: For a nuttier flavor, swap half with crushed ginger snaps or vanilla wafers.
- Granulated Sugar (¼ cup for crust, ¾ cup for filling): For sweetness and structure. We use just enough to let the fruit shine.
- Unsalted Butter, melted (½ cup): The glue for our crust. Unsalted lets us control the seasoning. Melt it and let it cool just slightly so it doesn’t make the crumbs soggy.
- Cream Cheese, softened (16 oz / 450 g): The STAR. Use full-fat brick-style, never the tub spread. Critical Tip: Soften it at room temp for 2-3 hours. It should indent deeply when pressed. This is the #1 secret to a smooth, lump-free filling.
- Large Eggs (3): They bind and enrich our filling. Add them one at a time, letting each fully incorporate before adding the next. This prevents over-beating, which can incorporate too much air and cause cracking.
- Pure Vanilla Extract (1 tsp): The flavor enhancer. It rounds out all the other notes. Always use pure, not imitation!
- Sour Cream (½ cup): My secret weapon for the creamiest texture and a delightful, subtle tang. Full-fat Greek yogurt works in a pinch.
- Fresh Peaches, diced (1 cup) & Fresh Raspberries (¾ cup): The heart of the matter! Use ripe, fragrant peaches. Substitution Tip: In winter, thawed frozen peaches and raspberries (well-drained and patted dry!) work beautifully. No fresh fruit? A high-quality peach or raspberry jam swirled in is a delicious cheat.
- For Topping: Whipped cream, fresh peach slices, fresh raspberries, powdered sugar. This is your artistic playground!
Let’s Build Some Beauty, Step-by-Step
Follow these steps, breathe, and remember: you’ve got this. I’m right here with you!
- Prep & Preheat: Position a rack in the lower third of your oven and preheat to 325°F (165°C). Take your 9-inch springform pan, line the bottom with a round of parchment paper (just trace and cut!), and lightly grease the sides. This little parchment step is a life-saver for flawless removal later. Chef’s Hack: Wrap the outside bottom and sides of the springform pan tightly with heavy-duty foil. This isn’t for a water bath today, but it’s just good insurance against any butter leaks!
- Crust Time: In a medium bowl, stir the graham cracker crumbs and ¼ cup sugar. Drizzle in the melted butter and mix until it resembles wet sand. Dump it into your prepared pan and press it firmly and evenly into the bottom with the flat bottom of a glass or measuring cup. Bake for 8-10 minutes until it’s fragrant and just set. Let it cool on a rack while you make the filling. This par-baking helps prevent a soggy bottom—worth the extra few minutes!
- The Creamy Dream Filling: In a large bowl, beat the softened cream cheese and ¾ cup sugar with a hand mixer (or stand mixer) on medium-low speed for 2-3 minutes. You want it silky smooth, with no lumps. Scrape down the bowl often! Now, add the eggs one at a time, beating on low just until the yellow disappears after each addition. Over-beating eggs = too much air = potential cracks. Gently mix in the vanilla and sour cream until just combined. The filling should be thick, smooth, and glorious.
- Fold in the Fruit: This is the pretty part! Gently toss your diced peaches and raspberries in a tablespoon of flour (this helps prevent them from sinking). Using a rubber spatula, fold them into the cream cheese mixture with a few gentle turns. We want lovely fruit pockets, not a pink purée. A few streaks of raspberry juice are perfectly fine and beautiful.
- Bake with Confidence: Pour the filling over your cooled crust. Give the pan a few gentle taps on the counter to release any big air bubbles. Slide it into the oven and bake for 50-60 minutes. It’s done when the edges are puffed and set, but the center—about a 3-inch circle—still has a slight, gentle jiggle when you nudge the pan. It will firm up as it chills. This is the key to creaminess!
- The Crucial Cool-Down: Here’s my favorite no-crack hack: Turn off the oven. Crack the oven door open about an inch (I use the handle of a wooden spoon to prop it). Let the cheesecake cool slowly in this turned-off oven for 1 hour. This gradual temperature change is like a cozy blanket for your dessert, preventing stress cracks.
- Chill Out: After its oven nap, transfer the cheesecake (still in the pan) to a wire rack to cool to room temperature. Then, cover it loosely and refrigerate for at least 4 hours, but overnight is truly best. This patience allows the flavors to marry and the texture to become perfectly sliceable.
- The Grand Finale (Decorate!): Run a thin knife around the inside edge of the pan before unclasping the springform. Transfer the cake to a serving plate. Now, have fun! Pipe or dollop on whipped cream, artfully arrange fresh peach slices and raspberries, and give it a heavenly dusting of powdered sugar through a fine-mesh sieve. A drizzle of melted raspberry jam thinned with a splash of water makes a gorgeous, easy sauce.
How to Serve This Stunner
Presentation is part of the joy! For clean slices, dip your sharp knife in hot water and wipe it dry between each cut. Serve on simple, elegant plates to let the colors pop. A little extra berry sauce on the plate underneath each slice looks incredibly professional. This cake is rich, so modest slices are perfect alongside a cup of strong coffee, iced tea, or even a glass of Prosecco for a real celebration.
Make It Your Own: Delicious Twists
Love the base recipe? Here’s how to play with it!
- Lemon Zest Burst: Add the zest of one lemon to the filling. The citrus makes the peaches and raspberries sing even brighter.
- Ginger Snap Crust: Swap the graham crumbs for crushed ginger snaps. The warm spice with the fruit is a next-level combination.
- Boozy Berry: Fold 2 tablespoons of Chambord (raspberry liqueur) or Amaretto into the filling for a sophisticated adult twist.
- Dairy-Free Delight: Use your favorite plant-based cream cheese and butter, and swap the sour cream for coconut cream. The fruit flavors will still be the star.
- “Cheesecake” Bars: Press the crust into a 9×13 pan, add the filling, and bake for 35-40 minutes. Cut into squares for easy, portable treats.
From My Kitchen to Yours: A Few Final Secrets
This recipe has become a staple in my home, and like any good friend, it’s evolved a bit over time. I started out meticulously arranging the fruit on top before baking, but I found folding it into the batter created more surprise and flavor in every bite. The “cool in the oven” trick was a game-changer I learned after one too many minor surface cracks (which, by the way, are always covered by whipped cream and absolutely nothing to worry about!).
The funniest kitchen story? The time I was filming a video for this recipe and my cat, Mortimer, decided the sound of the mixer was his personal battle cry. He leaped onto the counter mid-beat, trying to “save” me from the “dangerous machine.” Let’s just say there was cream cheese on the ceiling. The takeaway? Cooking is never perfect, and the best memories often come from the little chaotic moments. Embrace them!
Your Questions, Answered
Q: Can I use frozen fruit?
A: You absolutely can! Thaw the fruit completely first, then drain it in a colander and pat it very, very dry with paper towels. Excess moisture is the enemy of cheesecake structure. I often give frozen berries a quick chop after thawing to prevent giant icy pockets.
Q: My center is still super wobbly after 60 minutes. Help!
A: Ovens vary! If the edges aren’t pulling away yet and the top isn’t browned, give it 5-10 more minutes. The very center (a small circle) should have a jiggle like Jell-O, not a liquid wave. If the edges are done but the center is too loose, it will continue to set dramatically in the fridge.
Q: Why did my cheesecake crack?
A> The top three culprits are: 1) Over-beating the eggs (incorporates too much air), 2) A drastic temperature change (hence our slow cool-down), or 3) Over-baking. Remember, it continues to cook as it cools. A crack is just a sign of character and a great excuse for extra whipped cream!
Q: How far ahead can I make this?
A: Cheesecake is a fantastic make-ahead dessert! It keeps beautifully, covered, in the fridge for up to 4 days. The flavors actually improve on day two. You can also freeze the fully chilled, undecorated cake (wrapped tightly in plastic and foil) for up to 2 months. Thaw overnight in the fridge before decorating.
Nutritional Information*
*This is a rough estimate per slice (based on 10 servings) and will vary based on specific ingredients and toppings used.
- Calories: ~410 kcal
- Protein: 7 g
- Carbohydrates: 34 g
- Fat: 28 g
- Fiber: 1 g
Prep Time: 20 mins | Cook Time: 60 mins | Chill Time: 4+ hours | Total Time: 5 hours 20 mins | Servings: 8-10
 Final Thoughts
This Peach Raspberry Cheesecake is the ultimate summer dessert: creamy, fruity, and utterly irresistible. The tender graham cracker crust provides the perfect base for a lush cream cheese filling, while pockets of juicy peaches and bright raspberries add bursts of color, flavor, and that unmistakable taste of sunny afternoons. Every slice is a little celebration of summer’s best flavors, wrapped in a dessert that feels indulgent without being fussy.
I love how approachable this cheesecake is. No water baths, no stress cracks—just a few simple tricks, patience, and the confidence to let the fruit shine. It’s versatile, too: swap in frozen fruit, play with a flavored crust, or make it dairy-free—the core magic remains the same.