***
Your New Favorite Kitchen Hack: No-Bake Protein Power Balls!
Hey there, friend! Let’s be real for a second: life moves fast. Between school runs, work deadlines, that daily walk you’re trying to be better about, and just… well, everything, it’s so easy to hit that 3 PM slump and reach for something that tastes great but leaves you feeling blah. I’ve been there more times than I can count, staring into the pantry abyss, willing a magical, energizing, and delicious snack to materialize out of thin air.
Well, consider this your magic wand. These no-bake Protein Balls are my absolute, number-one, never-fail solution for busy days and snack cravings. They’re like little bites of wholesome energy, packed with clean protein, healthy fats, and just the right amount of natural sweetness to satisfy that pesky sweet tooth. Think of them as your edible cheerleader – perfect for a pre-workout boost, an essential post-workout refuel, or just that moment when you need a little something to carry you through to dinner without a side of guilt.
The best part? They come together in about 10 minutes, require zero baking (hello, cool kitchen in the summer!), and are seriously foolproof. Whether you’re a kitchen newbie or a seasoned meal prepper, this recipe is your ticket to snack-time victory. So, let’s ditch the packaged bars and cook up something amazing – and wonderfully simple – together.
A Story of Snack-Time Salvation
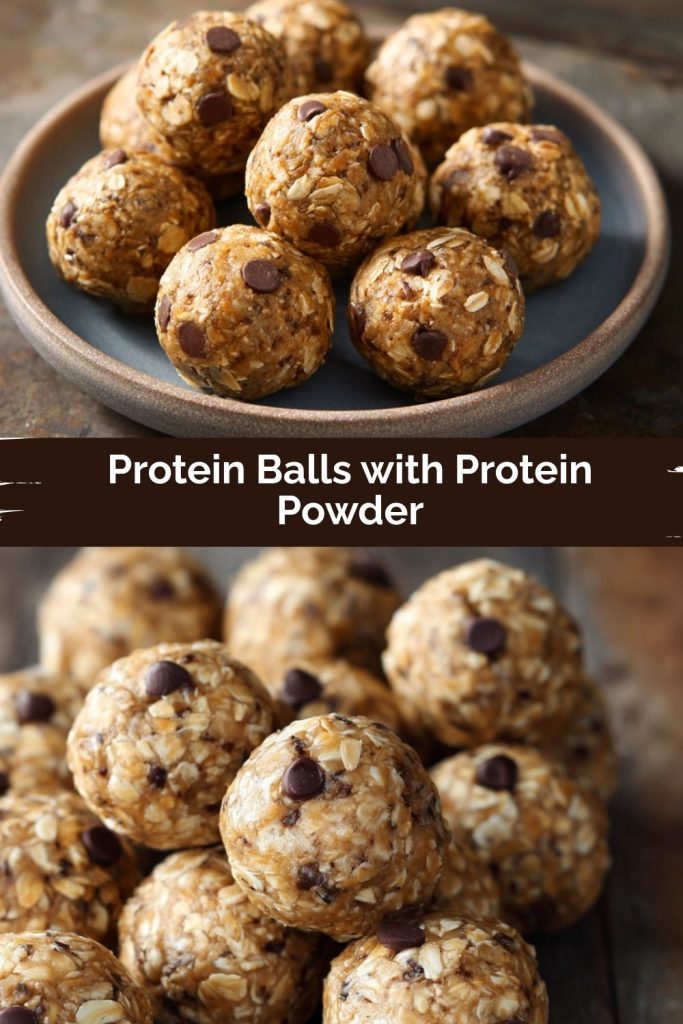
PrintProtein Balls with Protein Powder
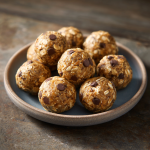
These Protein Balls are your grab-and-go solution to busy days and snack cravings. Packed with clean energy, healthy fats, and a protein boost, they’re perfect pre- or post-workout, or just when you need a little something sweet—without the crash.
- Prep Time: 10 mins
- chill: 20 mins
- Total Time: 30 mins
- Yield: 12 balls 1x
Ingredients
1 cup rolled oats
1/2 cup nut butter (peanut, almond, or cashew)
1/4 cup honey or maple syrup
1/4 cup protein powder (vanilla or chocolate)
1/4 cup mini chocolate chips or chopped nuts
1/2 tsp vanilla extract
Pinch of salt
Instructions
In a bowl, mix all ingredients until a thick dough forms.
Scoop and roll into 1-inch balls using your hands or a cookie scoop.
Chill in the fridge for 20–30 minutes to firm up.
Store in an airtight container in the fridge for up to a week—or freeze for longer!
Nutrition
- Calories: 120
- Sugar: 6g
- Fat: 6g
- Carbohydrates: 12g
- Protein: 5g
I’ll never forget the first time I truly needed this recipe. It was a typical chaotic Wednesday. My youngest was going through a phase of refusing naps, my editor was waiting on a draft, and I had about 15 minutes to get out the door for school pickup. My stomach was growling, my energy was plummeting faster than a failed soufflé, and the only “quick” option was a handful of cereal that sounded about as appealing as cardboard.
In a moment of desperate inspiration, I started throwing things into a bowl – the rolled oats from breakfast, the nearly-empty jar of almond butter I’d been scraping, a scoop of my husband’s vanilla protein powder, and a generous pour of honey. I mixed it all up, rolled the sticky dough into haphazard little balls, and shoved them in the fridge. I grabbed two on my way out the door.
Sitting in the car line, I took a bite. It was chewy, slightly sweet, nutty, and utterly satisfying. It wasn’t just a snack; it was a moment of calm, a tiny burst of fuel that made the rest of the afternoon feel manageable. That’s the magic I’m talking about. It’s not just about the ingredients; it’s about creating little moments of joy and nourishment amidst the beautiful chaos of everyday life. These humble protein balls became an instant family staple, and I have a feeling they’ll become one in your home, too.
Gathering Your Ingredients: The Dream Team
Here’s the beautiful cast of characters that makes these protein balls so incredible. I’ve included my best tips and substitutions for each one because I want you to feel empowered to make this recipe work with what you have!
- 1 cup rolled oats (old-fashioned oats): This is our fantastic fiber-filled base that gives these balls their satisfying, chewy texture. Chef’s Insight: Don’t use quick oats if you can avoid it! Rolled oats provide a much heartier, chewier bite. For a gluten-free version, just ensure your oats are certified GF.
- 1/2 cup nut butter: The glue that holds everything together! I love creamy almond butter for its mild flavor, but classic peanut butter is a crowd-pleasing winner, and cashew butter is luxuriously smooth. Substitution Tip: If you have a nut allergy, sunflower seed butter works perfectly! Just note that it can make the mixture a tad thicker, so you might need an extra teaspoon of honey.
- 1/4 cup honey or maple syrup: Our natural sweetener and another key binding agent. Honey gives a classic flavor, while pure maple syrup keeps it vegan-friendly. Chef’s Insight: If your honey is super thick or crystallized, warm it up for 10 seconds in the microwave to make it easier to mix.
- 1/4 cup protein powder: The star of the show for that energizing boost! Vanilla or chocolate are my go-to flavors. Substitution Tip: The type of protein powder matters! Whey protein isolate tends to make the dough drier, while plant-based blends (like pea or brown rice protein) can be more absorbent. If your mixture seems too dry, see my troubleshooting tips below!
- 1/4 cup mini chocolate chips or chopped nuts: The fun mix-in! Mini chocolate chips distribute little pockets of joy in every bite. Chopped walnuts or pecans add a fantastic crunch. Chef’s Insight: For a lower-sugar option, try cacao nibs! They provide a wonderful chocolatey crunch without the added sugar.
- 1/2 tsp vanilla extract: The flavor enhancer that makes everything taste warmer and more bakery-style. Don’t skip it!
- Pinch of salt: This is non-negotiable! Salt balances the sweetness and makes all the other flavors pop. If your nut butter is unsalted, you might even add a tiny bit more.
Let’s Make Some Magic: Step-by-Step Instructions
Ready to get your hands a little dirty? This is the fun part. I’ll walk you through each step with my favorite kitchen hacks to ensure perfect results every single time.
Step 1: The Big Mix. Grab a medium-sized mixing bowl. Honestly, any bowl will do! Add all of your ingredients to the bowl at once. Yes, you read that right—we’re keeping this truly simple. Now, take a sturdy wooden spoon or a silicone spatula and start mixing. At first, it might seem a bit dry and crumbly, but keep the faith! As you continue to mix, the nut butter and honey will work their magic, and a thick, cohesive dough will start to form. Chef’s Hack: If your arm needs a break, you can also use the paddle attachment on a stand mixer on low speed. It works like a charm!
Step 2: The Texture Test. This is the most important step for success! Once the mixture is fully combined, stop and do a quick test. Grab a small handful and squeeze it tightly in your palm. It should stick together easily and not crumble apart. If it’s too dry and won’t hold its shape, add a tiny bit more nut butter or honey (a teaspoon at a time) until it’s pliable. If it’s too wet and sticky (which is rare, but can happen), add a tablespoon more of oats or protein powder. Perfect dough = easy rolling!
Step 3: Roll It Out. Now for the fun, slightly messy part! Using a tablespoon-sized cookie scoop (my secret weapon for evenly-sized balls every time) or just a regular spoon, portion out the dough. I like to scoop all of them onto a parchment-lined plate or baking sheet first. Then, with clean, slightly damp hands, roll each portion into a smooth, tight ball. Chef’s Hack: Lightly wetting your hands prevents the sticky dough from clinging to you and makes the rolling process incredibly smooth.
Step 4: The Chill Factor. Place your beautiful little orbs of energy on a plate or baking sheet lined with parchment paper. Pop them into the refrigerator for at least 20-30 minutes. This is not a suggestion—it’s a must! Chilling allows the oats to soften slightly and all the flavors to meld together beautifully. It also firms them up perfectly, transforming them from sticky dough into a portable, grab-and-go snack.
Step 5: Store for Success. Once they’re firm, transfer your protein balls to an airtight container. They’ll keep happily in the fridge for up to a week, making them the ultimate meal prep hero. For long-term storage, you can freeze them for up to 3 months! Just lay them in a single layer on a baking sheet to freeze solid first, then toss them all into a freezer bag. They thaw in minutes, so you can always have a healthy snack on demand.
How to Serve & Savor Your Creation
Honestly, grabbing one straight from the fridge is my preferred method! But if you want to make them feel extra special, here are a few ideas. For a post-workout treat, pair two balls with a big cold glass of almond milk. For a quick breakfast, crumble one over a bowl of Greek yogurt and berries. You can even pack a few in a small reusable container for a hike, a road trip, or to stash in your desk drawer for emergency snacking. They are endlessly versatile and always delicious.
Get Creative: Endless Flavor Variations
The basic formula is your playground! Once you’ve mastered the original, try one of these delicious twists:
- Almond Joy: Use almond butter, vanilla protein powder, and swap the chocolate chips for unsweetened shredded coconut and a few dark chocolate chunks.
- Cookie Dough Delight: Use vanilla protein powder and add a handful of mini chocolate chips. A pinch of cinnamon takes it over the top!
- Gingerbread Spice: Use maple syrup, add a teaspoon of molasses, and spice it up with 1/2 tsp ginger, 1/4 tsp cinnamon, and a pinch of nutmeg and cloves.
- Sunflower Cocoa Crunch (Nut-Free): Use sunflower seed butter, vanilla or chocolate protein powder, and mix in cacao nibs and sunflower seeds.
- Peanut Butter & Jelly: Use peanut butter and roll the finished balls in a little bit of freeze-dried strawberry or raspberry powder for that classic PB&J vibe.
Anna’s Chef Notes & Kitchen Stories
This recipe has evolved so much in my kitchen over the years. My kids are now expert ball-rollers, and they love arguing over which mix-in is best (chocolate chips always win). We’ve made these for soccer teams, bake sales (where they’re always a surprising hit!), and as edible gifts for new parents.
One of my favorite kitchen fails-turned-wins was the time I accidentally used mint chocolate chip protein powder. I was skeptical, but it tasted like a healthy Thin Mint cookie! It was a delicious accident that now gets requested regularly. So don’t be afraid to experiment. The worst thing that can happen is you have to add a bit more oats or honey, and the best thing is you might discover your family’s new favorite flavor.
Remember, cooking is supposed to be fun. Put on some music, get the kids involved, and don’t stress about making them perfectly round. Imperfectly made snacks taste just as good, I promise.
Your Questions, Answered!
Q: My mixture is too dry and crumbly! It won’t stick together. What did I do wrong?
A: This is the most common issue, and it’s almost always fixable! Different protein powders and nut butters have different levels of absorbency and oil content. Simply add more of your binding agent: add one teaspoon of nut butter OR one teaspoon of honey at a time, mixing thoroughly after each addition, until the dough becomes pliable and holds together when squeezed.
Q: My mixture is too wet and sticky! How can I fix it?
A> This is less common, but it can happen. The easy fix is to add more of your dry ingredients. Add one tablespoon of rolled oats OR one tablespoon of protein powder at a time, mixing well, until the dough is firm enough to handle and roll.
Q: Can I make these without protein powder?
A> You can! The protein powder adds structure and the obvious protein boost, but if you don’t have any or want to avoid it, you can substitute it with an additional 1/4 cup of rolled oats (ground into a fine oat flour works best) and maybe a tablespoon of ground flaxseed for a little nutritional punch. The texture will be slightly different but still delicious.
Q: Why do I HAVE to chill them? Can’t I eat one right away?
A> You absolutely can sneak a taste—I always do! But chilling is crucial for the final texture. It allows the oats to absorb the moisture from the nut butter and honey, which firms everything up and gives them that perfect, satisfying chewy bite rather than a soft, messy one. Trust me, it’s worth the wait.
Nutritional Information*
Per ball (based on recipe making 12 balls, using almond butter, honey, vanilla whey protein, and mini chocolate chips)
Calories: ~120 | Fat: 6g | Saturated Fat: 1.5g | Carbohydrates: 12g | Fiber: 2g | Sugar: 6g | Protein: 5g
*Please note: This is an estimate based on the specific ingredients I used. Your nutritional information will vary based on the brands and ingredients you choose.
Prep Time: 10 mins | Chill Time: 20 mins | Total Time: 30 mins | Servings: 12 balls
 Final Thoughts
No-bake protein balls are proof that healthy snacks don’t need to be complicated, bland, or boring. With just a few pantry staples and 10 minutes of your time, you can whip up a batch of bites that fuel your body, satisfy your sweet tooth, and fit seamlessly into even the busiest of days.
What I love most about this recipe is its flexibility—you can keep it classic with oats, nut butter, and honey, or play around with endless flavor combos to suit your cravings (or whatever’s hiding in your pantry). Plus, they’re portable, freezer-friendly, and always ready when that mid-afternoon slump hits.
So, the next time you find yourself standing in front of the pantry wishing for a magic snack, remember this recipe. These little protein-packed power balls are the magic—and once you try them, you’ll wonder how you ever lived without them