Quesabirria Tacos: Your New Favorite Crispy, Cheesy, Dip-Worthy Comfort Food
Welcome to Taco Heaven!
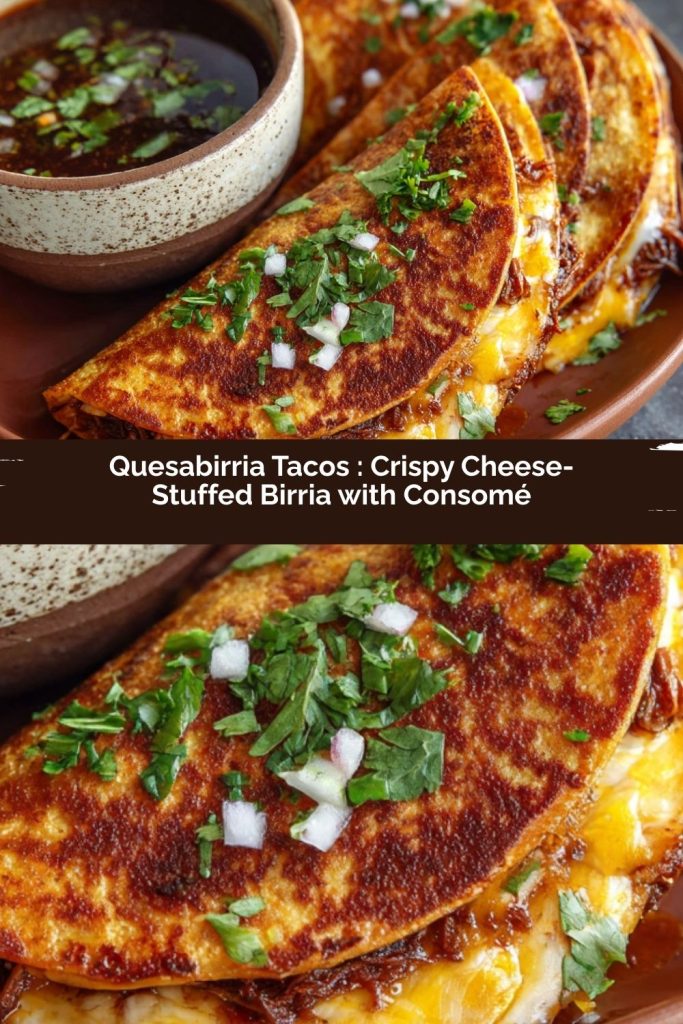
PrintQuesabirria Tacos : Crispy Cheese-Stuffed Birria with Consomé

Quesabirria tacos are the ultimate comfort-food mashup: slow-braised, deeply spiced birria tucked into tortillas loaded with melty cheese, then crisped until golden and dunk-ready. Rich, savory, and irresistibly crunchy, these tacos turn any dinner into a crave-worthy moment—especially when served with a warm cup of consomé on the side.
- Prep Time: 30 minutes
- Cook Time: 3–4 hours (slow cook or braise)
- Total Time: 4 hours
- Yield: 10–12 tacos
Ingredients
Birria
Beef chuck or short ribs
Dried guajillo chiles
Dried ancho chiles
Onion
Garlic
Tomato
Beef broth
Apple cider vinegar
Bay leaves
Cumin, oregano, cloves, cinnamon
Salt & pepper
Tacos
Corn tortillas
Oaxaca or mozzarella cheese, shredded
Chopped white onion
Fresh cilantro
Instructions
Toast dried chiles lightly, then soak in hot water until softened.
Blend chiles with onion, garlic, tomato, spices, vinegar, and broth until smooth.
Pour sauce over beef, add bay leaves, and slow-cook until meat is fall-apart tender.
Shred beef and strain broth to create rich consomé.
Dip tortillas into the top layer of the consomé, then place on a hot skillet.
Add cheese and shredded birria, fold, and cook until crispy and golden on both sides.
Serve hot with consomé for dipping, topped with onion and cilantro.
Nutrition
- Calories: 320
- Fat: 18g
- Carbohydrates: 20g
- Protein: 20g
Tell me if this sounds familiar: you’re scrolling, you see a video of a gloriously crispy taco being dipped into a shimmering, deep red broth, cheese stretching for miles… and your stomach does a full, dramatic growl. That, my friend, is the magic of Quesabirria Tacos. And let me tell you, the hype is 1000% real.
These aren’t your average Tuesday night tacos. This is a flavor experience. We’re talking fall-apart-tender beef, braised for hours in a complex, soul-warming chile sauce, then stuffed into a tortilla with outrageous amounts of melty cheese. The whole thing gets crisped to golden perfection in a skillet, creating this incredible textural symphony: crunchy exterior, gooey cheese, succulent meat. And then… you dunk it. Right into that same braising liquid, now transformed into a rich, sippable consommé. It’s messy, it’s joyful, and it’s quite possibly the most satisfying thing you’ll make all year.
I know the idea of a multi-hour recipe might seem like a weekend project, but trust me, 90% of that time is hands-off while your kitchen fills with the most incredible aroma. This recipe is my love letter to slow, flavorful cooking that ends in a seriously fun, interactive meal. So, tie on your apron, clear your stovetop, and let’s make some taco magic happen together. You’ve got this!
The Trip That Started a Taco Obsession
My love affair with birria didn’t start in a fancy restaurant, but at a bustling, no-frills lonchería just outside of Guadalajara. My husband and I were on a “food crawl” (our favorite kind of vacation), and our taxi driver, sensing our mission, insisted we stop at his cousin’s place. “The best birria de res in Jalisco,” he promised with a wink.
We sat at a plastic table, and a steaming clay bowl of consommé was placed in front of me, followed by a plate of simple, stewed meat tacos. The first sip of that broth was a revelation—deep, spicy, tangy, and incredibly restorative. But the real “aha!” moment came when I watched the abuela running the kitchen take a tortilla, dip it swiftly into the fat floating on top of the consommé, and throw it on the griddle. It sizzled wildly. She added meat, folded it, and pressed it until it was audibly crispy. She served it with a side cup of that same broth. It was a humble, brilliant act of culinary resourcefulness that created the ultimate package: crunch, juice, and dip, all in one bite. I came home dreaming of that sound, that smell, and that perfect bite. This recipe is my attempt to bottle that memory and share it with you.
Gathering Your Flavor Arsenal
Don’t let the list intimidate you! Many are pantry staples, and the dried chiles are the non-negotiable stars that create that signature deep, red color and complex flavor. You can find them in the international aisle of most supermarkets or at any Latin market.
- 3 lbs beef chuck roast or short ribs (or a mix!) – Chuck roast is my go-to for perfect shredding. Short ribs add incredible richness. Don’t trim all the fat—that’s flavor and future taco-crisping gold!
- 4 dried guajillo chiles – These bring a mild, sweet tang and that vibrant red color. They’re the backbone of the sauce.
- 2 dried ancho chiles – These are dried poblanos, offering a deeper, raisiny sweetness and less heat. They round out the guajillo’s brightness.
- 1 large white onion, roughly chopped – Half gets blended into the sauce for sweetness, half gets reserved for our fresh topping.
- 6 cloves garlic, smashed – Because can you ever have too much garlic? No, you cannot.
- 1 large tomato, quartered – Adds a touch of acidity and body to the blended sauce.
- 4 cups beef broth – Use a good quality, low-sodium broth. You’re the salt boss here!
- 2 tbsp apple cider vinegar – The secret weapon! This little splash cuts through the richness and makes all the flavors pop.
- 2 bay leaves – Their subtle herbal note works wonders in long braises.
- Spices: 2 tsp cumin, 2 tsp dried oregano (Mexican if you have it!), 1/4 tsp ground cloves, 1 cinnamon stick or 1/4 tsp ground cinnamon, 1 tsp black pepper – This is your spice choir. Each one sings a little harmony to create a complex, warming flavor that isn’t overly “spicy.”
- Salt to taste – We’ll season in layers.
- For Assembly: 12-16 corn tortillas, 1 lb Oaxaca or mozzarella cheese (shredded), Fresh cilantro (chopped), Lime wedges – Oaxaca cheese is traditional and melts like a dream, but whole-milk mozzarella is a fantastic, accessible substitute. And always, always fresh lime!
Let’s Build Some Flavor, Step-by-Step
This process is a labor of love, but I’ll walk you through every step. Put on some music, pour yourself a drink, and enjoy the journey. The payoff is so worth it.
- Toast & Soak Your Chiles. Heat a dry skillet or comal over medium heat. Toast your guajillo and ancho chiles for about 30 seconds per side, just until they become fragrant and pliable. Be careful not to burn them, or they’ll turn bitter! Place the toasted chiles in a bowl and cover them with very hot water. Let them soak and rehydrate for 15-20 minutes while they soften up. Chef’s Hack: Save the soaking water! We’ll use a bit of it to blend the sauce, as it’s now packed with chile flavor.
- Blend the Magical Red Sauce. To your blender, add the soaked chiles (stems and seeds removed), half of the chopped onion, the garlic, tomato, cumin, oregano, cloves, cinnamon, pepper, apple cider vinegar, and 1 cup of the beef broth. Blend on high until it’s completely smooth and velvety. This is your flavor bomb. Tip: If your blender struggles, add a splash more broth or chile-soaking water to get it going.
- Sear & Simmer the Beef. Pat your beef dry and season it generously with salt. In a large Dutch oven or heavy pot, heat a tablespoon of oil over medium-high heat. Sear the beef on all sides until you have a beautiful brown crust. This is where we build foundational flavor! Pour your beautiful red sauce over the beef, then add the remaining beef broth and the bay leaves. The liquid should come about 3/4 of the way up the meat. Bring it to a simmer, then cover, reduce the heat to low, and let it braise gently for 3-4 hours. The beef is ready when it practically falls apart at the touch of a fork.
- Shred & Strain. Carefully remove the beef to a bowl and shred it with two forks. Now, look at that gorgeous pot of liquid! Strain it through a fine-mesh sieve into a separate bowl or pot. You’ll see the magic happen: the clear, red, fatty consommé will rise to the top, and the thicker sediment will stay at the bottom. Skim off that top layer of rich, red fat—this is liquid gold for frying our tacos! The clear consommé below is for dipping. Season both the meat and the consommé with salt to taste.
- The Crispy, Cheesy Assembly Line. This is the fun part! Set up your station: bowl of consommé fat, shredded birria, shredded cheese, chopped onion/cilantro, and a hot skillet or griddle over medium heat. Using tongs, quickly dip a corn tortilla into the consommé fat, coating both sides. Place it immediately on the hot skillet. Sprinkle a generous amount of cheese on one half, then top with a hefty pinch of shredded birria. Let it cook for about 60 seconds, then use a spatula to fold the tortilla over. Press down gently and cook for another 1-2 minutes per side, until it’s crispy, golden, and the cheese is oozing. Repeat in batches! Pro-Tip: Don’t overcrowd the skillet. Give each taco its space to crisp up properly.
How to Serve These Masterpieces
Presentation is part of the fun! I love serving these family-style on a big platter. For each person, serve 2-3 crispy quesabirria tacos with a small bowl or ramekin of the warm, clear consommé for dipping. Scatter the remaining chopped white onion and fresh cilantro over everything for that essential bright, fresh crunch. Don’t forget plenty of lime wedges for squeezing—the acid is crucial for balancing the richness. Have hot sauce on the table for the heat-lovers. Now, dig in and get dippin’!
Make It Your Own: Delicious Twists
- Chicken Birria: Use bone-in, skin-on chicken thighs for a lighter but still incredibly flavorful version. Reduce braise time to 1.5-2 hours.
- Vegetarian “Birria”: Swap the beef for hearty king oyster mushrooms or sliced jackfruit. Use a rich vegetable broth and add a tablespoon of soy sauce or tamari to the sauce for umami depth.
- Breakfast Quesabirria: Add a fried egg on top of your crispy taco. The runny yolk mixed with the consommé is a game-changer.
- Spice It Up: Add 1-2 dried arbol chiles to the blend with the guajillos for a noticeable kick of heat.
- Quesabirria Ramen: The ultimate leftover hack. Heat consommé, cook ramen noodles in it, top with shredded birria, cheese, and a crispy taco on the side for crushing over the top.
Anna’s Kitchen Notes
This recipe has evolved so much in my kitchen! The first time I made it, I was so nervous about the chiles, I barely used any. The result was… beige and sad. Lesson learned: embrace the color! Now, I always make a double batch of the birria and freeze half. The meat and consommé freeze beautifully for up to 3 months, making “taco night” a 20-minute affair on a busy weeknight. Also, a confession: I’ve been known to use the leftover consommé fat to fry eggs the next morning. You haven’t lived until you’ve had a birria-fat-fried egg. Just saying. Most importantly, have fun with it. If your tortilla tears while dipping, patch it with cheese. If your first one isn’t perfectly crispy, you’ve learned for the next one. Cooking is a journey, not a perfection contest.
Your Quesabirria Questions, Answered
Q: My tortillas are tearing when I try to dip and fold them. Help!
A: This usually means your tortillas are too cold or dry. Warm the whole stack for 20 seconds in the microwave wrapped in a damp towel before you start dipping. Also, ensure your consommé fat is warm—it should be liquid. A quick, confident dip is better than a long soak.
Q: Can I make this in a slow cooker or Instant Pot?
A> Absolutely! For a slow cooker: complete steps 1 & 2, then sear the beef and add everything to the pot. Cook on LOW for 8 hours. For an Instant Pot: use the sauté function to sear, then add everything and cook on HIGH pressure for 60-75 minutes, followed by a natural release. Both methods work great!
Q: My consommé isn’t very red or flavorful. What happened?
A> The color comes from properly toasted and blended chiles. Make sure you didn’t skip the toasting step—it wakes up the oils! For flavor, ensure you seasoned the consommé adequately with salt after straining. If it tastes flat, a squeeze of lime and another pinch of salt can often bring it right back to life.
Q: What’s the best cheese to use if I can’t find Oaxaca?
A> No stress! A combination of part-skim, low-moisture mozzarella (for melt) and a mild Monterey Jack (for flavor) is my favorite supermarket substitute. Avoid pre-shredded cheese if you can, as it has anti-caking agents that can make the melt less smooth.
Nutritional Information*
*This is an estimate per taco (based on 12 tacos), including a portion of the beef, cheese, and tortilla. The consommé is primarily broth and is not included in this calculation.
Calories: ~320 | Protein: 20g | Fat: 18g | Carbohydrates: 20g | Fiber: 3g