Why Settle for One Slice When You Can Have Dozens of Bite-Sized Pies?
Hey friend! Anna here, apron on and spatula in hand, bubbling over with excitement to share these little pockets of pure autumnal bliss. Imagine this: all the soul-warming comfort of your grandma’s apple pie – that flaky, buttery crust, the tender cinnamon-kissed apples, the sticky-sweet caramel rivers – but transformed into adorable, hand-held cookies you can pop straight into your happy mouth. No fork required! These Caramel Apple Pie Cookies are like the best party guest: utterly charming, impossible to resist, and guaranteed to leave everyone asking for your secret.
I get it. Pie can feel like a project. The chilling, the rolling, the lattice anxiety! That’s why these cookies are my not-so-secret weapon for making “wow” moments achievable on a busy Tuesday. They harness the magic of refrigerated pie crust (no shame in that game, my friend!) and transform humble apple pie filling into something extraordinary. In about 40 minutes, you’ll have a double batch of golden-brown, sugar-dusted cuties ready to make your kitchen smell like a cozy fall dream. Perfect for lunchboxes, irresistible on a holiday cookie platter, and absolutely essential for those “I need a hug in food form” afternoons. So, grab your favorite mug of cider or coffee, put on some feel-good tunes, and let’s turn ordinary into extraordinary, one delicious bite at a time!
The Happy Accident That Sparked a Cookie Revolution
PrintCaramel Apple Pie Cookies

These bite-sized beauties are the best parts of apple pie—flaky crust, warm spiced apples, and gooey caramel—all wrapped up in cookie form. Sweet, cinnamon-kissed, and totally portable, they’re perfect for fall gatherings or holiday cookie trays.
- Prep Time: 20 mins
- Cook Time: 20 mins
- Total Time: 40 mins
- Yield: 24–28 cookies 1x
Ingredients
2 packages refrigerated pie crusts (4 crusts total)
10 oz caramel topping
20 oz apple pie filling (chopped finely)
2 eggs, beaten
2 tsp cinnamon
1/2 tsp nutmeg
1/2 cup sugar
Instructions
Preheat oven to 350°F (175°C). Line baking sheets with parchment.
Prepare filling: Chop apple pie filling into small pieces for easy spreading.
Roll out crusts: Lay out two crusts. Spread caramel topping evenly over each, then add a thin layer of apple pie filling.
Top and seal: Place the remaining crusts on top. Press gently. Use a pizza cutter or knife to slice into rounds or squares.
Cut and crimp: Use a cookie cutter to shape cookies. Seal edges with a fork. Place on baking sheet.
Egg wash & sugar: Whisk egg and brush tops of cookies. Mix sugar, cinnamon, and nutmeg; sprinkle generously on top.
Bake: 18–22 minutes or until golden brown. Let cool slightly before serving.
Nutrition
- Calories: 180
- Sugar: 14g
- Fat: 7g
- Carbohydrates: 27g
- Protein: 1g
Okay, confession time: these cookies were born from a pie crust rebellion! A few autumns ago, I was determined to make a stunning, Instagram-worthy apple pie for a big family potluck. Picture it: flour dusting my hair like premature grey, apples piled high, ambition soaring… and then, disaster. My *beautiful* homemade crust? It cracked. Like, Grand Canyon-level cracking. Panic set in! With guests arriving soon, I grabbed a box of refrigerated crusts from the fridge (my emergency stash), rolled them out in a frenzy, and had a wild idea: “What if I just… make tiny pies?”
I slapped caramel and chopped apples between two crusts, cut them into rough circles with a glass, crimped the edges like my life depended on it, and tossed them in the oven praying for a miracle. Friends, the miracle happened! Those little wonky cookies vanished faster than the fall leaves outside. My “failed” pie became the unexpected star. My nephew declared them “way better than boring pie” (kids, right?), and my sister begged for the recipe immediately. Now, they’re a non-negotiable part of our fall traditions – proof that sometimes the happiest kitchen moments come from the sweetest little accidents. They remind me that cooking isn’t about perfection; it’s about joy, sharing, and embracing the delicious detours!
Gathering Your Autumn Treasure Trove
Here’s the beautiful part – this magic relies on simple, accessible ingredients. Let’s break down what you’ll need for your double batch of joy (yep, one batch is never enough!):
- 2 packages refrigerated pie crusts (4 crusts total): Our flaky foundation! Look for the standard 14-15 oz packages found near the canned biscuits. Thaw according to package directions (usually 15-20 mins at room temp). Chef Insight: Don’t unroll them until thawed, or they might crack! Pillsbury and store brands both work great.
- 10 oz caramel topping: The gooey heart! Use the thick ice cream topping kind in a jar (like Smucker’s or Mrs. Richardson’s), not the liquid syrup. Substitution Tip: Short on time? Melt about 30-35 soft caramel candies with 1-2 tbsp of cream or milk until smooth!
- 20 oz apple pie filling (2 cans): The cozy core! We’ll chop these apples finely for perfect cookie-sized bites. Chef Insight: Use a sharp knife right in the can or drain slightly and chop on a cutting board. Comstock or Lucky Leaf are reliable brands.
- 2 eggs, beaten: Our golden glue! This creates the egg wash for that beautiful shine and helps the sugar topping stick. Substitution Tip: For an egg-free wash, whisk 2 tbsp milk with 1 tbsp maple syrup.
- 2 tsp ground cinnamon: Warmth in a bottle! This is non-negotiable for that classic apple pie spice hug. Chef Insight: For deeper flavor, try 1 1/2 tsp cinnamon + 1/2 tsp apple pie spice blend.
- 1/2 tsp ground nutmeg: The subtle spark! Just a hint adds incredible depth. Use freshly grated if you have it – the aroma is unreal!
- 1/2 cup granulated sugar: The sweet sparkle! Mixes with the spices for that irresistible crunchy-sugary top. Substitution Tip: Turbinado or coarse sanding sugar adds fantastic sparkle and crunch!
Pro-Tip Alert! Having everything measured and ready (your “mise en place”) makes assembly a breeze. Trust me, sticky fingers appreciate it!
Let’s Build Some Bite-Sized Magic!
Ready to create cookie bliss? This is where the fun really happens. Don’t worry – it’s easier than pie (literally!). Follow along:
- Preheat & Prep: Fire up your oven to 350°F (175°C). Line 2-3 large baking sheets with parchment paper. Why parchment? It prevents sticking AND makes cleanup a dream. No scrubbing caramel off pans! Chef Hack: If your kitchen runs cool, take the pie crusts out of the fridge now so they warm up slightly and become more pliable.
- Chop the Filling: Open your cans of apple pie filling. Grab a sharp knife and chop those apple chunks right in the can (carefully!) or pour them onto a cutting board and dice finely into small, pea-sized pieces. Why chop? Big chunks make sealing the cookies tricky! Drain off a little excess syrup if it seems super liquidy. Chef Insight: Toss the chopped apples with 1 tsp of the cinnamon right now for an extra flavor boost!
- Roll & Layer – Bottom Crust: Gently unroll two pie crusts onto a lightly floured surface or directly onto parchment for easy moving. If they crack slightly at the edges, just pinch them back together. Chef Hack: Use a rolling pin to gently roll them *just* enough to smooth any creases – no need to thin them out significantly. Spread half of the caramel topping (about 5 oz) evenly over each crust, leaving a small border (about 1/2 inch) around the edge clean. Watch the border! Caramel on the edge makes sealing tough.
- Add the Apples & Top Crust: Sprinkle half of the finely chopped apple pie filling evenly over the caramel layer on each bottom crust. Gently unroll the remaining two pie crusts and carefully place one on top of each apple-covered base. Pro-Tip: Lift it using the parchment or carefully drape it over your rolling pin to transfer without tearing. Press down *very gently* over the filling to remove big air pockets.
- Seal & Cut: This is crucial! Press the edges firmly together all the way around with your fingertips. Now, grab a fork and crimp those edges decoratively – press the tines straight down firmly all around. This seals in the goodness! Chef Hack: Chill the layered crusts for 10 mins in the fridge or freezer – it makes cutting cleaner! Use a 2.5 to 3-inch round cookie cutter (or a floured glass) to cut out as many circles as possible. Re-roll scraps once for extra cookies. No cutter? A sharp knife works great for squares or rectangles!
- Egg Wash & Spice Sugar: Whisk those two eggs in a small bowl until smooth. In another small bowl, mix the 1/2 cup sugar, 2 tsp cinnamon, and 1/2 tsp nutmeg. Arrange your cookie cutouts on the prepared baking sheets, leaving a little space between them (they don’t spread much, but caramel might bubble). Use a pastry brush to lightly but thoroughly coat the top of each cookie with the beaten egg. Chef Insight: Avoid getting egg wash down the sides, as it can glue them to the pan! Immediately sprinkle the cinnamon-sugar mixture generously over the top of each cookie.
- Bake to Golden Perfection: Slide those beauties into the preheated oven. Bake for 18-22 minutes. What to look for: The crust should be a beautiful, deep golden brown, especially around the crimped edges, and the caramel will be bubbly around the sides. Rotate the pans halfway through for even browning. Chef Hack: Place a baking sheet on the rack below to catch any potential caramel drips! Let the cookies cool on the baking sheets for at least 10-15 minutes. Resist the urge! The caramel filling is molten lava hot straight out of the oven and needs time to set.
Sharing the Autumn Joy (Because You’ll Want To!)
Okay, the hardest part is over – waiting for them to cool enough to eat! These cookies are stars all on their own, warm from the oven. I love serving them slightly warm on a rustic wooden board or a pretty vintage plate – that golden sugar sparkle is pure eye candy! For an extra touch of magic, offer a small bowl of extra warmed caramel sauce for dipping, or a dollop of softly whipped cream spiked with a little bourbon or vanilla. They’re perfect alongside hot apple cider, a steaming mug of chai tea, or a strong cup of coffee. Pack them in little parchment-lined boxes for the most appreciated lunchbox surprise or hostess gift ever. Trust me, handing someone one of these is basically giving them a delicious autumnal hug!
Make Them Uniquely Yours!
The beauty of this recipe is its versatility! Play with these fun twists:
- Pecan Crumble Delight: Before baking, sprinkle the egg-washed tops with a mixture of chopped pecans and brown sugar instead of the cinnamon-sugar.
- Cheddar Crust Twist: Add 1/4 cup finely shredded sharp cheddar cheese to the cinnamon-sugar topping mix for a sweet-salty kick that’s amazing with apples!
- Maple Bourbon Bliss: Stir 1 tbsp bourbon and 1 tbsp pure maple syrup into the apple pie filling after chopping it.
- Gluten-Free & Vegan Friendly: Use your favorite store-bought gluten-free pie crusts. Swap the egg wash for the milk/maple syrup mix mentioned earlier. Ensure your caramel is vegan (many are!).
- Berry Patch Surprise: Swap half the apple pie filling for finely chopped frozen cherries (thawed and drained) or blueberries mixed with a squeeze of lemon.
Anna’s Kitchen Chronicles: Cookie Wisdom
These little guys have come a long way since my pie-crust-panic moment! I’ve learned that chilling the layered crusts before cutting is a total game-changer for clean edges. And that border rule? Learned the hard way after caramel explosions glued my first test batch to the pan – hilarious now, messy then! Over the years, I’ve found that using a *sharp* cookie cutter dipped in flour makes the cleanest cuts. Don’t stress about re-rolling the scraps once – they might be slightly tougher, but still delicious. The funniest evolution? My kids now demand I make them year-round, arguing that “apple caramel joy shouldn’t be seasonal.” They might be onto something! The biggest lesson? Always make a double batch. Always. Because the smell alone will summon hungry humans from miles around, and you’ll want plenty to enjoy (and share… maybe).
Your Cookie Questions, Answered!
Let’s tackle those common kitchen hiccups before they happen:
- Q: My caramel bubbled out everywhere and made a mess! Help!
A: Don’t panic! This usually means the filling was piled too high in the center or the edges weren’t sealed tightly enough. Next time: Spread the filling evenly, leaving that clean border. Press and crimp the edges *really* firmly. Using the baking sheet on the lower rack catches drips. If it happens, let cookies cool completely before gently prying them off the parchment – they’ll still taste amazing! - Q: My cookies are soggy on the bottom. What went wrong?
A: Sogginess often comes from hot caramel leaking onto the pan. Parchment paper is essential! Also, ensure your oven is fully preheated – a hot oven sets the crust quickly. Letting them cool *completely* on the baking sheet helps the bottom crisp up as they cool. If using a dark baking sheet, try lowering the oven temp by 25°F next time. - Q: Can I make these ahead of time? How do I store them?
A: Absolutely! They are best enjoyed within 1-2 days. Store cooled cookies in a single layer in an airtight container at room temperature. Separate layers with parchment paper. Avoid the fridge, as it can make the crusts tough. You can also freeze unbaked cutouts! Freeze them solid on the baking sheet, then transfer to a freezer bag. Bake straight from frozen, adding 2-4 minutes to the baking time. - Q: My edges didn’t seal, and filling leaked! How can I prevent this?
A: A tight seal is key! Ensure the bottom crust border is completely clean (no caramel/apples). Press the top crust down firmly all around before crimping. Crimping with a fork isn’t just decorative – it welds the layers! Chilling the layered crust before cutting also helps the dough firm up, making sealing easier.
Nutritional Info (Per Cookie, Approximate)
Calories: 180 | Fat: 7g | Saturated Fat: 2.5g | Carbohydrates: 27g | Sugar: 14g | Protein: 1g | Sodium: 150mg
Note: Nutritional values are estimates and can vary based on specific brands of ingredients used.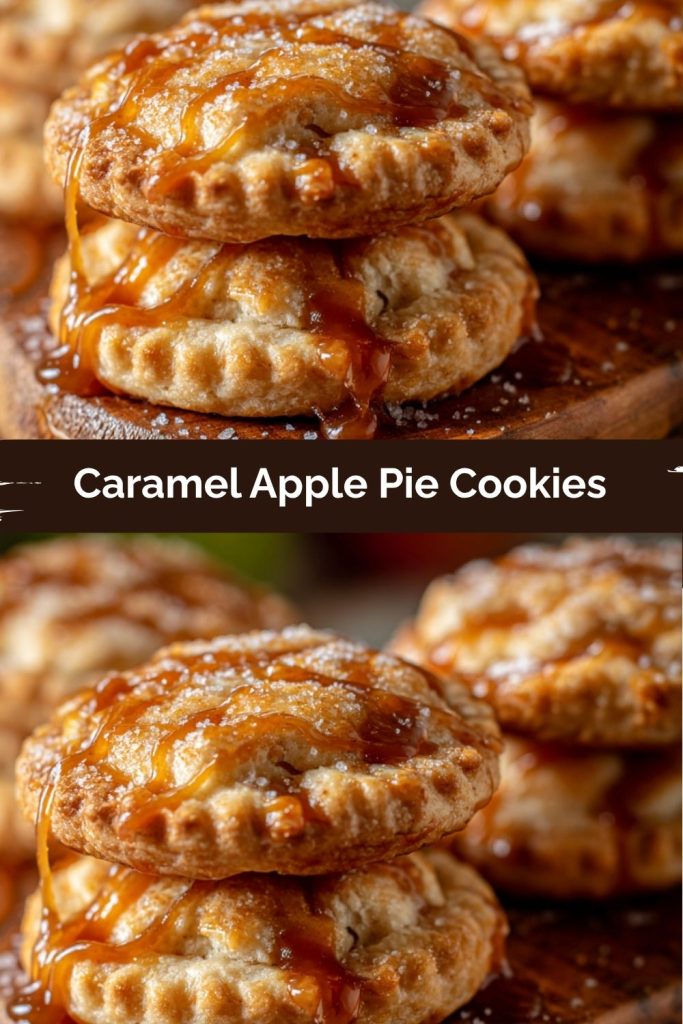
Final Thoughts
These Caramel Apple Pie Cookies are what fall dessert dreams are made of — flaky, buttery layers, gooey caramel, cozy cinnamon apples, and all the magic of pie in a grab-and-go cookie. Whether you’re baking for a fall bake sale, Thanksgiving table, or just treating yourself to something sweet on a chilly afternoon, these little hand pies deliver all the cozy with none of the fuss. Bake them once, and you’ll be hooked through every leaf-crunching, cider-sipping season ahead.