Hey There, Pie Lover! Let’s Bake Mini Magic Together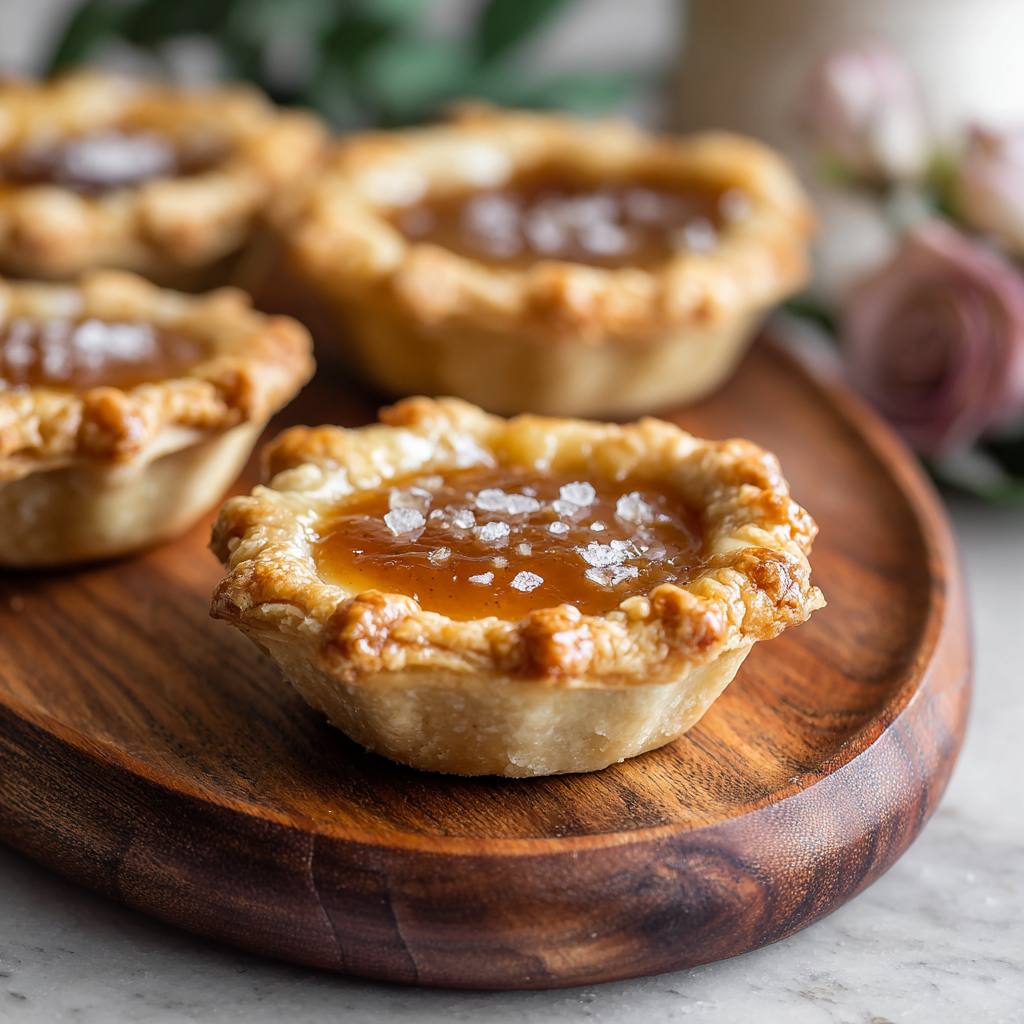
Picture this: golden, flaky crusts cradling a pool of velvety maple custard, each bite finished with a whisper of sea salt that makes your taste buds sing. That’s the cozy hug of my Mini Salted Maple Pies—and trust me, they’re about to become your secret weapon for turning ordinary afternoons into something sparkly. ✨
I’ll let you in on a little kitchen truth: I live for recipes that feel like a warm conversation. No stiff techniques, no fussy ingredients—just pure, unfiltered joy. These mini pies? They’re the edible equivalent of slipping into your favorite sweater. Perfect for when you’re hosting friends (imagine their faces when you bring out a tray!), sneaking a treat with tea, or just celebrating Tuesday because why not?
What I adore most is how they balance simplicity and wow-factor. We’re talking 15 minutes of prep, pantry-friendly staples, and a result that tastes like you fussed for hours. Whether you’re a newbie nervously rolling dough for the first time or a seasoned pro looking for a quick win, these little gems are your invitation to play. So tie on that apron, crank up your feel-good playlist, and let’s bake up some bite-sized happiness!
Maple Memories & My Grandma’s Apron Strings
PrintMini Salted Maple Pies
Buttery, flaky crusts filled with a rich, gooey maple custard and topped with a kiss of flaky sea salt—these mini pies are a fall dessert dream in bite-sized form.
Perfect for holiday spreads, cozy gatherings, or afternoon tea.
- Prep Time: 15 minutes
- Cook Time: 20 minutes
- Total Time: 35 minutes
Ingredients
Crust
1 sheet refrigerated pie dough (or homemade)
Flour, for dusting
Filling
½ cup pure maple syrup
¼ cup brown sugar
2 tablespoons unsalted butter, melted
1 large egg
2 tablespoons heavy cream or half-and-half
1 teaspoon vanilla extract
Pinch of salt
Topping
Flaky sea salt, for finishing
Optional Twists
Add 1 tablespoon chopped pecans to each pie for crunch
Mix in ½ teaspoon cinnamon or bourbon for added depth
Instructions
Preheat oven to 350°F (175°C). Grease a mini muffin pan.
Roll out pie dough on a floured surface. Cut into 12 rounds using a 3-inch cutter. Press into muffin tin wells.
In a bowl, whisk maple syrup, brown sugar, butter, egg, cream, vanilla, and salt until smooth.
Spoon filling into each crust, about ¾ full.
Bake for 18–22 minutes, until filling is set and crust is golden.
Cool slightly, then sprinkle each with a pinch of flaky sea salt.
Nutrition
- Calories: 180
- Sugar: 14g
- Fat: 9g
- Carbohydrates: 22g
- Protein: 2g
Every time I whisk maple syrup into a filling, I’m right back in my Grandma Eleanor’s kitchen. She’d make her legendary maple walnut pie every Thanksgiving, rain or shine—even that year her oven died and she finished it in a neighbor’s toaster oven! I’d perch on a stool, legs swinging, as she’d let me drizzle the syrup and whisper, “Anna, sweetness is better when it’s shared.”
Years later, during my first chaotic fall hosting friends in my tiny apartment, I craved that taste of home but needed something simpler. Enter these mini pies! I swapped walnuts for sea salt (a happy accident when I knocked over a salt jar mid-bake), and the moment that salty-sweet combo hit my tongue? Pure nostalgia magic. Now, they’re my go-to for potlucks, new neighbor gifts, or when I just need a taste of Grandma’s kitchen courage. Funny how the smallest treats hold the biggest memories, isn’t it?
Your Mini Pie Toolkit: Simple Stars, Smart Swaps
Makes 12 adorable pies
Gather these goodies—I’ve sprinkled in substitutions so you can riff like a rockstar!
Crust
- 1 sheet refrigerated pie dough (or homemade) – No shame in store-bought! Keeps it speedy. Chef’s hack: If homemade’s your jam, use my foolproof crust recipe—it’s butterier but adds 10 mins.
- Flour, for dusting – Just a light snowstorm on your counter prevents sticky disasters!
Filling
- ½ cup pure maple syrup – Non-negotiable: Grade A Amber for that deep, caramelized flavor. Pancake syrup won’t work—it’s too thin and sugary!
- ¼ cup packed brown sugar – Light or dark both work. Dark adds molasses warmth. Vegan? Swap coconut sugar 1:1.
- 2 tbsp unsalted butter, melted – Salted butter? Skip the pinch of salt later. Dairy-free? Coconut oil works beautifully.
- 1 large egg – Your binding superstar. Room temp blends smoother—just soak it in warm water 5 mins if you forgot!
- 2 tbsp heavy cream or half-and-half – Makes the filling luxuriously silky. No cream? Whole milk + ½ tsp extra butter does the trick.
- 1 tsp vanilla extract – Use the real stuff! It rounds out the maple. Bourbon vanilla? Even better.
- Pinch of fine sea salt – Balances the sweetness. If using table salt, use half the amount.
Topping
- Flaky sea salt (like Maldon) – Those delicate crystals melt just right. Chef’s secret: Sprinkle right after baking so it stays crunchy!
Let’s Build Your Bite-Sized Bliss: Step by Step
Ready? Channel your inner pie artist! I’ve woven in all my foolproof tips so you glide through this.
- Preheat & Prep: Fire up your oven to 350°F (175°C). Now, grab your mini muffin pan—give each well a generous spritz of cooking spray or butter swipe. (Why? Non-stick pans can still stick with sugary fillings! Trust me, I learned the hard way.)
- Roll & Cut: Unroll your dough onto a lightly floured surface. Flour your rolling pin too, and give it a few gentle passes to smooth seams. Use a 3-inch round cutter (or a glass!) to stamp out 12 circles. No cutter? Trim a plastic cup lid! Re-roll scraps if needed. (Hack: Chill dough scraps 5 mins before re-rolling for flakier crusts.)
- Shape Your Shells: Nestle each dough round into a muffin well. Use your thumbs to press it snugly up the sides—no gaps! Prick the bottoms once with a fork to prevent puffing. (Worried about tearing? If it happens, patch with dough scraps—baking hides all sins!)
- Whisk the Filling: In a medium bowl, combine maple syrup, brown sugar, melted butter, egg, cream, vanilla, and salt. Whisk until silky-smooth—no streaks! (Pro move: Whisk wet ingredients first, then add sugar. Avoids grainy texture.)
- Fill ‘Em Up: Pour filling into each crust, stopping just below the rim (~¾ full). Resist overfilling! (That bubbling maple lava cleanup? Not fun. Ask my oven floor.)
- Bake to Golden Perfection: Slide pan into the oven. Bake 18-22 minutes. They’re ready when the filling just sets (it’ll jiggle slightly like Jell-O™ when nudged) and crusts turn golden-brown. (Watch closely after 18 mins—ovens vary!)
- Salt & Swoon: Pull them out—smell that caramelized maple goodness? Immediately sprinkle each pie with flaky salt. Let cool in the pan 10 minutes (patience, grasshopper!), then gently lift out with a butter knife.
See? Easier than pie. (Pun totally intended 😉)
Serving Up the Cozy ✨
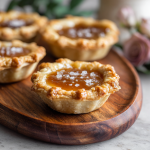
These minis shine brightest on a rustic wooden board or dainty cake stand. For next-level magic, add a dollop of bourbon-spiked whipped cream or a drift of powdered sugar. Pair with hot apple cider in autumn or iced chai in summer—they’re season-flexible! And here’s a tip: serve them slightly warm (reheat 5 secs in the microwave) to make that salted maple sing. For gatherings? Stack ‘em high on tiered trays and watch them disappear.
Make It Your Own: 5 Tasty Twists
Play with these riffs—they’re all kitchen-tested winners!
- Pecan Crunch: Toss 1 tbsp chopped toasted pecans into each crust before adding filling.
- Spiced Soul: Whisk ½ tsp cinnamon or pumpkin spice into the filling. Autumn in a bite!
- Bourbon Kiss: Swap 1 tbsp cream for bourbon. Adults-only bliss.
- Vegan Vibes: Use coconut oil + vegan butter, flax egg (1 tbsp ground flax + 3 tbsp water), and coconut cream. Maple stays!
- Chocolate Drizzle: Melt dark chocolate with a splash of coconut oil and zigzag over cooled pies.
From My Kitchen to Yours: Extra Love Notes
This recipe’s evolved like a good friendship! The first batch? I used muffin liners (don’t—they stick like glue) and cried when half the filling volcano-ed onto my oven floor. Now? I embrace imperfection. So what if one crust tears? Patch it! Filling bubbles over? Call it “caramel art.” My kids love “fixing” wonky pies with extra salt. 😂
Over time, I’ve learned chilling the filled pans 10 mins before baking reduces spills, and using a piping bag for filling = zero drips. But the real secret? Share them generously. I once left a box on a neighbor’s porch after her rough day—she texted, “You bottled sunshine.” That’s the magic, friend.
Your Pie Queries, Solved!
Q: Can I make these ahead?
A: Absolutely! Bake, cool completely, then store airtight in the fridge 3 days. Freeze unfilled shells up to 1 month—just thaw before filling. Reheating tip: 10 secs in the microwave revives that gooey goodness.
Q: Help! My filling overflowed and burned. What went wrong?
A: Overfilling’s the usual suspect—stick to ¾ full! Also, place a baking sheet under your muffin pan to catch drips. If your oven runs hot, try reducing temp to 340°F (170°C).
Q: Can I use homemade pie dough?
A: Yes! Roll it slightly thinner than store-bought (⅛-inch thick). Pre-bake shells 5 mins at 350°F (175°C) if your recipe is extra buttery to avoid sogginess.
Q: No mini muffin pan? Can I improvise?
A: Use a regular muffin pan—fill only ¼ full and bake 12-15 mins. Or try ramekins on a sheet pan! Crust won’t wrap all sides, but still delicious.
Nutritional Nibbles (Per 1 Pie)
- Calories: ~180
- Fat: ~9g
- Carbs: ~22g
- Sugar: ~14g
- Protein: ~2g
Note: Estimates vary with substitutions. Bourbon or pecans add ~15 calories per pie.
Final Thoughts
At the end of the day, these Mini Salted Maple Pies are more than just a dessert—they’re little bites of comfort that bring the taste of fall right to your table. The rich maple filling, buttery crust, and that touch of flaky salt make every bite feel special, whether you’re sharing them at a Thanksgiving feast or sneaking one with your afternoon coffee.
So go ahead, bake up a batch, and let these golden little pies remind you that the sweetest moments often come in small packages.