Your New Favorite Little Bite of Joy: Mini Red Velvet Cupcakes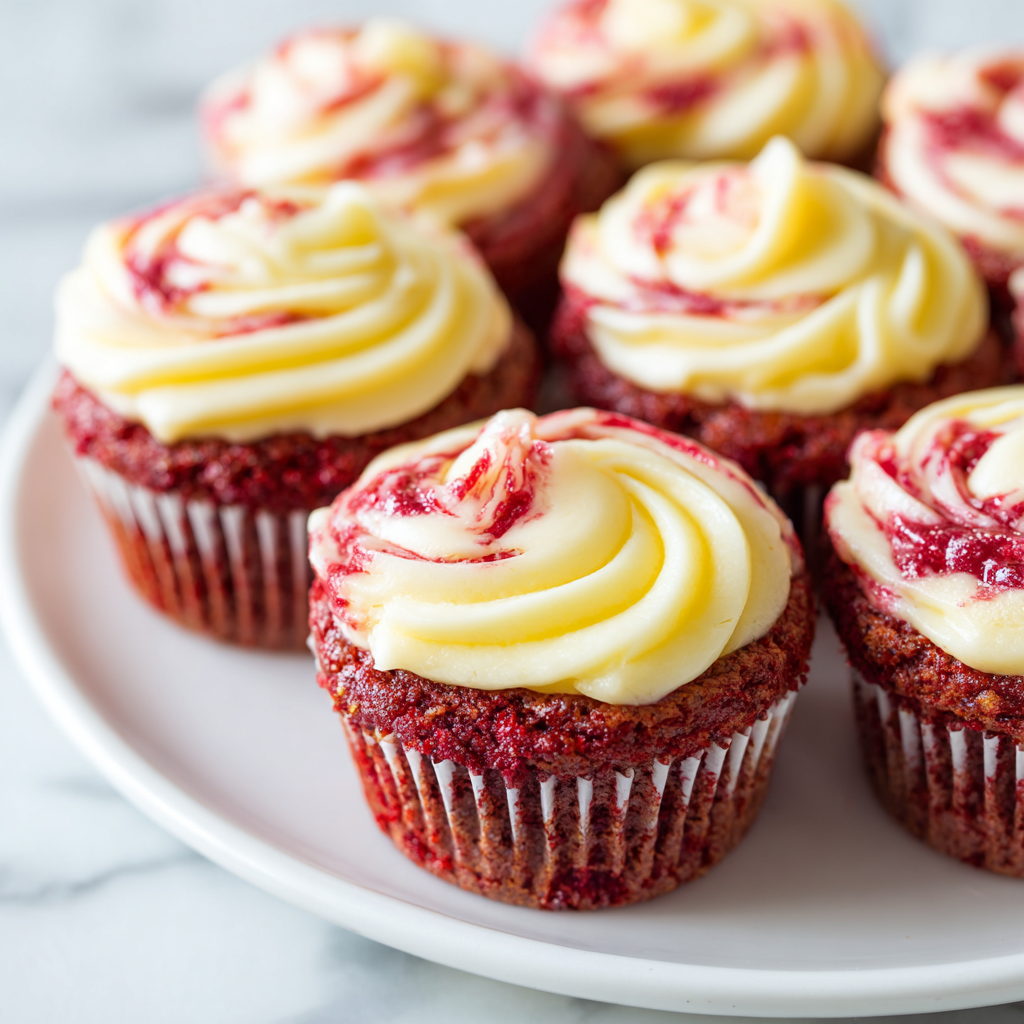
Hey there, friend! Have you ever been at a party, seen a towering dessert table, and gone straight for the smallest, most adorable thing there? There’s just something about a mini dessert that feels like a secret little gift just for you. No commitment, no need to find a plate and fork—just a pure, unadulterated bite of happiness. Well, my mission today is to bring that exact feeling right into your kitchen with these utterly irresistible Bite-Sized Red Velvet Cupcakes with a dreamy Cream Cheese Swirl baked right in.
We’re talking about the softest, most tender crumb you can imagine, with that classic, subtle cocoa flavor and that iconic, cheerful red hue. But the real magic happens when you bite into them and discover the hidden treasure: a tangy, creamy, luscious swirl of sweetened cream cheese that bakes into the very heart of the cupcake. It’s the iconic red velvet and cream cheese combo, but all in one perfect, poppable package. They’re ideal for holiday parties, baby showers, Valentine’s Day, or just because Tuesday deserves a little celebration. So, let’s preheat those ovens and whip up a batch of pure, miniature magic together. I promise, your family and friends are going to go absolutely wild for these!
A Swirl of Sweet Memories
PrintBite-Sized Red Velvet Cupcakes with Cream Cheese Swirl

These mini red velvet cupcakes are soft, rich, and perfectly portioned, with a luscious swirl of tangy cream cheese baked right in. Every bite delivers that classic cocoa flavor and vibrant red hue—ideal for parties, holidays, or sweet everyday moments.
- Prep Time: 20 minutes
- Cook Time: 15 minutes
- Total Time: 35 minutes
- Yield: 24 mini cupcakes 1x
Ingredients
For the Cupcakes:
1 cup all-purpose flour
2 tablespoons cocoa powder
½ teaspoon baking soda
¼ teaspoon salt
½ cup buttermilk
½ cup vegetable oil
¾ cup granulated sugar
1 large egg
1 teaspoon vanilla extract
1 teaspoon white vinegar
1 tablespoon red food coloring
For the Cream Cheese Swirl:
4 oz cream cheese, softened
2 tablespoons sugar
1 egg yolk
½ teaspoon vanilla extract
Instructions
Preheat oven to 350°F (175°C). Line a mini muffin tin with paper liners.
In a bowl, whisk flour, cocoa powder, baking soda, and salt.
In another bowl, mix buttermilk, oil, sugar, egg, vanilla, vinegar, and food coloring.
Add dry ingredients to wet and stir until just combined.
For the swirl, beat cream cheese, sugar, egg yolk, and vanilla until smooth.
Fill each liner ¾ full with batter. Top with a small dollop of cream cheese mixture and swirl gently with a toothpick.
Bake 12–15 minutes or until a toothpick comes out clean. Cool before serving.
Nutrition
- Calories: 130
- Sugar: 10g
- Fat: 7g
- Carbohydrates: 15g
- Cholesterol: 20mg
This recipe takes me right back to my grandma’s linoleum-floored kitchen, a place that always smelled like cinnamon and unconditional love. She was the queen of from-scratch cakes, and her red velvet cake was the stuff of legend. It was a towering, three-layer masterpiece with frosting so fluffy you could lose a spoon in it. But making it was an all-day event, a sacred ritual I was only allowed to observe from a safe distance, lest I jiggle the table and cause a layer to slide.
When I started my own family, I craved that same iconic flavor but needed something a little less… monumental. I wanted the joy of red velvet without the hours of labor. One afternoon, experimenting for my daughter’s birthday party, I had the idea to go mini. I whipped up a simple batter, swirled in some sweetened cream cheese on a whim, and crossed my fingers. What came out of the oven were these perfect, two-bite wonders that captured every bit of my grandma’s magic in a fraction of the time. They were an instant hit with a crowd of sugar-hyped five-year-olds and their parents alike. That day, I realized that the heart of a recipe isn’t in its complexity, but in the joy it brings—and these little cupcakes bring it by the bucketload.
Gathering Your Magical Ingredients
One of the things I love most about this recipe is how approachable the ingredient list is. You likely have most of these pantry staples already! Here’s what you’ll need, along with a few of my chef-y insights to help you understand the “why” behind the “what.”
For the Red Velvet Cupcakes:
- 1 cup all-purpose flour: The trusty foundation of our cupcake. For a slightly lighter crumb, you can swap it for a 1:1 gluten-free baking blend—I’ve done it with great success!
- 2 tablespoons cocoa powder: Use natural, unsweetened cocoa here, not Dutch-process. We want that classic, slightly sharp red velvet flavor that plays so nicely with the tangy buttermilk.
- ½ teaspoon baking soda: Our leavening agent! It’s going to react with the acidic ingredients (buttermilk and vinegar) to give these minis a beautiful, tender rise.
- ¼ teaspoon salt: Never, ever skip the salt! It’s the flavor enhancer that makes all the sweet and tangy notes sing in harmony.
- ½ cup buttermilk: The secret weapon for tenderness and tang. No buttermilk? No panic! Make a quick substitute by placing 1 ½ teaspoons of white vinegar or lemon juice in a measuring cup and adding enough regular milk to reach the ½ cup line. Let it sit for 5 minutes until it curdles slightly.
- ½ cup vegetable oil: Oil keeps the cupcakes incredibly moist and tender for days longer than butter-based cakes would be. Canola or a light olive oil work great too.
- ¾ cup granulated sugar: The perfect amount of sweetness to balance the cocoa and tang.
- 1 large egg: Bring it to room temperature! This helps it incorporate smoothly into the batter for a more even texture.
- 1 teaspoon vanilla extract: The warm, aromatic backbone of so many baked goods. Use the good stuff!
- 1 teaspoon white vinegar: This might seem odd, but it’s crucial! It reacts with the baking soda for lift and also enhances the red color. You won’t taste it, I promise.
- 1 tablespoon red food coloring: For that iconic vibrancy! I prefer gel food coloring because it’s more concentrated and doesn’t add extra liquid, but liquid works just fine. For a natural option, beet powder is a great alternative (though the color will be more muted).
For the Cream Cheese Swirl:
- 4 oz (half a block) cream cheese, softened: This is non-negotiable—it must be soft! Take it out of the fridge at least an hour ahead. This ensures a smooth, lump-free swirl that won’t sink like a rock.
- 2 tablespoons sugar: Just enough to sweeten the tangy cream cheese.
- 1 egg yolk: This helps the swirl set into a creamy, custardy layer as it bakes. It’s the magic binder!
- ½ teaspoon vanilla extract: Because even our swirl deserves a little flavor love.
Let’s Make Some Magic: Step-by-Step
Ready to create? This process is simple and oh-so-satisfying. Follow these steps, and you’ll be a mini cupcake master in no time.
Step 1: Prep Party! First things first, preheat your oven to 350°F (175°C). This is so important for even baking. While it’s heating up, line a 24-cup mini muffin tin with those cute little paper liners. This batter is moist, and liners are your best friend for easy removal. Pro-Tip: Give the liners a very light spritz with cooking spray. It guarantees a perfectly clean peel every single time!
Step 2: The Dry Team. In a medium bowl, grab your whisk and thoroughly combine the flour, cocoa powder, baking soda, and salt. Whisking now does two things: it combines everything evenly, and it sifts the ingredients lightly, preventing lumps in your batter. Set this bowl aside—it’s ready for its moment.
Step 3: The Wet Team. In a larger bowl, it’s time for the liquid goodness. Whisk together the buttermilk, vegetable oil, sugar, egg, vanilla extract, white vinegar, and that glorious red food coloring. Whisk until it’s completely smooth and homogenous. You should have a brilliantly red, slightly thin, and shiny liquid. Don’t be alarmed!
Step 4: The Grand Union. Here’s where we need a gentle touch. Pour your dry ingredients into the wet ingredients. Using a spatula, fold them together until just combined. I mean it—a few streaks of flour are okay! Overmixing is the enemy of tender cupcakes; it develops gluten and leads to a tough, dense crumb. We want light and fluffy.
Step 5: The Swirl Star. In a separate small bowl, beat your softened cream cheese until it’s completely smooth. Add in the sugar, egg yolk, and vanilla, and beat again until it’s a silky, lump-free mixture. If you have a small cookie scoop, this is its time to shine! If not, a spoon is perfect.
Step 6: Fill and Swirl! Now for the fun part. Using a small spoon or a piping bag, fill each mini muffin liner about ¾ of the way full with the red velvet batter. Then, place a small dollop (about ½ teaspoon) of the cream cheese mixture right on top of each one. Take a toothpick or a wooden skewer and gently swirl it through the batter and cream cheese. Don’t overdo it! Just a few figure-eight motions will create that beautiful marbled effect.
Step 7: Bake to Perfection. Carefully slide your tin into the preheated oven. Bake for 12-15 minutes. You’re looking for the edges of the cupcakes to be set and a toothpick inserted into the *cake* part (not the cream cheese swirl) to come out clean or with a few moist crumbs. The cream cheese swirl will still look a little soft and jiggly—that’s exactly what we want! It will firm up as it cools.
Step 8: The Patient Wait. Let the cupcakes cool in the pan for about 5 minutes before transferring them to a wire rack to cool completely. I know it’s hard to wait, but that cream cheese swirl is molten lava hot right out of the oven! Letting them cool ensures they set properly and won’t fall apart when you peel the liner.
How to Serve These Little Gems
The beauty of these mini cupcakes is that they are a complete delight all on their own. Simply pile them high on a beautiful cake stand or a rustic wooden board for a stunning presentation. For an extra touch of elegance and a hint of flavor, you can dust them with a light snowfall of powdered sugar just before serving. If you’re feeling extra (and I always am), a tiny dot of extra cream cheese frosting and a single red sprinkle on top turns them into the most professional-looking petit fours. They pair wonderfully with a cup of coffee, a glass of cold milk, or a bubbly mimosa at brunch!
Get Creative! Recipe Variations
Once you’ve mastered the classic, feel free to play with the formula! Here are a few of my favorite twists:
- Chocolate Chip Surprise: Fold ¼ cup of mini chocolate chips into the red velvet batter before filling the liners.
- Orange Zest Zing: Add the zest of one orange to the cream cheese swirl for a bright, citrusy twist that cuts through the sweetness.
- Mocha Madness: Dissolve 1 teaspoon of instant espresso powder into the buttermilk before mixing for a deep, rich mocha flavor.
- “Naked” Frosted: For cream cheese purists, skip the swirl, bake the plain cupcakes, and pipe a small rosette of classic cream cheese frosting on top of each cooled cupcake.
- Gluten-Free & Dairy-Free: Use a 1:1 GF baking flour, your favorite plant-based milk + vinegar for the buttermilk, and a vegan cream cheese alternative. It works like a dream!
Anna’s Chef Notes & Kitchen Stories
This recipe has become such a staple in my home that I’ve lost count of how many batches I’ve made. The first time I tried it, I made the classic mistake of not softening the cream cheese enough. I thought I could beat it into submission. I was wrong. My first swirl had little cream cheese lumps throughout, which my husband lovingly called the “cheesecake chunk” version. They were still delicious, but not the smooth, marbled beauty we were going for! So learn from my mistake: patience with your ingredients is a virtue in baking.
I’ve also learned that the brand of cocoa powder can slightly affect the color. Some Dutch-process cocoas are so dark they can make the red look a little burgundy. For the brightest, most vibrant red, stick with a lighter, natural cocoa powder. And finally, don’t be shy with the food coloring! This is the one time to embrace the artificial vibrancy for the sake of pure, unapologetic joy.
Your Questions, Answered!
Q: My cream cheese swirl sank to the bottom! What did I do wrong?
A: The two most common culprits are (1) The cream cheese mixture was too cold and dense, making it heavier than the batter. Always ensure it’s fully softened. (2) The batter was overmixed and became too thin, unable to support the weight of the swirl. Remember, fold just until combined!
Q: Can I make these into regular-sized cupcakes?
A: Absolutely! This recipe will make about 10-12 standard cupcakes. Just fill the liners halfway, add the swirl, and increase the baking time to 18-22 minutes, checking for doneness with a toothpick.
Q: Why did my cupcakes turn out dense and tough?
A: This is almost always a sign of overmixing. Once you add the flour, you’re working gluten. Mix with a gentle hand and stop as soon as you no longer see dry streaks of flour. A few lumps are perfectly fine!
Q: Can I make the batter ahead of time?
A: I don’t recommend it. The baking soda begins reacting with the acidic ingredients the moment they’re combined. For the best rise and texture, bake the batter immediately after mixing.
Nutritional Information (Approximate, per mini cupcake)
Calories: 130 | Fat: 7g | Saturated Fat: 2g | Cholesterol: 20mg | Sodium: 90mg | Carbohydrates: 15g | Sugar: 10g | Protein: 2g
Please note: This is an estimate provided by an online nutrition calculator. It is not a substitute for professional dietary advice.
Prep Time: 20 minutes | Cook Time: 15 minutes | Total Time: 35 minutes | Servings: 24 mini cupcakes
There you have it, friend! My all-time favorite recipe for bite-sized joy. I hope you and your loved ones enjoy making and devouring these as much as we do. Remember, the kitchen is your playground. Happy baking!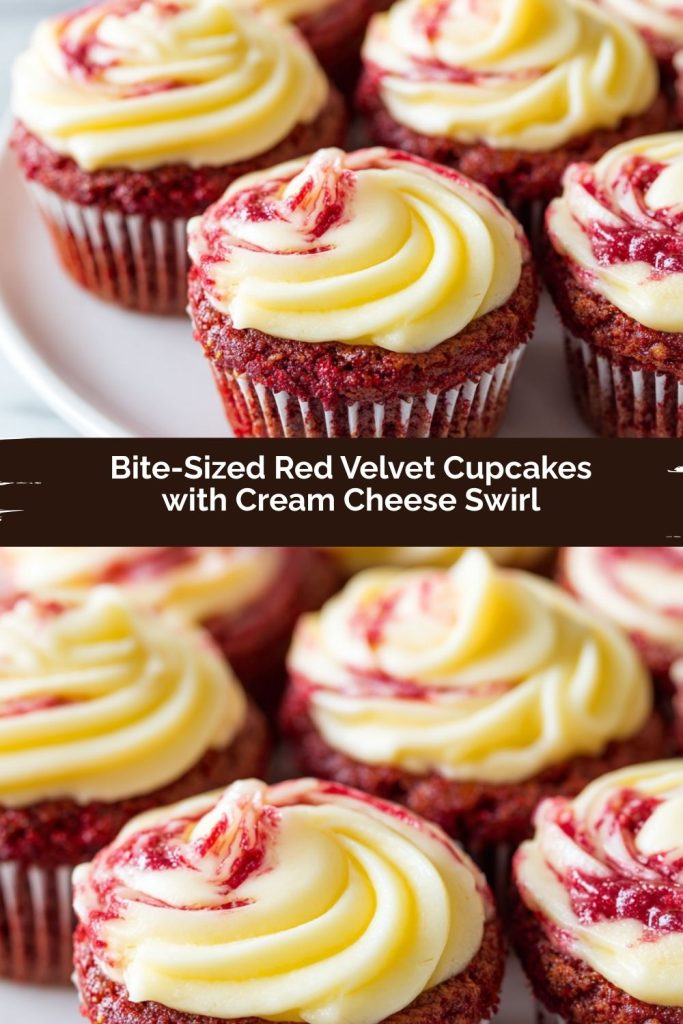
Final Thoughts
These Mini Red Velvet Cupcakes are proof that joy really can come in small packages. With their soft, cocoa-kissed crumb and that luscious cream cheese swirl baked right in, they’re the perfect blend of nostalgic flavor and modern ease. Whether you’re serving them at a big celebration or baking a batch just because, these little bites will always deliver smiles. So grab your whisk, preheat that oven, and get ready to spread a little red velvet magic.