***
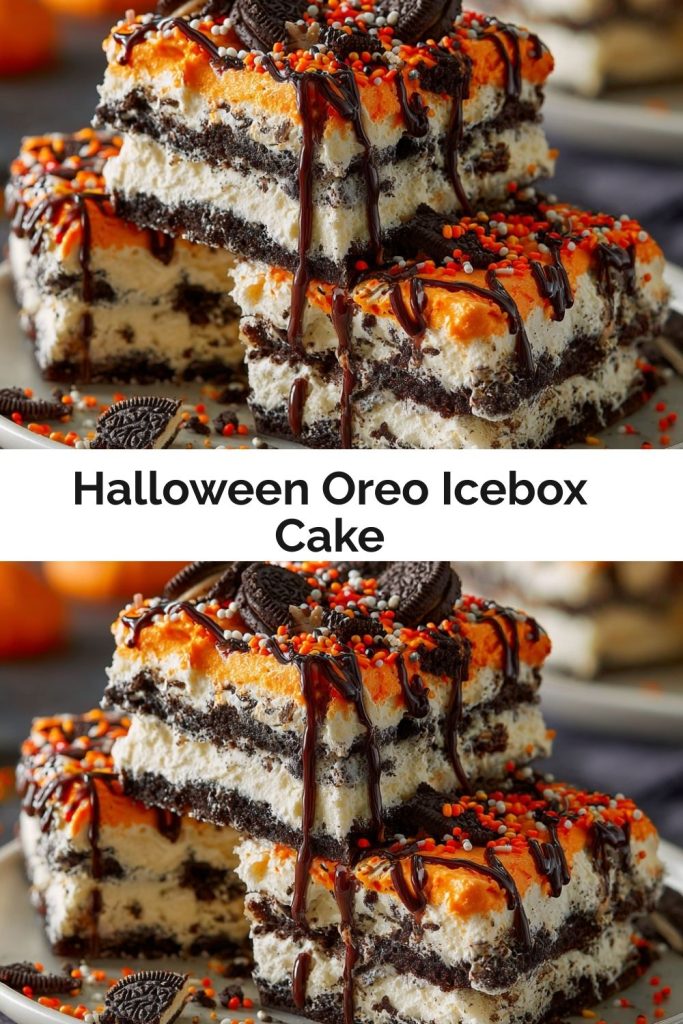
Your New Favorite No-Bake Halloween Dessert is Here!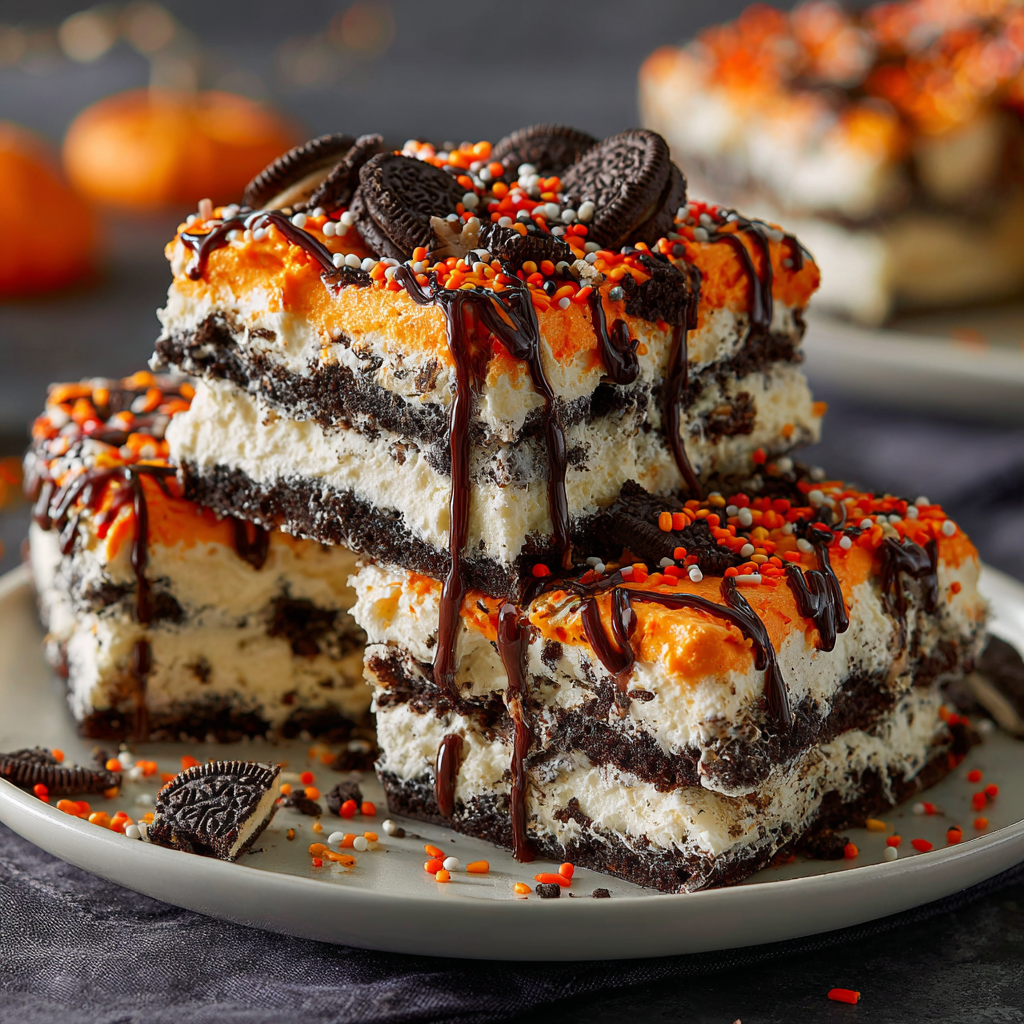
Hey there, friend! Anna here. Is there anything better than a dessert that feels incredibly special but is secretly one of the easiest things you’ll ever make? I don’t think so. That’s why, when Halloween rolls around, my mind immediately goes to one glorious, crowd-pleasing treat: the Icebox Cake.
If you’ve never made one before, get ready to have your mind blown. This Halloween Oreo Icebox Cake is a no-bake dream come true. We’re talking layers upon layers of impossibly fluffy, vanilla-speckled whipped cream and classic chocolate Oreo cookies. As it chills, something magical happens: the cookies soften just enough to become cake-like, creating a dessert that’s rich, creamy, and utterly irresistible.
I’ve taken this classic concept and given it a full-spooky-season makeover. We’re talking a hauntingly beautiful orange whipped cream, a decadent chocolate drizzle, and all the festive sprinkles your heart desires. It’s the perfect make-ahead dessert for Halloween parties, potlucks, or just a fun, family-friendly baking project that doesn’t require turning on the oven. So, let’s grab our mixing bowls and whip up a little kitchen magic together!
A Spooky Tradition is Born
PrintHalloween Oreo Icebox Cake

This Halloween Oreo Icebox Cake is a no-bake dream—layers of whipped vanilla cream and chocolate cookies come together in a spooky, sweet dessert that’s as easy to assemble as it is to devour. We’ve doubled the servings, added a chocolate drizzle twist, and turned up the festive flair with orange icing and sprinkles.
- Prep Time: 25 min
- chill: 6+ hrs
- Total Time: 6.5 hrs
Ingredients
cups heavy whipping cream (2 quarts)
2 tsp vanilla extract
2 cups powdered sugar
Orange gel food coloring
4 (14.5 oz) packages Oreo cookies (about 84 cookies, plus extras)
Decorations:
Orange icing (for piping or drizzling)
Halloween sprinkles
Optional: chocolate ganache drizzle (½ cup heavy cream + 1 cup chocolate chips)
Instructions
Beat cold cream with vanilla and powdered sugar until stiff peaks form. Add orange gel coloring and mix until evenly tinted.
In a 9×13″ dish, spread a thin layer of whipped cream.
Add a single layer of Oreos. Cover with whipped cream. Repeat layers until dish is full, ending with whipped cream on top.
Chill for at least 6 hours or overnight so cookies soften into a cake-like texture.
Drizzle with orange icing and optional ganache. Top with sprinkles before serving.
Nutrition
- Calories: 380
- Fat: 25g
- Carbohydrates: 35g
- Protein: 3g
This cake actually has its roots in a bit of a kitchen panic story—my favorite kind! A few years ago, I signed up to bring a dessert to my son’s school Halloween carnival. Of course, I left it to the last minute. The oven was occupied with other spooky treats, time was ticking, and I had a serious moment of “what on earth am I going to make?!”
I stared into my pantry, praying for inspiration, and my eyes landed on a family-sized package of Oreos. A lightbulb went off. I remembered my grandma’s simple icebox cakes she’d make in the summer. I thought, “Why not make it Halloween?” I whipped up some cream, tinted it a vibrant orange, and started layering. In less than 20 minutes, it was assembled and tucked into the fridge to work its magic.
The result? It was the first dessert to disappear at the carnival. Kids and parents alike were raving about it. Now, it’s not a proper Halloween in the Reynolds household without this cake sitting in our fridge, waiting to be devoured after a night of trick-or-treating. It’s a happy accident that turned into our sweetest tradition.
Gathering Your Magical Ingredients
Here’s everything you’ll need to create this show-stopping dessert. The beauty of this recipe is in its simplicity, and I’ve got a few chef’s secrets to share for each component to ensure your success!
- 8 cups (2 quarts) heavy whipping cream: This is the foundation of our fluffy layers. Chef’s Insight: Make sure your cream is ICE cold. I even pop my mixing bowl and beaters in the freezer for 15 minutes before I start. Cold cream whips up faster and holds its shape much better.
- 2 teaspoons vanilla extract: Pure vanilla adds a warm, classic flavor that pairs perfectly with chocolate. Substitution Tip: Feel free to get creative! Almond extract (use just 1 tsp) or even a little bit of mint extract would be delicious for a different twist.
- 2 cups powdered sugar: This sweetens our whipped cream and helps stabilize it slightly. Chef’s Insight: Sift your powdered sugar if you have time! It prevents any little lumps from forming in your otherwise perfectly smooth cream.
- Orange gel food coloring: Gel coloring is my absolute go-to for this. Why? It provides vibrant, bold color without thinning out the whipped cream like liquid food coloring might. A little goes a long way!
- 4 (14.5 oz) packages Oreo cookies: That’s about 84 cookies, plus a few extras for snacking (the cook’s treat is mandatory!). You’ll use them whole—no crushing required. Fun Twist: For a different flavor profile, try this with Mint Oreos or even the Pumpkin Spice variety for an extra fall kick!
For the Spooky Decorations:
- Orange icing: You can use store-bought for convenience or make a simple one with powdered sugar and a little milk or cream. Perfect for piping webs or just drizzling artistically.
- Halloween sprinkles: Go wild! This is where the personality comes through. Black and orange jimmies, bat-shaped sprinkles, ghost-shaped ones—the more festive, the better.
- Optional chocolate ganache drizzle: This is my “wow factor” upgrade. It adds a rich, decadent touch that chocolate lovers will adore. Simply heat ½ cup heavy cream and pour it over 1 cup of chocolate chips. Let it sit for 2 minutes, then whisk until smooth.
Let’s Assemble Our Masterpiece!
Ready to create some magic? Follow these steps, and you’ll have a perfect icebox cake in no time. I’m sharing all my best tips along the way!
- Whip It Good! In your chilled large bowl, combine the cold heavy cream, vanilla extract, and powdered sugar. Using a hand mixer or a stand mixer fitted with the whisk attachment, beat on medium-high speed. Watch for soft peaks first, then continue until you have beautiful, stiff peaks. This means when you lift the beaters, the cream stands straight up without flopping over. Chef’s Hack: Don’t walk away! Over-whipping will turn your cream into butter. If you see it starting to look grainy, stop immediately.
- Color Your World (Orange!) Now, add your orange gel food coloring. Start with a small amount—you can always add more. Gently fold it in or beat on low speed for just a few seconds until the color is uniform and vibrant. Taste it (my favorite part) and make sure it’s perfectly sweet and delicious.
- Create Your First Layer. Grab your 9×13-inch baking dish. Using a spatula, spread a thin, even layer of your orange whipped cream on the bottom. This first layer acts like the “frosting” for your first layer of cookies and prevents them from sliding around.
- The Cookie Layer. Time for the Oreos! Place a single layer of whole Oreos over the whipped cream. You should be able to fit about 21 cookies per layer (3 rows of 7). It’s okay if they touch—that’s what we want!
- Repeat, Repeat, Repeat! Now, cover that cookie layer with a generous amount of whipped cream. Use your spatula to spread it evenly, making sure to get into all the nooks and crannies so every cookie is covered. Then, add another layer of cookies. Keep going! You’ll likely get 3-4 layers of cookies. The final layer should be a beautiful, thick blanket of orange whipped cream.
- The Patience Part. This is the most crucial step! Cover the dish tightly with plastic wrap and refrigerate for at least 6 hours, but honestly, overnight is best. This isn’t just to chill it; it’s to transform it. The cookies slowly absorb moisture from the cream and soften into a tender, cake-like texture that slices beautifully.
- Decorate with Spooky Flair! Just before serving, unleash your inner artist. Drizzle or pipe on your orange icing. If you made the optional ganache, let it cool slightly so it’s thick but still pourable, then drizzle it over the top. Immediately shower it with a blizzard of Halloween sprinkles for that perfect festive finish.
How to Serve This Spooky Sensation
Presentation is part of the fun! Because this cake is so rich and creamy, I like to serve it in modest squares. A metal spatula or a sharp knife dipped in hot water (and wiped dry) will give you the cleanest slices. For a real party effect, serve it on black plates to make those orange and black colors really pop. A little extra sprinkle on each plate never hurt anybody, either! It’s a standalone star, so it doesn’t need any accompaniments, but a glass of cold milk is always a welcome sidekick.
Make It Your Own! Creative Twists & Swaps
The fun doesn’t stop here! This recipe is a fantastic canvas for your creativity. Here are a few of my favorite ways to mix it up:
- Peanut Butter Paradise: Use Peanut Butter Oreos for the layers and add a cup of creamy peanut butter to your whipped cream mixture. Drizzle with melted chocolate for the ultimate PB&Chocolate experience.
- Cookies & Cream Cheesecake: For a tangier twist, fold 8 oz of softened cream cheese into your whipped cream mixture. Make sure to beat the cream cheese with the powdered sugar first until smooth to avoid lumps.
- Mint Chocolate Chill: Use Mint Oreos and add ½ teaspoon of peppermint extract to the cream instead of vanilla. It’s refreshingly cool and delicious!
- Dairy-Free Delight: You can absolutely make this vegan! Use full-fat canned coconut cream (chilled) whipped with powdered sugar, and use vegan chocolate sandwich cookies. It works like a charm.
Anna’s Chef Notes & Kitchen Stories
This recipe has evolved so much since that first panicked version! The original was just plain white cream and Oreos. The orange color was a hit with the kids, so that stayed. Then one year, I had some leftover chocolate ganache from another recipe and decided to swirl it on top. It was a game-changer! The bitter dark chocolate against the sweet, creamy layers is just *chef’s kiss*.
One funny story: I once tried to shortcut the chilling time because I was impatient. I let it chill for only 3 hours. Let’s just say when I went to serve it, the cookies were still crunchy, and the whole thing kind of slid apart on the plate. It was still tasty, but it was definitely a mess! So learn from my mistake—let that cake rest. The wait is 100% worth it for that perfect, melt-in-your-mouth texture.
Your Questions, Answered!
Q: Can I make this cake ahead of time?
A: Absolutely! That’s one of its best features. You can assemble it up to 24 hours in advance. I would wait to add the final decorations (icing, ganache, sprinkles) until just before serving so they stay bright and don’t bleed color.
Q: My whipped cream is runny and won’t form stiff peaks. What happened?
A: This usually boils down to two things: temperature or fat content. First, ensure your cream, bowl, and beaters are very cold. If it’s still not working, your cream might not have a high enough fat content. Always use “heavy whipping cream” (usually around 36-40% milkfat). “Whipping cream” has less fat and won’t hold its shape as well.
Q: The cookies are still a bit hard/crunchy after chilling. Why?
A: This means it needs more time! The magic of an icebox cake happens during the long, slow chill. The cookies need time to absorb moisture from the cream. If you’re in a pinch, you can very briefly dip each cookie in milk before placing it in the layer, but I find a full 6-8 hour chill is the most reliable method.
Q: Can I freeze this icebox cake?
A: I don’t recommend freezing the assembled cake, as the whipped cream can become icy and grainy when thawed. It’s best enjoyed cold from the refrigerator.
Nutritional Information (Per Serving)
This is a rich, indulgent dessert meant for celebrating! Per serving (approximately 1/24th of the cake):
Calories: ~380 | Fat: 25g | Carbohydrates: 35g | Protein: 3g
Please note: This is an estimate based on the ingredients used and may vary slightly with specific brands or decorations.
There you have it, friend! Your guide to the easiest, most impressive Halloween dessert on the block. I can’t wait for you to try it and make your own spooky-sweet memories. If you do, tag me on social media—I love seeing your creations! Happy baking (or rather, happy no-baking!).
Final Thoughts
This Halloween Oreo Icebox Cake is proof that you don’t need complicated steps—or even an oven—to wow your friends and family. With its fluffy orange whipped cream, rich chocolatey layers, and festive decorations, it’s as fun to make as it is to eat. Best of all, it’s a true set-it-and-forget-it dessert—the fridge does all the work while you get to take the credit.
Whether you’re bringing it to a Halloween party, making it for a classroom treat, or just surprising your family after a night of trick-or-treating, this no-bake cake is sure to be the first dessert to disappear. It’s spooky, it’s sweet, and it’s guaranteed to become a new holiday tradition in your home—just like it did in mine.