***
Your New Favorite Sourdough Adventure Starts Tonight!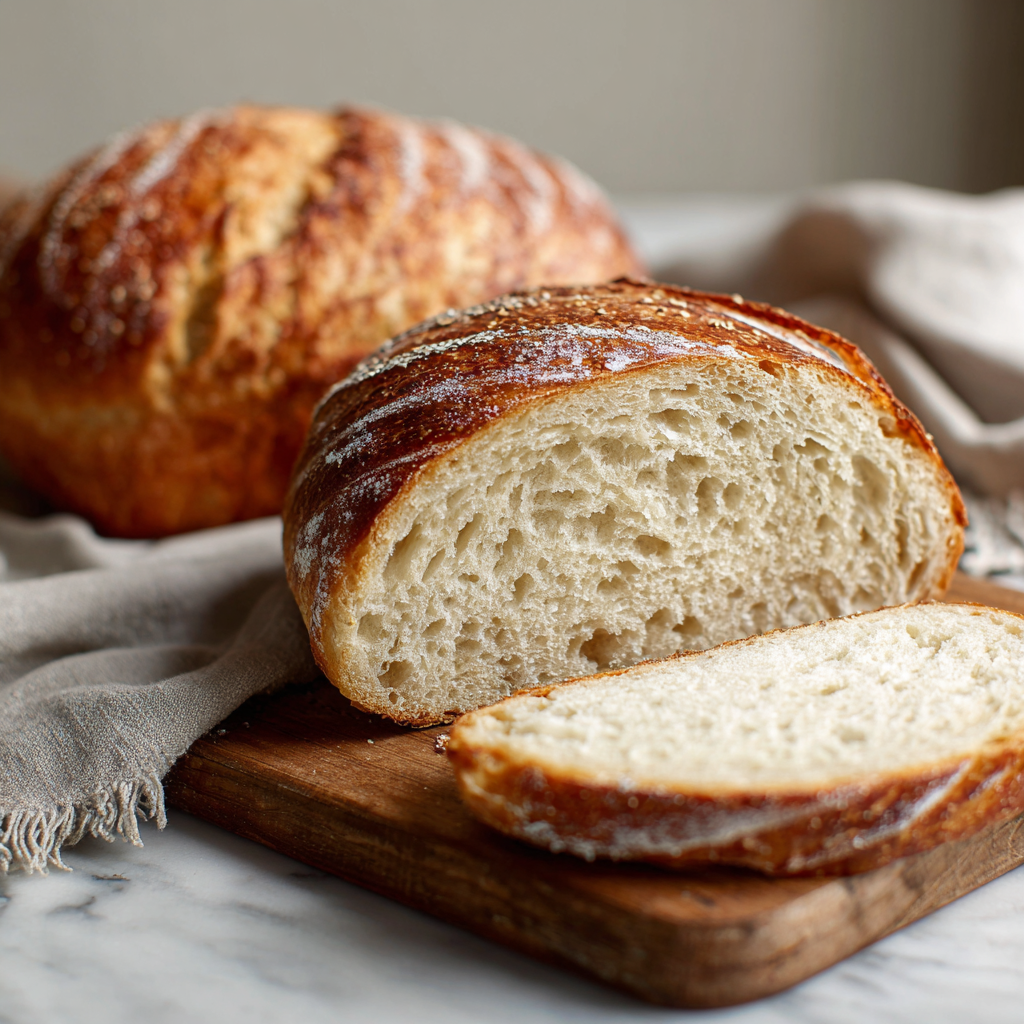
Hey there, friend! Let’s talk about something magical: the smell of freshly baked bread filling your home. There’s nothing quite like it, is there? It’s a scent that promises comfort, accomplishment, and a seriously delicious snack. If you’ve ever looked at a gorgeous, crusty loaf of sourdough and thought, “I could never make that,” I’m here to tell you—with a big, enthusiastic cheer—that you absolutely can.
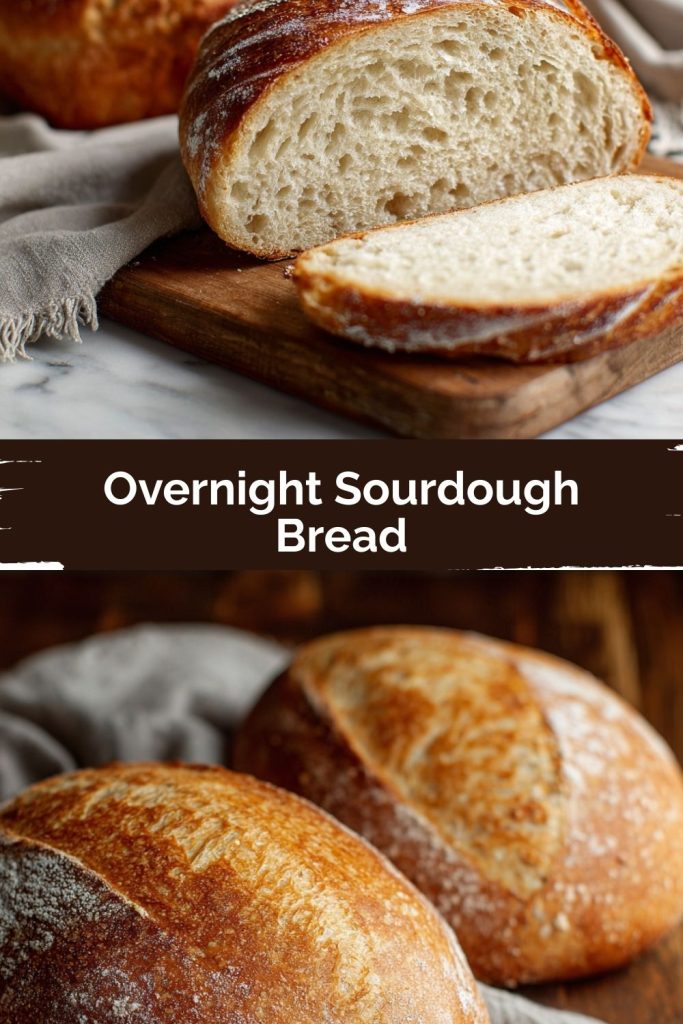
Today, we’re diving into my go-to recipe for Overnight Sourdough Bread. This isn’t a fussy, slap-your-wrist-if-you-mess-it-up kind of recipe. This is a friendly, forgiving, and wonderfully flexible bread that works with your schedule, not against it. We’re making a double batch that yields four beautiful, soft-loaf-pan loaves because, let’s be real, one loaf of homemade bread disappears faster than you can say “pass the butter.” This bread has a hint of sweetness, a tender crumb thanks to a touch of oil, and that classic, tangy sourdough soul we all love.
It’s the perfect bread for toast that actually holds jam, for sandwiches that don’t fall apart, and for just tearing off a warm hunk and slathering it with honey. The best part? The “overnight” part does most of the work for you. You mix up a simple dough before bed, let the wild yeast work its slow, fermenting magic while you dream, and then you shape and bake the next day. It’s my kind of kitchen magic. So, are you ready to fill your kitchen with that incredible aroma? Grab your favorite mixing bowl, and let’s get started!
The Loaf That Started It All: A Sourdough Love Story
PrintOvernight Sourdough Bread

This classic overnight sourdough bread gives you two beautifully soft loaves with a hint of sweetness and a golden crust. With a touch of oil for tenderness and sugar for a gentle flavor boost, it’s perfect for toast, sandwiches, or snacking. This double batch yields 4 loaves—because one is never enough!
- Prep Time: 20 mins
- rise time: 8–10 hrs + 1–2 hrs
- Cook Time: 40 mins
- Total Time: 9–10 hrs
Ingredients
3 cups warm water
2 cups active sourdough starter
1 cup corn oil (or swap for olive oil for a savory twist)
1 cup white sugar (or use honey or maple syrup for a natural option)
3 teaspoons salt
12 cups bread flour
Optional Twists:
Add ½ cup rolled oats or flaxseed for extra texture
Stir in fresh chopped rosemary, garlic, or shredded cheese for savory loaves
Swap 2 cups of bread flour for whole wheat flour for a heartier crumb
Sprinkle sesame or poppy seeds on top before baking
Instructions
In a large bowl, combine warm water, sourdough starter, oil, and sugar. Mix until sugar dissolves.
Stir in salt and flour, one cup at a time, until a soft dough forms.
Knead dough on a floured surface for 10–12 minutes until smooth and elastic.
Place dough in a greased bowl, cover, and let rest at room temp overnight (8–10 hours).
Punch down dough, divide into 4 equal parts, and shape into loaves.
Place in greased 8×4″ loaf pans, cover, and let rise until doubled (1–2 hours).
Bake at 350°F (175°C) for 35–40 minutes, until tops are golden and sound hollow when tapped.
Cool before slicing.
Nutrition
- Calories: 160
- Sugar: 3g
- Fat: 4g
- Carbohydrates: 28g
- Protein: 4g
My love affair with this particular bread started not in a fancy bakery, but in my Great-Aunt Clara’s warm, always-flour-dusted kitchen. I remember visiting her as a kid, and the first thing you’d notice walking through the door was the smell—a mix of brewing coffee and baking bread. She never used a recipe, just a big ceramic crock of sourdough starter she called “Herman” that lived in her fridge.
One Saturday morning, she let me help her make this very bread. She’d scoop out a cup of Herman, add flour, water, a glug of oil, and a scoop of sugar with a practiced hand. As we kneaded the dough, she’d tell me stories about her mother teaching her the same method. The dough would rest overnight on the counter, and the next morning, we’d wake up to a bowl that had puffed up like a happy cloud. That act of transforming simple ingredients into something so nourishing and full of life felt like pure alchemy. This recipe is my homage to Aunt Clara—a little less mysterious than Herman, but every bit as full of love and history. Every time I bake it, I’m right back in her kitchen, and I hope it creates those same warm, lasting memories for you and your family.
Gathering Your Ingredients: A Little Chat About Each One
Here’s everything you’ll need for our four-loaf bonanza. Don’t be intimidated by the quantity of flour—this is a big, beautiful batch of dough! I’ve included some notes on why each ingredient is here and how you can play around with it.
- 3 cups warm water: Think baby-bottle warm, not hot. Too hot, and you’ll harm your yeast buddies. The warmth just helps wake them up and get them active.
- 2 cups active sourdough starter: This is the heart of the operation! Make sure your starter is “active”—meaning it’s been fed recently, has doubled in size, and is nice and bubbly. If it sinks in water, it needs a bit more time to peak. A hungry starter won’t give you a good rise.
- 1 cup corn oil: This is our secret to a wonderfully soft and tender crumb. It keeps the bread moist for days.
- Chef’s Swap: You can use any neutral oil like avocado or canola. For a savory, rustic twist, a good extra-virgin olive oil is fantastic!
- 1 cup white sugar: Don’t worry, this isn’t for making the bread sweet! The sugar provides a gentle flavor boost and gives the yeast a little extra food to munch on, promoting a good rise.
- Chef’s Swap: Honey or pure maple syrup work beautifully here and add a lovely depth of flavor. If using honey, reduce the water by a tablespoon or two as it’s a liquid.
- 3 teaspoons salt: Crucial for flavor! It also helps strengthen the gluten structure. Always add it after you’ve mixed the starter with the water and flour, as direct contact with salt can slow down yeast activity.
- 12 cups bread flour: Bread flour has a higher protein content than all-purpose, which means more gluten and a better, chewier structure for your bread.
- Chef’s Insight: You can swap out up to 2 cups of the bread flour for whole wheat flour for a heartier, nuttier loaf. Just know it might make the final loaf a bit denser.
Let’s Make Some Bread! Your Step-by-Step Guide
Okay, apron on? Let’s do this! I’ll walk you through each step with a few little hacks I’ve picked up over the years.
- Wake Up the Starter: In a very large bowl (I mean it, this is a big batch!), combine the 3 cups of warm water with your 2 cups of active sourdough starter. Add the 1 cup of oil and 1 cup of sugar. Use a whisk or a wooden spoon to mix it all together until the starter is mostly broken down and the sugar has dissolved. You should see some happy little bubbles—that’s the yeast saying hello!
- Incorporate the Flour: Now, stir in the 3 teaspoons of salt. Then, it’s flour time! Add the flour one cup at a time, stirring with a sturdy spoon after each addition. For the first 6-8 cups, this will be easy. Then, it will start to become a shaggy, stiff mass. This is where the magic begins! Keep incorporating the flour until it becomes too difficult to stir.
- The Kneading Dance: Turn the dough out onto a lightly floured surface. Here’s the fun part! Knead the dough for a full 10-12 minutes. Yes, set a timer! This isn’t a step to rush. Kneading develops the gluten, which is what gives bread its structure and lovely, chewy texture. How do you know you’re done? The dough will transform from a shaggy, sticky mess into a smooth, soft, and elastic ball. Do the “windowpane test”: take a small piece of dough and gently stretch it between your fingers. If you can stretch it thin enough to see light through it without it tearing immediately, you’re golden!
- The Overnight Rest (The Easy Part!): Place your beautiful, smooth ball of dough into a large, greased bowl. Turn it over once to grease the top—this prevents it from drying out. Cover the bowl tightly with plastic wrap or a damp kitchen towel. Now, just leave it on your countertop. Don’t put it in the fridge! Let it rest and rise for 8-10 hours, or overnight. When you wake up, you’ll be greeted by a beautifully puffed-up dough.
- Shape with Love: In the morning, gently punch down the dough to release the air. Turn it out onto your surface and divide it into four equal parts. To shape a loaf, flatten a piece of dough into a rough rectangle. Fold the bottom third up, then the top third down (like a letter). Pinch the seam closed. Then, roll it gently into a log shape, tucking the ends under. The goal is to create a tight-ish “skin” on the top to help it rise upwards in the pan.
- The Second Rise: Grease four 8×4 inch loaf pans. Place each shaped loaf into a pan, seam-side down. Cover the pans loosely with a towel or plastic wrap. Let them rise in a warm, draft-free spot for 1-2 hours, or until the dough has crested about 1-2 inches above the rim of the pan. This is called “proofing.”
- Bake to Golden Perfection: While the loaves are proofing, preheat your oven to 350°F (175°C). Once risen, you can slash the top of the loaves with a sharp knife or razor blade (called “scoring”) to allow for expansion, but it’s not strictly necessary for this soft loaf style. Bake for 35-40 minutes. You’ll know it’s done when the tops are a deep golden brown and the loaf sounds hollow when you tap the bottom. If you have a thermometer, the internal temperature should be about 190-200°F.
- The Hardest Part: Cooling! Remove the loaves from the oven and immediately turn them out of the pans onto a wire rack. This stops the cooking process and prevents the bottoms from getting soggy. I know it’s tempting, but you MUST let them cool completely before slicing (about 2 hours). Slicing into hot bread messes with the texture and makes it gummy. Trust me, it’s worth the wait!
How to Serve Your Homemade Masterpiece
Once cooled, the possibilities are endless! For the ultimate experience, slice it thick and toast it until golden. It’s the perfect vehicle for a generous slather of good butter and your favorite jam. This bread makes incredible grilled cheese sandwiches or a classic BLT—the structure is soft but sturdy. For a simple, elegant appetizer, slice a loaf, brush with olive oil, toast until crisp, and top with bruschetta or a creamy cheese spread. Honestly, just a slice on its own is a little taste of heaven.
Get Creative! Fun Twists on the Classic
Once you’ve mastered the basic recipe, have some fun with it! Here are a few of my favorite variations:
- Hearty Grain: Stir in ½ cup of rolled oats or flax seeds along with the flour for a lovely texture and nutty flavor.
- Savory Herb: Add 2 tablespoons of fresh chopped rosemary and 2 minced garlic cloves to the dough for a fragrant, savory loaf that’s amazing with soups.
- Cheesy Delight: Fold in 1-2 cups of shredded sharp cheddar or Gruyère cheese during the last few minutes of kneading.
- Seeded Crust: Before the second rise, brush the tops of the loaves with water or an egg wash and sprinkle generously with sesame seeds, poppy seeds, or everything bagel seasoning.
- Partially Whole Wheat: Substitute 2 cups of the bread flour with whole wheat flour for a denser, more nutritious loaf.
Anna’s Chef Notes & Kitchen Stories
This recipe has been a constant in my kitchen for years, and it’s evolved with me. I remember one time I was so tired I accidentally used salted butter to grease the bowl. The result? A slightly saltier crust that my husband declared was the best batch ever! Don’t be afraid of little mistakes; sometimes they lead to happy accidents.
The most common question I get is about the rise. “What if my kitchen is cold?” If your house is chilly, the overnight rise might take a bit longer. That’s okay! Look for the dough to have visibly doubled in size. Conversely, if your kitchen is very warm, it might rise faster. The dough is your guide, not the clock. This recipe is wonderfully resilient. It has survived my distracted mornings, my kids “helping” by adding extra flour, and even a forgotten loaf in the oven (oops!). It’s a testament to the forgiving nature of sourdough. It’s not just bread; it’s a living, breathing kitchen companion.
Your Sourdough Questions, Answered!
Q: My dough didn’t rise much overnight. What happened?
A: The most likely culprit is an inactive starter. Make sure your starter is bubbly and floats in water before you begin. The second possibility is that your kitchen was too cold. Next time, try placing the covered bowl in the oven with the light on (but the oven OFF!) to create a slightly warmer, draft-free environment.
Q: My bread is really dense. Why?
A: Density usually points to a few things: 1) Not enough kneading, so the gluten didn’t develop properly. 2) The dough was over-proofed (rose for too long) and the yeast exhausted itself. 3) You used too much flour. When measuring flour, fluff it up in the bag, spoon it into your measuring cup, and level it off. Don’t scoop directly with the cup, as this packs in too much flour.
Q: Can I halve this recipe?
A: Absolutely! Just divide all the ingredients in half. You’ll end up with two perfect loaves instead of four. The method and baking time remain the same.
Q: How do I store all this bread?
A: Once completely cool, you can store the loaves in a bread bag or an airtight container at room temperature for 4-5 days. For longer storage, this bread freezes beautifully! Wrap the cooled loaves tightly in plastic wrap and then in foil, and freeze for up to 3 months. Thaw at room temperature whenever a bread craving strikes.
Nutritional Information*
*Please note: This is an approximate calculation based on the ingredients used and can vary significantly with substitutions.
Per Slice (assuming 16 slices per loaf): Calories: ~160, Carbohydrates: ~28g, Fat: ~4g, Protein: ~4g, Sugar: ~3g
Prep Time: 20 mins | Cook Time: 40 mins | Rise Time: 8-10 hrs + 1-2 hrs | Total Time: 9-10 hrs+ | Yields: 4 Loaves
Final Thoughts
There’s just something magical about homemade bread, isn’t there? This Overnight Sourdough Bread isn’t just about the loaves that come out of your oven—it’s about the process, the patience, and the joy of creating something so simple yet so satisfying. From that first bubbly starter to the golden, fragrant loaves cooling on your counter, every step feels like a little victory.
Whether you’re making it for family breakfasts, hearty sandwiches, or to tuck in the freezer for later, these loaves are proof (pun intended!) that homemade sourdough doesn’t have to be intimidating. So, grab your mixing bowl tonight, let the dough work its magic while you sleep, and wake up to the smell of fresh-baked comfort. Trust me—once you bake this bread, it might just become your new family tradition.