***
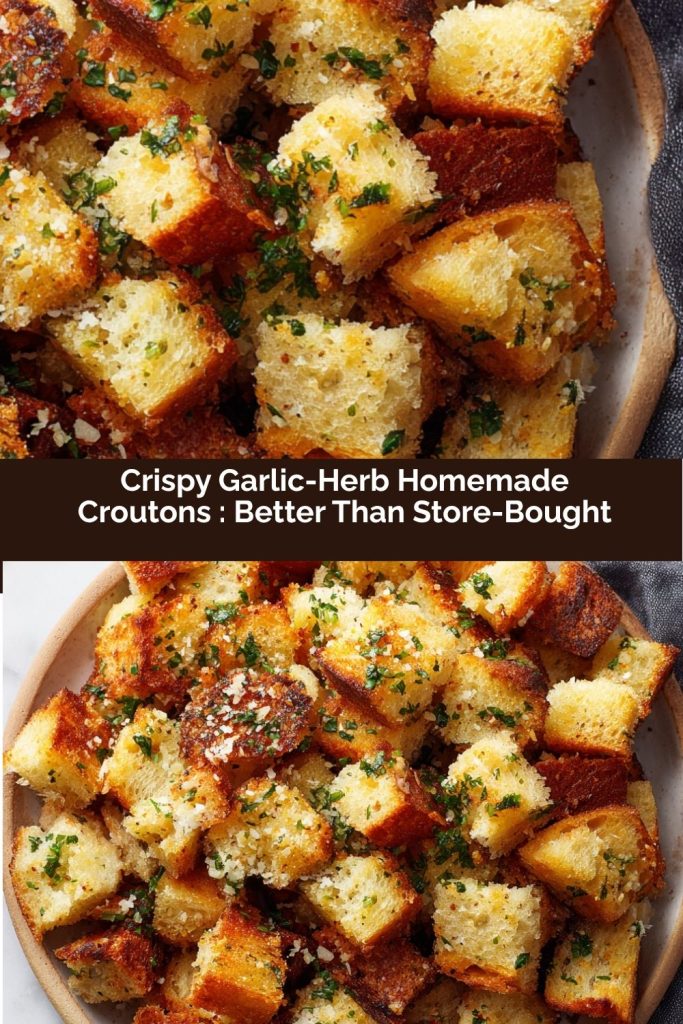
So Long, Sad Croutons: Let’s Make Magic in a Bowl!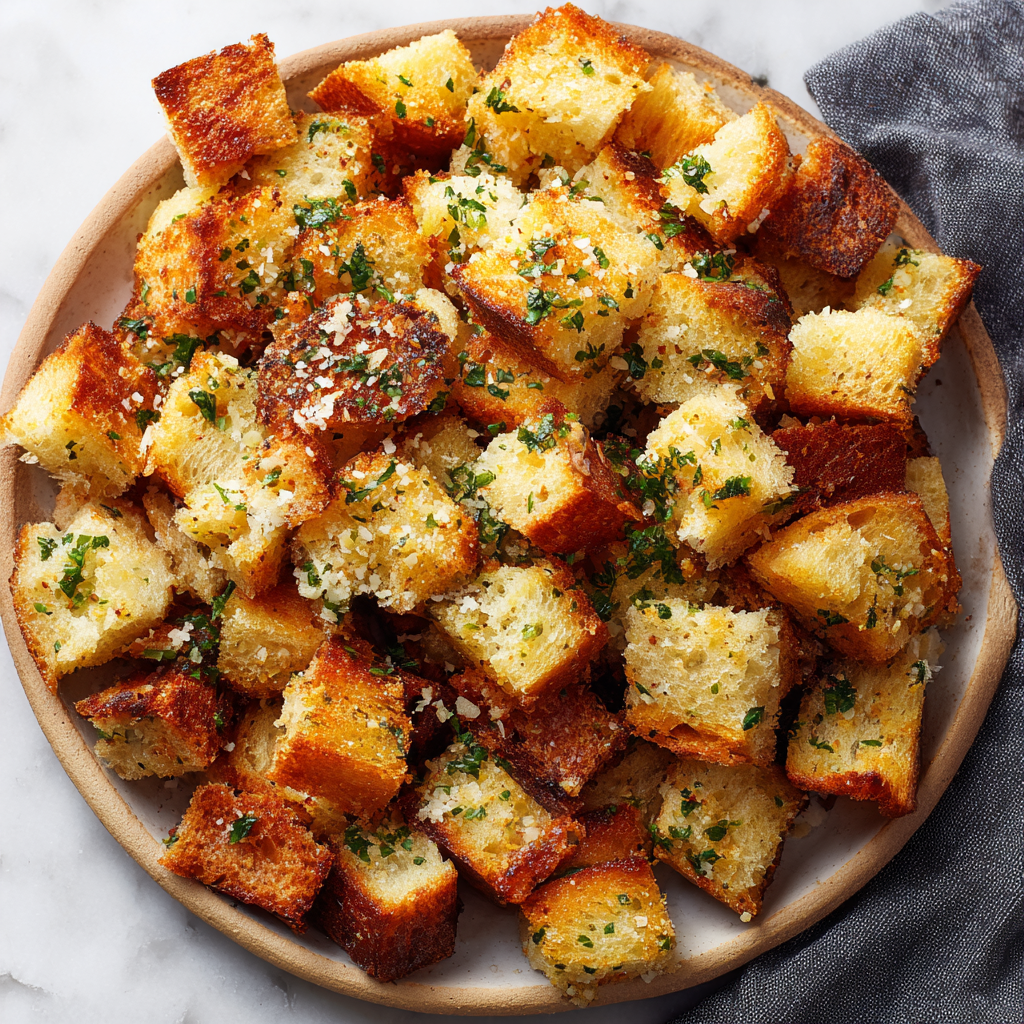
Hey there, friend! Let’s have a little heart-to-heart about something we’ve all probably done: standing in the salad dressing aisle, reaching for a box of those, well, okay store-bought croutons. You know the ones. They’re a bit too hard, a little bland, and often taste more like a cardboard box with a faint garlic whisper than the crispy, flavor-packed nuggets of joy our salads truly deserve.
I’m here to tell you that a better world exists, and it’s just about 15 minutes away. We’re not just making a recipe today; we’re conducting a little kitchen alchemy. We’re taking humble, day-old bread and transforming it into pure gold. These Crispy Garlic-Herb Homemade Croutons are a total game-changer. They’re shatteringly crisp on the outside, with a slightly chewy center, and they’re absolutely bursting with real garlic and aromatic herbs.
Once you try them, you’ll realize they’re not just a salad topping. They’re the star of the soup bowl, the perfect crunch on top of a creamy pasta, and yes, a dangerously snackable treat straight from the baking sheet. This is one of those foundational recipes that will make you feel like a kitchen rockstar with minimal effort. So, let’s grab that loaf that’s seen better days and turn it into something absolutely amazing. Your future salads are already thanking you!
A Stale Loaf and a Grandmother’s Wisdom
PrintCrispy Garlic-Herb Homemade Croutons : Better Than Store-Bought
Say goodbye to bland, store-bought croutons—these homemade garlic-herb croutons are golden, flavorful, and irresistibly crunchy. Made with rustic bread, olive oil, and a simple blend of seasonings, they’re the perfect way to elevate your soups, salads, or snack game. Fresh, fast, and full of flavor.
- Prep Time: 12 minutes
- Cook Time: 15 minutes
- Total Time: 27 minutes
- Yield: 16 1x
Ingredients
12 cups 1-inch bread cubes (from day-old French baguette, sourdough, or rustic country bread)
1/2 cup olive oil
2 cloves garlic, minced
2 tsp Italian seasoning
1 tsp garlic powder
1 tsp fine sea salt
1/4 tsp black pepper
Optional twists:
2 tbsp grated Parmesan for a savory touch
A pinch of red pepper flakes for a gentle kick
Fresh chopped parsley or rosemary for extra herb flavor
Instructions
Preheat oven: Set to 375°F (190°C). Line two large baking sheets with parchment paper.
Season the bread: In a large mixing bowl, combine olive oil, minced garlic, Italian seasoning, garlic powder, salt, pepper, and any optional flavor add-ins. Add the bread cubes and toss until evenly coated.
Spread and bake: Arrange the cubes in a single layer on the baking sheets. Bake for 12–18 minutes, stirring once halfway through, until golden brown and crisp.
Cool and store: Let cool completely before serving or storing. Keep in an airtight container at room temperature for up to one week.
Nutrition
- Calories: 110 per serving
- Fat: 6g
- Carbohydrates: 14g
- Protein: 2g
This recipe always takes me right back to my grandma’s kitchen. She was a woman who believed, with every fiber of her being, that you should never, ever waste good food. I remember one summer afternoon, I was about to toss a half-eaten, slightly stale baguette into the compost. Before I could even lift the lid, her hand gently landed on mine. “Anna, my dear,” she said, her eyes twinkling, “that’s not stale bread. That’s tomorrow’s croutons.”
She showed me her way—no fancy measurements, just a glug of olive oil from the bottle, a generous crush of fresh garlic from the garden, and a handful of dried herbs from her cupboard. We tossed it all together in her big, wooden bowl, the one with the scratches that told a thousand stories. The smell that filled her kitchen as they baked was pure, unadulterated love. It was more than just a cooking lesson; it was a lesson in seeing potential where others see an end. That philosophy—of making something magical out of the simple, the leftover, the humble—is at the very heart of my cooking today. Every time I make a batch, I think of her, and I’m reminded that the best food is often born from a little creativity and a whole lot of heart.
Your Crouton Toolkit: Simple Ingredients, Big Flavor
Here’s the beautiful part: you likely have most of this in your pantry right now. This isn’t about fancy, hard-to-find ingredients; it’s about letting a few simple, high-quality components shine.
- 12 cups (1-inch) bread cubes: This is your canvas! A day-old French baguette or a rustic sourdough is my top pick—they have a sturdy, open crumb that gets super crispy. Chef’s Insight: Stale bread is actually ideal here because it’s lost some moisture and will soak up the flavorful oil like a dream without getting soggy.
- 1/2 cup olive oil: This is our flavor vehicle. A good extra virgin olive oil will give the best taste. Substitution Tip: If you’re out, avocado oil or even melted butter will work wonderfully for a richer, more decadent flavor.
- 2 cloves garlic, minced: This is where the real magic starts. Using fresh, minced garlic gives you those authentic, punchy notes that powder just can’t replicate.
- 2 tsp Italian seasoning: A perfect, convenient blend of herby goodness. Chef’s Insight: If your jar has been in the pantry for a while, give it a quick rub between your palms before adding it—this wakes up the dried herbs’ essential oils and makes them more fragrant.
- 1 tsp garlic powder: “But Anna, you already added fresh garlic!” I know! The powder clings to the bread and gives an all-over, consistent garlic flavor that complements the fresh minced stuff perfectly.
- 1 tsp fine sea salt: Crucial for making all the other flavors pop. Don’t be shy here!
- 1/4 tsp black pepper: A little bit of peppery warmth to round everything out.
Optional Flavor Twists (Go Wild!):
- 2 tbsp grated Parmesan: Adds a savory, umami depth. Toss it in with the oil and herbs.
- A pinch of red pepper flakes: For those of us who like a gentle, sneaky kick.
- Fresh chopped parsley or rosemary: Stir in fresh herbs after baking for a burst of color and bright flavor.
Let’s Get Crispy: Your Foolproof Crouton Method
Ready to see the magic happen? It’s so simple, I promise. We’re just going to coat, spread, and bake. Let’s walk through it together.
- Preheat and Prep: First things first, get that oven preheating to 375°F (190°C). This hot, even heat is key for a perfect, golden crisp. While it’s warming up, line two large baking sheets with parchment paper. Chef’s Hack: Using two sheets might seem like a extra step, but giving the croutons plenty of space is the #1 secret to getting them crispy instead of steaming them. We want a single, non-crowded layer!
- The Flavor Bath: Grab your biggest mixing bowl—trust me, you’ll want the space for tossing. To the empty bowl, add your 1/2 cup of olive oil, the minced garlic, Italian seasoning, garlic powder, salt, and pepper. If you’re using Parmesan or red pepper flakes, add them now. Whisk it all together. Take a moment to smell it. Isn’t that incredible already? You’ve just made the most glorious garlic-herb dressing.
- Toss with Love: Now, dump all your bread cubes into the bowl of flavorful oil. Here’s my favorite part: get your (clean!) hands in there and toss, toss, toss! Gently massage the oil mixture into every nook and cranny of the bread. Using your hands gives you the most control and ensures every single cube is perfectly and evenly coated. Chef’s Tip: Don’t be too rough—we’re coating, not squishing! If the bread is very fresh and soft, a gentle fold with a spatula might be better to avoid mush.
- Bake to Perfection: Divide the coated bread cubes between your two prepared baking sheets, spreading them out into a single layer. Pop them into the preheated oven and set your timer for 10 minutes. When it dings, take the sheets out and give the croutons a good stir/flip. This is the other secret to even browning! Put them back in the oven for another 5-10 minutes. Watch them closely now! They’re done when they are a beautiful, deep golden brown and feel firm and crisp to the touch. They will continue to crisp up a bit as they cool.
- The (Hardest Part) Cool Down: As soon as they’re out of the oven, transfer the croutons to a large plate or baking sheet to cool completely. I know, the smell is intoxicating and you’ll want to eat them immediately, but this cooling step is non-negotiable for achieving that final, perfect crunch. Let them hang out for at least 15 minutes.
How to Serve Your Golden Gems
Okay, they’re cool. Now for the fun part—eating them! Of course, they are the undisputed champion atop a classic Caesar salad or a simple garden salad. But don’t stop there! Scatter a handful over a creamy tomato soup or a hearty lentil stew—they add the most wonderful textural contrast. I also love using them as a crunchy topping for mac and cheese or a baked pasta dish. And let’s be real, a small bowl of these on the coffee table is a far superior snack to any bag of chips. They’re that good.
Get Creative! Flavor Twists & Dietary Swaps
The basic formula is your playground. Once you’ve mastered the classic, try one of these delicious twists!
- Everything Bagel Croutons: Swap the Italian seasoning for 2 tablespoons of everything bagel seasoning. Instant brunch vibes!
- Lemon-Pepper Parmesan: Add the zest of one lemon and an extra 1/4 tsp of black pepper along with the Parmesan. So bright and zesty!
- Herbes de Provence: For a more French-inspired flavor, use herbes de Provence instead of Italian seasoning.
- Vegan/Dairy-Free: This recipe is naturally vegan if you skip the Parmesan cheese. Easy!
- Gluten-Free: Use your favorite sturdy gluten-free bread. Just be a little more gentle when tossing, as it can be more fragile.
Anna’s Extra Crouton Chronicles
This recipe has been a living, evolving thing in my kitchen for years. I’ve learned a few things along the way! For instance, I once got a phone call right after putting a batch in the oven and completely forgot about them. Let’s just say I created “crouton charcoal briquettes” that day. So, my number one rule now is: set a timer! They go from golden to gone in what feels like seconds.
I’ve also found that different breads bring different personalities. A hearty, seedy multigrain loaf makes for a robust, nutty crouton, while a classic white sourdough gives you that perfect airy-yet-crispy texture. Don’t be afraid to mix and match ends of different loaves you have lying around—it’s the ultimate “clean out the bread box” project. This recipe is wonderfully forgiving and wants you to make it your own.
Your Crouton Questions, Answered!
Over the years, I’ve gotten a few repeat questions about this recipe. Here are the answers to help you achieve crouton perfection every single time.
Q: My croutons turned out soft/chewy, not crispy. What happened?
A: The most common culprits are overcrowding the pan or not letting them cool completely. If they’re piled on top of each other, they steam instead of bake. Always use two baking sheets if needed! Also, they will always feel a bit soft when they first come out of the oven—the cooling process is when they fully crisp up. If they’re still soft after cooling, they just needed a few more minutes in the oven.
Q: Can I use fresh bread instead of stale bread?
A: You can, but stale is best. Fresh bread has more moisture, which can lead to a slightly chewier crouton and it might soak up a bit too much oil. If you only have fresh bread, you can dry out the cubes by spreading them on a baking sheet and putting them in a 300°F oven for 5-10 minutes before you toss them with the oil and seasonings.
Q: How long do these homemade croutons last, and what’s the best way to store them?
A> Once completely cooled, store them in an airtight container or a zip-top bag at room temperature. They’ll stay perfectly crispy for up to one week. Do not store them in the fridge, as the moisture can make them soft.
Q: I’m worried about the garlic burning in the oven. Any tips?
A> This is a great instinct! Burnt garlic can taste bitter. The minced garlic is coated in oil and stuck to the bread, which largely protects it, but if you’re nervous, you can infuse the oil instead. Gently warm the olive oil with the minced garlic for 2-3 minutes on the stove, then let it cool slightly before mixing with the herbs and bread. This gives you all the garlic flavor without any risk of burning.
Nutritional Information*
*Please note: This is an estimate for informational purposes and can vary based on specific ingredients used.
Servings: 16 | Serving Size: About 3/4 cup
Calories: ~110 | Carbohydrates: 14g | Fat: 6g | Protein: 2g
💛 Final Thoughts
Who knew something as simple as a stale loaf could lead to such joy? These Crispy Garlic-Herb Croutons are proof that the best kitchen magic happens when we slow down, use what we have, and add a little love. Whether they’re topping your soup, crunching over salad, or sneaked straight off the tray (no judgment here), these golden bites turn the ordinary into something extraordinary.
So the next time you eye that half-eaten baguette, remember Grandma’s words — it’s not stale bread, it’s tomorrow’s croutons. And maybe, just maybe, it’s a little reminder that in the kitchen, nothing truly goes to waste — not even a good story.