Loaded 7-Layer Dip: The No-Cook, Crowd-Pleasing MVP That’s Always the First to Go!
Tell me if this sounds familiar: You’ve got people coming over in an hour. The house is… presentable. You’ve got drinks sorted. But that nagging question pops up: “What on earth am I going to feed everyone?” You want something that feels generous, looks impressive, and tastes amazing, but you absolutely do not want to turn on the oven or stand over a stove. Friend, I have been there more times than I can count. And every single time, my culinary superhero swoops in to save the day: The Legendary 7-Layer Dip.
This isn’t just a dip. It’s a flavor fiesta in a dish. It’s a cool, creamy, crunchy, savory masterpiece that takes all of 10 minutes to assemble. It’s the dish that gets placed on the table with a casual, “Oh, I just threw this together,” and then you watch in silent, smug satisfaction as it becomes the gravitational center of the party. People will hover around it. They’ll break the sacred “dip from your side” chip rule. They’ll ask for the recipe. It’s that good.
Today, I’m sharing my tried-and-true, no-cook, absolutely foolproof version. We’re talking layers of seasoned refried beans, bright homemade guacamole (so easy!), tangy sour cream, a mountain of cheese, and all the fresh, crunchy toppings you can dream of. It’s the ultimate make-ahead appetizer for game day, potlucks, BBQs, or just a Tuesday night that needs a little spark. So, let’s ditch the stress, grab a bowl and a spoon, and build something legendary together.
The Dip That Saved My Sister’s Wedding Shower
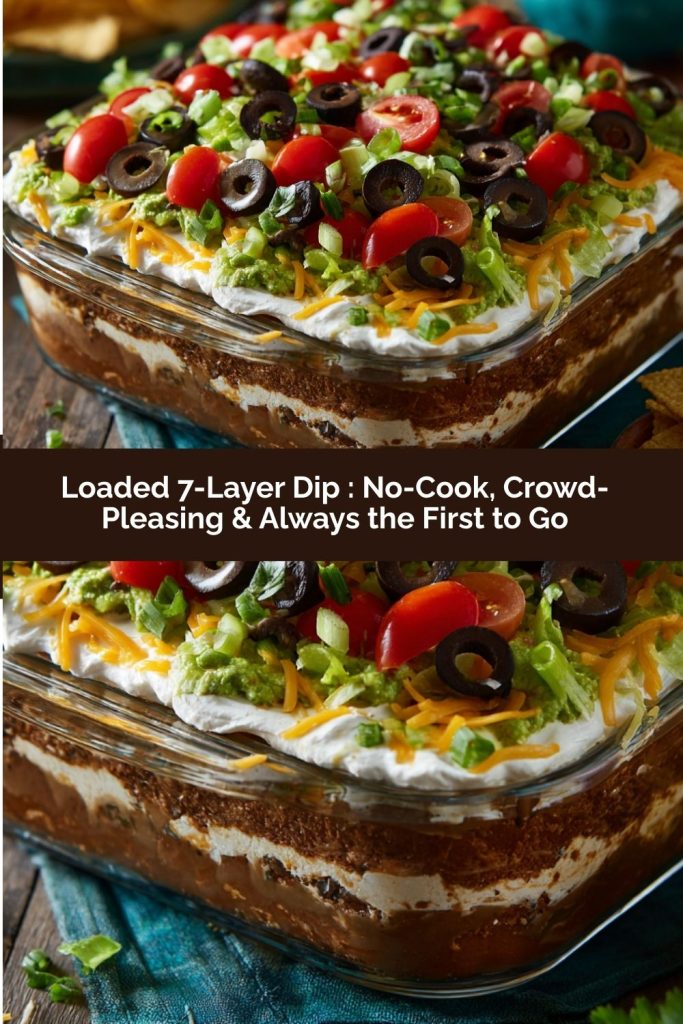
PrintLoaded 7-Layer Dip : No-Cook, Crowd-Pleasing & Always the First to Go
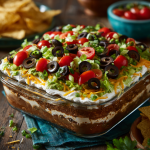
This classic 7-layer dip is the MVP of party snacks. It’s cool, creamy, and crunchy with layers of refried beans, guacamole, sour cream, cheese, olives, and fresh toppings. No oven needed, and it’s ready in minutes—just layer, chill, and serve. Perfect for game day, BBQs, or anytime you need a guaranteed hit.
- Prep Time: 10 minutes
- chill time: 30 minutes (optional)
- Total Time: 10–40 minutes
- Yield: 8–10 1x
Ingredients
1 can (16 oz) refried beans
1 cup guacamole
1 cup sour cream
1 packet taco seasoning (or 2 tablespoons homemade)
1 cup shredded cheddar or Mexican cheese blend
1/2 cup sliced black olives
1/2 cup diced tomatoes
Optional: chopped green onions, jalapeños, or cilantro
Tortilla chips, for serving
Instructions
In a bowl, mix sour cream with taco seasoning. Set aside.
In a 9×9-inch dish or shallow serving platter, layer ingredients in this order:
Refried beans
Guacamole
Seasoned sour cream
Shredded cheese
Diced tomatoes
Sliced olives
Any extra toppings (green onions, jalapeños)
Cover and chill for 30 minutes if possible.
Serve cold with tortilla chips.
Nutrition
- Calories: 180
- Carbohydrates: 9g
- Protein: 5g
I have to tell you about the time this dip literally saved a party. It was my sister Megan’s bridal shower, a lovely backyard affair I was hosting. I had a beautiful menu planned: dainty tea sandwiches, a fancy fruit platter, delicate pastries. You get the vibe. Well, an hour before guests arrived, a summer storm of epic proportions rolled through. The power flickered and went out. For good. My oven was dead. My fridge was warming up. Panic started to set in.
Then, I looked at my pantry. Cans of refried beans. A bag of avocados ripening on the counter. Sour cream. Cheese. It was like the culinary heavens parted. I rallied my family, and we became a dip-assembly line right there on the kitchen island, using phone flashlights. We layered this dip into the biggest glass bowl I owned. When the guests arrived, damp but cheerful, it was the only “planned” dish ready. I set it out with a mountain of chips, slightly embarrassed it wasn’t my fancy spread.
You can guess what happened. That bowl was scraped clean within 30 minutes. It was the talk of the shower! People were piled around it, laughing, chatting, and double-dipping with abandon. It turned a potential disaster into the most fun, relaxed, and memorable part of the day. It taught me a powerful lesson: The best party food isn’t about being the most complicated. It’s about being delicious, shareable, and made with a spirit of fun. This dip embodies that. It’s my edible safety net, and it’s never let me down.
Gathering Your Flavor Layers: A Guide to the Ingredients
Here’s the beautiful part: every layer in this dip is a star, and you likely have half of this in your kitchen right now! I’ll walk you through each one with some chef-y insights and easy swaps.
- 1 can (16 oz) Refried Beans: The hearty, savory base. I prefer the “traditional” kind, not the fat-free version, for the best texture and flavor. Chef’s Tip: For a smoother spread, give the beans a quick stir in a bowl with a squeeze of lime juice before layering.
- 1 cup Guacamole: The cool, creamy green layer! You can use store-bought in a pinch, but my easy 5-minute guacamole is truly worth it. Swap Idea: If avocados are crazy expensive, a layer of mashed, seasoned peas or even a thick salsa verde can be a fun, bright alternative.
- 1 cup Sour Cream & 1 packet Taco Seasoning: This is the tangy, zesty magic layer! Mixing the seasoning into the sour cream distributes flavor perfectly. Homemade Hack: No packet? Use 2 tbsp of a mix of chili powder, cumin, garlic powder, onion powder, and a pinch of salt and paprika.
- 1 cup Shredded Cheese: I use a sharp cheddar for bite or a Mexican blend for meltability. Pro Move: Shred your own cheese! Pre-shredded bags have anti-caking agents that can make the layer a bit drier. Freshly shredded melts into the other layers beautifully.
- 1/2 cup Diced Tomatoes: Freshness and acidity! Use Roma tomatoes (they’re less watery) and give them a gentle squeeze in a paper towel to remove excess juice so your dip doesn’t get soggy.
- 1/2 cup Sliced Black Olives: Their briny, salty punch is essential! If you’re not an olive fan, you can skip them, but I urge you to try it—they balance the richness.
- The “Confetti” (Optional but Recommended): Chopped green onions for a fresh snap, sliced jalapeños for heat, and a generous handful of fresh cilantro leaves for herby brightness. This is where you make it your own!
- Tortilla Chips, for serving: The vessel! I love a sturdy, restaurant-style chip that can scoop a massive bite without breaking. Offer a variety for fun.
Building Your Dip Masterpiece: Step-by-Step
Ready to create? It’s less like cooking and more like edible arts and crafts. Let’s do this!
- The Flavor Base: Grab a medium bowl and plop in your sour cream. Add the taco seasoning. Now, stir, stir, stir until it’s completely combined and a lovely, uniform orangey-pink color. Taste it! Isn’t that good? Set this aside. Little Hack: If you have 5 extra minutes, let this mixture sit for a bit. The dried herbs in the seasoning will hydrate from the sour cream, making the flavor even more vibrant.
- Choose Your Vessel: Get out your serving dish. A 9×9-inch glass baking dish is classic and shows off the layers beautifully. A wide, shallow bowl or even a clear trifle bowl for a tall, impressive look works great too! Just make sure it has a relatively flat base.
- Layer 1 – The Bean Bed: Open your can of refried beans. If they seem super thick, stir in a teaspoon or two of water or lime juice to make them more spreadable. Spoon them into your dish and use the back of the spoon to press and spread them into a smooth, even layer that covers the bottom. This is your foundation—make it strong and level!
- Layer 2 – The Green Goddess: Carefully spoon your guacamole over the bean layer. Here’s my top tip: Drop dollops of guac all over the bean layer first, then gently spread them together. Trying to spread one big lump can pull up the beans and make a mess. We want distinct, pretty layers! Spread it to the edges.
- Layer 3 – The Zesty Cloud: Take your seasoned sour cream and repeat the dollop method! Plop spoonfuls over the guacamole and gently spread. The goal is a creamy, fluffy blanket that covers the green completely. This layer acts as a barrier to keep the guacamole fresh and bright.
- Layer 4 – The Cheesy Blanket: Ah, cheese. Sprinkle it evenly and generously over the sour cream. Don’t press it down—let it stay light and fluffy. This is the layer that makes everyone’s eyes light up.
- The Fresh Finish (Layers 5, 6, & 7!): Now for the confetti! Evenly scatter your well-drained diced tomatoes. Follow with the sliced black olives. Then, crown your creation with your chosen extras: a flourish of green onions, rings of jalapeño, a shower of cilantro. It should look like a festive, edible garden.
- The Patience Game (Optional but Wise): If you can bear it, cover the dip loosely with plastic wrap and pop it in the fridge for 30 minutes. This lets the flavors get to know each other and firms up the layers for the perfect scoop. But guess what? If your guests are at the door, just serve it immediately. It will still be devoured.
How to Serve Your Culinary Masterwork
Presentation is part of the fun! Place your dazzling dip in the center of a large board or platter. Surround it with an abundant, overflowing mountain of tortilla chips—I like to use two or three different kinds for color and texture. For a real “wow” factor, add little bowls of extra toppings on the side: more jalapeños, hot sauce, or even some crumbled cooked chorizo for the meat-lovers. Provide a sturdy, wide serving spoon so people can dig in and get a perfect bite of every single layer. Then, step back and watch the magic happen.
Make It Your Own: Fun Variations & Swaps
The beauty of this framework is its flexibility. Play with it!
- Tex-Mex Fiesta: Add a layer of cooked, seasoned ground beef or turkey between the beans and guacamole.
- Fiesta Ranch Style: Swap the taco seasoning in the sour cream for a packet of dry ranch seasoning. It’s a cool, herby twist!
- Black Bean & Corn: Use black refried beans and add a layer of drained corn kernels (fresh off the cob in summer is amazing) between the sour cream and cheese.
- Lightened Up: Use Greek yogurt instead of sour cream, and swap the refried beans for a layer of mashed, seasoned black beans.
- Seven-Layer Salad Dip: Inspired by the classic salad, do layers of cream cheese mixed with mayo, then peas, cheddar, crispy bacon, chopped romaine, and green onions!
Anna’s Chef Notes & Kitchen Stories
This recipe has been in my arsenal for over a decade, and it has evolved in the best ways. I used to be a strict “must follow the exact seven layers” purist. Now? I see it as a canvas. Sometimes it’s a 6-layer dip because I forgot the olives. Sometimes it’s a 9-layer dip because I added corn and bacon. It’s always delicious.
One of my favorite kitchen memories is teaching my then 5-year-old nephew how to make it. He was in charge of the “sprinkles” (the cheese and olives). He took his job so seriously, meticulously placing each olive slice. His face when everyone at the family BBQ raved about “his” dip was priceless. That’s what cooking is all about—creating joy, together.
So, please, don’t stress about perfection. A messy, lovingly assembled dip eaten with friends tastes infinitely better than a perfect one eaten alone. Have fun with it!
Your 7-Layer Dip Questions, Answered!
Q: Can I make this dip ahead of time?
A: Absolutely! You can assemble it completely (except for the fresh tomato and cilantro) up to 24 hours in advance. Cover it very tightly with plastic wrap, pressing the wrap directly onto the surface of the sour cream/cheese layer to prevent browning (especially of the guacamole underneath). Store in the fridge. Add the fresh tomato and any delicate herbs right before serving.
Q: My guacamole layer turned brown overnight. What did I do wrong?
A: You did nothing wrong! Avocados oxidize when exposed to air. The sour cream layer should protect it, but for ultimate insurance, you can: 1) Use extra sour cream as a seal, 2) Press plastic wrap directly on the surface as mentioned above, or 3) Squeeze a little extra lime juice into your guacamole—the acid slows browning. If a tiny bit browns, just give it a gentle stir before serving; it’s still perfectly fine to eat.
Q: The dip seems watery/soggy after a while. How can I prevent that?
A: The usual culprit is the tomatoes. Always drain your diced tomatoes and even give them a gentle press in a paper towel to remove excess juice. Salting tomatoes also draws out water, so I add salt to the dip via the other layers, not directly on the tomatoes. Also, ensure your guacamole isn’t too runny.
Q: What’s the best way to get a perfect scoop with all the layers?
A: A wide, shallow spoon (like a serving spoon) is key. Scoop straight down and lift up. Encourage your guests to do the same! Also, serving it in a wider, shallower dish rather than a deep bowl makes this much easier.
Nutritional Information*
*This is a rough estimate for the dip only, per serving (about 1/2 cup), without tortilla chips. Values can vary based on specific ingredients and brands used.
- Calories: ~180
- Protein: 5g
- Carbohydrates: 9g
- Fat: 14g
- Fiber: 3g
Prep Time: 10 minutes | Chill Time: 30 minutes (optional) | Total Time: 10-40 minutes | Servings: 8-10
Final Thoughts
Loaded 7-Layer Dip is proof that the best party food doesn’t have to be complicated—it’s all about layers of flavor, texture, and a little bit of flair. From creamy refried beans to fresh, crunchy toppings, every bite is a mix of indulgence and fun. The best part? You don’t need an oven or hours of prep—just assemble, chill if you can, and watch it disappear in minutes.
This dip is endlessly adaptable. Swap ingredients, add extra layers, or make it lighter with Greek yogurt or black beans—no matter what, it’s always a crowd-pleaser. Perfect for game day, potlucks, BBQs, or even a last-minute snack emergency, it’s the kind of recipe that makes you look like a kitchen rockstar without breaking a sweat.
Serve it up, grab a chip, and watch your friends (and family) fight over the first scoop. Messy, colorful, and utterly irresistible, this dip isn’t just food—it’s a little edible celebration in every bite.