Chicken Pot Pie–Style Potato Bake: Your New Favorite Cozy Dinner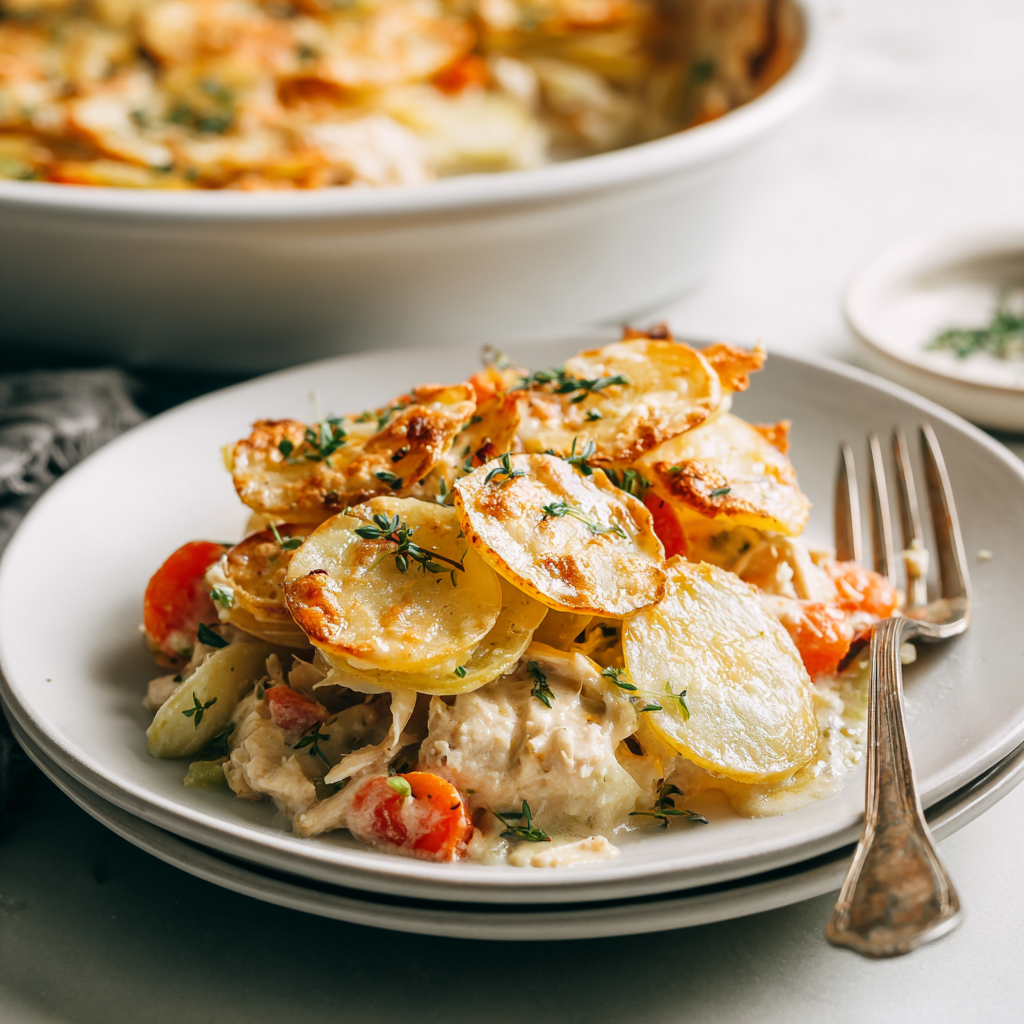
Hey there, friend! Let’s talk about the ultimate kitchen hug. You know the feeling—when you’re craving something deeply comforting, something that fills your kitchen with the kind of aroma that makes everyone wander in, asking “what’s cooking?” with hopeful eyes. But maybe you’re also dreaming of a night without rolling out pastry or babysitting a fussy dish.
That’s exactly why I created this Chicken Pot Pie–Style Potato Bake. Imagine everything you adore about a classic pot pie—the tender chicken, the sweet peas and carrots, that luxuriously creamy, thyme-scented sauce—but instead of a pastry lid, we’re crowning it with a gorgeous, overlapping layer of thinly sliced potatoes. They roast up crisp and golden on top, while staying tender underneath where they meet the filling. It’s a textural dream: creamy, savory, and crispy all in one spoonful.
This isn’t just a recipe; it’s your secret weapon for turning simple ingredients into a showstopping family meal. It’s forgiving, flexible, and absolutely packed with flavor. Whether you’re a weeknight warrior or cooking for a cozy weekend gathering, this bake is here to make you look like a kitchen rockstar with minimal stress. So, preheat that oven, grab your favorite baking dish, and let’s cook up a big pan of pure comfort together.
Why This Dish Feels Like Home
PrintChicken Pot Pie–Style Potato Bake: Creamy Comfort with a Crispy Twist

This chicken pot pie–style potato bake is the coziest mashup you didn’t know you needed. It has the creamy, savory filling you love in a classic pot pie—tender chicken, veggies, and a rich sauce—all topped with thinly sliced potatoes that roast up golden and crisp. No pastry, no fuss—just pure comfort in every bite.
- Prep Time: 20 mins
- Cook Time: 55 mins
- Total Time: 1 hr 15 mins
- Yield: 4–6 1x
Ingredients
2 cups cooked chicken, shredded or chopped
2 tbsp butter
1 small onion, diced
2 cloves garlic, minced
2 tbsp all-purpose flour
1½ cups chicken broth
½ cup milk or cream
1 cup frozen peas and carrots
½ tsp dried thyme
Salt and pepper, to taste
3–4 medium Yukon Gold potatoes, thinly sliced (use a mandoline if possible)
Olive oil, for brushing
Fresh parsley, for garnish (optional)
Instructions
Preheat oven to 375°F (190°C).
In a skillet, melt butter over medium heat. Add onion and garlic; sauté until soft.
Stir in flour and cook for 1 minute. Gradually whisk in broth and milk to make a smooth sauce.
Add chicken, peas and carrots, thyme, salt, and pepper. Simmer 5 minutes until thickened.
Transfer filling to a greased baking dish.
Arrange potato slices on top, overlapping slightly. Brush with olive oil and season with salt.
Cover with foil and bake for 30 minutes. Remove foil and bake 20–25 minutes more, until potatoes are tender and golden.
Garnish with parsley and serve warm.
Nutrition
- Calories: 370
- Fat: 16g
- Carbohydrates: 30g
This recipe always takes me right back to my grandma’s linoleum-floored kitchen. She was a champion of the “clean out the fridge” supper, a culinary magician who could turn leftovers into gold. Her version of pot pie was legendary, but she only made the pastry from scratch on Sundays. On Wednesdays? That’s when her “rustic potato crust” version was born.
I’d sit at the counter, my legs swinging, watching her slice potatoes so thin I could almost see through them. “The secret, Anna,” she’d whisper dramatically, “is letting the potatoes get *crispy* on top but *drink up the gravy* underneath.” She’d let me brush the olive oil over the top, a responsibility I took very seriously. When that heavy ceramic dish came out of the oven, bubbling and bronzed, it was a triumph. It tasted like resourcefulness, like warmth, like being home. My version is a loving nod to her kitchen wisdom—a little more refined in method, but every bit as soul-satisfying.
What You’ll Need: Your Comfort Food Toolkit
Here’s your shopping list! These are simple, humble ingredients that, when combined, create pure magic. I’ve added my notes and swaps so you can make this your own.
- 2 cups cooked chicken, shredded or chopped: The ultimate time-saver! Use a rotisserie chicken, leftover roasted chicken, or even boiled/shredded chicken breasts. This is a brilliant way to give leftovers a glorious second act. For a vegetarian twist, swap in canned chickpeas or white beans.
- 2 tbsp butter: Our flavorful base for the sauce. It adds a rich, rounded depth that oil just can’t match. For dairy-free, a good olive oil or vegan butter works perfectly.
- 1 small onion, diced & 2 cloves garlic, minced: The aromatic dream team. They build the foundational flavor. Don’t rush sautéing them—we want them soft and sweet, not browned.
- 2 tbsp all-purpose flour: This is our thickening agent, creating the luscious sauce. To make this gluten-free, use an equal amount of a 1:1 gluten-free flour blend (like Bob’s Red Mill).
- 1½ cups chicken broth & ½ cup milk or cream: The liquid stars! Broth gives savory depth. The milk or cream adds creaminess—use whole milk for richness, half-and-half for luxury, or even unsweetened almond milk for a lighter touch. The sauce will still be delicious.
- 1 cup frozen peas and carrots: My favorite shortcut! No chopping needed, and they’re frozen at peak freshness. Feel free to use a mixed veggie bag with corn or green beans.
- ½ tsp dried thyme: That quintessential “pot pie” herb. It’s earthy and cozy. If you have fresh, use 1½ teaspoons, finely chopped.
- Salt and pepper, to taste: Season in layers! Taste your filling before it goes into the dish.
- 3–4 medium Yukon Gold potatoes: My top pick! Yukon Golds have a buttery flavor and a waxy texture that holds beautiful slices and gets perfectly tender. Russets will work but can fall apart more easily.
- Olive oil, for brushing & Fresh parsley, for garnish (optional): The olive oil is crucial for crispy, golden potatoes. The parsley? A fresh, green pop that makes it look restaurant-worthy.
Let’s Build Your Bake: A Step-by-Step Journey
Ready? Let’s transform these simple ingredients into something spectacular. I’ll walk you through each step with my best tips to ensure success.
- Preheat and Prep: Crank your oven to 375°F (190°C). This is our sweet spot—hot enough to cook the potatoes through and crisp them up, but not so hot that the filling bubbles over before the spuds are tender. Lightly grease your favorite 9×9 or equivalent baking dish. Chef’s Hack: While the oven heats, prep all your ingredients (this is called *mise en place*—it makes the cooking process so smooth!).
- Sauté the Aromatics: In a large skillet, melt the butter over medium heat. Add the diced onion and a pinch of salt. Sauté for 4-5 minutes until they’re soft and translucent. Now add the garlic and cook for just 60 seconds until fragrant—we don’t want it to burn! That gentle sizzle and smell is the sound of flavor building.
- Create the Creamy Sauce: Sprinkle the flour over the onions and garlic. Stir constantly and cook for a full minute. This cooks out the raw flour taste and creates our “roux.” Now, slowly pour in the chicken broth while whisking vigorously. This is the key to a lump-free sauce! Once smooth, whisk in the milk or cream. Let it simmer for 2-3 minutes. You’ll see it transform from a thin liquid into a lovely, coating sauce.
- Bring the Filling Together: Turn the heat down to medium-low. Stir in the cooked chicken, frozen peas and carrots, dried thyme, and a good crack of black pepper. Let it all simmer together for about 5 minutes. The sauce will thicken further, and the frozen veggies will thaw perfectly. Give it a taste here—this is your moment to adjust the seasoning. Does it need more salt? A pinch more thyme? Make it yours!
- Potato Topping Artistry: Pour the warm, savory filling into your prepared baking dish and spread it evenly. Now, for the fun part! Using a sharp knife or a mandoline (carefully!), slice your potatoes into ⅛-inch thick rounds. Arrange them in overlapping concentric circles or neat rows on top of the filling. They’ll shrink a bit as they bake, so don’t be shy about overlapping. Brush the tops generously with olive oil and sprinkle with a little extra salt and pepper. This is what gives us that gorgeous, crispy lid.
- The Two-Stage Bake: Cover the dish tightly with aluminum foil. This first 30-minute bake is a steam bath—it gently cooks the potatoes and filling without browning the top. Then, carefully remove the foil (steam alert!). Return the dish to the oven, uncovered, for 20-25 more minutes. Watch for the magic: the potatoes will turn golden brown and the edges will be beautifully bubbly.
- The Final Touch: Once out of the oven, let it rest for 5-10 minutes. This allows the filling to set just enough so it doesn’t run everywhere when you serve it. Sprinkle with fresh chopped parsley for that perfect finish. Then, dig in and savor the comfort!
How to Serve This Cozy Masterpiece
This bake is a complete meal in a dish, but a little something on the side never hurts! I love serving it right from the baking dish at the table for that family-style, “gather round” feeling. Use a big spoon to scoop down through the crispy potato crust and into the creamy filling. It pairs beautifully with a simple, crisp green salad with a tangy vinaigrette to cut through the richness. For a real treat, a warm, crusty loaf of sourdough bread is perfect for mopping up every last bit of that delicious sauce.
Make It Your Own: Delicious Twists & Swaps
One of my favorite things about this recipe is how adaptable it is! Here are a few ways to mix it up:
- Herb Garden Bliss: Swap the thyme for tarragon or sage for a different aromatic profile. Add a tablespoon of fresh chopped chives to the filling.
- “Everything But the Kitchen Sink” Veggie: Sauté some sliced mushrooms with the onions, or stir in a handful of fresh spinach at the end of the filling simmer.
- Cheesy Comfort Bomb: Stir ½ cup of shredded sharp cheddar or Gruyère into the warm filling before transferring to the bake dish. Thank me later.
- Turkey or Ham Leftover Remix: This is the perfect post-holiday solution. Swap the chicken for diced leftover turkey or ham.
- Root Vegetable Rendezvous: Swap half the potato topping for thin slices of sweet potato, parsnip, or rutabaga for a colorful, earthy twist.
Anna’s Kitchen Notes & Stories
This recipe has been a work-in-progress in my kitchen for years! The first time I made it, I was so worried the potatoes wouldn’t cook through that I sliced them paper-thin. They practically dissolved! I learned that a confident ⅛-inch slice is the golden ticket. I’ve also been known to accidentally double the garlic (a happy accident) and once used sweet potato slices for a Thanksgiving leftover version that was a massive hit.
My biggest tip? Don’t skip the foil-covered bake. It’s the guardian of tender potatoes. And if you’re in a rush, pre-slice your potatoes and keep them in a bowl of cold water while you make the filling to prevent browning. This dish also holds beautifully. You can assemble it a few hours ahead, keep it covered in the fridge, and just add 5-10 minutes to the bake time. It’s a friend to busy cooks everywhere!
Your Questions, Answered
Q: Can I make this ahead of time?
A: Absolutely! You can assemble the entire dish (through step 5), cover it tightly, and refrigerate for up to 24 hours. When you’re ready to bake, you may need to add 5-10 extra minutes to the covered baking time since it’s starting from cold.
Q: My sauce seems too thin/too thick. What happened?
A: Sauces can vary based on your stove’s heat and your skillet. If it’s too thin after simmering, let it cook a bit longer to reduce. If it’s too thick (like paste), simply whisk in a splash more broth or milk until it reaches a creamy, gravy-like consistency. Remember, it will thicken a bit more in the oven, too.
Q: Do I have to use a mandoline for the potatoes?
A: Not at all! A sharp chef’s knife and a steady hand work perfectly. The key is to get the slices as even as possible so they cook at the same rate. If some are thicker, just tuck them underneath or in the middle layer of your pattern.
Q: Can I freeze this bake?
A: I don’t recommend freezing it after it’s fully assembled and baked, as the creamy sauce and potatoes can become grainy and watery upon thawing. It’s best enjoyed fresh or made a day ahead and refrigerated.
Nutritional Information (Per Serving, serves 6)
Approximate values: Calories: ~370 | Protein: 25g | Fat: 16g | Carbohydrates: 30g | Fiber: 4g
Please note: This is an estimate generated from an online nutrition calculator. Actual values will vary based on specific ingredients used and portion sizes.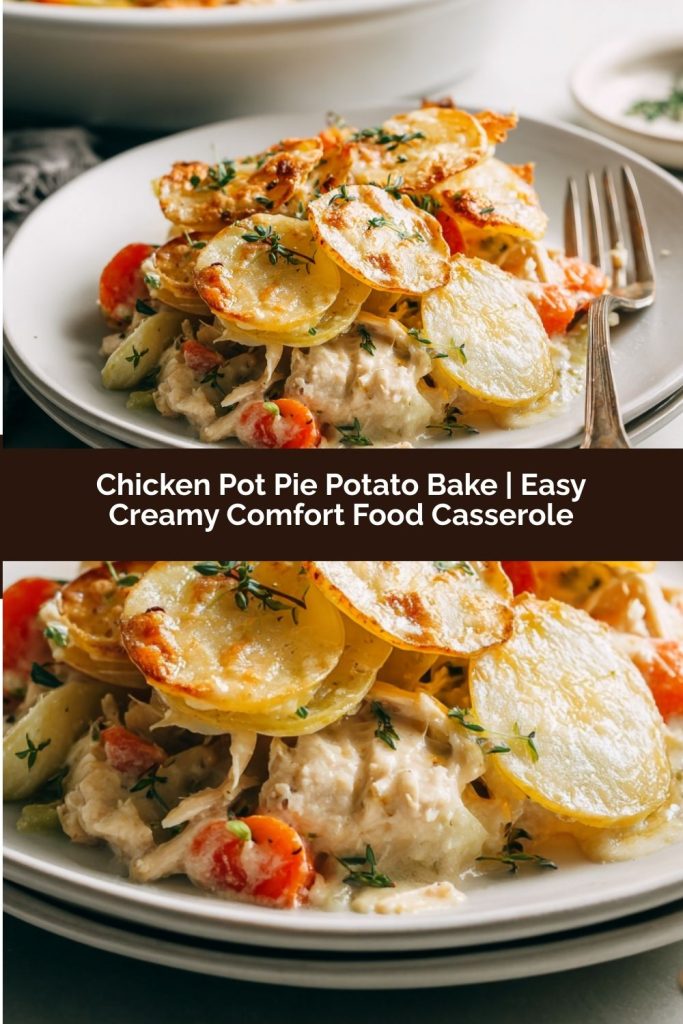
Final Thoughts
This Chicken Pot Pie–Style Potato Bake proves that comfort food doesn’t have to be complicated. With a creamy, savory filling and a perfectly crisp potato topping, it’s an effortless twist on a classic favorite. From busy weeknights to casual family dinners, this bake delivers warmth, flavor, and satisfaction in every bite.
The beauty is in its versatility: switch up the veggies, add herbs, stir in cheese, or use leftover turkey or ham. It’s forgiving, adaptable, and reliably delicious—just like grandma intended. Serve it fresh from the oven with a crisp salad or crusty bread, and you’ve got a dinner that feels indulgent without the stress.