***
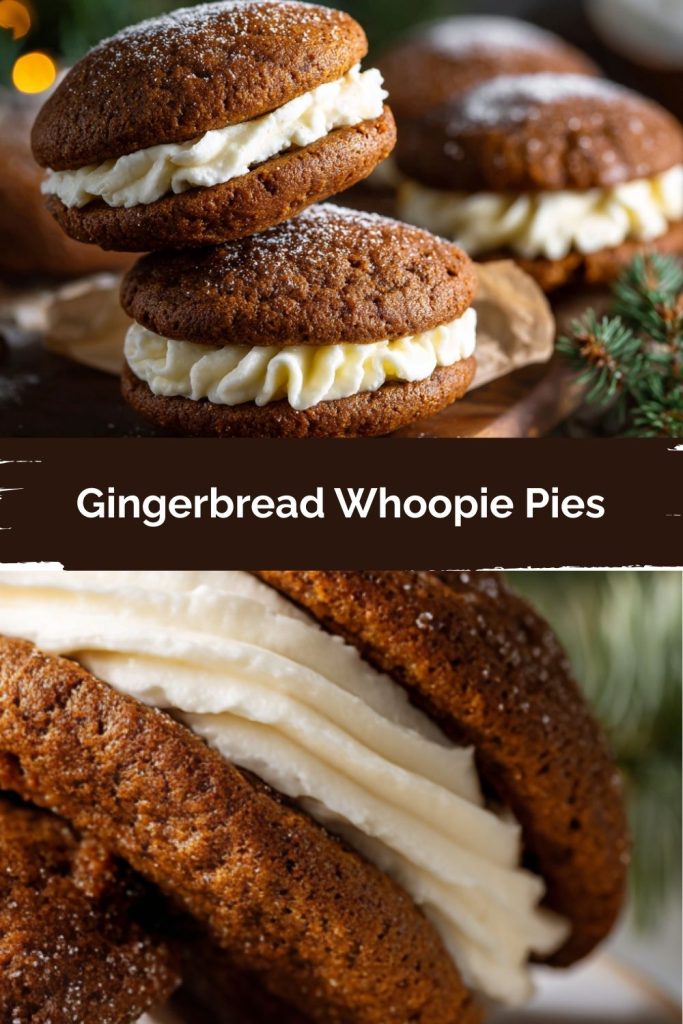
Your New Favorite Holiday Treat: Gingerbread Whoopie Pies!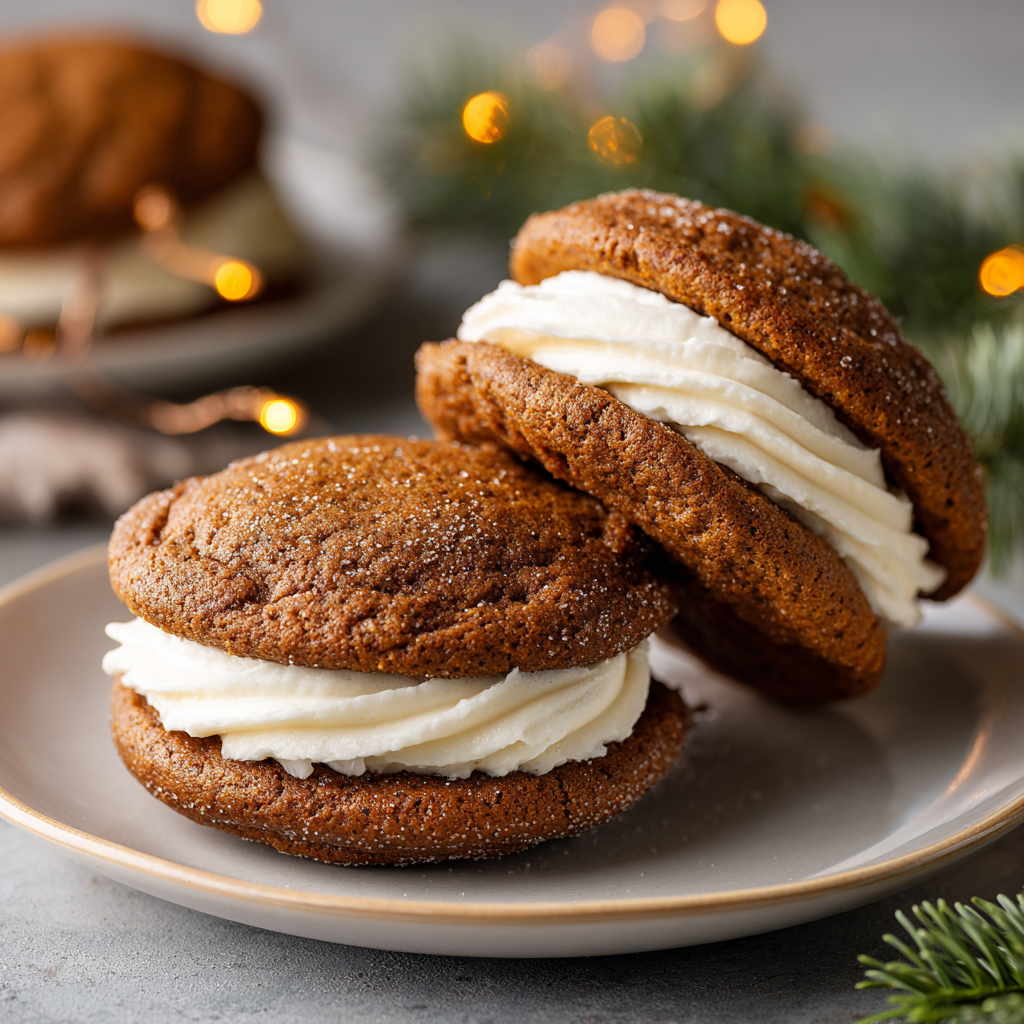
Hey there, friend! Is there anything that screams “cozy holiday vibes” more than the warm, spiced aroma of gingerbread baking in the oven? I’m Anna, and if you’re anything like me, you’re probably always on the hunt for that next show-stopping dessert that’s equal parts impressive and an absolute joy to make. Well, pull up a chair and get ready to fall in love, because we’re taking all those classic gingerbread flavors and transforming them into the most irresistible, handheld, cream-filled dream of a cookie: Gingerbread Whoopie Pies.
Imagine this: two incredibly soft, cakey, and perfectly spiced gingerbread-molasses cookies. They’re pillowy and light, with just the right amount of chew. Now, picture sandwiching them together with a lush, tangy, and impossibly creamy cloud of cream cheese frosting. One bite and you get the warm hug of ginger, cinnamon, and molasses, immediately followed by the cool, sweet richness of the frosting. It’s a texture and flavor party in your mouth, and everyone’s invited! This isn’t just a cookie; it’s an experience. It’s the kind of treat that disappears from a holiday platter in seconds and has everyone begging you for the recipe. The best part? They’re surprisingly simple to whip up. So, let’s dust off those mixing bowls and create a little kitchen magic together!
A Snowy Day & A Whoopie Pie Tradition
PrintGingerbread Whoopie Pies

Spiced to perfection and irresistibly soft, these gingerbread whoopie pies sandwich a dreamy cream cheese frosting between pillowy ginger-molasses cookies. It’s the holiday dessert mash-up you didn’t know you needed!
- Prep Time: 20 mins
- Cook Time: 10–12 mins
- Total Time: 35 mins
- Yield: 12 whoopie pies 1x
Ingredients
Gingerbread Cookies:
¾ cup unsalted butter, softened
½ cup brown sugar
½ cup molasses
1 large egg
1 tsp vanilla extract
2 ¼ cups all-purpose flour
1 tsp baking soda
1 Tbsp ground ginger
1 tsp cinnamon
½ tsp cloves
½ tsp nutmeg
½ tsp salt
Cream Cheese Frosting:
6 oz cream cheese, softened
4 Tbsp unsalted butter, softened
1½ cups powdered sugar
1 tsp vanilla extract
Pinch of salt
Instructions
Preheat oven to 350°F (175°C). Line two baking sheets with parchment.
In a large bowl, cream butter and sugar until fluffy. Beat in molasses, egg, and vanilla.
In a separate bowl, whisk flour, baking soda, spices, and salt.
Gradually mix dry into wet until dough forms.
Scoop dough (about 1 Tbsp) into rounds and place 2 inches apart.
Bake 10–12 minutes until set and puffed. Let cool completely.
Make frosting: Beat cream cheese and butter until smooth. Add powdered sugar, vanilla, and salt; beat until fluffy.
Sandwich frosting between two cookies. Chill 10–15 mins to set (optional, but recommended).
Nutrition
- Calories: 280
- Sugar: 22g
- Fat: 14g
- Carbohydrates: 34g
This recipe takes me right back to my grandmother’s kitchen on a particularly blustery December afternoon. The first big snow of the season had fallen, school was canceled, and the world outside was a silent, white wonderland. My grandma, who believed every problem could be solved with something baking in the oven, declared it a “Gingerbread Day.” But that year, she decided to shake things up. Instead of the usual house or men, she started scooping little rounds of dough onto a pan. I was confused. “Where are the gumdrop buttons, Gram?” I asked. She just winked and said, “We’re making something even better, my dear. We’re making whoopie!”
I remember giggling at the silly name as we whipped up the sweet, spiced filling. The moment I took my first bite of that finished whoopie pie, my childhood mind was blown. It was like all my favorite parts of a gingerbread cookie and a cupcake had a delicious baby. From that day on, Gingerbread Whoopie Pies became our special snow day tradition. It’s a memory filled with warmth, laughter, and the smell of molasses and spice. Now, I get to share that same feeling of joy with my own family—and with you. Every time I make them, I can almost hear my grandma’s laugh and feel that same snowy-day coziness.
Gathering Your Whoopie Pie Ingredients
Let’s talk ingredients! The magic of this recipe lies in the balance of warm spices and rich molasses. Here’s everything you’ll need to make about a dozen glorious whoopie pies (that’s 24 individual cookies!). I’ve included my best chef tips and substitutions so you can bake with confidence.
For the Gingerbread Cookies:
- ¾ cup unsalted butter, softened – Using unsalted butter lets you control the salt level. Chef’s Tip: “Softened” means your butter should give slightly when pressed but still hold its shape. Too soft or melted, and your cookies will spread too much!
- ½ cup brown sugar – Light or dark brown sugar works. Dark brown will give a slightly deeper molasses flavor and more moisture.
- ½ cup molasses – This is the heart of the flavor! I prefer unsulphured molasses for its cleaner, smoother taste. Don’t use blackstrap—it’s too bitter.
- 1 large egg – Bring it to room temperature! This helps it incorporate smoothly into the butter and sugar, creating a better emulsion and a more uniform dough.
- 1 tsp vanilla extract – The vanilla is a supporting actor that makes all the other flavors sing a little louder.
- 2 ¼ cups all-purpose flour – The foundation of our cookie. For a slightly more tender cookie, you can swap ¼ cup with cake flour.
- 1 tsp baking soda – Our leavening agent! It helps the cookies puff up beautifully.
- 1 Tbsp ground ginger – Yes, a full tablespoon! This gives that signature spicy kick.
- 1 tsp cinnamon – The cozy, warm spice we all know and love.
- ½ tsp cloves – Adds a deep, pungent warmth. A little goes a long way.
- ½ tsp nutmeg – I highly recommend freshly grating your own nutmeg if you can—the flavor is incredible.
- ½ tsp salt – Crucial for balancing all the sweetness and spices. If you only have salted butter, reduce this to a ¼ tsp.
For the Cream Cheese Frosting:
- 6 oz cream cheese, softened – Use the full-fat, brick-style cream cheese for the best stability and flavor. Low-fat versions can make the frosting runny.
- 4 Tbsp unsalted butter, softened – Again, softened is key for a smooth, lump-free frosting.
- 1½ cups powdered sugar – Sift it! This is the #1 tip to avoid a gritty frosting. It incorporates so much easier.
- 1 tsp vanilla extract – A must for any good frosting.
- Pinch of salt – This might seem odd, but it cuts the overwhelming sweetness and makes the cream cheese flavor pop.
Let’s Make Some Magic: Step-by-Step Instructions
Ready to bake? Follow these steps, and you’ll have perfect whoopie pies in no time. I’m walking you through every single step with all my best kitchen hacks!
Step 1: Preheat and Prep. First things first, preheat your oven to 350°F (175°C). This gives it plenty of time to reach a consistent, even temperature. Line two baking sheets with parchment paper. Trust me, this is non-negotiable for easy cleanup and preventing any sticking! Chef’s Hack: If your parchment is always curling up, just dab a tiny bit of your softened butter under each corner to make it stick to the pan.
Step 2: Cream the Wet Ingredients. In a large bowl, beat the softened butter and brown sugar together on medium-high speed for a good 2-3 minutes. We’re not just mixing; we’re creaming. This process incorporates air into the dough, which is part of what gives the cookies their lovely, cakey texture. You’ll know it’s ready when the mixture becomes noticeably lighter in color and fluffy. Scrape down the sides of the bowl with a spatula. Now, beat in the molasses, room-temperature egg, and vanilla until everything is beautifully combined and smooth.
Step 3: Whisk the Dry Team. In a separate, medium-sized bowl, whisk together the flour, baking soda, ginger, cinnamon, cloves, nutmeg, and salt. Whisking is important here—it ensures the baking soda and spices are evenly distributed throughout the flour so you get a perfect bite every time, with no pockets of spice.
Step 4: Combine with Care. With your mixer on low speed, gradually add the dry ingredients to the wet ingredients. Mix just until the flour disappears and a soft dough forms. Do not overmix! Overworking the dough develops gluten, which can lead to tough cookies. A few stray flour streaks are okay; they’ll incorporate when you scoop.
Step 5: Scoop and Space. Using a tablespoon-sized cookie scoop (or a regular spoon), portion out the dough into rounded mounds. I like to make them about 1 to 1.5 tablespoons each. Place them at least 2 inches apart on your prepared baking sheets. They don’t spread a ton, but they do need their personal space to puff up properly. Chef’s Hack: For perfectly uniform cookies (so your whoopie pies are all the same size!), use a trigger-release cookie scoop. It’s a game-changer!
Step 6: Bake to Perfection. Bake for 10-12 minutes. You’re looking for the tops to be set and puffed, and they might have just a few little cracks. They might still feel soft to the touch in the center—that’s perfect! They will firm up as they cool. Do not overbake, or you’ll lose that wonderful soft texture. Let them cool on the baking sheet for 5 minutes before transferring them to a wire rack to cool completely. This is critical! If you try to assemble them with warm cookies, your frosting will melt into a puddle. Patience, my friend!
Step 7: Whip Up the Frosting. While the cookies cool, make the dreamy filling. In a clean bowl, beat the softened cream cheese and butter together until completely smooth and lump-free. Gradually add the sifted powdered sugar, vanilla, and that pinch of salt. Beat on medium-high speed for 2-3 minutes until it’s light, fluffy, and wonderfully spreadable. Give it a taste—you deserve it!
Step 8: Assemble the Joy. Once the cookies are completely cool, turn half of them over so their flat sides are facing up. Spoon or pipe a generous dollop of frosting onto the flat side of each upside-down cookie. Gently press a second cookie on top, flat side down, to create a sandwich. Give it a slight squeeze so the frosting peeks out the edges just a little.
Step 9: The Final Chill (Optional but Recommended). If you can bear to wait, pop the assembled whoopie pies into the refrigerator for 10-15 minutes. This helps the frosting set up, making them less messy to eat and allowing the flavors to meld together beautifully. It’s worth the wait, I promise!
How to Serve These Beauties
Presentation is part of the fun! I love arranging these whoopie pies on a rustic wooden board or a vintage cake stand for a real homey feel. They’re rich, so I usually serve them whole, but for a party, you can slice them in half to show off that gorgeous creamy center. A light dusting of powdered sugar or a tiny sprinkle of cinnamon right before serving adds a lovely little finishing touch. They pair perfectly with a cold glass of milk, a hot coffee, or even a mug of spiced cider. Pure bliss!
Get Creative: Recipe Variations
Feel like mixing it up? Here are a few delicious twists on the classic:
- Orange Zest Delight: Add the zest of one orange to the cream cheese frosting for a bright, citrusy twist that cuts through the richness.
- Maply Goodness: Replace half of the molasses with pure maple syrup in the cookie dough for a more complex, autumnal sweetness.
- Chocolate Dip: For the ultimate indulgence, melt some dark chocolate and dip half of each assembled whoopie pie in it. Let it set on parchment paper.
- Ginger-Lemon: Swap the vanilla in the frosting for lemon extract and add a teaspoon of lemon zest for a tangy, zingy filling.
- Gluten-Free Swap: Use a 1:1 gluten-free all-purpose flour blend in place of the regular flour. The texture might be slightly more delicate, but just as delicious!
Anna’s Chef Notes
This recipe has been my holiday workhorse for years, and it’s evolved with a few funny fails along the way. The first time I made them, I was so impatient I iced a warm cookie. Let’s just say I ended up with gingerbread cookies with a cream cheese soup center—delicious, but not exactly photogenic! I’ve also learned that the brand of molasses can make a difference. Some are stronger than others, so if you’re new to baking with it, start with a trusted brand like Grandma’s Original. The dough might seem a little sticky—that’s normal! Chilling it for 30 minutes can make it easier to handle if you’re not using a scoop, but I find scooping it right away works like a charm. These cookies are forgiving and full of love, so don’t stress. Embrace the process!
Your Questions, Answered!
Q: My cookies spread too much and came out flat. What happened?
A: The most common culprit is butter that is too soft or even melted. Your butter should be cool to the touch but able to hold an indent when pressed. Also, make sure your baking soda is fresh! Old baking soda loses its leavening power. Finally, double-check your flour measurement. The best way to measure flour is to spoon it into the measuring cup and level it off. Scooping directly from the bag can pack in too much flour, but if you have too little, the cookies will spread.
Q: Can I make the components ahead of time?
A: Absolutely! You can bake the cookies up to 2 days in advance. Let them cool completely and store them in an airtight container at room temperature. The frosting can be made up to 3 days ahead and stored in the fridge. Just let it come to room temperature and give it a quick re-whip before assembling. You can also assemble the whoopie pies a day ahead and keep them refrigerated.
Q: My frosting is too runny. How can I fix it?
A> This usually happens if the cream cheese or butter was too warm. Pop the whole bowl of frosting into the refrigerator for 20-30 minutes to firm up, then beat it again. If it’s still too soft, you can add a little more sifted powdered sugar, a tablespoon at a time, until it reaches a pipeable consistency.
Q: Can I freeze whoopie pies?
A: Yes, they freeze beautifully! Assemble them completely, then place them in a single layer on a baking sheet to “flash freeze” for about an hour. This prevents them from sticking together. Once firm, transfer them to a freezer-safe bag or container. They’ll keep for up to 2 months. Thaw in the refrigerator overnight.
Nutritional Information (Approximate, per Whoopie Pie)
Calories: ~280 | Fat: 14g | Saturated Fat: 9g | Carbohydrates: 34g | Sugar: 22g | Protein: 2g
Please note: This is an estimate based on the ingredients used. Values can vary depending on specific brands and measurements.
Final Thoughts: A New Holiday Tradition in Every Bite
These Gingerbread Whoopie Pies aren’t just cookies—they’re little bundles of holiday joy. With their pillowy-soft, spiced gingerbread shells and tangy cream cheese filling, they strike that perfect balance between cozy and festive. Whether you’re baking them for a snow day, a holiday cookie swap, or just to treat yourself with a mug of cocoa by the tree, these whoopie pies are guaranteed to spark smiles and memories.
Every time I make them, I think back to that snowy afternoon in my grandma’s kitchen, and I hope they bring that same feeling of warmth and magic into your home too. Bake a batch, share them with loved ones, and let these little cream-filled gems become part of your own holiday traditions.