Your New Favorite Holiday Tradition: The 10-Minute Donut Christmas Tree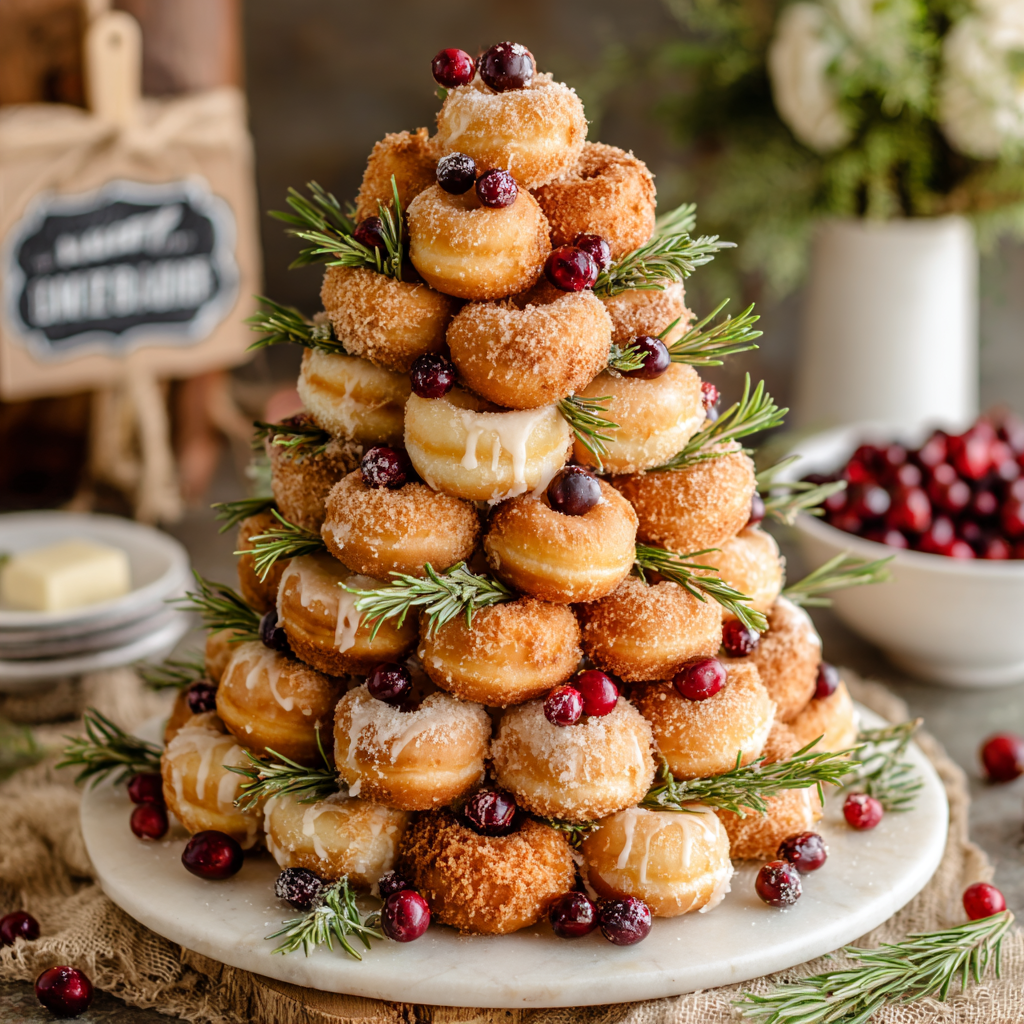
Hey there, friend! Can you feel it? That buzzing, sparkling, slightly chaotic energy that only comes around once a year? The holidays are truly upon us, and with them comes the joy of gathering, the warmth of shared meals, and let’s be honest—the ever-growing to-do list that can make even the most festive among us feel a little overwhelmed. I’m a firm believer that the magic of the season isn’t found in perfection, but in those moments of pure, uncomplicated joy we create together. And that’s exactly why I’m so head-over-heels in love with this Holiday Donut Christmas Tree.
Imagine this: a gorgeous, towering centerpiece that looks like you spent hours crafting, but secretly took you less time than it takes to brew a pot of coffee. No baking, no fussing with finicky dough, and absolutely zero stress. This stunning edible tree, built from fluffy donut holes, fragrant rosemary, and jewel-toned cranberries, is the ultimate party trick. It’s a conversation starter, a dessert, and a gorgeous decoration all rolled into one spectacular showstopper. Whether you’re hosting a big family brunch, a cozy friendsgiving, or just want to make a regular Tuesday feel special, this project is your ticket to instant holiday hero status. So, let’s put the stress aside and cook up a little bit of magic, together.
A Sprinkle-Fueled Memory
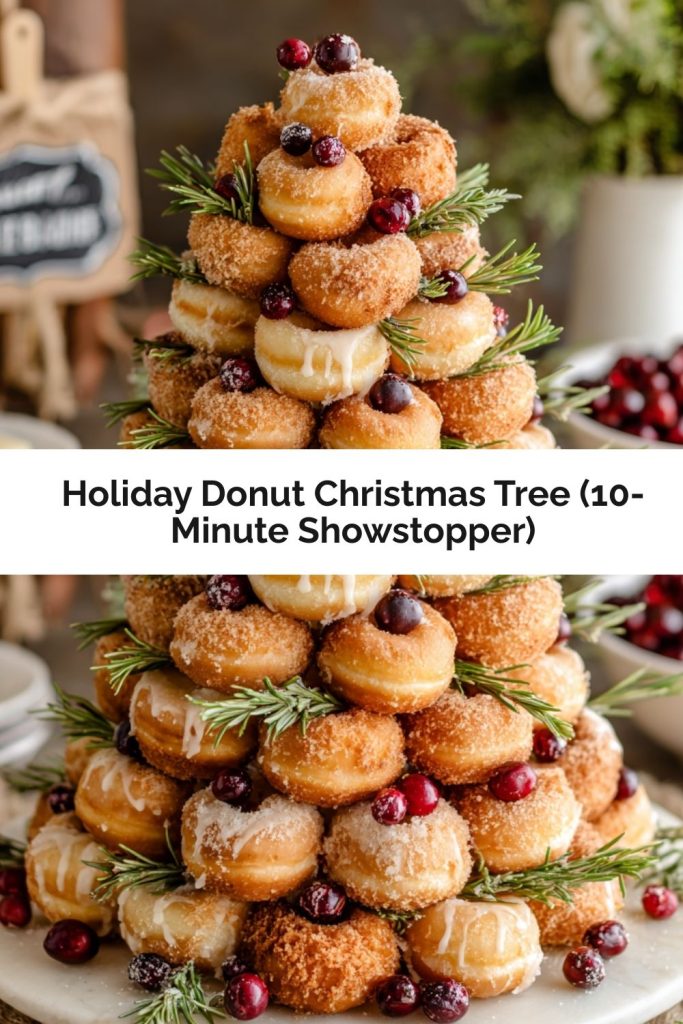
PrintHoliday Donut Christmas Tree (10-Minute Showstopper)

Festive, fun, and irresistibly sweet—this Donut Christmas Tree is a stunning centerpiece and dessert all in one. Built with donut holes, fresh rosemary, and cranberries, it’s the perfect no-bake treat for your holiday table.
- Prep Time: 10 minutes
- Total Time: 10 minutes
- Yield: 10 1x
Ingredients
80 donut holes (approx. 8 per person)
Fresh rosemary sprigs (for garnish)
½ cup fresh cranberries (for decoration)
Toothpicks
1 foam cone (12-inch)
Plastic wrap (to cover cone)
Instructions
Wrap foam cone with plastic wrap to keep it food-safe.
Secure donut holes using toothpicks, starting at the base and layering upward.
Tuck in rosemary like pine branches and dot with cranberries as “ornaments.”
Serve on a platter or cake stand. Guests can pull off donuts directly from the tree!
Nutrition
- Calories: 320
- Sugar: 20g
- Sodium: ~210mg
- Fat: 18g
- Carbohydrates: 38g
- Fiber: 1g
This recipe takes me right back to my grandma’s kitchen, a place that always smelled like cinnamon and pine during the holidays. One particularly hectic Christmas Eve, she realized she’d forgotten to make a dessert for the onslaught of cousins, aunts, and uncles about to arrive. Instead of panicking, she winked, pulled out a box of store-bought donut holes, a jar of toothpicks, and the rosemary plant from her windowsill. With us kids as her eager assistants, we constructed a wobbly, lopsided, and absolutely magnificent “tree” on a cake stand. It was the hit of the party! The adults were amazed, and we kids felt like culinary geniuses, sneaking “ornaments” (aka donut holes) off the structure all night long. It taught me a lesson I’ve carried ever since: the best recipes aren’t about the most expensive ingredients or intricate techniques; they’re about creativity, laughter, and sharing something delightful with the people you love.
Gathering Your Magical Supplies
The beauty of this project is in its simplicity! Here’s everything you need to build your edible evergreen. Think of this as your shopping list for fun.
- 80 donut holes (approx.): This is about 8 per person for 10 guests. I’m a sucker for the classic powdered sugar or cinnamon sugar variety—they look like little snow-dusted orbs! But feel free to get creative. Chef’s Insight: Glazed donut holes work too, but they can be a bit sticky. If you’re using them, have a towel handy for your fingers!
- 1 (12-inch) foam cone: This is the structural backbone of your tree. You can find these at any craft store. Pro Tip: If you can’t find a 12-inch cone, a shorter one works perfectly—you’ll just have a smaller, adorable tree!
- Plastic wrap: This is our food-safe barrier. We’ll snugly wrap the entire foam cone so the donuts never actually touch the foam.
- Toothpicks: The unsung heroes! These are the “nails” that will hold our delicious “shingles” in place. Standard round toothpicks are perfect.
- Fresh rosemary sprigs: Rosemary is my go-to because it’s sturdy, smells incredible (like a Christmas forest!), and looks just like tiny pine branches. Substitution Tip: No rosemary? Fresh thyme sprigs or even flat-leaf parsley can work in a pinch for a green accent.
- ½ cup fresh cranberries: These are our beautiful, pop-of-color “ornaments.” Their vibrant red is just so festive. Chef’s Insight: If cranberries aren’t your thing, red and green gumdrops, M&Ms, or even small candied oranges make gorgeous alternatives.
Building Your Edible Masterpiece: A Step-by-Step Guide
Alright, let’s get building! This is the fun part. Put on some holiday music, and let’s transform these simple ingredients into pure holiday magic.
Step 1: Prep Your Foundation
First, take your foam cone and give it a tight, full-body hug with the plastic wrap. You want to cover it completely so no foam is peeking out. This ensures everything is food-safe and makes cleanup a dream later. Once it’s snugly wrapped, place it on your serving platter or cake stand. This is your canvas!
Step 2: Start at the Bottom and Work Up
Now, grab your toothpicks and donut holes. We’re going to start building from the very bottom row. Take a toothpick, spear a donut hole, and then gently but firmly push the other end of the toothpick into the base of the foam cone. The bottom row should be resting on the platter itself for stability. Continue placing donut holes side-by-side until you’ve completed a full circle around the base. Chef’s Hack: Angle your toothpicks slightly upward as you move up the cone—this helps the donuts look like they’re layered like shingles on a roof!
Step 3: Layer Upwards
For the next row, place a toothpick and donut hole in the gap between two donuts from the row below. This staggered pattern is key to covering the cone completely and giving it that full, lush tree look. Keep going, row by row, moving upwards. Don’t worry if it’s not perfectly symmetrical—it’s a tree, and trees have character!
Step 4: Add the Greenery and ornaments
Once your tree is fully covered in delicious donut holes, it’s time to decorate! Take small sprigs of fresh rosemary and tuck them gently between the donut holes, letting them peek out like little evergreen branches. Then, take your fresh cranberries and nestle them into the nooks and crannies. I love clustering a few together for a bigger “ornament” effect. There’s no wrong way to do this—channel your inner artist!
Step 5: The Grand Finale (The Star!)
No tree is complete without a star on top! You can get creative here. A single donut hole on a toothpick with a dusting of extra powdered sugar works. You could also use a star-shaped cookie, a piece of yellow candy, or even a sprig of rosemary shaped into a star. Gently place it on the very top of the cone, and stand back to admire your incredible, 10-minute work of art!
How to Serve Your Donut Tree
Place your finished Donut Christmas Tree right in the center of your holiday table or dessert spread. It’s a true centerpiece! When it’s time to serve, simply invite your guests to pluck donut holes directly from the tree. It’s interactive, fun, and guaranteed to bring smiles (and maybe a few playful fights over the powdered sugar ones). For an extra touch, you can offer small bowls of melted chocolate or caramel for dipping.
Let’s Get Creative: Festive Variations
The fun doesn’t stop here! This tree is a fantastic base for all your holiday whims.
- Chocolate Lover’s Tree: Use chocolate-glazed donut holes and tuck in mini peppermint patties or chocolate kisses as ornaments. Add mint sprigs for greenery.
- Winter Wonderland Tree: Use plain glazed donut holes. After building the tree, give it a light dusting of powdered sugar “snow.” Use blueberry or silver dragées as icy ornaments.
- “Fir” Real Healthy Twist: For a slightly healthier option, use baked apple cider donut holes. Decorate with dried apple chips and cinnamon sticks.
- Kid-Friendly Craft: Let the kids decorate with colorful cereal loops, gummy worms, and sprinkles! It’s a fantastic holiday activity.
- New Year’s Eve Sparkler: Use donut holes rolled in sparkling sugar. Decorate with gold-wrapped chocolates and black-eyed Susans for a glamorous midnight treat.
Anna’s Chef Notes
I’ve made this tree more times than I can count, and it’s evolved in the silliest ways. One year, my dog became a little *too* interested in the low-hanging “fruit,” and we had to perform emergency donut surgery on the bottom row. Another time, I used mini powdered donuts instead of holes for a different texture—it was fabulous but created a hilarious snowstorm of sugar with every bite. The moral of the story? Embrace the imperfections! This recipe is meant to be playful. It’s okay if a donut hole falls off, if the cranberries roll away, or if your tree leans a little to the left. It just adds to the charm and gives everyone a story to tell. The goal is joy, not perfection.
Your Questions, Answered!
Q: Can I make this ahead of time?
A: You can assemble the tree up to 2-3 hours before serving. If you assemble it too far in advance, the donut holes might dry out a little or the powdered sugar might dissolve into the glaze. It’s best as a last-minute masterpiece!
Q: My donut holes keep sliding down the toothpicks! Help!
A: This usually means the donuts are a bit heavy for the toothpick. No problem! Just break the toothpicks in half to make them shorter and sturdier. This gives the donut less “lever” to slide down and holds it firmly in place.
Q: I can’t find a foam cone. What can I use instead?
A: Get creative! You can stack upside-down bowls or cups and cover them with foil to form a cone shape. A stable, cone-shaped colander might even work. The key is just to have a structure to build on that you can cover completely.
Q: Are there any vegan or gluten-free options?
A> Absolutely! Many bakeries and grocery stores now carry vegan and/or gluten-free donut holes. Just be sure to check the labels. Your tree will be just as beautiful and delicious!
Nutritional Information*
*This is a rough estimate based on standard powdered sugar cake donut holes. Values will vary significantly based on the brand and type of donut hole you use.
Per Serving (approximately 8 donut holes): Calories: ~320 | Carbohydrates: ~38g | Protein: ~3g | Fat: ~18g | Saturated Fat: ~4.5g | Sugar: ~20g | Fiber: ~1g | Sodium: ~210mg
Prep Time: 10 minutes | Total Servings: 10
Final Thoughts
At the heart of it, this Donut Christmas Tree is more than just a centerpiece—it’s a reminder that holiday magic doesn’t need to be complicated. With just a few simple ingredients and a little creativity, you can create something that brings joy, laughter, and wonder to your table in minutes.
It’s playful, it’s delicious, and it’s a guaranteed crowd-pleaser whether you’re hosting a big holiday bash or making memories with your kids on a quiet December night. So, grab some donut holes, roll up your sleeves, and let this sweet little tree become your new holiday tradition. After all, the best part of the season is sharing moments (and donut holes) with the people you love most.