***
Your New Favorite Dessert: Mini S’mores Tarts That Steal the Show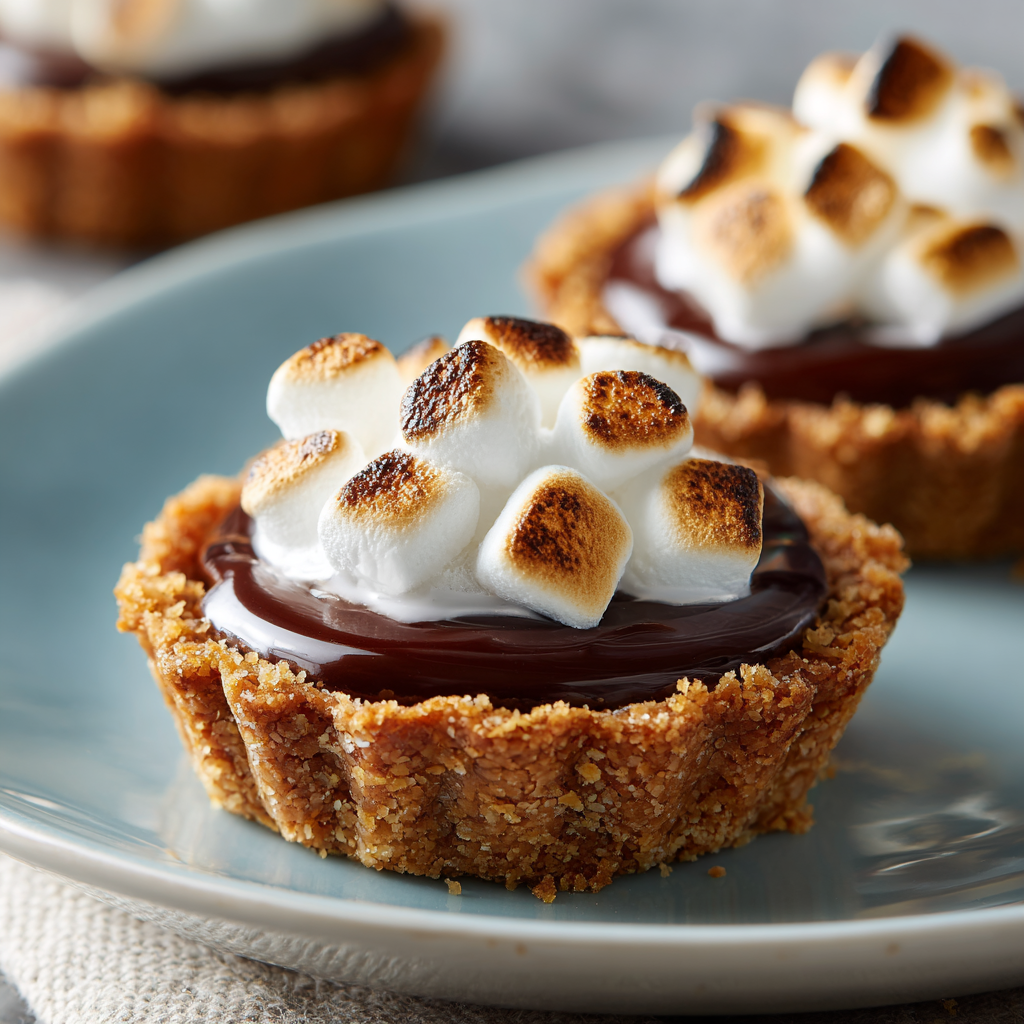
Hey there, friend! Let’s talk about one of life’s simple, perfect pleasures: the s’more. That magical combination of crackling graham cracker, melty chocolate, and gooey, fire-toasted marshmallow is a taste of pure, unadulterated joy. It whispers of campfire stories, starry nights, and the kind of laughter that makes your belly ache. But let’s be real for a second—actually building a fire in your backyard (or, heaven forbid, your apartment) isn’t always in the cards. And trying to perfectly toast a marshmallow over a gas stove burner? Let’s just say it’s a recipe for a smoke alarm serenade.
That’s exactly why I became obsessed with creating a version of this classic that delivers all that nostalgic flavor without any of the hassle. I wanted to capture that magic, bottle it up, and turn it into something you could serve at a dinner party, pack for a picnic, or simply enjoy on a random Tuesday because you deserve a little sparkle. Enter these utterly irresistible Mini S’mores Tarts.
Imagine this: a crisp, buttery graham cracker crust that holds its shape in a perfect, bite-sized cup. It’s filled with a luxuriously smooth and rich dark chocolate ganache that just melts on your tongue. And the crowning glory? A fluffy, perfectly toasted marshmallow top that gives you that iconic campfire kiss in every single bite. They’re elegant enough for your fanciest gathering but fun enough to make with your kids on a rainy afternoon. So, are you ready to bring the campfire magic indoors? Grab your favorite mixing bowl—we’re about to cook up something amazing together!
A Sticky, Sweet Memory
PrintMini S’mores Tarts

A crisp graham cracker crust, velvety chocolate ganache, and toasted marshmallow topping—these mini s’mores tarts turn the campfire classic into an elegant, bite-sized dessert. No sticks, no mess—just pure indulgence in every gooey, crunchy bite.
- Prep Time: 20 minutes
- chill: 1 hour
- Cook Time: 6 minutes
- Total Time: 1 hour 26 minutes
- Yield: 12 mini tarts 1x
Ingredients
For the Crust:
1½ cups graham cracker crumbs
¼ cup sugar
6 tablespoons unsalted butter, melted
For the Filling:
½ cup heavy cream
4 oz semi-sweet chocolate, chopped
2 tablespoons butter
For the Topping:
Mini marshmallows or marshmallow fluff
Optional: kitchen torch for toasting
Instructions
Preheat oven to 350°F (175°C). Grease a mini muffin tin or mini tart pans.
Mix graham cracker crumbs, sugar, and melted butter. Press into muffin wells to form mini tart shells.
Bake 5–6 minutes or until lightly golden. Let cool.
Heat cream until just simmering. Pour over chocolate and butter in a bowl. Let sit 1 minute, then stir until smooth.
Spoon chocolate ganache into cooled tart shells. Chill until set, about 1 hour.
Top with marshmallows or pipe on marshmallow fluff. Toast with a kitchen torch or under a broiler until golden.
Nutrition
- Calories: 180
- Sodium: 85mg
- Fat: 11g
- Saturated Fat: 6g
- Cholesterol: 20mg
My love affair with s’mores started not around a campfire, but in my grandmother’s tiny, always-too-warm kitchen. Nana wasn’t much for the great outdoors (“Why sleep on the ground when you have a perfectly good bed, Anna?”), but she was a champion of fun. On humid summer nights when the air was too thick to bear, she’d pull out her little electric stove-top burner, a bag of jumbo marshmallows, and two long-handled forks.
We’d sit at her Formica table, carefully rotating our marshmallows over the blue flame, engaged in a serious debate: slow-and-steady for a perfect golden brown all over, or straight into the heart of the flame for a quick char that hid a shockingly liquid, molten interior? (I was, and always will be, a char-on-the-outside, lava-on-the-inside kind of girl). The best part was the inevitable mess. There would always be a long, sticky strand of marshmallow stretching from the fork to my chin, and a smudge of chocolate on my cheek. Nana would just laugh, her eyes twinkling, and say, “A little mess is the sign of a good time, my dear.” These mini tarts are my tribute to those nights—all the fun and flavor, with just a little less mess to clean up. I think Nana would approve.
Gathering Your Magical Ingredients
Part of the beauty of this recipe is its simplicity. You only need a handful of ingredients to create something truly spectacular. Here’s what you’ll need, with a few of my favorite chef-y insights and swaps to make it your own.
For the Graham Cracker Crust:
- 1½ cups graham cracker crumbs: You can buy these pre-crumbled, but I find crushing whole crackers (in a zip-top bag with a rolling pin) gives you more control over the texture. You want a fine sand with a few tiny pebbles for that perfect crunch. Chef’s Insight: For a deeper flavor, try using cinnamon or honey-flavored grahams!
- ¼ cup granulated sugar: This sweetens the crust and helps it caramelize slightly in the oven, giving it that “toasted over the fire” vibe right from the start.
- 6 tablespoons unsalted butter, melted: This is the glue that holds our little crusts together. Using unsalted butter lets us control the salt level. Substitution Tip: If you only have salted butter, that’s totally fine! Just omit any additional salt from the recipe.
For the Chocolate Ganache Filling:
- ½ cup heavy cream: Also called heavy whipping cream. This is non-negotiable for a truly luxurious, silky ganache. Lower-fat milks will not set properly. Chef’s Insight: Want to infuse extra flavor? Heat the cream with a tiny pinch of flaky sea salt or a half a cinnamon stick, then strain it before pouring over the chocolate.
- 4 oz semi-sweet chocolate, finely chopped: Use a bar of baking chocolate, not chocolate chips! Chips contain stabilizers that prevent them from melting as smoothly. Substitution Tip: Feel free to play with the chocolate! A dark chocolate bar will make it richer and less sweet, while milk chocolate will make it ultra-decadent and kid-friendly.
- 2 tablespoons unsalted butter, softened: Adding butter to the ganache gives it an incredible shine and a melt-in-your-mouth texture that’s simply divine.
For the Toasty Topping:
- Mini marshmallows or marshmallow fluff: This is a matter of preference! Mini marshmallows give you that classic, distinct toasted ‘mallow look. Marshmallow fluff, piped on with a star tip, looks beautifully elegant and toasts evenly. The choice is yours! Chef’s Insight: If you’re a true marshmallow purist, you can make your own! It’s a fun (if sticky) project.
- Kitchen torch (optional but highly recommended): This is your secret weapon for that professional, evenly toasted finish without heating up your entire oven. They are inexpensive and so much fun to use!
Let’s Build Some Bite-Sized Magic: Step-by-Step
Don’t let the fancy look fool you—these tarts are surprisingly simple to make. We’ll walk through each step together. Read through all the instructions once before you start, and remember, I’m right here with you!
- Preheat and Prep: First things first, get that oven preheating to 350°F (175°C). This ensures it’s perfectly hot and ready for our crusts. Now, grab your mini muffin tin or mini tart pans. Give them a very light coating of non-stick spray or a quick brush with melted butter. This is our insurance policy for perfect, pop-outable tarts later. Trust me on this one!
- Create the Crust: In a medium bowl, combine your graham cracker crumbs and sugar. Give it a good whisk to break up any lumps of sugar. Now, pour in that glorious melted butter. Mix it with a fork until every last crumb is moistened and the mixture looks like wet sand. It should hold together when you pinch it. Chef’s Hack: The back of a small, flat-bottomed glass or a tamper tool is perfect for pressing the crumbs firmly and evenly into each well of the muffin tin. You want a solid, compact layer.
- Bake to Perfection: Slide your pan into the preheated oven and bake for just 5-6 minutes. You’re not looking for a deep brown color here, just a light golden hue and a warm, toasty smell. This short bake sets the crust and deepens the graham cracker flavor. Once done, remove the pan and let it cool completely on a wire rack. This is crucial! If the shells are warm when you add the ganache, it will melt and make the crusts soggy. Patience, my friend!
- Whip Up the Ganache: While the shells cool, let’s make the filling. Place your finely chopped chocolate and the 2 tablespoons of soft butter in a heatproof bowl. In a small saucepan, heat the heavy cream over medium heat until it just begins to simmer—you’ll see little bubbles forming around the edges. Do not let it boil vigorously! Immediately pour the hot cream over the chocolate and butter. Now, walk away. Let it sit untouched for a full 1-2 minutes. This allows the heat to gently melt the chocolate. Then, starting in the center, slowly whisk everything together until it’s gloriously smooth, shiny, and unified. This is ganache magic happening right before your eyes!
- Fill and Chill: Once your tart shells are completely cool, spoon or pipe the chocolate ganache into each one, filling them almost to the top. Gently tap the pan on the counter to settle the filling and remove any air bubbles. Now, pop the whole pan into the refrigerator to chill and set for at least 1 hour. This is the perfect time to clean up and do a little happy dance.
- The Grand Finale: The Toasted Topping! Once the ganache is firm, it’s time for the fun part! If using mini marshmallows, press a few onto the center of each tart. If using marshmallow fluff, spoon it into a piping bag (a zip-top bag with a corner snipped off works great!) and pipe a beautiful swirl or dollop on top. Now, using your kitchen torch, gently wave the flame over the marshmallows until they are puffed and toasted to your desired level of golden-brown perfection. If you don’t have a torch, you can place the tarts on a baking sheet and pop them under the broiler for 30-60 seconds—but WATCH THEM like a hawk! They go from golden to charcoal in a heartbeat.
How to Serve Your Masterpiece
Presentation is part of the fun! These mini tarts are stunning all on their own. Arrange them on a simple white platter or a rustic wooden board to let their golden tops shine. For an extra special touch, you can drizzle a little leftover melted chocolate over the plate before placing the tarts, or add a few crumbs of the leftover graham cracker crust around for texture. They are the ultimate party dessert—easy to grab, completely mess-free, and guaranteed to elicit happy sighs from everyone. Serve them immediately after toasting for that incredible contrast of cool, smooth chocolate and warm, gooey marshmallow. Pure bliss!
Make It Your Own: Delicious Twists & Swaps
The basic recipe is a classic for a reason, but playing with flavors is where the real kitchen joy is! Here are a few of my favorite ways to mix it up:
- Peanut Butter Cup: Add a tiny dollop of peanut butter (or a mini peanut butter cup!) into the bottom of the crust before adding the ganache. The classic combo never fails.
- Mint Chocolate Chip: Add a drop or two of peppermint extract to the ganache along with a tablespoon of finely chopped chocolate chips for a cool, refreshing twist.
- Salted Caramel Swirl: Before chilling, swirl a teaspoon of your favorite store-bought or homemade salted caramel sauce into the top of each ganache-filled tart. The sweet-salty contrast is incredible.
- Cookie Dough Lover: Press a small ball of edible cookie dough (egg-free, of course) into the crust before the ganache for a surprise inside.
- Gluten-Free Friendly: Simply use your favorite gluten-free graham-style crackers to make the crumbs! The rest of the recipe is naturally gluten-free.
Anna’s Chef Notes & Kitchen Stories
This recipe has been through a few fun iterations in my kitchen. The first time I made them, I was so eager to taste one that I didn’t let the ganache set fully. I piped on the marshmallow fluff and immediately hit it with the torch. Let’s just say I ended up with delicious but decidedly *leaning* towers of goo. It was a delicious mess! So learn from my mistake—let that ganache get nice and firm.
I also highly recommend doubling the recipe. Always. They disappear faster than you can say “s’more please!” and they hold up beautifully in the fridge (without the topping) for a day or two, making them a fantastic make-ahead dessert. Just add the marshmallow and toast right before serving. This recipe is a testament to the idea that the best recipes are often the simplest, made with love and a sense of play. Don’t be afraid to get a little creative and make some messes—and memories—along the way.
Your Questions, Answered!
I love hearing from you guys, and over time, a few common questions have popped up. Here’s some troubleshooting to ensure your tart-making is smooth sailing!
Q: My crusts are stuck in the pan! How do I get them out?
A: Oh no, we’ve all been there! First, ensure you greased the pan well. If they’re stuck, run a small, thin knife around the edge of each tart to loosen it. You can also try letting the pan sit at room temperature for a few minutes—sometimes the butter in the crust just needs to soften a tiny bit. For next time, consider using silicone mini muffin molds—they’re non-stick wonders and the tarts pop right out!
Q: My ganache is grainy or seized. What happened?
A: This usually happens if the cream was too hot or if a bit of steam got into the chocolate. If it’s just a little grainy, you can often save it by adding a teaspoon of warm cream and whisking vigorously until it smooths out. If it’s truly seized (thick and clumpy), sadly, it’s best to start over. The key is to heat the cream until it’s just simmering, not boiling!
Q: Can I make these without a kitchen torch?
A> Absolutely! Your broiler is a fine substitute. Place the topped tarts on a baking sheet and put them under the broiler on the middle rack. Stay right there and don’t walk away! They can burn in seconds. Rotate the pan for even toasting. It works like a charm, it just requires a bit more vigilance.
Q: How far in advance can I make these?
A> You can make the crusts and fill them with ganache up to 2 days in advance. Keep them covered in the fridge. I highly recommend adding the marshmallow and toasting them right before you serve them for the best texture and that amazing warm-to-cool contrast.
Nutritional Information (Per Tart, Approximate)
Disclaimer: This is just an estimate based on the ingredients used. Your specific brands may vary!
- Calories: 180
- Fat: 11g
- Saturated Fat: 6g
- Cholesterol: 20mg
- Sodium: 85mg
- Carbohydrates: 20g
- Sugars: 14g
- Protein: 2g
Prep Time: 20 minutes | Cook Time: 6 minutes | Chill Time: 1 hour | Total Time: 1 hour 26 minutes | Servings: 12 mini tarts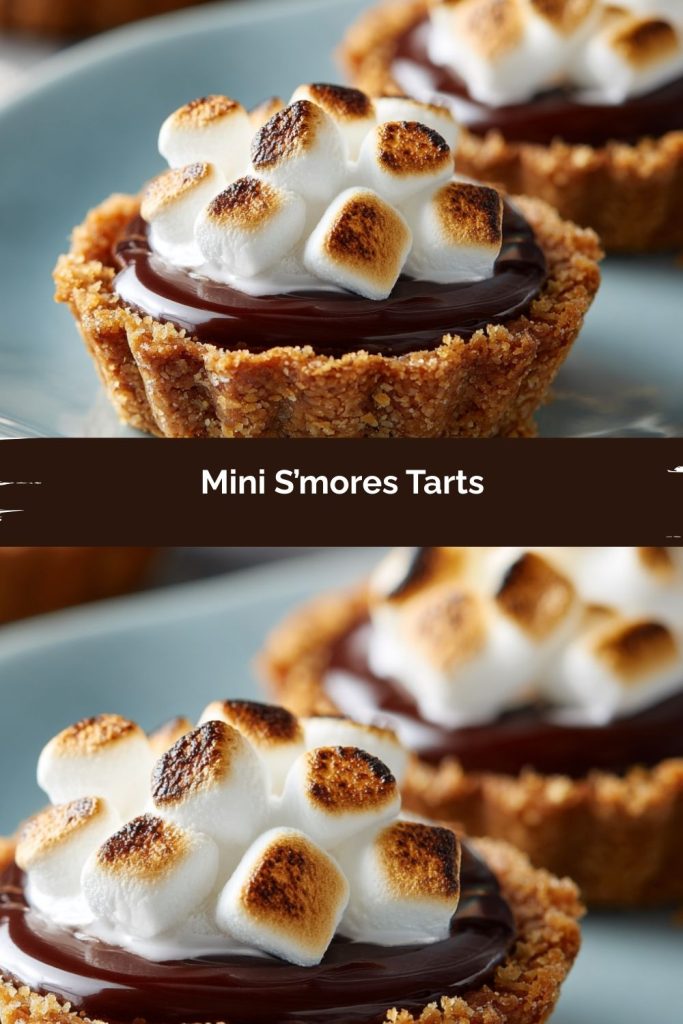
Final Thoughts
Mini S’mores Tarts are proof that a campfire isn’t required to capture the magic of this classic treat. With a buttery graham cracker crust, silky chocolate ganache, and that irresistible toasted marshmallow topping, each bite is a little spark of joy. They’re simple enough to make on a weeknight but elegant enough to wow at any gathering—a true crowd-pleaser.
Whether you’re sharing them with friends, serving them at a party, or sneaking one with your coffee (highly recommend), these tarts bring back all the nostalgia of childhood s’mores nights with a little grown-up sophistication. Nana was right: a little mess is just the sign of a good time.