***
Strawberry Christmas Trees: Your New Favorite Festive Treat!
Hey there, friend! Anna here. Can you believe the holiday season is already upon us? The air is getting crisp, the lights are twinkling, and my kitchen is officially buzzing with the scent of cinnamon, gingerbread, and all things merry and bright. But you know what I love most about this time of year? It’s the magic of creating something together. The recipes that aren’t just about the final dish, but about the laughter, the little hands helping, and the memories made right there on the countertop, probably covered in a bit of flour and sprinkles.
If you’re looking for a dessert that’s equal parts adorable, delicious, and downright fun to make, you’ve come to the right place. Forget the stress of complicated pastry recipes—today, we’re making Strawberry Christmas Trees! These little guys are the star of every holiday party I bring them to. They’re a burst of fresh, juicy strawberry, wrapped in a sweet, festive coat, and they come together in a flash. Seriously, if you can dip and drizzle, you can make these.
They’re the perfect project to get the kids involved in, a gorgeous addition to your Christmas dessert table, and a wonderfully light treat that balances out all the rich, heavy holiday fare. So, let’s put on our favorite holiday playlist, tie on our aprons, and turn these beautiful berries into a forest of edible Christmas cheer. I promise, it’s going to be a blast!
A Berry Merry Memory
PrintStrawberry Christmas Trees
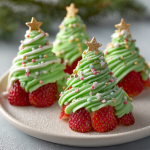
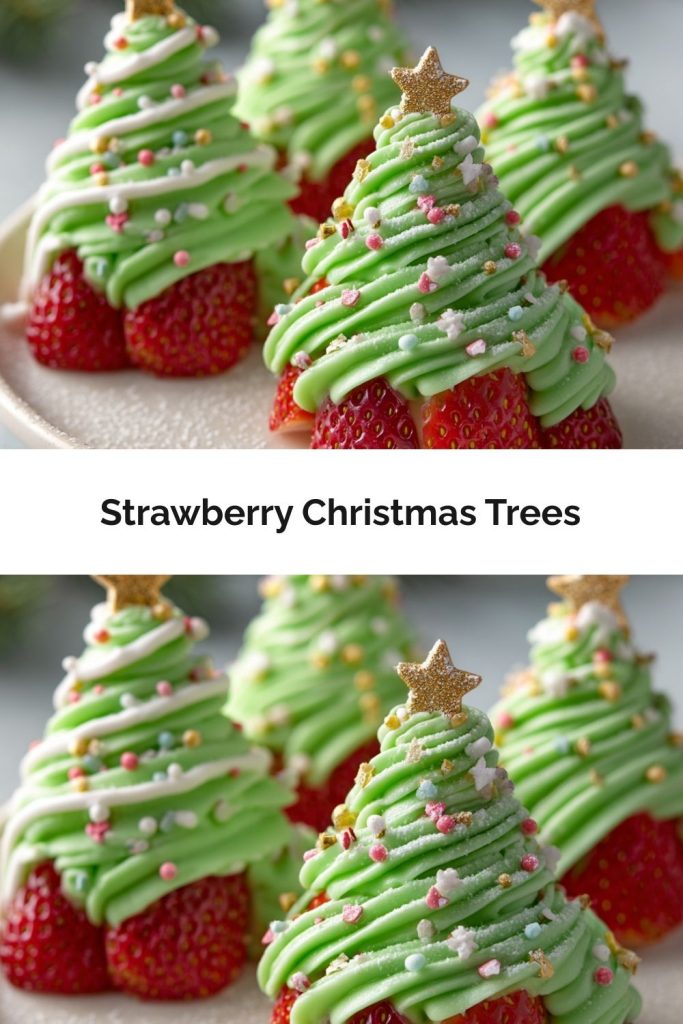
These Strawberry Christmas Trees are as cute as they are delicious! Fresh strawberries are decorated with sweet green frosting and sprinkles to look like little Christmas trees. They’re quick to make, fun for kids to decorate, and the perfect festive treat for holiday parties or dessert tables.
- Prep Time: 20 minutes
- chill time: 20 minutes
- Total Time: 40 minutes
- Yield: ~20
Ingredients
20 large fresh strawberries (washed & hulled)
1 ½ cups white chocolate chips (or candy melts)
Green gel food coloring (if using white chocolate)
½ cup buttercream or cream cheese frosting (tinted green)
Sprinkles, star-shaped candies, or edible glitter (for decorating)
Powdered sugar (for dusting, optional)
Instructions
Prep strawberries: Wash, dry, and hull strawberries so they sit flat.
Melt coating: Melt white chocolate chips or candy melts until smooth. Stir in green coloring if using white chocolate.
Coat strawberries: Dip each strawberry in green coating, letting excess drip off. Place on parchment-lined tray. Chill until set.
Decorate: Pipe green frosting swirls to mimic tree branches. Add sprinkles or candy stars as ornaments.
Finish: Dust lightly with powdered sugar for a snowy effect.
Nutrition
- Calories: 90
- Fat: 4g
- Carbohydrates: 12g
- Protein: 1g
This recipe always takes me back to a particularly chaotic but wonderful Christmas Eve a few years ago. My then five-year-old niece, Lucy, was “supervising” my baking efforts. We had just finished a marathon gingerbread house construction that ended with more candy on the floor than on the house, and I needed a quick, no-bake treat for a party the next day. I spotted a pint of gorgeous, red strawberries on the counter, and inspiration struck.
“Lucy,” I said, “how would you like to make Christmas trees we can actually eat?” Her eyes widened. We melted some white chocolate, tinted it a cheerful green, and started dipping. Lucy’s job was the “decorating,” which involved an enthusiastic application of sprinkles and a star candy perched precariously on top of each berry. They were messy, a little lopsided, and absolutely perfect. The pride on her face when we presented our strawberry tree forest to the family was better than any professionally decorated cake. It reminded me that the best recipes aren’t about perfection; they’re about the joy you stir into them. That’s the spirit I want to bring to your kitchen today.
Gathering Your Magical Ingredients
One of the best things about this recipe is its simplicity! You only need a handful of ingredients to create something truly spectacular. Here’s what you’ll need to make about 20 delightful little trees.
- 20 large, fresh strawberries: Look for berries that are firm, bright red, and have a nice conical shape—the more they naturally resemble a tree, the easier they are to decorate! Avoid any that are soft or have white shoulders.
- 1 ½ cups white chocolate chips or candy melts: This is our “tree” base. I often use white chocolate chips because I love the flavor, but a quick chef tip: they can be a bit trickier to melt smoothly. If you’re a beginner or want guaranteed smooth results, vanilla candy melts are your best friend—they’re formulated to melt perfectly every time.
- Green gel food coloring (if using white chocolate): Gel coloring is key here! It provides vibrant color without thinning out your chocolate like liquid food coloring can. If you’re using green candy melts, you can skip this!
- ½ cup buttercream or cream cheese frosting (tinted green): This is for our piped “garland” effect. I adore the tangy contrast of cream cheese frosting with the sweet strawberry, but a simple vanilla buttercream works beautifully, too. Use store-bought to save time, or whip up a small batch of your favorite.
- Sprinkles, star-shaped candies, or edible glitter: This is where the personality comes in! Use nonpareils, jimmies, or even tiny edible pearls for ornaments. A yellow star candy on top is the quintessential finishing touch.
- Powdered sugar (optional): A light dusting right before serving gives a magical, snowy effect that’s just irresistible.
Let’s Build Our Edible Forest: Step-by-Step
Ready to create some magic? Follow these steps, and you’ll have a platter of adorable treats in no time. I’ve packed each step with my best tips and little hacks to ensure your success!
Step 1: The Great Berry Prep
First things first, give your strawberries a good rinse under cool water and pat them completely dry with a paper towel. This is non-negotiable! Any extra moisture will prevent the chocolate coating from sticking properly. Next, hull the strawberries by slicing off the green leafy top and a tiny bit of the stem end so that each berry has a flat base. This allows your little trees to stand up straight and proud on the plate. Chef’s hack: If a berry is a bit wobbly, you can slice a tiny bit more off the bottom to level it out, but be careful not to cut into too much of the juicy red part!
Step 2: Mastering the Melt
Now, let’s melt our coating. You can do this two ways. The double boiler method is the gentlest: place a heatproof bowl over a pot of simmering water (make sure the bottom of the bowl doesn’t touch the water), add your chocolate chips or candy melts, and stir continuously until smooth. My preferred quick method is the microwave: place the chips in a microwave-safe bowl and heat in 30-second bursts, stirring well after each interval. Stop when there are just a few small lumps left—the residual heat will melt them as you stir. Do not overheat, or the chocolate will seize and become grainy! If you’re using white chocolate, now is the time to stir in a tiny bit of green gel food coloring until you reach a lovely forest green hue.
Step 3: The Dip & Drip
Line a baking sheet with parchment or wax paper. Holding a strawberry by its pointy tip, dip it into the green chocolate, swirling it gently to coat about ¾ of the way up. Lift it out, let the excess chocolate drip back into the bowl for a second, and then place it firmly on your prepared tray. Repeat with all the strawberries. If your chocolate starts to thicken up, just pop it back in the microwave for 10-15 seconds. Once all your trees are coated, slide the tray into the refrigerator for about 15-20 minutes, or until the chocolate is completely set and firm to the touch.
Step 4: The Decorating Party!
This is the most fun part! While the trees are chilling, tint your frosting a festive green (if it isn’t already) and spoon it into a piping bag fitted with a small round tip (like a Wilton #3 or #4). No piping bag? No problem! You can use a small plastic zip-top bag and just snip a tiny corner off. Once the chocolate shells are set, take the strawberries out of the fridge. Now, pipe a swirling line of frosting around each strawberry, starting from the base and working your way up to the tip to mimic the branches of a tree. Immediately after piping on a tree, add your sprinkles and press a star candy onto the very top while the frosting is still soft and sticky. This is the perfect job for little helpers!
Step 5: The Snowy Finish
Just before serving, for an extra touch of winter wonderland magic, you can give your trees a light dusting of powdered sugar. It looks like a fresh dusting of snow! Place them on a beautiful platter, and watch them disappear.
How to Serve Your Strawberry Christmas Trees
Presentation is part of the fun! Arrange your finished trees on a simple white platter or a rustic wooden board to let their vibrant colors pop. For a truly stunning centerpiece, create a “forest” by grouping them together. You can even add a few sprigs of fresh rosemary around the base of the trees – it looks like little evergreen bushes and smells amazing! These are best served the same day they are made, so they’re the perfect last-minute, wow-factor dessert for your holiday gathering.
Get Creative! Fun Recipe Variations
Feel like mixing it up? Here are a few delicious twists on the classic Strawberry Christmas Tree:
- Chocolate Forest: Use melted dark or milk chocolate instead of green for the coating. Decorate with white frosting “snow” and silver sprinkles.
- Peppermint Swirl: Add a drop or two of peppermint extract to your white chocolate coating and crush some candy canes for a crunchy, minty “ornament” topping.
- Citrus Zest: Add a bit of orange or lemon zest to your buttercream frosting for a bright, zingy flavor that cuts through the sweetness.
- Nutty Trunks: Before the chocolate sets, press a slivered almond into the flat base of the strawberry to look like a tiny tree trunk.
- Dairy-Free Delight: Use dairy-free white chocolate chips and frosting to make this treat accessible to everyone.
Anna’s Chef’s Notes
This recipe has become a holiday staple in my home, and it’s evolved in the funniest ways. One year, my husband decided he was going to be “in charge” of the decorating. Let’s just say his trees were… abstract. He created a whole storyline about a blizzard hitting the forest, which was his excuse for the copious amounts of white frosting and sprinkles everywhere! We laughed until we cried. The moral of the story? Don’t take it too seriously. Whether your trees are neat and tidy or wildly creative, they will be made with love and taste incredible.
I’ve also learned that the quality of the strawberry really matters. Since it’s the star of the show, a ripe, sweet, and juicy berry makes all the difference. If you can find them at a local farmers’ market, even in winter, grab them! Most of all, have fun with it. Cooking is about the experience, and this recipe is all about joy.
Your Questions, Answered!
Q: My chocolate coating is thick and clumpy! What happened and can I fix it?
A: Ah, this is the classic “seized” chocolate. It usually happens if a tiny bit of steam or water gets into the melting chocolate, or if it gets too hot. To rescue it, try stirring in a teaspoon of neutral oil (like vegetable or coconut oil) at a time until it smooths out again. If it’s beyond repair, it’s best to start fresh. This is why I often recommend candy melts for beginners—they’re much more forgiving!
Q: Can I make these ahead of time?
A> You can prepare them a few hours in advance! Store them in a single layer in an airtight container in the refrigerator. I recommend holding off on the powdered sugar dusting until right before you serve them, as it can dissolve into the frosting over time. For the best texture, enjoy them within 24 hours.
Q: My strawberries are super juicy and making the chocolate wet. Help!
A> This usually means the strawberries weren’t dried thoroughly enough after washing. It’s so important to pat them bone-dry! If you’re in a pinch, you can even let them air-dry on a towel for 15-20 minutes after washing. Also, ensure they are at room temperature before dipping, as condensation can form on cold berries.
Q: What’s the best way to hull a strawberry?
A> The easiest way is to use a paring knife. Insert the tip of the knife at an angle next to the stem, and cut a small, shallow circle around the stem and core, then pop it out. You can also buy a nifty little tool called a strawberry huller, but a small knife works perfectly well!
A Little Note on Nutrition
While these are definitely a treat, it’s nice to know that you’re getting a boost of vitamin C from the fresh fruit! Here’s a rough estimate per strawberry tree (approximate, as ingredients can vary):
Per Serving (1 tree): Calories: 90 | Fat: 4g | Carbohydrates: 12g | Protein: 1g
Final Thoughts
Strawberry Christmas Trees aren’t just a recipe—they’re a memory in the making. They prove that holiday magic doesn’t need to be complicated: just a few strawberries, some chocolate, a swirl of frosting, and a sprinkle of joy. Whether you’re decorating them with kids, serving them at a holiday party, or gifting a little “forest” to someone special, these sweet little trees will bring more smiles than you can count.
Because at the end of the day, the holidays aren’t about perfect piping or flawless presentation—they’re about laughter, love, and creating traditions one strawberry at a time.